
Make three adorable mini amigurumi animals with one seamless crochet body pattern, fluffy yarn, and simple character details for cute charms or tiny desk companions.

These tiny crochet animals share the same rounded head-and-body shape, making this pattern a fun way to create matching bear, frog, and piglet charms. Plush chenille yarn gives each character a soft look, while bobble-stitch arms and legs add little details without requiring separate crocheted limbs.
This tutorial walks you through the shared body pattern first, then explains how to customize each crochet animal with its own colors, ears, muzzle, eye stalks, and facial features. You’ll also find assembly guidance, finishing tips, and alternatives for turning your finished crochet animals into keychain charms or small decorative companions.
Credit: TheHappyHues🍁
Materials & Tools Needed
Gather the supplies before starting so you can work through the body, character details, and assembly without interrupting your progress.
- Yarn: Fluffy chenille yarn, super bulky yarn, or plush yarn.
- Bear: Brown for the main body and ears; white or off-white for the muzzle.
- Frog: Olive or moss green for the main body and eye stalks; white or cream for the belly patch.
- Piglet: Light pink for the main body, ears, and snout.
- Crochet Hook: 3.0 mm. If using thicker plush yarn, use a 5.0–6.0 mm hook and adjust the tension to help prevent the fiberfill from showing through.
- Stuffing: Polyester fiberfill.
- Notions and Hardware:
- Stitch marker, essential for keeping track of continuous spiral rounds.
- Tapestry needle or blunt yarn needle.
- Sharp scissors.
- Sewing pins for positioning parts before stitching.
- Facial Details and Finishing:
- Black felt sheet for cut-out eyes, noses, and the frog’s mouth.
- Hot glue gun and glue sticks, or fabric glue.
- Pink soft pastel stick and sandpaper, optional for adding blush to cheeks and ears.
- Small makeup or detail brush for shading.
Finished Size and Customization Ideas
Each finished animal measures approximately 2.5–3.2 inches (6.5-8 cm) tall when made with standard chenille yarn and a 3.0 mm crochet hook. The final dimensions may vary with yarn thickness, hook size, and personal tension.
You can customize the finished animals in several ways:
- Keychain Charm: Before pulling the magic ring completely tight, attach a jump ring and swivel lobster clasp or ball chain through the top ring.
- Safety Eyes Alternative: Replace the felt eyes with 6 mm safety eyes positioned between Rounds 5 and 6 of the head. Install them before stuffing and closing the neck at Round 8.
- Embroidered Details: Use black embroidery floss to backstitch French knots for the eyes and embroider a small curved “w” or “v” mouth instead of gluing on felt.
- Bag Pendant or Desk Buddy: Add a small weighted pouch of plastic pellets inside the bottom base, beneath Round 12, to help the finished figure stand upright.
Pattern Abbreviations and Terminology
All terms use standard US crochet terminology.
- MR: Magic Ring
- st / sts: Stitch / Stitches
- ch: Chain
- sc: Single Crochet
- inc: Increase; work 2 single crochet stitches into the same stitch.
- dec: Decrease; work an invisible decrease or single crochet 2 stitches together.
- BBL: Four-Double-Crochet Bobble Stitch.
- Yarn over, insert the hook into the stitch, yarn over again, and pull up a loop. Yarn over and pull through 2 loops on the hook, leaving 2 loops.
- Repeat the same process three more times in the same stitch until 5 loops remain on the hook.
- Yarn over and pull through all 5 loops on the hook.
- Work the next stitch normally, pushing the bobble outward so it pops out as a paw.
- FLO: Front Loops Only.
- sl st: Slip Stitch.
- [#]: Total stitch count at the end of the round.

Step-by-Step Crochet Instructions
The bear, frog, and piglet all begin with the same seamless body. The head and body are crocheted from top to bottom in continuous spiral rounds, with the arms and legs formed directly into the body using bobble stitches.
Do not join rounds with a slip stitch unless specifically instructed. Move the stitch marker up at the end of each round to keep track of the beginning.
1. Crochet the Shared Head and Body
Head
Round 1: Make a magic ring and work 5 sc into the ring. [5] Pull the ring closed.
Round 2: Work 2 sc in each stitch around, making 5 increases. [10]
Round 3: Repeat (1 sc in the next stitch, inc in the next stitch) 5 times. [15]
Round 4: Work 1 sc in the next stitch, inc in the next stitch, repeat (2 sc, inc) 4 times, then work 1 sc in the last stitch. [20]
Rounds 5-7: Work 1 sc in each stitch around for 3 rounds. [20 stitches per round]
Round 8: Repeat dec 10 times. [10]
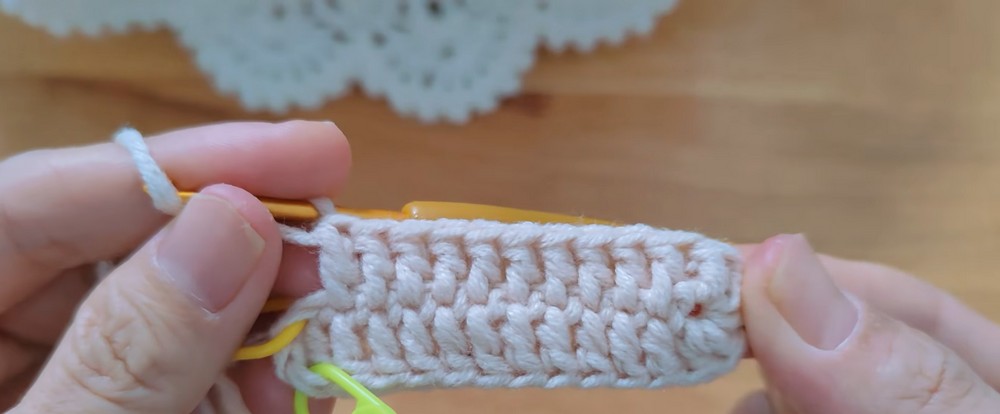
Stuffing Step 1: Firmly stuff the spherical head with polyester fiberfill, shaping it into an even ball.
Helpful tip: Keep the stuffing evenly distributed so the head looks rounded rather than lumpy. If you plan to use safety eyes, install them in the specified position before closing the neck and continue stuffing as needed.
Body and Limbs
Round 9: Work in FLO for this round only. Follow this sequence:
- 1 sc in the next stitch.
- Inc in the next stitch.
- 1 BBL for Arm 1.
- Inc in the next stitch.
- 1 sc in the next stitch.
- Inc in the next stitch.
- 1 BBL for Arm 2.
- Inc in the next stitch.
- 1 sc in the next stitch.
- Inc in the last stitch. [15]
Round 10: Working normally through both loops, work 1 sc in each stitch around. [15]
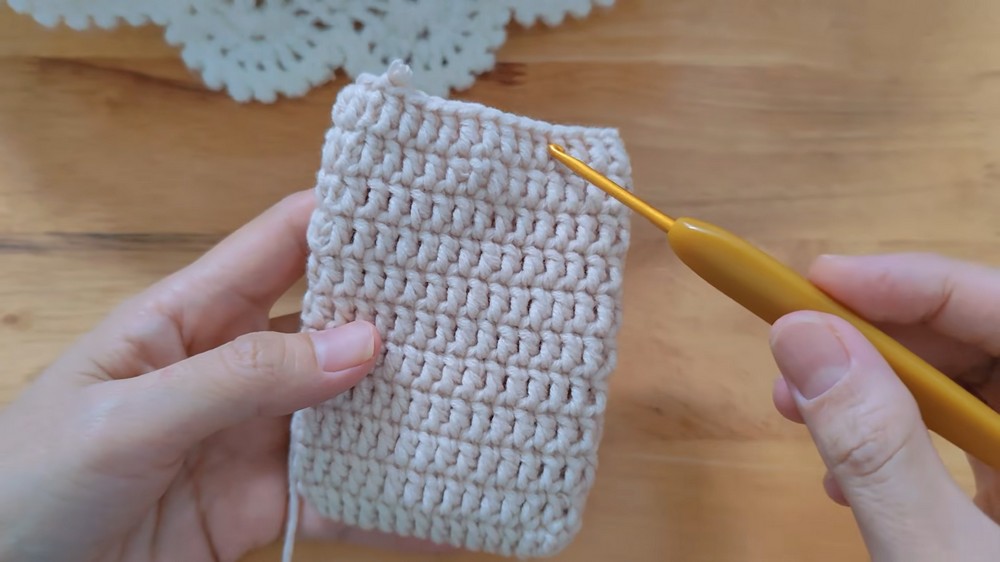
Round 11: Work 4 sc, 1 BBL for Leg 1, 4 sc, 1 BBL for Leg 2, and 5 sc. [15]
Helpful tip: After completing the round, firmly pop both bottom bobbles and both top bobbles outward toward the right side of the fabric so the arms and legs are clearly visible. [10:39]
Round 12: Repeat (1 sc in the next stitch, dec) 5 times. [10]
Stuffing Step 2: Lightly stuff the lower torso with fiberfill. Avoid over-stuffing, as excessive pressure can stretch the stitches and make the stuffing visible. [11:49]
Round 13: Repeat dec 5 times. [5]
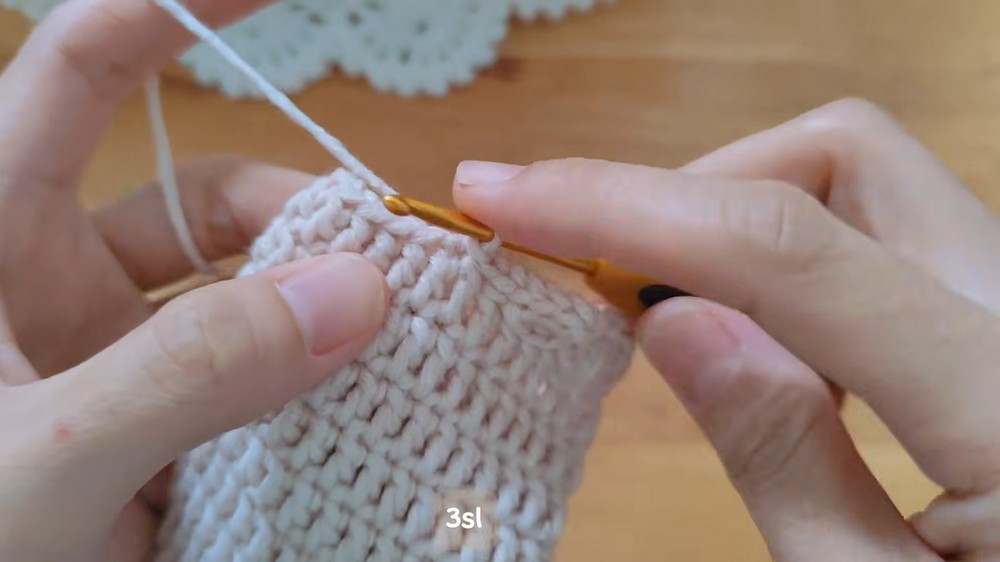
Fastening Off: Cut the yarn, leaving an 8-inch tail. Thread the tail onto a yarn needle and weave it through the front loop of each of the 5 remaining stitches. Pull snugly to close the hole, knot the yarn, and weave the remaining tail into the body.
2. Make the Bear
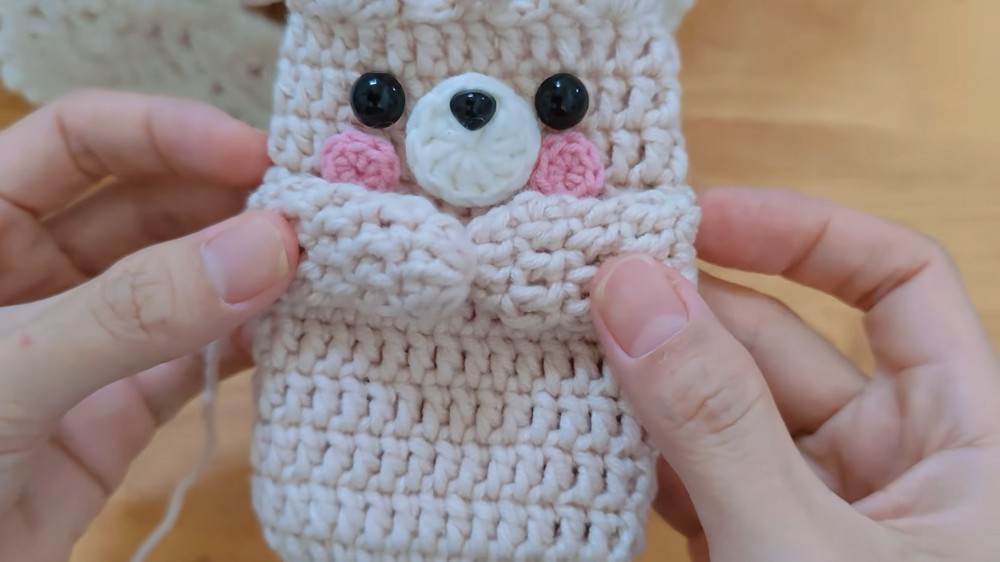
The bear uses a brown body, two small brown ears, and a white or cream muzzle.
Bear Body
Work the complete shared head-and-body pattern in brown yarn, following Rounds 1–13 exactly as written above. Stuff the head and lower torso at the specified points, then close the base.
Bear Ears – Make 2
Using brown yarn:
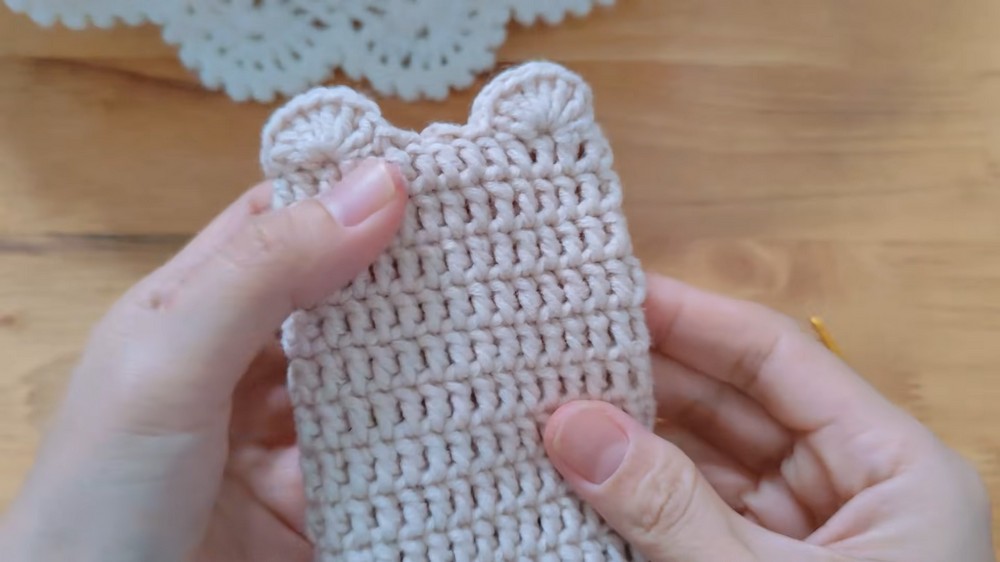
Round 1: Work 4 sc into a magic ring. [4]
Fasten off, leaving a tail long enough to sew each ear securely to the head.
Bear Muzzle
Using white or cream yarn:
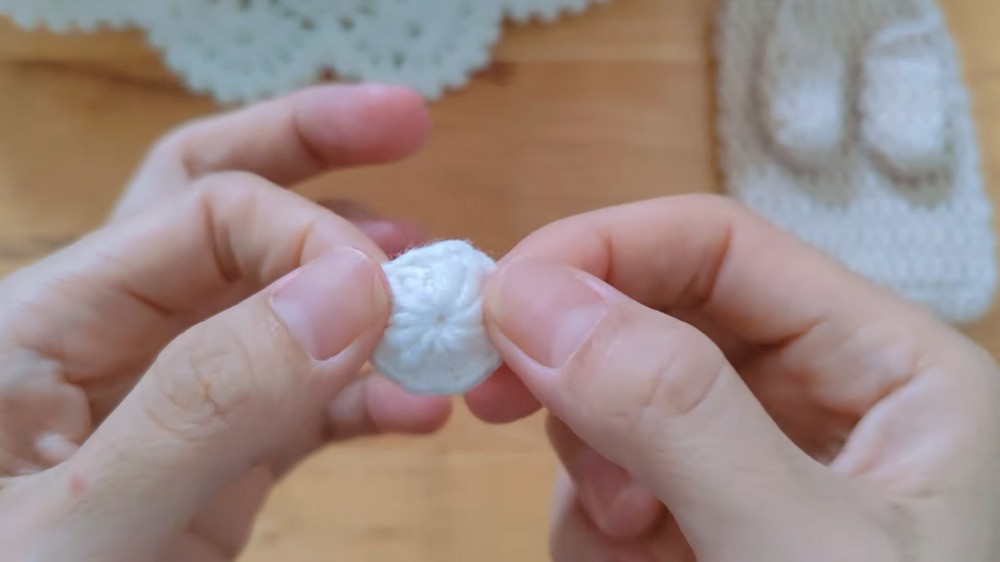
Round 1: Work 6 sc into a magic ring, then sl st to the first stitch to close the ring. [6]
Fasten off, leaving a sewing tail.
Assemble the Bear
- Position the ears: Pin the two brown ears symmetrically across Rounds 3-4, placing one on the upper left and one on the upper right of the head. Sew them securely using the yarn tails, then hide the ends inside the head.
- Attach the muzzle: Center the white or cream circle on the front of the face across Rounds 5-7. Sew it flat and weave the yarn tail inside.
- Prepare the facial features: Cut two small oval shapes for the eyes and a tiny triangle for the nose from black felt.
- Attach the nose: Apply a small dab of hot glue and position the nose on the upper half of the white muzzle.
- Attach the eyes: Glue the felt eyes directly onto the brown face, just outside the upper edge of the muzzle.
Before gluing the facial pieces permanently, check their placement from the front. Keeping the eyes balanced and the muzzle centered helps give the bear a neat, friendly expression.
3. Make the Frog
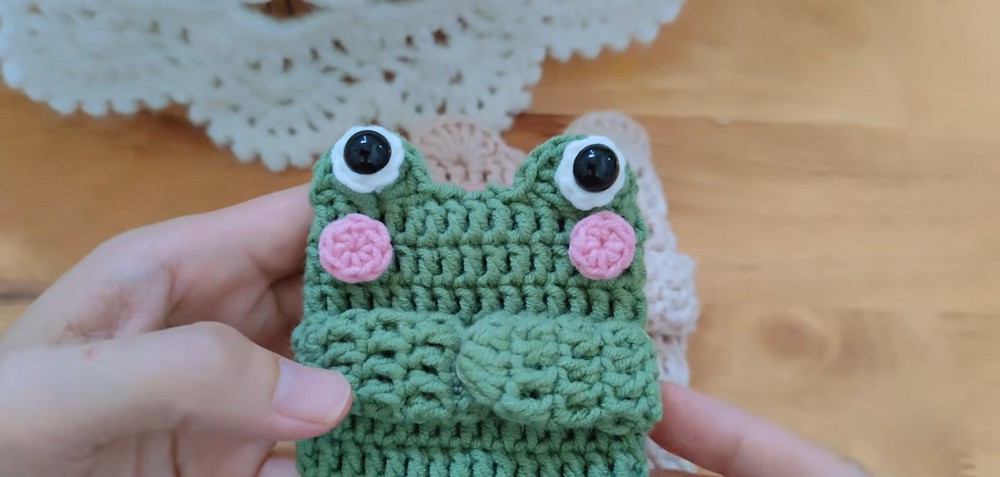
The frog uses green yarn for the head and body, a white belly patch formed through color changes, and two small green eye stalks.
Frog Body With Green and White Colorwork
Follow the shared body pattern, making the following color adjustments.
Rounds 1-8: Work the base body in green yarn. Follow the shared pattern exactly, including the head increases and decreases.
Round 9: Work in FLO.
- In green, work 1 sc, inc, 1 BBL for Arm 1, and inc.
- Switch to white on the final pull-through of the next increase stitch. In white, work 1 sc and inc.
- Switch back to green. Work 1 BBL for Arm 2, inc, 1 sc, and inc. [15]
Round 10:
- In green, work 5 sc.
- Switch to white and work 5 sc.
- Switch back to green and work 5 sc.[15]
Round 11:
- In green, work 4 sc and 1 BBL for Leg 1.
- Switch to white and work 4 sc.
- Switch back to green, work 1 BBL for Leg 2, and finish with 5 sc. [15]
Fasten off the white yarn. Continue in green only for Rounds 12-13, following the shared body instructions to decrease and close the base.
Color-change tip: Change colors at the specified point and keep the unused yarn from becoming too tight across the back of the work. If the color boundary looks uneven, check that the stitches are not pulling the fabric inward. Preserve the stated stitch counts when making any tension adjustments.
Frog Eye Stalks – Make 2 Using green yarn:
Round 1: Work 5 sc into a magic ring. [5]
Fasten off, leaving a long sewing tail for attaching each dome to the head.
Assemble the Frog
- Position the eye stalks: Place the two green 5-sc domes on top of the head across Rounds 2–3, tilting them slightly forward. Pin them in place and sew them down neatly.
- Prepare the face: Cut two small round circles and a short curved line for the mouth from black felt.
- Attach the eyes: Hot glue one black felt circle to the front center of each green dome.
- Attach the mouth: Glue the curved felt mouth across the center of the green head, above the white belly color block.
Check the eye stalks from the front before sewing them permanently. A similar height and balanced spacing help the frog look symmetrical.
4. Make the Piglet
The piglet uses light pink yarn throughout its body, with two small ears and a flat circular snout.
Piglet Body
Work the shared head-and-body pattern entirely in light pink yarn, following Rounds 1–13 as written. Complete both stuffing steps and close the base. [16:39]
Piglet Ears – Make 2
Round 1: Work 4 sc into a magic ring. [4]
Fasten off, leaving a sewing tail for each ear.
Piglet Snout Using light pink yarn
Round 1: Work 5 sc into a magic ring, then sl st to the first stitch to finish the snout flat. [5]
Fasten off, leaving a sewing tail.
Assemble the Piglet
- Attach the ears: Pin the two pink ears between Rounds 2 and 4, placing one on each side of the upper head. Sew them securely.
- Attach the snout: Center the pink snout on the face across Rounds 5-6. Pin it in place, then sew it flat.
- Prepare the blush: Rub a pink soft pastel stick against sandpaper to collect a small amount of fine pigment powder.
- Add shading: Dip a small makeup brush into the powder and lightly dust the insides of the ears and the cheeks beside the snout.
- Add the nostrils: Cut two tiny circles from black felt and hot glue one on each side of the snout.
Apply the pastel gradually so the color stays soft and delicate. A small amount is easier to control than a heavy layer.
Finishing and Customization
Once the bear, frog, or piglet is assembled, check that the parts are secure and the yarn ends are hidden.
- For a keychain: Attach the chosen jump ring and clasp or ball chain through the top magic ring, following the keychain placement described in the customization notes.
- For embroidered faces: Use black embroidery floss to make French-knot eyes and a small curved “w” or “v” mouth instead of using glued felt.
- For a standing desk companion: Add a small weighted pouch of plastic pellets beneath Round 12, as described in the customization notes. Keep the pellets fully enclosed and inaccessible, especially if the finished item may be handled by children.
- For safety-eye versions: Install the 6 mm safety eyes between Rounds 5 and 6 before stuffing and closing the neck at Round 8. Safety eyes are not suitable for every age group, so use embroidered features when a child-safe finish is needed.
Troubleshooting: Common Crochet Issues
The fiberfill is showing through the stitches.
Check whether your yarn and hook combination is creating overly large gaps. The supplied pattern recommends a 3.0 mm hook, with a 5.0–6.0 mm hook for thicker plush yarn. Match your tension to the yarn so the fabric remains sufficiently dense. If the yarn is especially thick, test a small section before completing the animal.
The head looks uneven or lumpy.
Redistribute the fiberfill evenly before moving on. Add small amounts at a time and shape the head into a smooth ball instead of forcing all the stuffing into one spot.
The bobble arms or legs are not sticking out.
Turn the fabric to the right side and gently push each bobble outward with your fingers. The supplied tutorial specifically recommends popping the arm and leg bobbles outward after completing Round 11.
The body is becoming distorted around the color changes.
Check that the carried yarn is not pulling the fabric too tightly. Follow the stated color sequence and stitch counts, and keep the tension even across the white belly section.
The final opening will not close neatly.
Thread the yarn tail through the front loops of all 5 remaining stitches at the end of Round 13. Pull the tail snugly, knot it, and weave the remaining yarn into the body.
Final Notes
This modular pattern uses one seamless head-and-body design to create three different mini amigurumi animals. The bear gains its character from rounded ears and a cream muzzle, the frog from its contrasting belly and raised eye stalks, and the piglet from its small ears, flat snout, and softly shaded cheeks.
By keeping the shared body pattern consistent and changing only the character-specific details, you can make a coordinated set of tiny crochet companions. Follow the supplied stitch counts and color sequences carefully, and use the finishing guidance to help each animal keep its shape and distinctive features.


