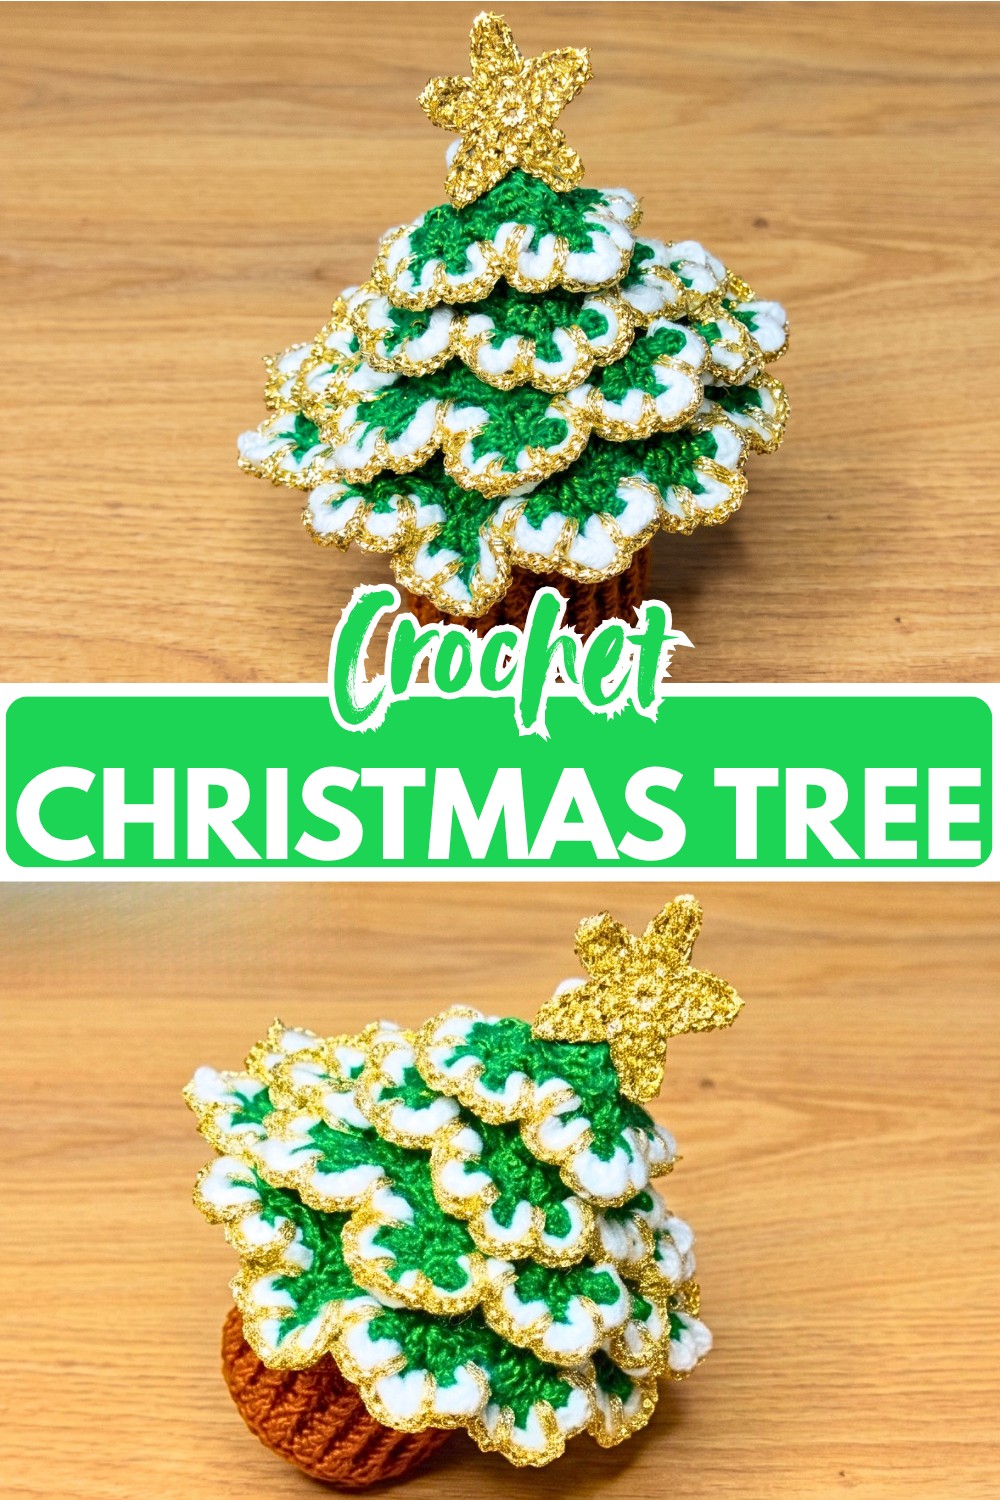
A tabletop Christmas tree with layered green branches, snowy white scallops, and a touch of gold is a lovely way to bring handmade charm to holiday decorating. The shaping is simple, while each decorative layer adds dimension.
Crochet Christmas Tree Pattern
Some crochet decorations are appealing because they are small and quick, while others stand out because of the way their details build from one stage to the next. This little Christmas tree has that second kind of charm: the green cone creates the structure, then four separate ruffled tiers give it the look of layered branches. White edging and metallic gold trim finish each tier without making the crochet design feel overly complicated.
The shaping is mostly straightforward, but the decorative layers deserve a little extra attention. They are worked into the remaining front loops of the cone rather than simply crocheted onto its outer surface, so finding the correct loops is important for keeping the tiers evenly spaced. Once those layers are in place, the star and crocheted pot give the tree a finished tabletop shape that is easy to customize with beads, sequins, or different metallic colors.
Credit Easy Knitting Crochet
Materials & Tools
- Yarn:
- Green yarn for the tree cone and branch tiers
- White yarn for the snowy scalloped edging
- Gold metallic or lurex yarn for the trim and star
- Terracotta or brown yarn for the pot
- Crochet Hook: 3.0 mm (Tulip 5/0)
- Tapestry or yarn needle
- Scissors
- Fiberfill stuffing or other suitable support for the tree
- Optional beads or sequins for decoration
Finished Size & Customization
The finished tree measures approximately 5–6 inches (13–15 cm) tall, depending on your yarn, tension, and hook size.
You can personalize the finished decoration in several ways:
- Add small beads or sequins between the branch tiers for ornaments.
- Replace gold with silver, pearl, or another metallic shade.
- Use a different pot color to change the overall look.
- Add or remove branch tiers if you want a shorter or taller version.
If you change the yarn weight, remember that both the cone and pot will change in size. A thicker yarn can also make the decorative shells look fuller, so keeping your tension reasonably consistent helps the tiers sit neatly.
Crochet Abbreviations
US crochet terminology is used throughout.
- MR: Magic Ring
- ch: Chain
- sl st: Slip stitch
- sc: Single crochet
- dc: Double crochet
- inc: Increase – 2 stitches worked into the same stitch
- BLO: Back loop only
- FLO: Front loop only

How to Crochet the Christmas Tree
Shape the Green Tree Cone
The main tree is worked in joined rounds, gradually increasing from the small top toward the wider bottom. The alternating increase and plain rounds create the tapered cone.
Teaching note: Because these rounds are joined, pay attention to where each round begins and ends. The starting chain counts as a double crochet in these instructions, so it is included in the stated stitch count. Keeping the joins consistent will make the later front-loop tiers easier to place.
- Round 1: With green yarn, make a MR, ch 3 (counts as 1 dc), work 6 dc into the ring, then sl st to the top of the starting ch-3 to join. (7 dc)
- Round 2: Ch 3, work 1 dc in the same stitch, then work 2 dc in each stitch around; sl st to join. (14 dc)
- Round 3: Ch 3, work 1 dc in each stitch around; sl st to join. (14 dc)
- Round 4: Ch 3, repeat [1 dc in next stitch, 2 dc in next stitch] around; sl st to join. (21 dc)
- Round 5: Ch 3, work 1 dc in each stitch around; sl st to join. (21 dc)
- Round 6: Ch 3, repeat [1 dc in each of next 2 stitches, 2 dc in next stitch] around; sl st to join. (28 dc)
- Round 7: Ch 3, work 1 dc in each stitch around; sl st to join. (28 dc)
- Round 8: Ch 3, repeat [1 dc in each of next 3 stitches, 2 dc in next stitch] around; sl st to join. (35 dc)
- Round 9: Ch 3, work 1 dc in each stitch around; sl st to join. (35 dc)
- Round 10: Ch 3, repeat [1 dc in each of next 4 stitches, 2 dc in next stitch] around; sl st to join. (42 dc)
- Round 11: Ch 3, work 1 dc in each stitch around; sl st to join, then fasten off the green yarn. (42 dc)
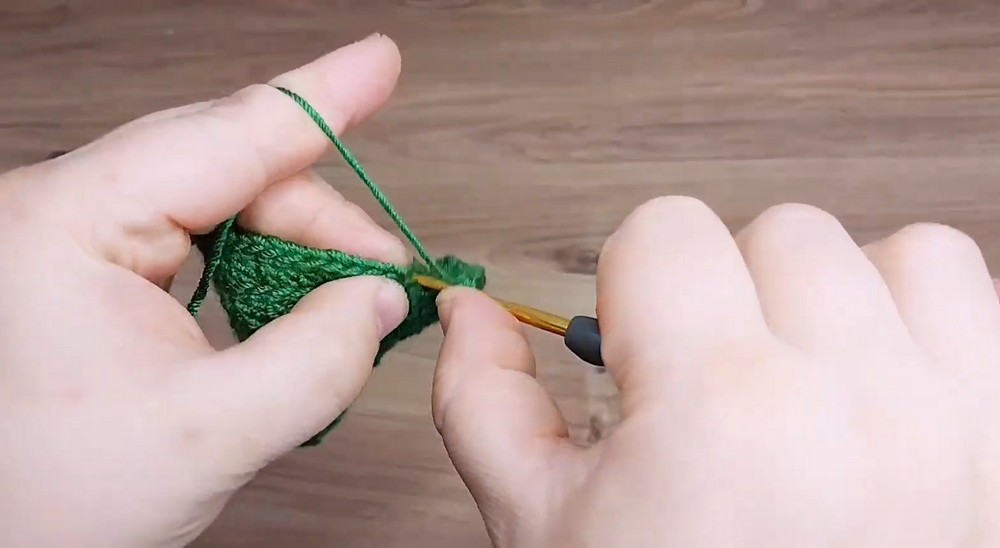
Check the Shape Before Moving On
At this point, you should have a tapered green cone that widens toward the bottom. The lower edge is where the decorative branch tiers will be built, so don’t worry if the plain cone looks simpler than the finished tree at this stage.
The important detail is that the increases happen every other round. If your cone is becoming noticeably too flat or too narrow, check the stitch counts before beginning the decorative work.
Add the Green Branch Tiers
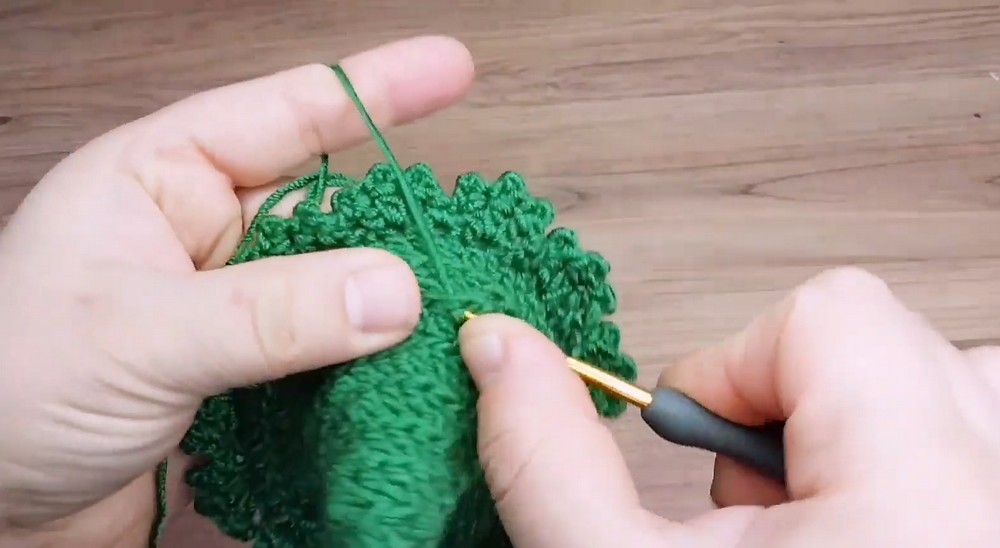
The ruffled branches are created separately from the main cone by working into remaining front loops (FLO) along the cone.
This is the part where placement matters most. You are not simply working into the next available stitch around the bottom edge. Each decorative tier uses a horizontal line of exposed front loops on the cone.
Reader tip: Before crocheting a shell, look at the cone and identify the unused front-loop line you want to work along. The shell should sit outward from the cone rather than pulling tightly against it. Repeat the same placement method for all four tiers so the branches remain visually balanced.
Tier 1
- Attach green yarn to the selected exposed front loop.
- Ch 3 and work 2 dc into the same loop.
- Skip 1 loop and sl st into the next loop.
- Skip 1 loop, then work 5 dc into the next loop to form a shell.
- Continue around using [skip 1 loop, sl st in next loop, skip 1 loop, 5 dc in next loop].
- Join with a sl st and fasten off.
Tier 2
Repeat the same shell sequence along the next horizontal row of remaining front loops.
Tier 3
Work another complete shell tier across the next available front-loop line, keeping the shell rhythm consistent with the tiers above.
Tier 4
Repeat the same pattern on the lowest selected front-loop line to complete the fourth branch tier.
Why the tiers need separate attention: The four rows of ruffles are what give the otherwise simple cone its layered Christmas-tree silhouette. If one tier is attached to the wrong loop line, it can sit too high, too low, or overlap the tier below it.
Add the White Snow Edging
The white border follows the scalloped green shells, giving each branch tier a snowy finish.
Attach white yarn to the first dc of a shell.
- Work [1 sc, ch 2, 1 sc] into the center stitch or center space of each shell peak.
- Sl st into the dip between neighboring shells.
- Continue across the tier.
- Fasten off and repeat the same edging across all four green tiers.
Teaching note: The center of the shell is the highest point of the scallop. That is where the [sc, ch 2, sc] group should sit. If this group is placed on one of the outer dc stitches instead, the white edging will shift to one side and the scallop may lose its clean shape.
Once the white edging is finished, gently arrange each tier before adding the gold trim. This makes it easier to see whether the branches are sitting evenly.
Finish the Branches With Gold Trim
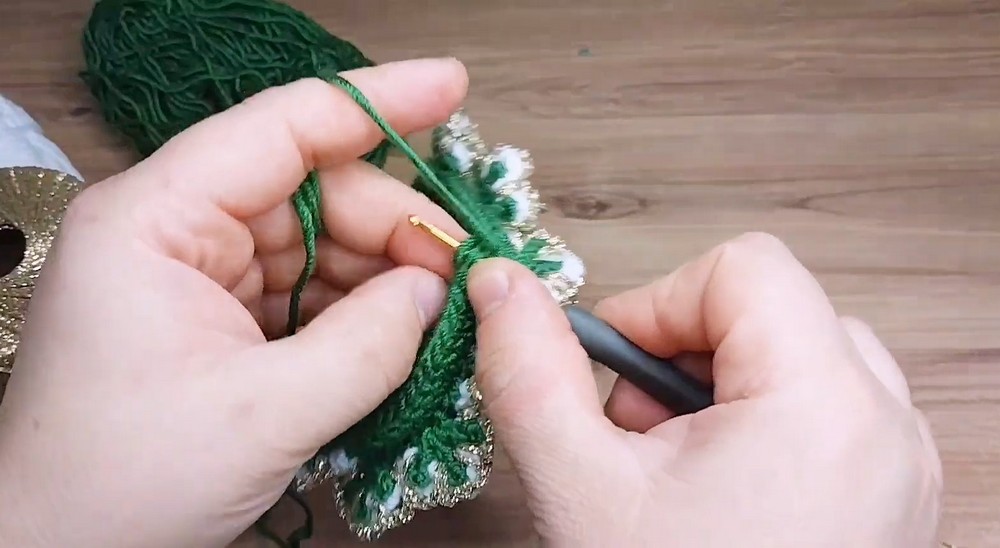
The metallic edging is simple, but it gives the white snow border a more defined finish.
Attach the gold yarn to the outer edge of the white scalloped border.
- Work [ch 3, sl st into next stitch] across the white edging.
- Continue around the complete tier.
- Fasten off and weave in the end.
- Repeat across the remaining tiers.
Keep the gold stitches relaxed rather than pulling them tightly. A tight metallic chain can draw the white scallop inward and make the branch edge look less open.
Crochet the Golden Star
The star is worked from a small center ring with five points added around it.
- Round 1: With gold yarn, make a MR, ch 1, work 10 sc into the ring, then join with a sl st.
Form the Five Points
For each point:
- Ch 4.
- Starting in the second chain from the hook, work 1 sl st, 1 sc, and 1 dc across the remaining chains.
- Skip 1 sc on the center ring.
- Sl st into the next sc on the ring.
Repeat this sequence until you have 5 star points.
Fasten off, leaving a yarn tail long enough to sew the star onto the top of the tree.
Shape check: Each point should fan outward from the center rather than bunching together. If the star looks uneven, gently arrange the points before sewing it down. Because the star is small, even a slight difference in tension can be noticeable.
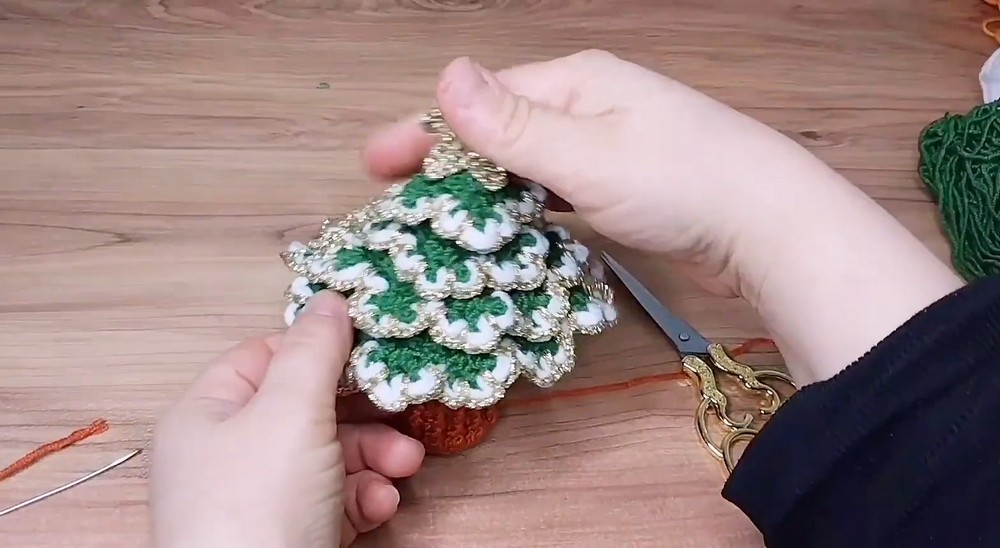
Crochet the Terracotta Pot
The pot gives the tree a stable, finished base and helps turn the crocheted cone into a tabletop decoration.
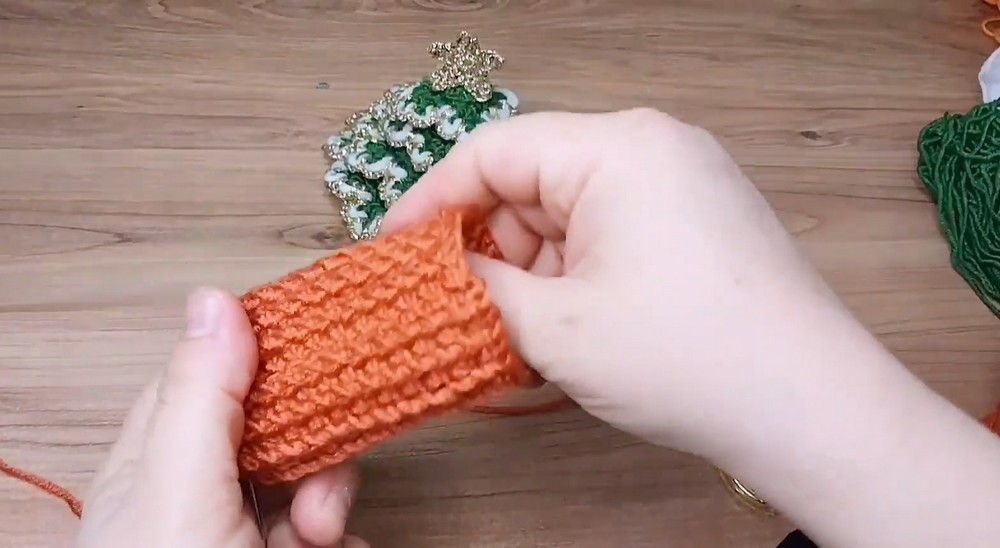
- Round 1: With terracotta or brown yarn, make a MR, ch 3 (counts as 1 dc), work 15 dc into the ring, then sl st to the top of the starting ch-3. (16 dc)
- Round 2: Ch 3, work 1 dc in the same stitch, then work 2 dc in each stitch around; sl st to join. (32 dc)
- Round 3: Ch 3, work 1 dc BLO in each stitch around; sl st to join. (32 dc)
- Rounds 4–7: Ch 3, work 1 dc in each stitch around; sl st to join. (32 dc each round)
Fasten off using an invisible needle join and weave in the end.
Why Round 3 Is Worked in BLO
The BLO round creates a small structural change in the fabric, helping define the transition between the pot’s base and its sides. Make sure you insert the hook under the back loop only for this round. Returning to both loops in Rounds 4–7 then gives the pot a more substantial wall.
Assemble the Tree
The assembly is easiest when the individual parts are checked for placement before you sew them permanently.
Attach the Tree to the Pot
Insert the bottom of the stuffed green cone into the opening of the crocheted terracotta pot.
Use a tapestry needle and matching yarn to sew the bottom rim of the tree cone securely to the inner top edge of the pot.
Before tightening the stitches: Look at the tree from the front and both sides. Make sure the cone is centered in the pot and is not leaning. Once the seam is tightened, correcting the position becomes much harder.
Attach the Star
Position the gold star directly at the peak of the tree.
Sew through the lower part of the star and into the top of the cone with the remaining gold yarn tail. Keep the stitches secure but avoid flattening the top of the tree.
Shape the Branches
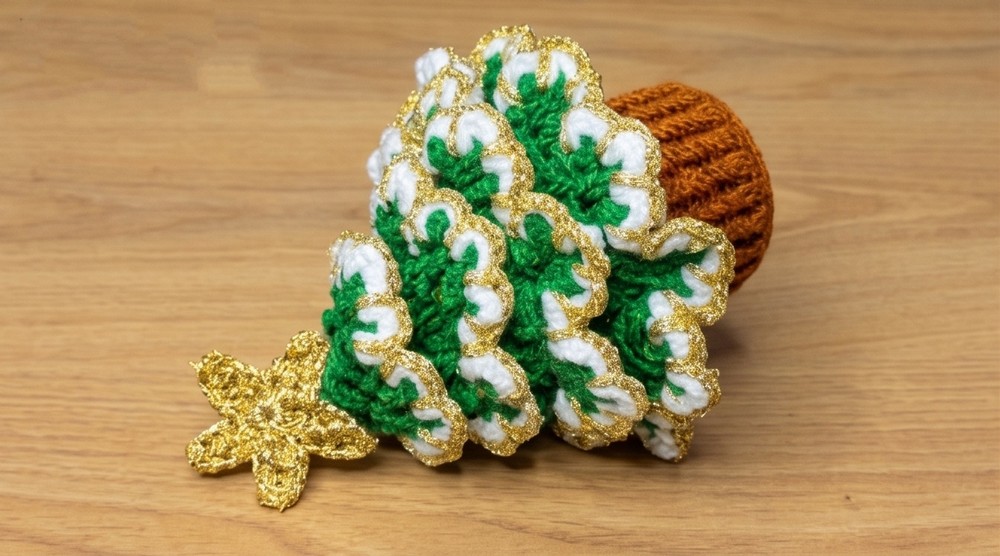
Finally, gently flare the four green tiers outward.
Arrange the white scallops so that they are visible from the front and the gold edging follows their curves naturally. If a tier has folded inward during sewing, use your fingers to reshape it rather than pulling aggressively on the stitches.

Helpful Finishing Checks
Before calling the tree finished, take a quick look at these details:
- Are all four branch tiers visible?
- Are the white scallops sitting along the outer edges of the green shells?
- Is the gold trim following the white edging rather than pulling it inward?
- Is the star centered at the top?
- Is the green cone sitting straight inside the pot?
- Are the yarn ends securely woven in?
These small checks make a noticeable difference in the finished appearance, especially because this decoration is viewed from several angles.

Video Tutorial