
A tiny crochet ghost with a wavy skirt and a pumpkin on its head brings a sweet Halloween touch to shelves, desks, gifts, and even keychains.
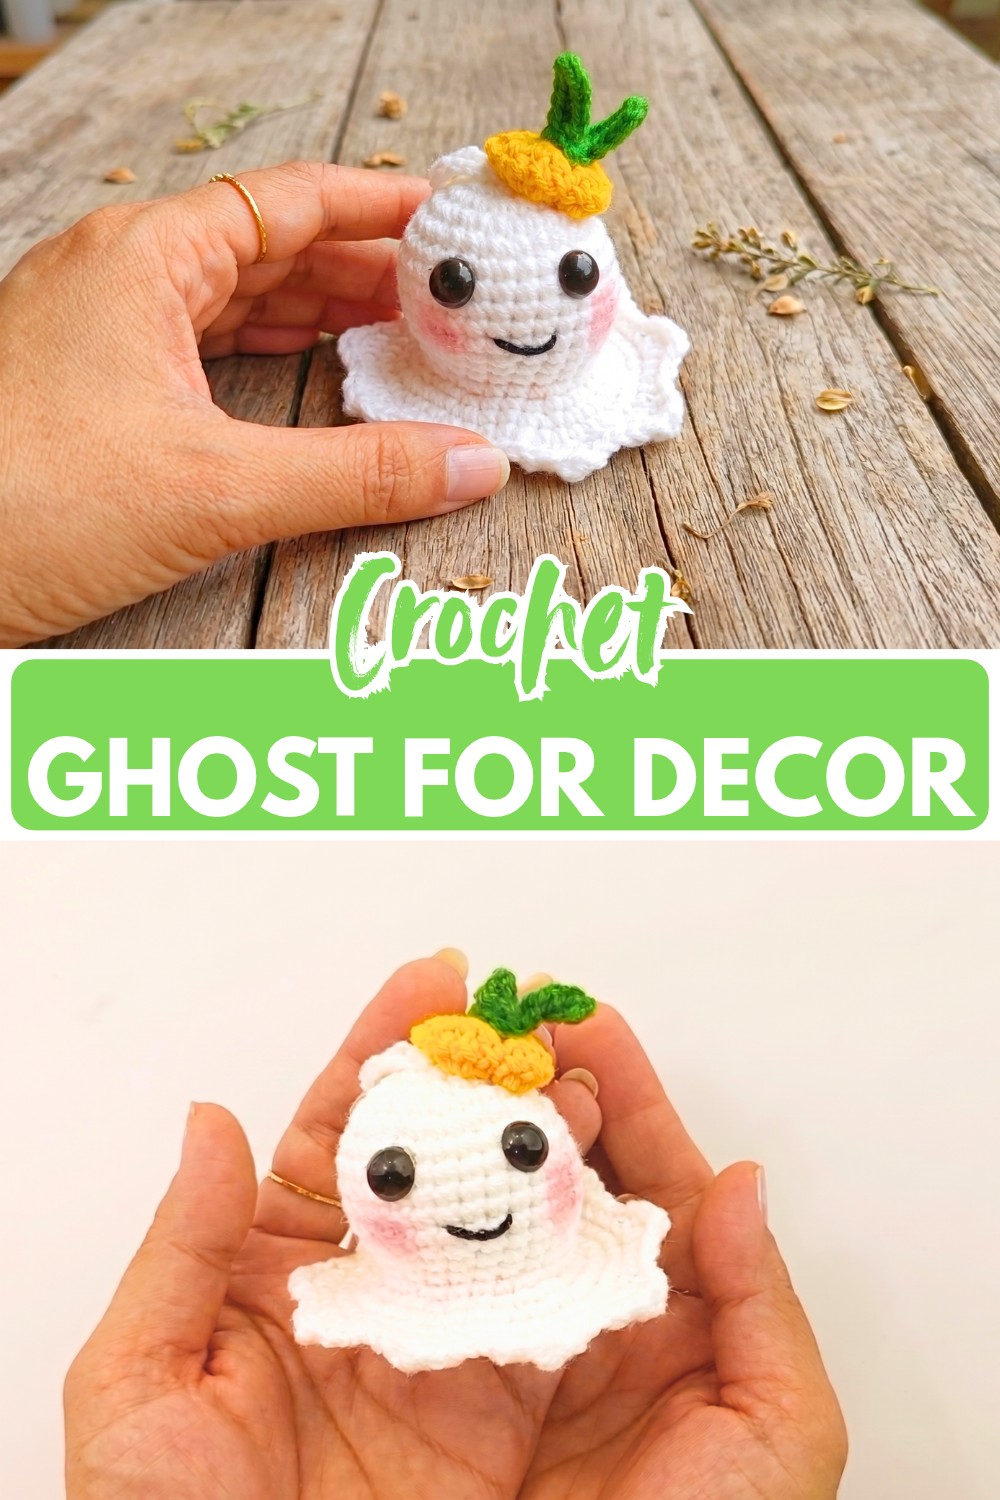
I’ve always found the cutest Halloween decorations are often the simplest ones, and this little crochet ghost has just the right amount of charm.
Its rounded white body, playful wavy skirt, tiny smile, and rosy cheeks give it a warm, friendly look, while the miniature pumpkin on its head adds a fun seasonal detail. It’s small enough to brighten a desk or shelf without taking over the rest of your Halloween décor.
The pattern is also a lovely introduction to making small crochet decorations. The ghost body comes together with familiar increases and decreases, while the wavy edging gives the bottom a playful shape and the tiny pumpkin adds an extra touch of Halloween character.
Add the keychain loop for a cute bag charm, or leave it off and use this cheerful little crochet ghost as a handmade decoration or gift.
Materials and Tools
Before you begin, gather the following:
- Fine or sport-weight yarn
- White for the ghost body
- Yellow or orange for the pumpkin
- Green for the pumpkin stem and leaf
- 2.5–3.0 mm crochet hook, or the size appropriate for your yarn
- 4 mm black safety or craft eyes
- Fiberfill or polyfill stuffing
- Black embroidery thread
- Tapestry needle
- Craft glue, if using glue-on eyes
- Keychain ring, optional
- Pink blush or marker, optional
- Scissors
The finished size will vary depending on your yarn weight, hook size, and crochet tension.
Crochet Abbreviations
This pattern uses US crochet terminology:
- MR: Magic Ring
- ch: Chain
- sc: Single crochet
- hdc: Half double crochet
- dc: Double crochet
- tr: Treble crochet
- inc: Increase – 2 sc in the same stitch
- dec: Decrease – 2 sc crocheted together
- BLO: Back Loop Only
- sl st: Slip stitch
- st(s): Stitch(es)
Unless otherwise noted, join each round with a slip stitch to the first stitch and begin the next round with ch 1.

Step-by-Step Instructions
Crochet the Main Ghost Body
Work the main body in white yarn. The shape starts with a rounded upper section and gradually widens toward the decorative bottom.
Rounds 1-5: Shape the Upper Body
- Round 1: Make a MR, ch 1, and work 6 sc into the ring. Sl st into the first sc. [6 sts]
- Round 2: Ch 1, work 6 inc around. Sl st. [12 sts]
- Round 3: Ch 1, work (1 sc, 1 inc) x 6. Sl st. [18 sts]
- Round 4: Ch 1, work (2 sc, 1 inc) x 6. Sl st. [24 sts]
- Round 5: Ch 1, work (3 sc, 1 inc) x 6. Sl st. [30 sts]
Rounds 6–12: Build the Body
- Rounds 6–9: Ch 1, work 30 sc around. Sl st at the end of each round. [30 sts]
- Round 10: Ch 1, work (3 sc, 1 dec) x 6. Sl st. [24 sts]
- Rounds 11–12: Ch 1, work 24 sc around. Sl st. [24 sts]
Rounds 13–16: Widen the Lower Body
- Round 13: Ch 1, work (3 sc, 1 inc) x 6. Sl st. [30 sts]
- Round 14: Ch 1, work 30 sc around. Sl st. [30 sts]
- Round 15: Ch 1, work (1 sc, 1 inc) x 15. Sl st. [45 sts]
- Round 16: Ch 1, work 45 sc around. Sl st. [45 sts]
At this point, the lower portion of the ghost should have a fuller, rounded shape.

Create the Wavy Ghost Skirt
The final round gives the ghost its distinctive wavy edge.
- Round 17: Ch 1, then work the following sequence 9 times around:
2 sc, 1 hdc, (1 dc, 1 tr, 1 dc in the same stitch), 1 hdc
Sl st into the first stitch to finish.
Fasten off and weave in the yarn end.
The taller stitches create gentle peaks and waves around the bottom, giving the ghost a more playful silhouette.

Make the Bottom Base Disk
The separate white disk closes the underside of the ghost and gives the finished body a neat base.
- Round 1: Make a MR, ch 1, and work 6 sc into the ring. Sl st. [6 sts]
- Round 2: Ch 1, work 6 inc. Sl st. [12 sts]
- Round 3: Ch 1, work (1 sc, 1 inc) x 6. Sl st. [18 sts]
- Round 4: Ch 1, work (2 sc, 1 inc) x 6. Sl st. [24 sts]
- Round 5: Ch 1, work (3 sc, 1 inc) x 6. Sl st. [30 sts]
Fasten off, leaving a long yarn tail for sewing.

Stuff and Attach the Base
Stuff the upper portion and body of the ghost with fiberfill.
Add enough stuffing to give the ghost a firm, rounded shape while avoiding excessive filling that could stretch the stitches.
Once the body has been filled, use the long yarn tail from the bottom disk and a tapestry needle to sew the disk to the inner ridge around Rounds 16–17 of the body skirt.
Work around the edge evenly so the base sits neatly inside the lower opening.

Add the Ghost’s Face
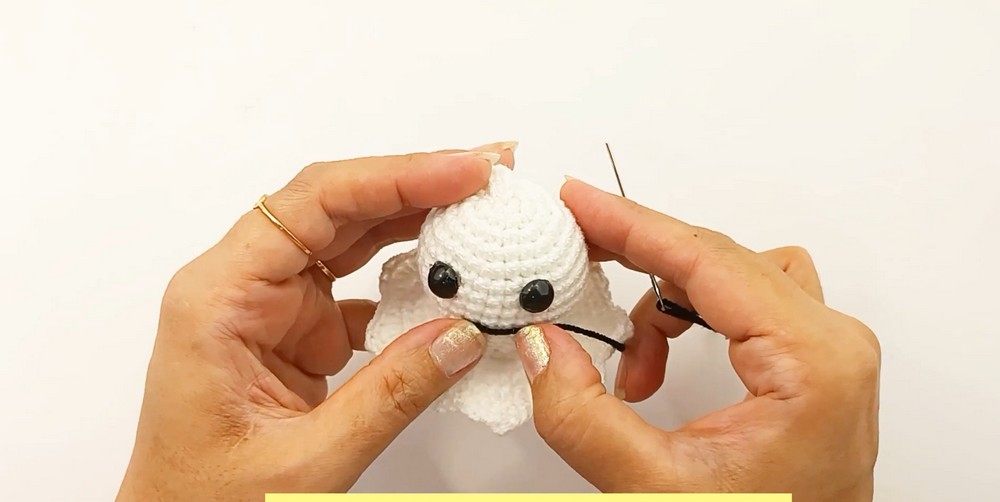
The facial details are simple, but they give the little ghost most of its personality.
Safety Eyes
Attach two 4 mm black safety or craft eyes between Rounds 6 and 8, leaving approximately 4 stitches between them.
If you prefer, you can embroider the eyes with black thread instead.
Embroidered Smile
Use black embroidery thread to add a small curved smile centered between Rounds 9 and 10.
A mouth approximately 3 stitches wide keeps the expression small and delicate.
Optional Blush
For rosy cheeks, add a tiny amount of pink blush beneath the eyes. A pink marker can also be used for this detail.
If the ghost will be handled frequently, embroidered cheek details are another option.
Add a Keychain Loop
The ghost can easily be turned into a small Halloween keychain or bag charm.
At the very top of the head, around Round 1:
- Attach white yarn.
- Ch 10.
- Sl st into the starting stitch to create a loop.
- Attach a keychain ring through the loop.
If you want the ghost to remain a simple decoration, you can skip this step.
Crochet the Mini Pumpkin
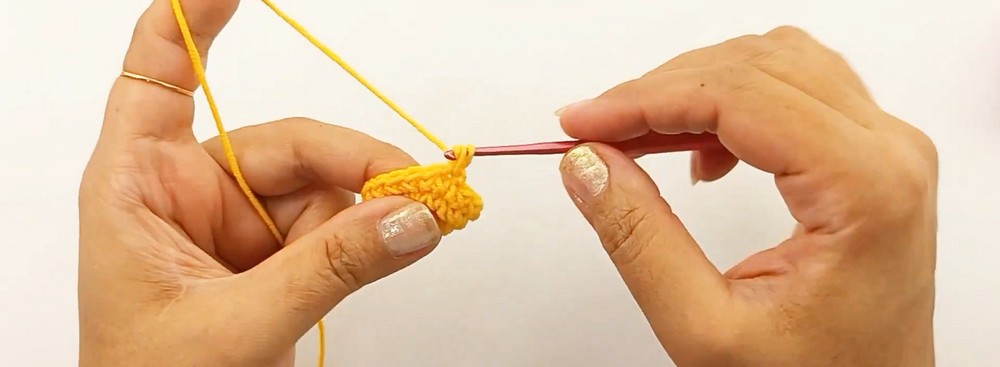
The tiny pumpkin is worked separately in yellow or orange yarn before the green stem is added.
Pumpkin Body
- Round 1: Make a MR, ch 1, and work 6 sc into the ring. Sl st. [6 sts]
- Round 2: Ch 1, work 6 inc. Sl st. [12 sts]
- Round 3: Ch 1, work (1 sc, 1 inc) x 6. Sl st. [18 sts]
- Round 4: Ch 1, work 18 sc around. Sl st. [18 sts]
- Round 5: Ch 1, work (1 sc, 1 dec) x 6. Sl st. [12 sts]
Change to green yarn.
Pumpkin Stem
- Round 6: Ch 1 and, working in the BLO, work (1 sc, 1 dec) x 4, then 1 sc. Sl st. [8 sts]
- Round 7: Ch 1, work 4 dec. Sl st. [4 sts]
- Round 8: Ch 1, work 4 sc around. Sl st. [4 sts]
Fasten off.
Make the Pumpkin Leaf
Using green yarn:
- Ch 7.
- Starting in the second chain from the hook, work 6 sl sts back down the chain.
- Fasten off, leaving a yarn tail.
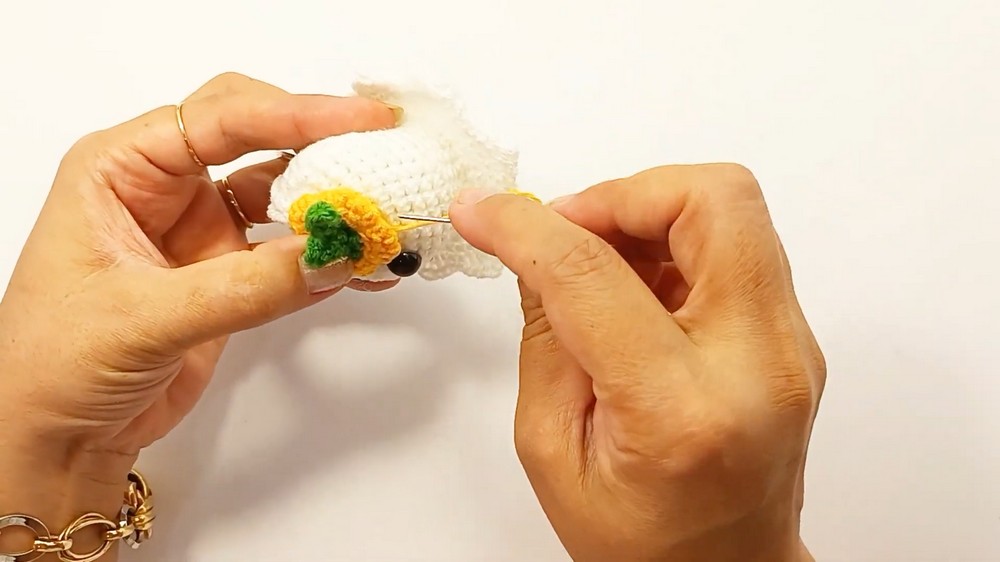
Wrap and sew the leaf around the pumpkin stem.
Shape the Mini Pumpkin
To make the pumpkin look more rounded and defined, use yellow yarn and a tapestry needle to create vertical shaping lines.
Pass the yarn from the top of the pumpkin toward the bottom and back again. Gently pull the yarn to create an indentation.
Repeat this process until you have approximately 5–6 evenly spaced ridges around the pumpkin.
Keep the tension consistent so the pumpkin remains plump while the ridges stay visible.
Attach the Pumpkin to the Ghost
Position the finished pumpkin slightly angled on top of the ghost’s head, close to the keychain loop if you added one.
Use the remaining yarn tails and a tapestry needle to sew it securely in place.
A slightly tilted pumpkin gives the ghost a playful appearance and keeps the topper from looking too rigid or perfectly centered.
Easy Ways to Customize Your Crochet Ghost
The basic design can be changed in several simple ways.
- Classic Halloween: Use white yarn with an orange pumpkin and green leaf.
- Pastel Halloween: Try lavender, pale pink, mint, or light blue.
- Different expressions: Change the shape of the embroidered smile for a sleepy, surprised, or mischievous look.
- Simple ghost: Leave off the pumpkin for a minimal Halloween decoration.
- Portable ghost: Add the keychain loop and ring to make a bag charm.
- Embroidered face: Replace plastic eyes with stitched details for a softer finish.
Tips for a Neat Finish
Small crochet pieces show uneven tension more easily than larger designs, so try to keep your stitches consistent throughout the ghost body.
When stuffing the body, check the shape from several angles. The ghost should look rounded and full without becoming overly firm.
Pay particular attention to the wavy skirt. The combination of sc, hdc, dc, and tr creates the decorative edge, so keeping the stitch sequence accurate will help the waves form evenly.
For the pumpkin, use gentle tension when creating the shaping ridges. Pulling too tightly can make the tiny topper look flat instead of plump.
If using safety or glue-on eyes, make sure they are securely attached. For a small item intended for a young child, embroidered facial details may be a better choice than detachable pieces.
How to Use Your Finished Crochet Ghost
This little ghost is easy to incorporate into Halloween decorating because of its compact size. Place it on a desk, shelf, side table, or among other seasonal decorations.
The keychain version can be attached to a backpack, handbag, or zipper for a small Halloween accent that you can take with you.
You can also make several ghosts with different facial expressions or pumpkin colors and display them together. The simple shape makes it easy to create a small collection without needing a large amount of yarn.
Final Thoughts
With its wavy skirt, sweet expression, and tiny pumpkin topper, this crochet ghost has a cheerful take on Halloween rather than a frightening one. The basic construction keeps the pattern approachable, while the little finishing details give it plenty of personality.
Whether you make it as a seasonal decoration, a handmade gift, or a tiny keychain companion, this crochet ghost is a fun way to add something handmade to your Halloween celebrations.


