
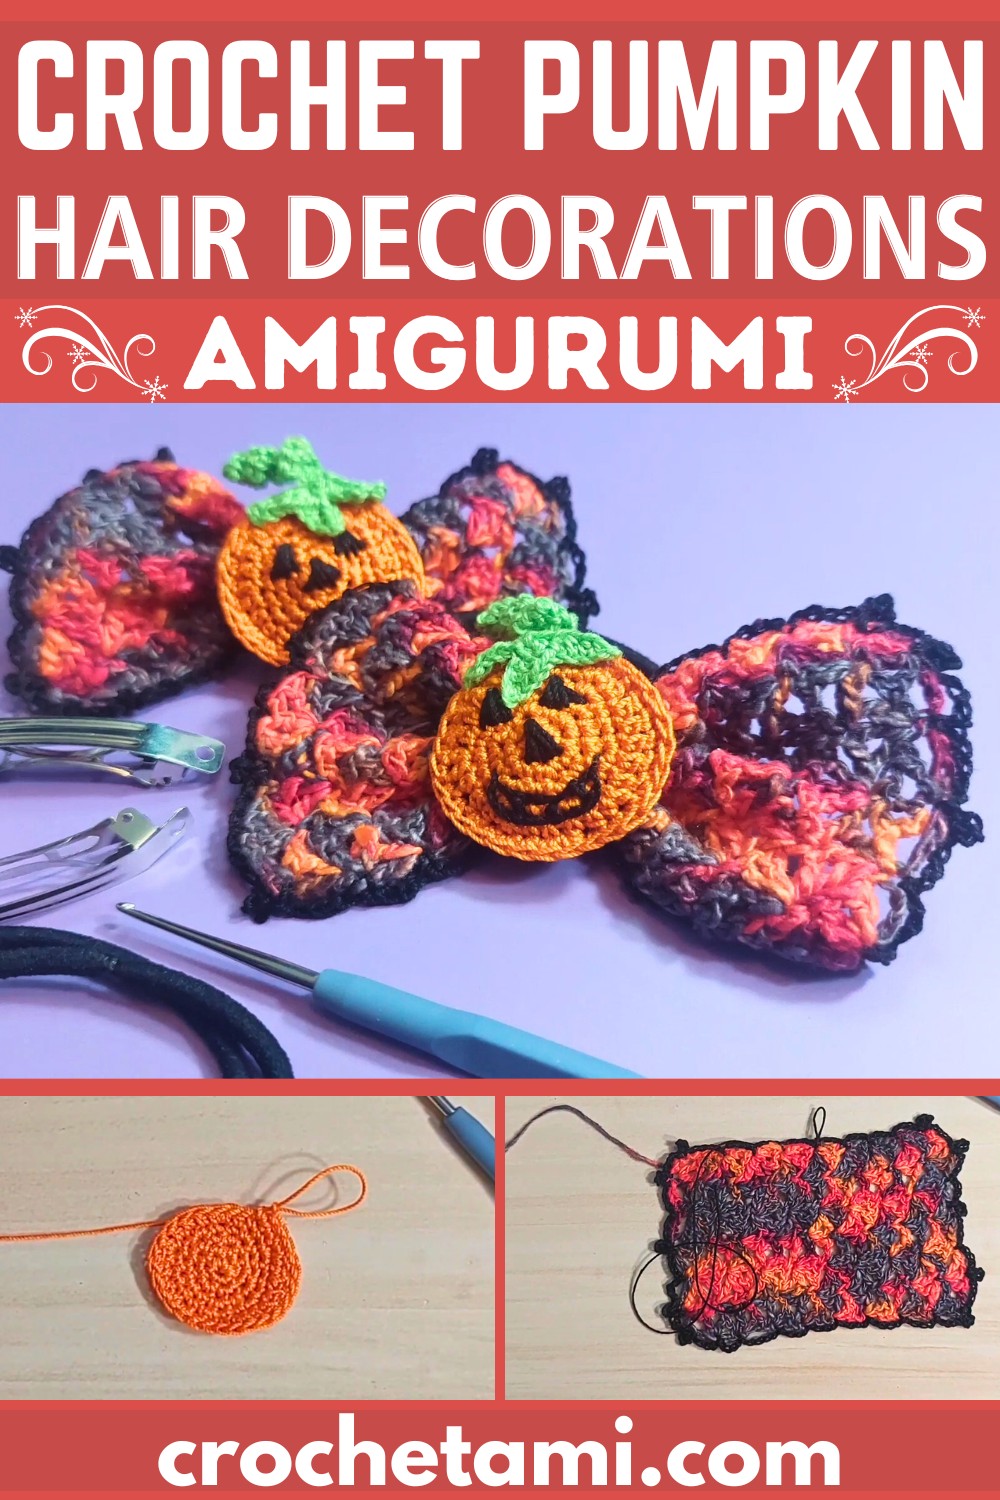
Crochet Pumpkin Hair Decorations for Halloween
Get ready to crochet adorable Jack-o’-Lantern Halloween hair decorations! Perfect for adding a festive touch to your holiday style, this DIY project combines charm and practicality.
Whether used with barrettes or hair bands, these handcrafted pumpkin-themed pieces are fun, functional, and versatile.
These crochet hair decorations aren’t just stylish—they are durable and eye-catching! Designed for Halloween, they work well with various hair accessories, such as elastics or barrettes.
Their rich autumn colors and intricate details make them ideal for costumes, themed events, or daily festive wear.
Materials and Preparation
Materials Needed:
- Yarn/Thread:
- Lace weight yarn or size 10 crochet thread:
- Orange Yarn or Thread: Aunt Lydia’s size 10 “Pumpkin”
- Black Crochet Thread: Loops and Threads size 10
- Green Crochet Thread: Unbranded size 10
- Optional Autumn-Themed Yarn: Lace weight yarn (“Autumn Skies” by Darn Good Yarn)
- Lace weight yarn or size 10 crochet thread:
- Hook:
- Steel crochet hook size 2 (1.5 mm)
- Additional Supplies:
- Hair elastic bands or barrette blanks (purchase at any craft or general store)
- Long tapestry needle (can use standard sewing needle with a large enough eye)
- Scissors
Abbreviations and Notes
Abbreviations:
- CH: Chain
- SC: Single Crochet
- HDC: Half Double Crochet
- DC: Double Crochet
- SL ST: Slip Stitch
- St(s): Stitch(es)
- PICOT: Chain 3, then SL ST into the first of the 3 chains to form a picot
General Tips:
- This pattern is beginner-friendly, but attention to detail is needed for the embellishments.
- Work tightly and precisely for clean finishes, especially since the project involves small, intricate pieces.
- The project consists of multiple components: the bow, the pumpkin face (front/back), the leaves/stem, and the attachments.
Gauge, Approximate Size, and Pattern Notes
Gauge:
- Gauge is not crucial for this project; just ensure consistent tension for all parts.
- A finished Jack-o-Lantern decoration should be proportional to the hair accessory (approximately 2.5–3 inches wide).
Finished Dimensions:
- The final bow will typically fit over a ~5″ wide elastic band or barrette blank.
Pattern Notes:
- Special techniques: picots for decorative edges; surface stitching for embroidering facial features.
- Embellishments (pumpkin’s eyes, nose, and mouth) are stitched onto the front piece.
Step-by-Step Pattern
Step 1: Create the Bow
- Foundation CH: Chain 26.
- Row 1:
- SC in the 2nd chain from the hook.
- CH 1. Skip the next 3 chains.
- (DC, CH1, DC, CH1, DC) in the next chain. CH 1.
- Skip the next 3 chains. SC in the next chain.
- Repeat from … across the row, ending with an SC in the last chain.

- Row 2:
- Turn, CH 4.
- (DC, CH 1, DC, CH 1, DC) in the next single crochet (centered on the 3 DC grouping below). CH 1.
- SC in the second DC of the 3 DC cluster below.
- Repeat from … to end the row.
- Row 3:
- Turn, CH 1.
- SC in the first stitch. CH 1. (3 DC, each separated by CH 1, in the SC below. CH 1. SC in the next DC of the cluster below.) Repeat.
- Repeat Rows 2 and 3: 7 more times to create 17 total rows.
- Edging: Using black thread:
- Attach yarn midway along the vertical edge of the bow.
- CH 4, SL ST into the edge of two adjoining rows. Repeat down the long vertical edge.
- At each corner, create a PICOT (CH 3, SL ST into the first chain).
- Continue CH 4, SL ST along all edges. Finish off.
- Shape the Bow:
- Fold the fabric, accordion-style, into a bow shape.
- Using a tapestry needle, secure the folds in place by stitching a few times through the center.
- Set aside.

Step 2: Create the Pumpkin Face
- Back of Pumpkin:
- Round 1: Create an adjustable ring. SC 6 into the ring.
- Round 2: 2 SC in each stitch (12 total).
- Round 3: SC in next stitch, 2 SC in next (18 total).
- Round 4: SC in next 2 stitches, 2 SC in next (24 total).
- Round 5: Increase using a mix of SC, HDC, and DC as follows:
- SC, SC, HDC, 2 HDC in next, DC, DC, DC, 2 DC in next… (Refer to the video timestamps or text for precise order).

- Front of Pumpkin:
- Follow the same steps as the back.
- Do NOT fasten off after Round 5. Use the working yarn to crochet both pieces together.
- Assemble Front/Back:
- Place both pieces together, wrong sides facing each other.
- Crochet through both layers by working a final round:
- SC 4, 2 SC in next around the edges (36 total).
- Embroidering the Face:
- Use black thread to stitch triangular eyes and a nose.
- Add the mouth (e.g., a smile or a spooky grin) with satin or simple stitches.

Step 3: Create the Stem and Leaves
- Stem:
- Chain 12.
- SC 2 into each chain, creating a curly stem.
- Leaves:
- For each leaf: CH 5.
- SC in second chain from hook, HDC in next 3 stitches.
- Repeat to form multiple leaves on the stem.
- Attach Stem/Leaves:
- Sew the stem and leaves onto the top center of the pumpkin head.
Step 4: Attach the Pumpkin to the Bow
- Sew the pumpkin head to the center of the bow securely using a tapestry needle.
- Wrap a small crocheted band (CH 23, SC across for 3 rows) around the bow’s center, overlapping the base of the pumpkin.
Step 5: Add Hair Accessories
- For Hairband:
- Loop the crocheted band around the elastic band. Sew the band in place securely.
- For Barrette:
- Insert the barrette’s center spring through the band and sew the bow to the barrette securely.

Key to Success
- Use premium lace-weight yarns or crochet threads for a polished look.
- Maintain consistency in stitches to ensure durability and uniformity.
- Choose bright autumn-themed colors like orange, black, and green.
- Carefully attach barrettes or hair bands for secure wear.
- Embroider the Jack-o’-Lantern face with precision for added charm.
Conclusion
Creating these Halloween-themed Jack-o’-Lantern hair decorations is a delightful and rewarding crochet project. They’re eye-catching, practical, and festive—perfect for dressing up or gifting. Give it a try to add a handmade touch to your Halloween celebrations!


