Crochet Snake Amigurumi – Fun No-Sew Pattern
Turn your crochet hook into a magic wand and bring a stylish snake to life! With its sleek shape, detailed textures, and colorful customization options, this crochet snake amigurumi is the playful project you didn’t know you needed. Whether it’s a whimsical decor piece, a unique handmade toy, or a charming desk companion, this design is as versatile as it is fun to create.

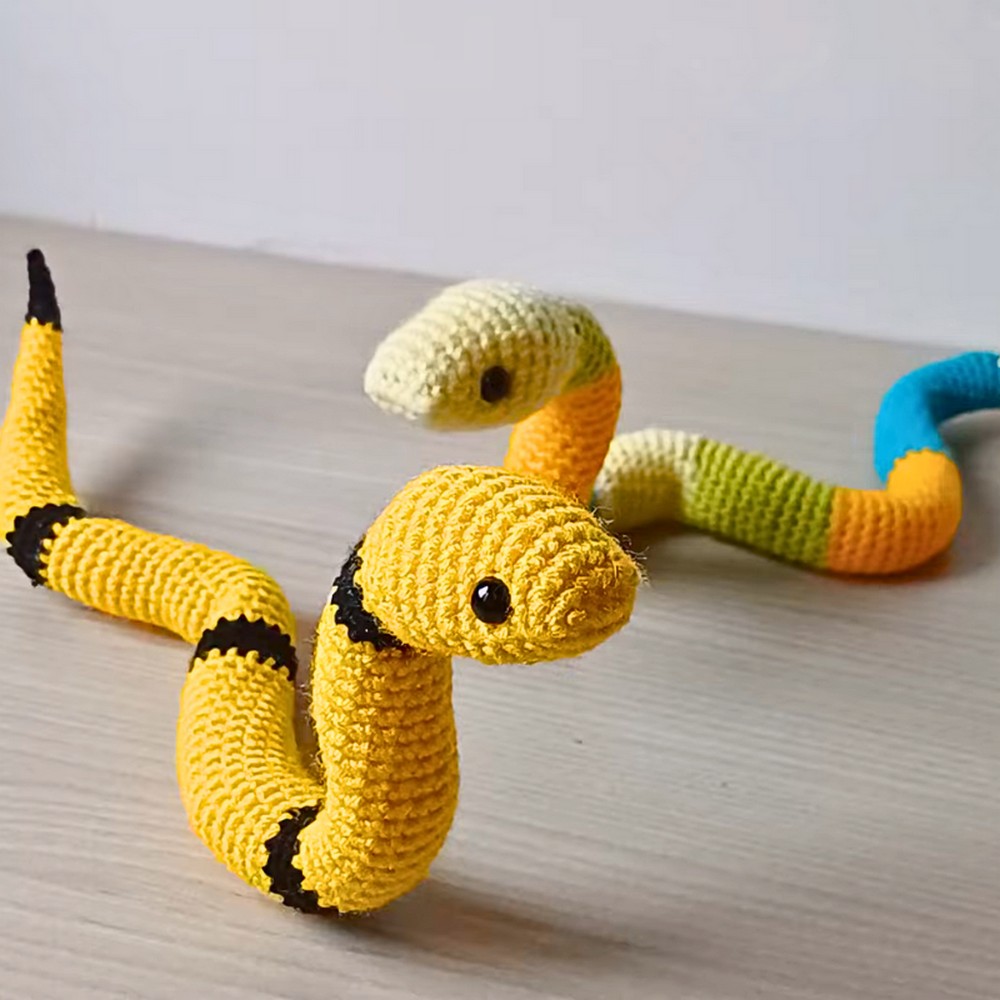
Crochet Snake Amigurumi
What sets this snake amigurumi apart is its smooth, seamless construction and adaptability. Its elongated body can be customized in length, allowing for a coiled look or a stretched design. The pattern’s no-sew approach simplifies the process, while added details like safety eyes or embroidered features add personality to your creation. With endless options for stripes, solid colors, or even textured stitches, this project lets you stitch up something truly one of a kind.
Credit Ambros Crochet
Required Materials
To create your crochet snake, you will need:
- Yarn: You can use as many colors as you like. The tutorial uses two colors, but feel free to experiment.
- Crochet Hook: 3 mm crochet hook (or any size that matches your yarn).
- Scissors
- Toy Stuffing
- Safety Eyes (Optional – 8 mm or 10 mm recommended)
- If you don’t have safety eyes, you can embroider the eyes using thread and a needle.
- Wire (Optional): To make the snake poseable, you can insert wire.

Important Notes
- Pattern is Beginner-Friendly: This pattern requires no sewing and primarily uses simple stitches.
- Skill Level:
- Stitches used:
- Magic Ring
- Chains
- Single Crochet (sc)
- Single Crochet Increase (inc)
- Single Crochet Decrease (dec)
- Stitches used:
- Stuffing:
- Begin stuffing the snake early (e.g., after the head) and continue as you crochet the body.
- Do not overstuff, particularly the head. Maintain the flat shape of the snake’s bottom while stuffing.
- Personalization:
- Change colors whenever you like. You don’t need to follow the color changes shown in the tutorial exactly.
- Add stripes, use variegated yarn, or experiment with other textures and stitches.
- Eye Placement:
- Place the eyes between rounds 5 and 6 and keep them around 6 stitches apart.
- Due to the natural round shift in crocheting, adjust placements so they are visually aligned.
- Wire Use (Optional):
- Use a small, bendable wire to make the snake moveable. Cut it slightly shorter than the snake length. Bend and smooth the ends to prevent sharp edges.
Step-by-Step Instructions
Head of the Snake
- Start with Magic Ring:
- Create 6 chains to begin.
- Round 1 (Head Base):
- Start from the second chain from the hook. Crochet:
- 1 sc in the next 4 chains.
- 3 sc in the last chain to turn your work onto the opposite side of the starting chain.
- 1 sc in the next 3 chains.
- 2 sc in the final chain. (12 sc total for this round.)
- Start from the second chain from the hook. Crochet:
- Round 2-7 (Shaping the Head):
- Round 2: Repeat patterns of increases and single crochets to create a flat bottom and round top following these guidelines. Keep increasing only on one side.
- Rounds 3, 5: Crochet one sc into each stitch (15, 18, and 21 sc total respectively).
- Continue alternating rounds of increases and single crochets until shaping is done.
- Rounds 8–11:
- Crochet one sc in each stitch, keeping the shape and ensuring 24 sc per round.

Midsection & Body
- Rounds 14–73 (Body):
- Crochet one sc in each stitch to lengthen the body.
- Use color changes to create stripes or patterns (e.g., 3 rounds of stripes followed by 17 rounds of a solid color).
- If using wire, insert it carefully at this stage.
- Stuff as You Go:
- Add stuffing continuously as the body grows longer. Avoid waiting until later, as access will become difficult.

Tail Shaping (Rounds 74–101):
- Gradually decrease stitches to taper the tail:
- Example: Decrease 1 sc in rounds while continuing to crochet sc in the rest.
- Reduce stitch counts from 14 sc to 6 sc.
- Final Rounds (100–101):
- Finish with a couple of decreases. When you are left with a few stitches, close off with a slip stitch and weave in the yarn tail.
Adding Wire (Optional)
- Insert the wire after the body is completed.
- Gently push the wire through the stuffed body, ensuring the wire doesn’t bend unnaturally during the process.
- Cut off excess wire and smooth the ends to avoid any poking.

Finishing Touches
- Adjust stuffing and positioning.
- If using safety eyes, secure them tightly; if embroidered, stitch neatly.
- Shape the snake body and twist it into your desired pose if a wire is added.
Final Notes
This crochet project is a fun, creative way to practice your skills, experiment with colors, and enjoy making a playful, poseable snake.


