Here’s a baby dragon that comes to life one tiny crochet piece at a time, with adorable wings, playful spikes, and a cuddly finish worth seeing.
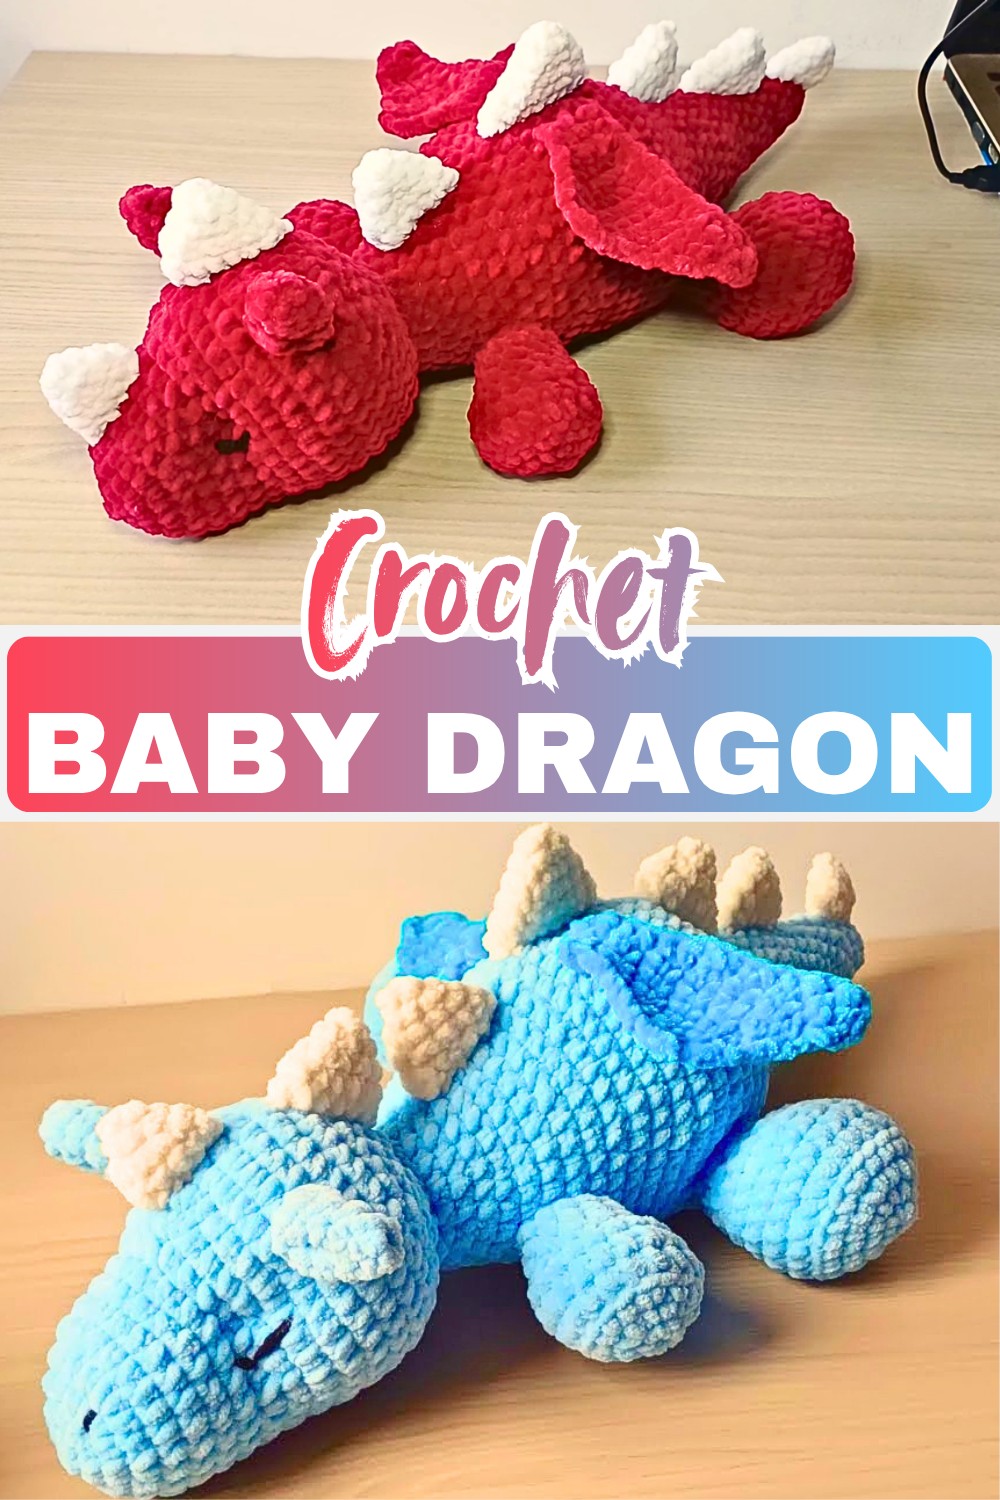
This crochet baby dragon is full of tiny details that make every stage enjoyable. From its round little head to its soft wings and neat row of spikes, each section slowly builds a character that’s both playful and charming. The simple shaping keeps the crochet design fun while the finished look feels wonderfully complete.
The body, paws, ears, wings, and spikes are made separately before everything comes together in the final assembly. Soft velvet yarn gives it a fluffy appearance, while different colors make every crochet dragon look unique. As each piece finds its place, the little crochet dragon quickly transforms into an adorable handmade companion.
Credit Ambros Crochet
Materials Needed
- Velvet yarn in three colors (or two, depending on preference; for body, wings, and spikes)
- Acrylic yarn (for embroidering the eyes)
- Toy stuffing
Tools Required
- Crochet hook (5mm to match velvet yarn)
- Tapestry needle
- Scissors
- Pins
Gauge:
Not specified.
Finished Size / Measurements:
Not specified.
Techniques & Key Stitches Used
- Crochet Techniques: Working in the round, magic ring
- Stitches: chain (ch), single crochet (sc), single crochet increase (inc), single crochet decrease (dec), back loops only (BLO), front loops only (FLO), half double crochet (hdc), double crochet (dc)
Helpful Tips
- Be cautious when tightening the magic ring if using velvet yarn, as it can break easily.
- When working on pieces with small stitch counts, it may help to work with the wrong side out at first, then flip it to the right side once the round is complete.
Abbreviations
Front Loops Only (FLO) means inserting the hook underneath only the loop closer to you instead of both loops. Back Loops Only (BLO) means inserting the hook under the loop further away from you.

Pattern Overview & Making Process
The pattern begins with the head, worked in continuous rounds from a magic ring using increases to shape the face before gradually decreasing after stuffing. The ears are made separately with a few simple rounds, creating small pointed shapes that are sewn on later.
The body starts at the tail and slowly expands through a series of increases before continuing into the main body shape. The front and back paws are crocheted individually, with the back paws made slightly larger, while the spikes are created in three different sizes to fit neatly along the dragon’s back.
The wings are worked flat in rows, increasing first and then decreasing to form their shape before adding a decorative border around the edges. Once every piece is finished, the ears, spikes, wings, and limbs are sewn into place to complete the baby dragon exactly as shown in the tutorial.
Step-by-Step Pattern Instructions
Head
- Round 1: 6 sc into a magic ring. (6)
- Round 2: 6 inc. (12)
- Round 3: (1 sc, 1 inc) x 6. (18)
- Round 4: (2 sc, 1 inc) x 6. (24)
- Rounds 5–8: 1 sc in each stitch. (24)
- Round 9: 1 sc in each of the first 6 stitches; working in FLO, repeat (2 sc, 1 inc) 6 times. (30)
- Round 10: 1 sc in each of the first 6 stitches; repeat (3 sc, 1 inc) 6 times. (36)
- Round 11: 1 sc in each of the first 6 stitches; repeat (4 sc, 1 inc) 6 times. (42)
- Rounds 12–15: 1 sc in each stitch. (42)
- Round 16: 1 sc in each of the first 6 stitches; repeat (4 sc, 1 dec) 6 times. (36)
- Round 17: 1 sc in each of the first 6 stitches; repeat (3 sc, 1 dec) 6 times. (30)
- Round 18: 1 sc in each of the first 8 stitches; repeat (2 sc, 1 dec) 6 times. (24)
- Round 19: (2 sc, 1 dec) x 6 (stuff the head here). (18)
- Round 20: (1 sc, 1 dec) x 6. (12)
- Round 21: 6 dec. (6)
Finish: Slip stitch and fasten off, leaving a long tail for shaping.

Ears (Make 2)
- Round 1: 4 sc into a magic ring. (4)
- Round 2: (1 sc, 1 inc) x 2. (6)
- Round 3: (2 sc, 1 inc) x 2. (8)
- Round 4: (3 sc, 1 inc) x 2. (10)
- Round 5: 1 sc in each stitch. (10)
Finish: Slip stitch, leaving a long tail for sewing.

Body & Tail
- Round 1: 6 sc into a magic ring. (6)
- Round 2: (2 sc, 1 inc) x 2. (8)
- Round 3: 1 sc in each stitch. (8)
- Round 4: (3 sc, 1 inc) x 2. (10)
- Round 5: (4 sc, 1 inc) x 2. (12)
- Round 6: 1 sc in each stitch. (12)
- Round 7: (5 sc, 1 inc) x 2. (14)
- Continue following the detailed instructions for rounds until Round 39, decreasing towards the end.
- At Round 39, finish stuffing the tail.
Finish: Slip stitch and cut yarn, leaving a long tail for assembly.

Front Paws (Make 2)
- Round 1: 6 sc into a magic ring. (6)
- Round 2: 6 inc. (12)
- Round 3: (1 sc, 1 inc) x 6. (18)
- Round 4: 1 sc in BLO only. (18)
- Rounds 5–6: 1 sc in each stitch. (18)
- Round 7: 1 sc in each of the first 6 stitches, 6 dec. (12)
- Rounds 8–9: 1 sc in each stitch. (12)
Finish: Slip stitch and fasten off, leaving a tail for sewing.
Back Paws (Make 2)
The process is similar to the front paws but includes additional increases for size:
- Increase to 24 stitches by Round 5.
- Work 3 rounds maintaining the 24 stitches before starting the decreases.

Spikes
- Small Spikes (Make 2): 3–4 rounds, increasing to 9 stitches.
- Middle Spikes (Make 4): 5 rounds, increasing to 12 stitches.
- Big Spike (Make 1): 6 rounds, increasing to 15 stitches.
Wings (Make 2)
Work in rows:
- Start with ch 3, then work 2 sc.
- Gradually increase rows until Row 7, then start decreasing toward Row 13, ending with 1 stitch.
- Add the edging border using ch, sc, hdc, and dc to form a scalloped ridge.

Finish: Leave a tail for sewing.
Assembly Instructions
- Assemble the ears, head, body, spikes, wings, and limbs in the specified order (placement details provided in timestamps for clarity).
- Spikes: Align them along the spine with clear spacing instructions for straight alignment.
- Wings & Limbs: Position as described for a “sprawled-out” appearance.

Customization Options
- Use acrylic yarn instead of velvet for a different texture that is easier to manage (and less prone to shedding).
Troubleshooting Tips
- Velvet Yarn Shedding: Minimize friction when sewing to reduce fiber loss.
- Tightening Magic Rings: Carefully tighten to prevent breakage.
Final Notes
- Follow the assembly carefully to achieve a perfectly finished baby dragon.
- For visual guidance, refer to the full YouTube video guide.


