A tiny crochet skull can turn an everyday keychain into a playful piece of Halloween style. With its spooky yet cheerful character, this small handmade piece adds a festive touch wherever you carry it. Clip it onto a backpack, purse, or set of keys to give an ordinary accessory a little seasonal personality. Its compact size makes it easy to carry, while its handmade charm helps it stand out.
Crochet Skull Amigurumi Pattern

This little crochet skull also has plenty of potential beyond being a keychain. Keep it as a fun Halloween accessory, add it to a seasonal display, or make one as a thoughtful handmade gift for a friend. Its small and simple design makes it approachable for beginners who want to create something festive without complicated details. Whether you carry it every day or give it to someone special, this cheerful crochet skull brings a cute touch of spooky character to the season.
Materials & Tools Needed
Prepare your supplies before starting so you can move smoothly from crocheting to stuffing and finally to the facial embroidery.
Yarn
For the large plush skull:
- Chunky plush or velvet yarn in white
- Pink yarn for facial embroidery
For the smaller keychain skull:
- Medium or chunky cotton yarn in white
- Black yarn for facial embroidery
You can also change the embroidery color to match the look you want. Black creates a traditional spooky appearance, while pink or another pastel shade gives the skull a softer, kawaii-style finish.
Crochet Hooks
- 10.0 mm crochet hook for the large plush skull
- 5.0 mm crochet hook for the smaller keychain version
The finished size will depend on your yarn weight, hook size, and crochet tension.
Other Tools
- Stitch marker
- Large tapestry needle
- Polyester fiberfill
- Scissors
- Keychain ring with chain, for the keychain version
- Tweezers, optional, for pushing stuffing into small areas
- Sewing or pearl-head pins for positioning facial features
Helpful Preparation Tip
If you are making the small skull as a keychain, keep your stitches firm and consistent. A tighter fabric helps the stuffing stay contained and gives the finished charm enough structure to handle everyday use.
Finished Size & Customization Ideas
With the yarn and hooks described above, the approximate sizes are:
- Large Plush Skull: 14–15 cm (about 5.5 inches)
- Keychain Skull: approximately 9 cm (about 3.5 inches)
Actual dimensions can vary with yarn thickness and tension.
Customize the Color
White is perfect for a classic skull, but Halloween projects give you plenty of room to experiment.
Try:
- Pastel purple
- Neon green
- Orange
- Black
- White with contrasting embroidery
Change the Expression
The embroidered face can completely change the personality of the skull.
Use:
- Black yarn for a classic spooky look
- Pink or pastel yarn for a cute kawaii expression
- Different eye shapes for a playful or mischievous character
Turn It Into a Decoration
The smaller skull can also be used as:
- A bag charm
- Backpack accessory
- Halloween ornament
- Garland element
- Small handmade gift
If making several skulls for a garland, use different colors and expressions to keep the collection interesting.

Pattern Abbreviations & Terminology
The pattern uses US crochet terminology.
- ch: Chain
- sc: Single Crochet
- inc: Increase — 2 single crochet stitches in the same stitch
- dec: Decrease — single crochet 2 stitches together (sc2tog)
- sl st: Slip Stitch
- st(s): Stitch(es)
- [ ]: Stitch count at the end of the round
Before You Start
This skull is worked in continuous-style shaping with joined rounds as specified in the pattern, so keeping track of your stitch count is important.
Use a stitch marker to help identify the beginning of each round. This is especially useful once you reach the decrease rounds because missing one stitch can change the final shape of the skull.
For a neat amigurumi fabric, try to keep your tension firm but not so tight that the hook becomes difficult to insert.
Overview
This crochet Halloween skull pattern gives you two ways to make the same spooky character: a larger plush skull for decorating or gifting and a smaller version that can be turned into a fun keychain. The basic skull shape is worked in simple single crochet rounds, then shaped with decreases and finished with embroidered eyes, a nose, and a stitched smile.
The process starts by crocheting the rounded skull from the bottom up. You’ll increase the first few rounds to create the width, work several even rounds to build the height, and then use decreases to close the top. Before the final opening is closed, the skull is filled with polyester fiberfill so it keeps its soft, rounded shape. Once the body is complete, the facial features are positioned with pins before being embroidered, making it easier to achieve a balanced expression.
The most important part of this project is getting the shape and facial placement right. Stuffing too little can leave the skull flat, while overstuffing can stretch the stitches. Likewise, embroidering the eyes or mouth before checking their position can make the face look uneven. This guide walks you through those details step by step, including how to close the skull neatly, create the stitched-mouth effect, hide embroidery tails, and adapt the finished piece into a Halloween keychain.
Step-by-Step Detailed Crochet Instructions
Skull Head Main Piece
The skull is crocheted from the starting point outward and then narrowed again with decreases. The first rounds create the width, the middle rounds build the head, and the final rounds close the shape.
Round 1
With white yarn, ch 2.
Starting in the second chain from the hook, work 6 sc.
Sl st to join.
(6 sts)
Round 2
Work 6 increases around.
(12 sts)
Each increase places two single crochets into the same stitch, doubling the stitch count from the previous round.
Round 3
Work:
(1 sc, 1 inc) × 6
(18 sts)
Round 4
Work:
(2 sc, 1 inc) × 6
(24 sts)
At this point, the crochet piece should begin forming a small rounded shape rather than remaining completely flat.
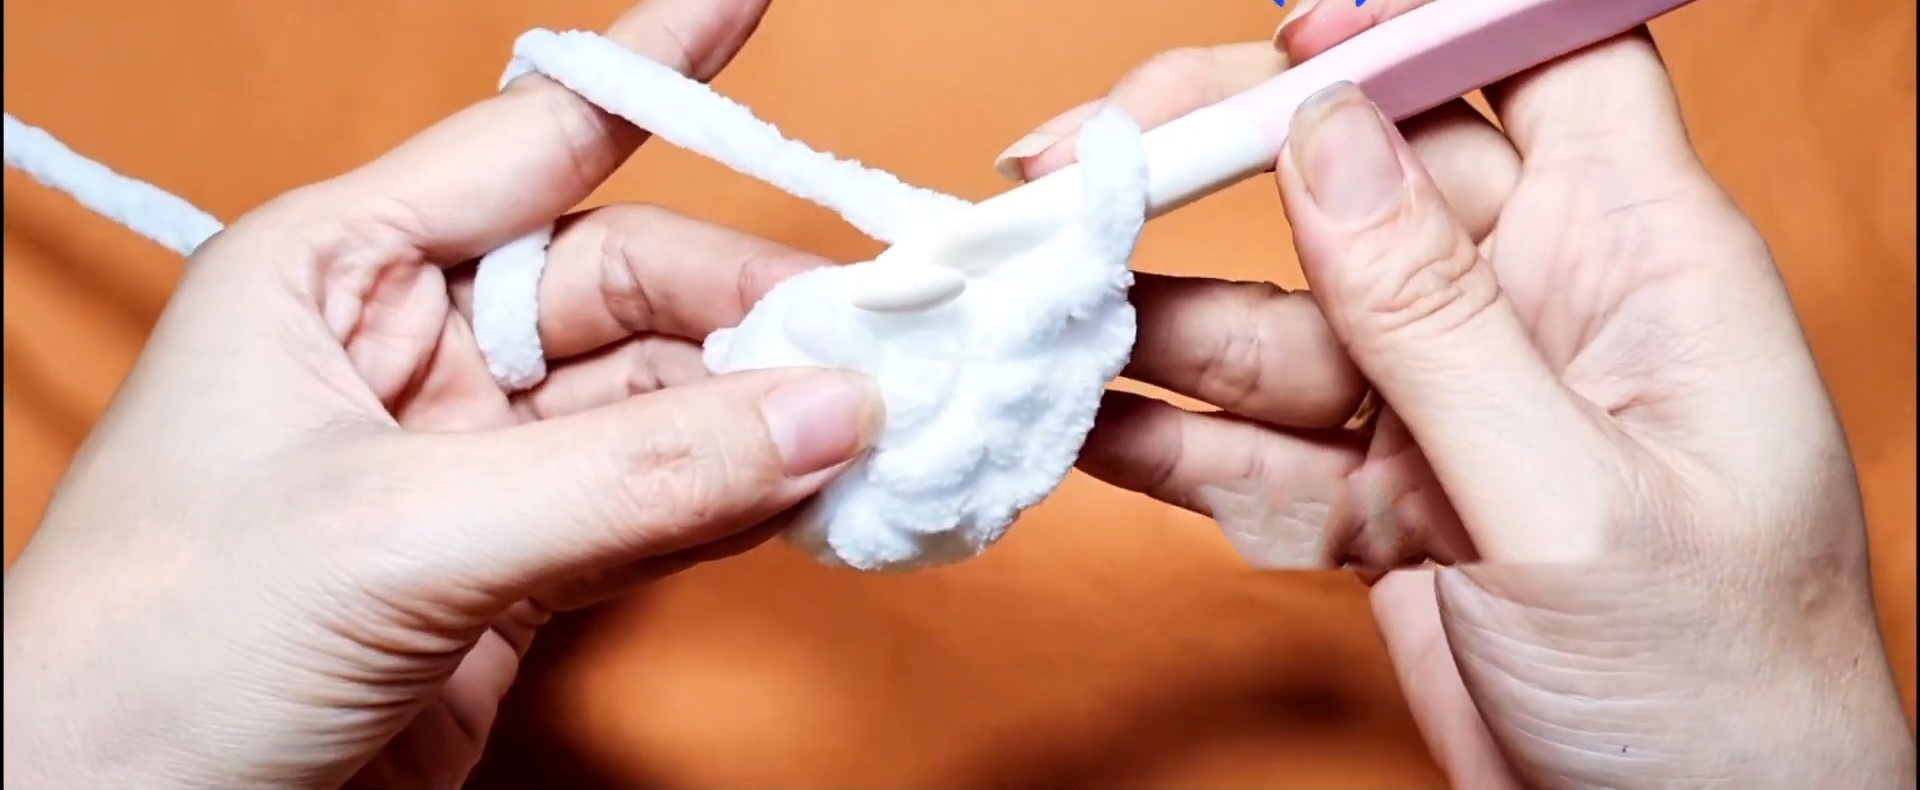
Rounds 5–6
Work 24 sc around for two rounds.
(24 sts per round)
These even rounds help establish the main height of the skull.
Round 7
Work:
(2 sc, 1 dec) × 6
(18 sts)
The decreases begin bringing the sides inward.
Rounds 8–10
Work 18 sc around for three rounds.
(18 sts per round)
Keep your tension consistent here because these rounds determine much of the skull’s final height.
Round 11
Work:
(1 sc, 1 dec) × 6
(12 sts)
The opening should now be noticeably smaller.

Stuff the Skull Before Closing
This is the best time to add the polyester fiberfill.
Add small amounts of stuffing rather than pushing a large amount in all at once.
How to Get a Good Skull Shape
Start by filling the bottom and sides, then gradually fill toward the center.
Use your fingers or optional tweezers to reach small hollow areas.
The finished skull should feel:
- Firm
- Rounded
- Evenly filled
Avoid compressing the stuffing into one large lump. Uneven stuffing can create dents that remain visible after the opening is closed.
Do not overstuff. Too much fiberfill can stretch the stitches and make the decrease area look distorted.
Round 12
Work:
6 dec
(6 sts)
Before closing, check the shape one final time. If you can feel a noticeable empty space inside the skull, add a small amount of fiberfill now.
Close the Opening
Sl st into the next stitch and cut the yarn, leaving approximately a 30 cm (12-inch) tail.
Thread the tail onto a tapestry needle.
Weave the needle through the front loops of the remaining 6 stitches.
Pull the yarn gently to draw the opening closed.
Secure the yarn and weave the remaining tail inside the skull.

Finishing Tip
Pull the closure firmly enough to eliminate the hole, but avoid pulling so aggressively that the surrounding stitches become distorted.
Now the basic skull shape is complete and ready for its face.
Facial Feature Placement
Before embroidering anything permanently, use sewing pins to mark the positions.
This small step makes a big difference because it lets you check the expression from the front before committing to the stitches.
Position the Eyes
Place the eye markers on Round 6, approximately 5 stitches apart.
Step back and look at the skull from the front.
If the eyes appear uneven, reposition the pins before embroidering.
Position the Mouth
Place the mouth markers across Rounds 7–8, approximately 6 stitches apart.
The mouth should sit comfortably below the eyes while remaining centered.
Expert Tip
Do not rely only on counting stitches when positioning the face. Crochet fabric can shift slightly depending on tension, so always look at the actual finished shape before embroidering.
Embroider the Skull Face
You can use pink or black yarn for the facial details.
A tapestry needle works well for carrying the embroidery through the plush crochet fabric.
Embroider the Mouth
Thread your tapestry needle with your chosen embroidery yarn.
Create a curved horizontal smile line across the marked area on Rounds 7–8.
Use small anchoring stitches to hold the curve in place.
Then add short vertical stitches across the horizontal line to create the characteristic stitched skull-mouth effect.
Making the Mouth Look Even
Rather than making every vertical stitch identical, first establish the main curved line.
Then add the vertical stitches one at a time, checking their spacing from the front.
This prevents the mouth from becoming unintentionally crowded on one side.
Embroider the Eyes
At the marked positions on Round 6, embroider slanted lines or cross-like stitches that angle inward.
Try to make both eyes similar in size and angle.
If one eye looks heavier than the other, remove and adjust it before finishing the yarn ends.
Add the Nose
The nose sits between the eyes on Round 7.
Embroider a small vertical stitch or triangular shape.
Keep it relatively small so it doesn’t overpower the eyes and mouth.
Optional Decorative Details
For extra character, add small diagonal X stitches or accent lines around the forehead or sides of the skull.
These details are completely optional.
They work especially well if you’re making several skulls and want each one to have a slightly different personality.
Secure and Hide the Embroidery Ends
Once all facial details are complete, do not simply cut the yarn close to the surface.
Instead:
- Tie or secure the yarn inside the skull.
- Thread the tail onto the tapestry needle.
- Pull it through the stuffing toward another area inside the skull.
- Trim the excess.
- Use tweezers if necessary to tuck the end farther inside.
This keeps the front of the skull clean and prevents loose embroidery from coming undone.

Keychain Attachment
The smaller version can be converted into a Halloween keychain after the crochet body is finished.
Attach the metal keychain ring or jump-ring assembly to the top center of the skull, around the starting/top area.
Check the Attachment Before Using It
Because a keychain is handled frequently, make sure the attachment is firmly secured.
The ring should connect to a sturdy section of the crochet fabric rather than a loose decorative stitch.
If the attachment feels unstable, reinforce that area with additional yarn stitches before using the skull as a bag or key charm.
How to Make the Skull as a Plushie or Keychain
The two versions follow the same basic concept, but the materials change the final result.
For a Large Plush Skull
Use:
- Chunky plush or velvet yarn
- 10 mm hook
- More substantial fiberfill
- Larger embroidery details
This produces a soft decorative skull that works well as a seasonal plushie.
For a Small Keychain Skull
Use:
- Medium/chunky cotton yarn
- 5 mm hook
- Smaller, firmer stitches
- A secure metal keychain attachment
The smaller version is more practical for bags, backpacks, or keys.
Common Problems & Easy Fixes
The Skull Looks Flat
The most common cause is insufficient stuffing.
Add fiberfill gradually and distribute it evenly throughout the head.
The Skull Looks Too Lumpy
The stuffing may be concentrated in one area.
Remove or redistribute some fiberfill before closing the opening completely.
The Face Looks Crooked
The embroidery was probably started before the positions were checked.
Use pins first, view the skull from the front, and only then stitch the features permanently.
The Mouth Looks Uneven
Start with the main horizontal smile line before adding the vertical stitches.
This gives you a guide for keeping the teeth stitches balanced.
The Keychain Feels Loose
Reinforce the attachment point with additional stitches and make sure the ring is connected to a secure part of the crochet fabric.
Final Finishing Check
Before calling the project complete, check:
- The skull is evenly stuffed.
- The bottom opening is completely closed.
- No stuffing is visible.
- Eyes are balanced.
- The nose is centered.
- Mouth is securely embroidered.
- All yarn tails are hidden.
- The keychain ring is firmly attached if using the small version.
Conclusion
Your crochet Halloween skull is now ready to become a spooky seasonal plushie, handmade gift, bag charm, or keychain. The simple rounded construction makes the basic shape approachable, while the embroidered eyes, nose, and stitched smile give it the unmistakable skull character.
Once you’ve mastered the basic version, experiment with different yarn colors and facial expressions to create your own Halloween collection. A large plush skull can become a cute seasonal decoration, while several smaller skulls can be turned into matching bag charms or a festive garland.
With the shaping, stuffing, embroidery placement, and finishing techniques covered here, you have everything you need to make the skull from start to finish without having to guess what comes next.