Need a mini Christmas touch for your keys or gifts? This crochet tree keychain stacks ruffled tiers into a cheerful keepsake, finished with a star and your own festive details.
Crochet Christmas Tree Keychain
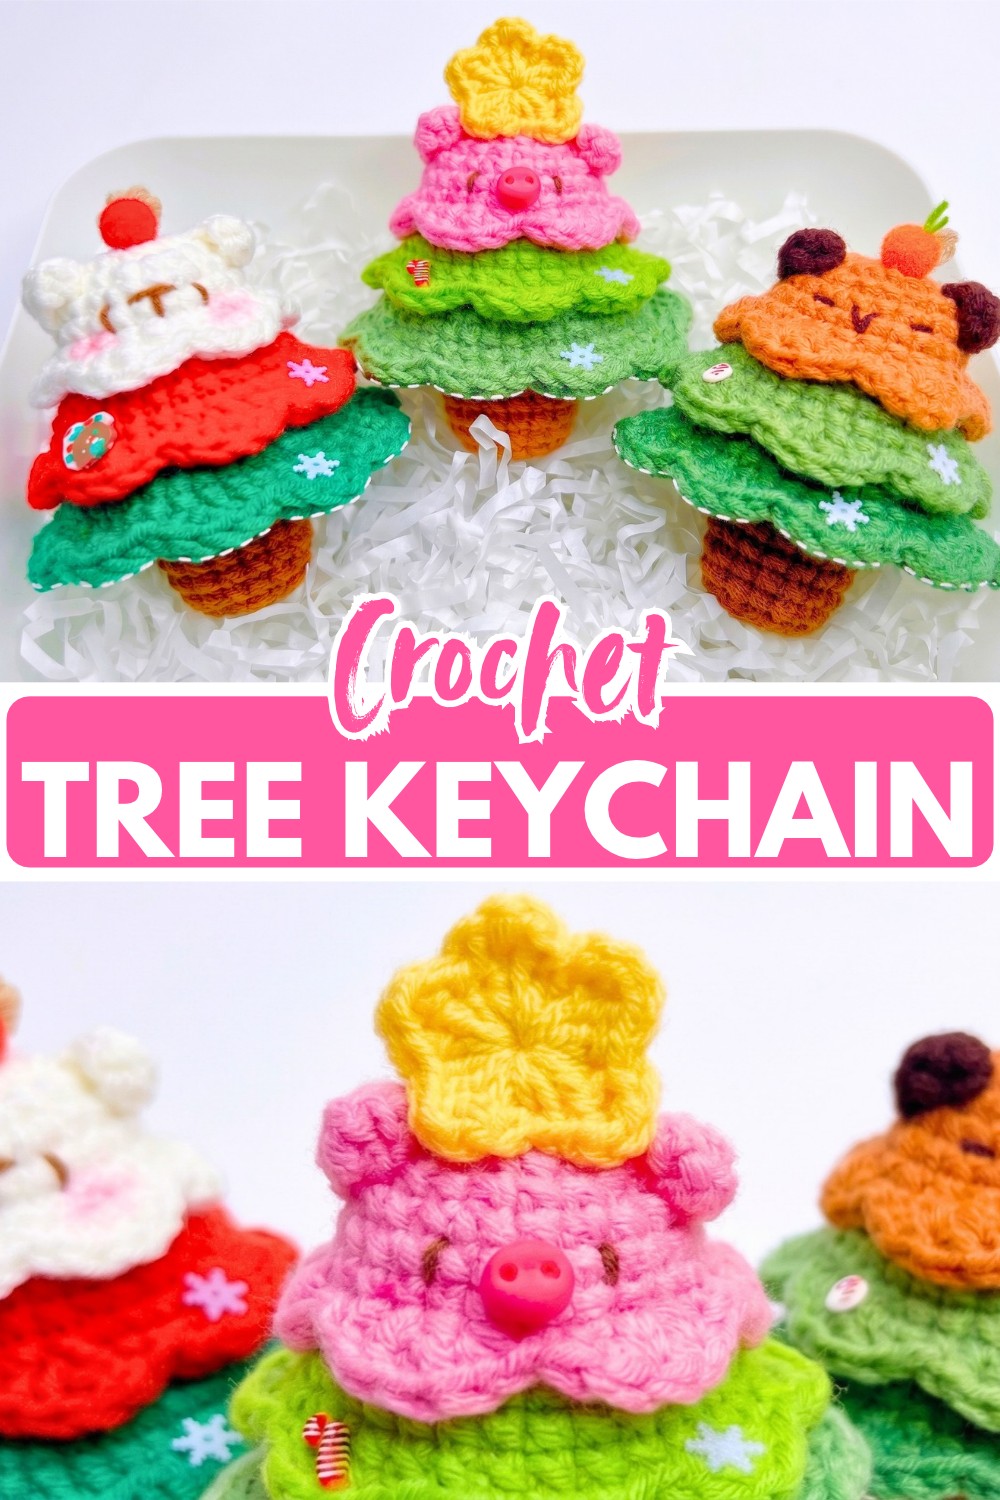
There is something especially satisfying about a Christmas decoration that is small enough to take with you. This crochet Christmas tree keychain has three layered tiers, softly ruffled edges, and a little star on top, giving it the look of a miniature decorated tree without needing much space. Hang it from your keys, backpack, or as a gift for a handmade holiday accent.
The layers are made separately and then joined, so you can see the crochet tree take shape as you work. The stitch counts also make each tier easy to check before moving on, while the small finishing details-like the hanging loop, star, and optional decorations-let you give the crochet tree its own personality.
Credit Xuxu Crochet
Materials & Tools Needed
- Yarn: 4-ply Milk Cotton or Susan’s 5-ply yarn, approximately 2 mm thread diameter
- Light Brown, Pink, or Tan for the optional animal-style top tier
- Dark Brown for the ears and tree trunk
- Light Green for Tier 2
- Dark Green for Tier 3
- Yellow for the star
- Beige or Cream for the hanging loop
- Black thread or fine brown yarn for facial embroidery
- Crochet Hook: 2.5 mm
- Fiberfill stuffing
- Stitch marker
- Tapestry/yarn needle
- Hot glue gun and glue sticks
- Keychain ring or lobster clasp
- Small charms, sequins, or tiny pom-poms for decoration
- Pink blush, optional, for cheeks
Before You Begin
This keychain is built from three crocheted tiers, so keep the finished stitch counts handy as you work. The first tier is smaller, the middle tier grows to 32 stitches, and the bottom tier reaches 40 stitches before its ruffle is added. Checking those counts before fastening off will help the three layers stack evenly later.
The top tier can be kept as a simple tree layer, or you can use the light-brown, pink, or tan color option to create an animal-style face. If you are making the bear version, add the ears and facial embroidery before joining the tiers together; it is much easier to position those details while the top piece is still separate.

Step-by-Step Crochet Pattern
Tier 1: Top Tier
Use Light Brown, Pink, or Tan yarn if you are making the optional character-style top.
Round 1: Make a MR, ch 1, work 8 sc into the MR, pull the ring tight, sl st into the first sc to join, then ch 1. (8 sts)
Round 2: Work 8 inc around, sl st to the first st to join, then ch 1. (16 sts)
Round 3: Work 16 sc around, sl st to the first st to join, then ch 1. (16 sts)
Round 4: Repeat [1 sc, 1 inc] 8 times, sl st to the first st to join, then ch 1. (24 sts)
Rounds 5–6: Work 24 sc around, sl st to the first st to join, then ch 1 after each round. (24 sts per round)
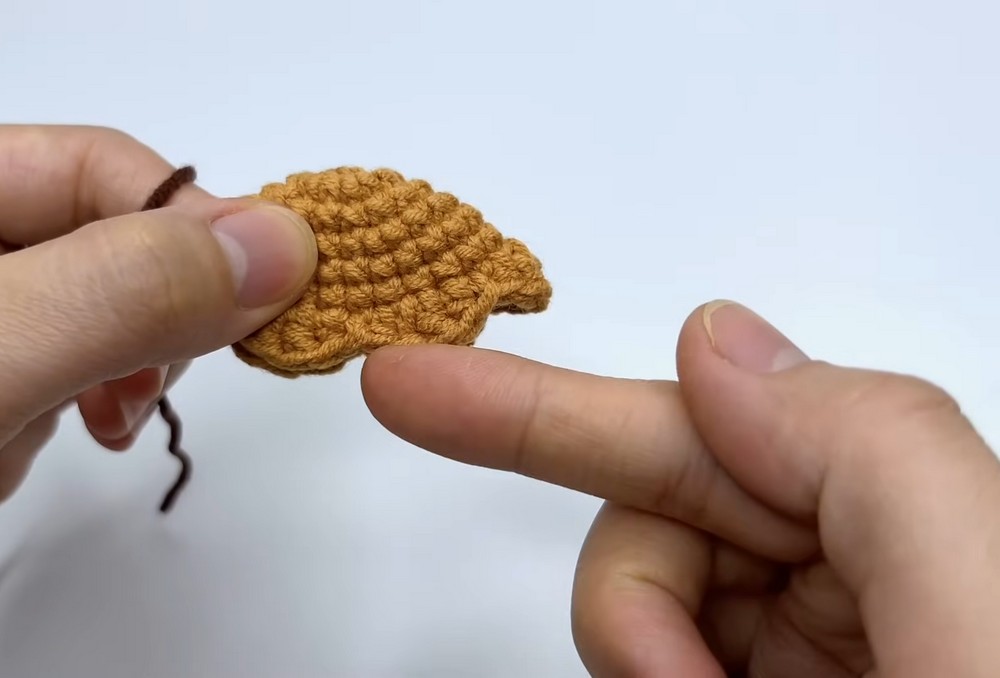
Round 7 – Ruffle Border: Sl st into the first st and mark it, then work 6 ruffle shells around using [1 hdc in st 1, 2 dc in st 2, 1 hdc in st 3], followed by 1 sl st in st 4; repeat until you have 6 ruffle petals, then sl st to the marked st, fasten off, and weave the tail inside.
The ruffle should spread outward rather than bunching tightly. If the petals look uneven, check that each shell is worked across the same four-stitch sequence before continuing around the tier.
Optional Bear Ears & Face
If you are giving the top tier an animal face, add these details before assembling the tree.
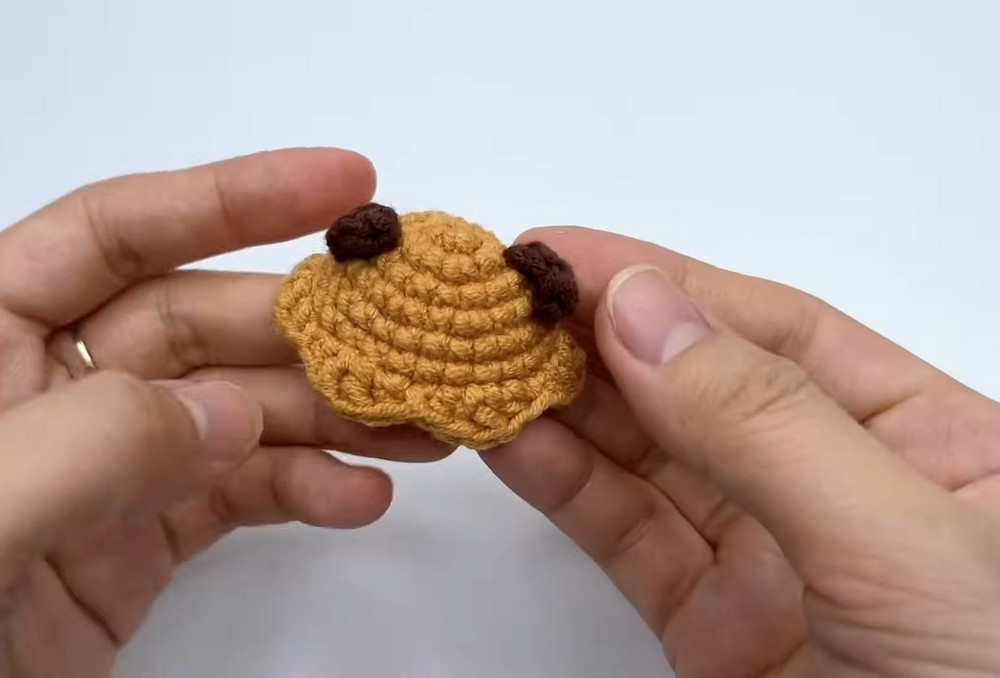
Ears (make 2): Fold Tier 1 flat, attach Dark Brown yarn between Rounds 4 and 5, or between Rounds 2 and 3 for the opposite side, ch 3, skip 2 sts, work 3 dc in the next st, skip 1 st, then work 1 sl st; fasten off and weave in the end, then repeat for the second ear.
Face: Split the Dark Brown yarn into thinner strands and embroider two simple eyes and a small V- or Y-shaped nose/mouth on Round 5, centered between the ears.
Tier 2: Middle Layer
Use Light Green yarn.
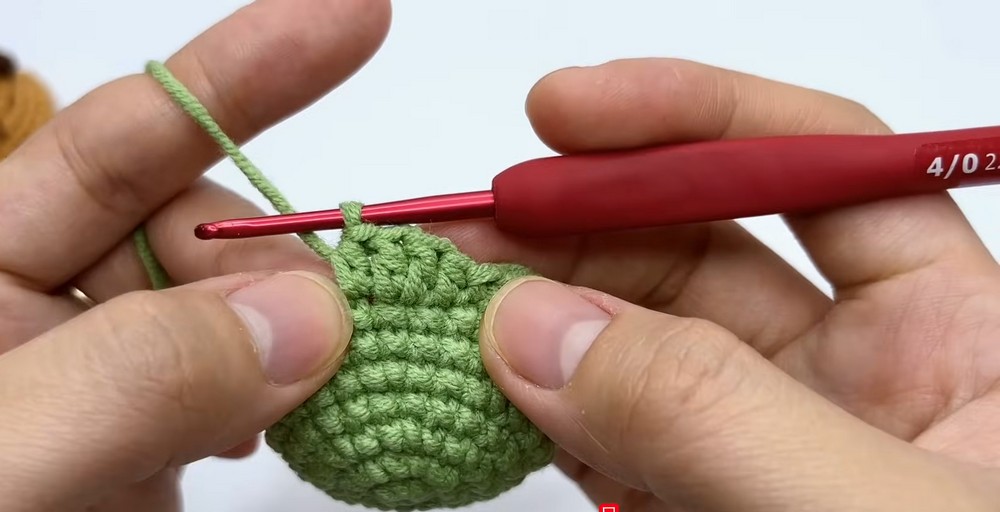
Round 1: Make a MR, ch 1, work 8 sc into the MR, pull the ring tight, sl st to join, then ch 1. (8 sts)
Round 2: Work 8 inc around, sl st to join, then ch 1. (16 sts)
Round 3: Repeat [1 sc, 1 inc] 8 times, sl st to join, then ch 1. (24 sts)
Round 4: Work 24 sc around, sl st to join, then ch 1. (24 sts)
Round 5: Repeat [2 sc, 1 inc] 8 times, sl st to join, then ch 1. (32 sts)
Rounds 6–7: Work 32 sc around, sl st to join, then ch 1 after each round. (32 sts per round)
Round 8 – Ruffle Border: Sl st into the first st and mark it, then repeat [1 hdc, 2 dc in next st, 1 hdc], followed by 1 sl st around until you have 8 ruffle petals; sl st to the marked st, fasten off, and hide the tail inside.
The eight petals should sit around the edge of the middle tier. Before fastening off, spread them gently with your fingers so the ruffle is easy to see when the tiers are stacked.
Tier 3: Bottom Layer
Use Dark Green yarn.
Round 1: Make a MR, ch 1, work 8 sc into the MR, pull the ring tight, sl st to join, then ch 1. (8 sts)
Round 2: Work 8 inc around, sl st to join, then ch 1. (16 sts)
Round 3: Repeat [1 sc, 1 inc] 8 times, sl st to join, then ch 1. (24 sts)
Round 4: Repeat [2 sc, 1 inc] 8 times, sl st to join, then ch 1. (32 sts)
Round 5: Work 32 sc around, sl st to join, then ch 1. (32 sts)
Round 6: Repeat [3 sc, 1 inc] 8 times, sl st to join, then ch 1. (40 sts)
Rounds 7–8: Work 40 sc around, sl st to join, then ch 1 after each round. (40 sts per round)
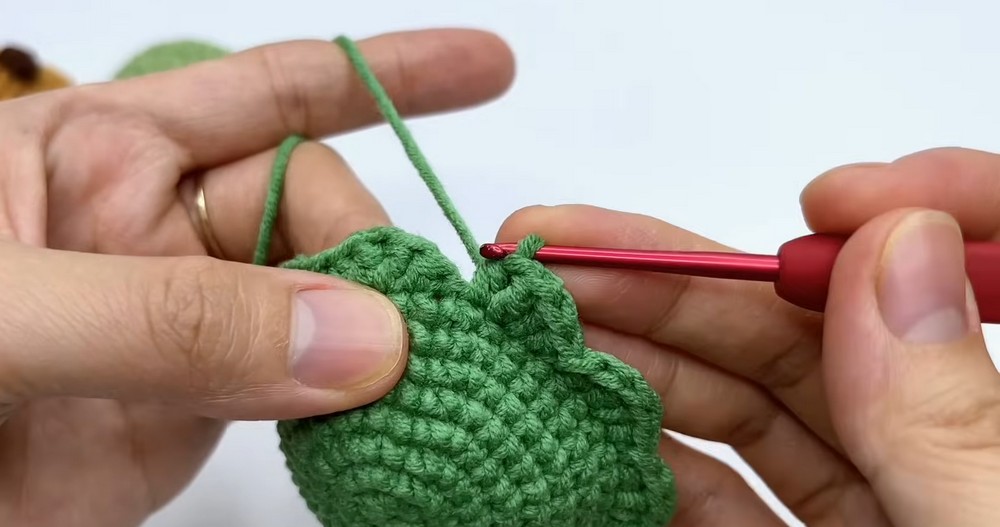
Round 9 – Ruffle Border: Sl st into the first st and mark it, then repeat [1 hdc, 2 dc in next st, 1 hdc], followed by 1 sl st around until you have 10 ruffle petals; sl st to the marked st, fasten off, and weave the end inside.
At this point, the three green/brown tiers should be visibly different in size. That difference is what creates the tapered Christmas-tree shape, so avoid stretching the smaller tiers to match the bottom one.
Tree Trunk
Use Dark Brown yarn.
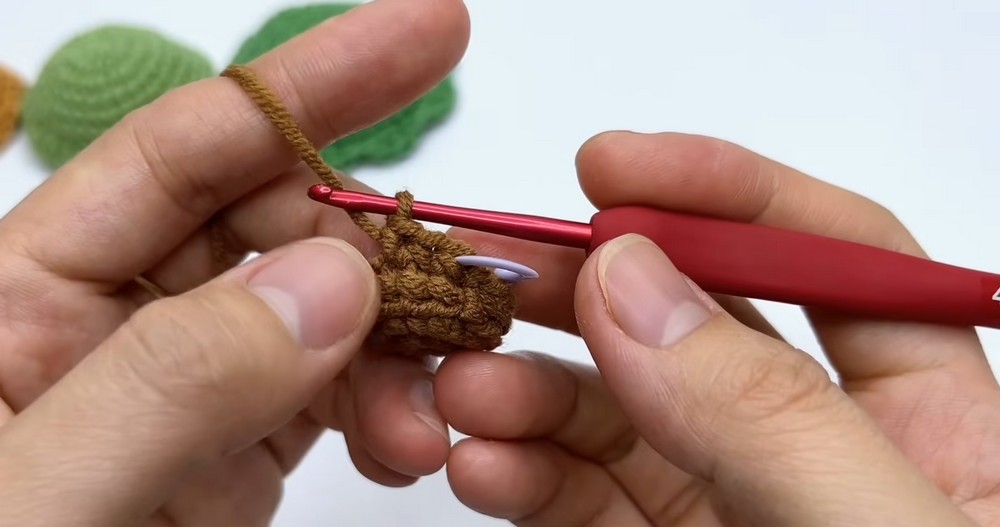
Round 1: Make a MR, ch 1, work 8 sc into the MR, pull the ring tight, sl st to join, then ch 1. (8 sts)
Round 2: Work 8 inc around, sl st to join, then ch 1. (16 sts)
Round 3 – BLO: Work 16 sc in the back loops only, sl st to join, then ch 1. (16 sts)
Rounds 4–11: Work 16 sc around through both loops, sl st to join, then ch 1 after each round. (16 sts per round)
Fasten off, weave the tail inside, and stuff the trunk firmly with fiberfill.
Hanging Loop & Star
For the hanging loop, use Beige or Cream yarn, leave a long tail, make a slip knot, and ch 8. Cut the yarn, leaving another long tail for sewing.
For the star, use Yellow yarn and work [1 sc, 1 dc, ch 2, 1 dc] 5 times into a MR. Pull the ring tight to form the five points, sl st to the first st, fasten off, and weave in the ends.
Assembly
Before permanently joining the tiers, stack them from smallest to largest and check that the ruffle petals are slightly offset. This keeps the edges from lining up in one stiff column and gives the finished tree a fuller, more natural shape.
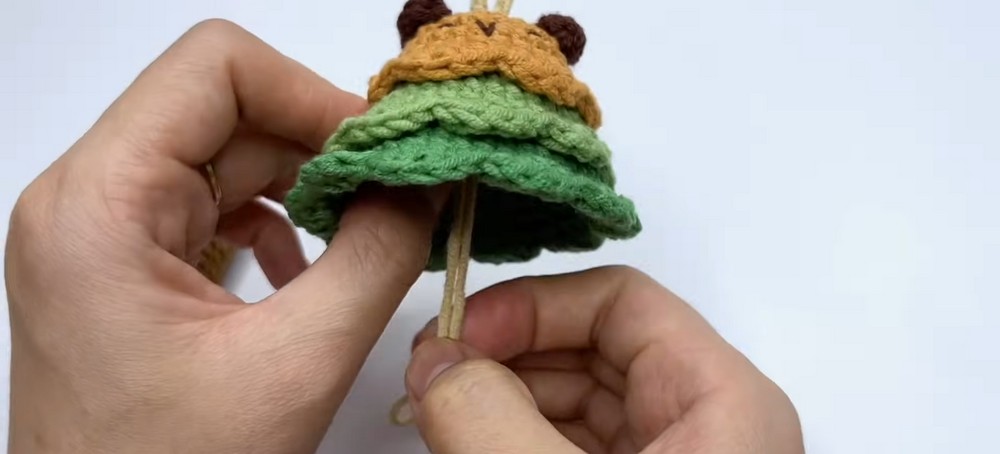
Thread the two long tails from the hanging loop down through the center MR of Tier 1, Tier 2, and Tier 3. Pull the layers together firmly and secure the ends inside.
Apply hot glue around the top rim of the stuffed trunk and press it firmly onto the bottom center of Tier 3. Let the glue set before handling the tree further.
Add small drops of hot glue between the tiers if they shift when handled. Then attach the yellow star, or a small orange/red pom-pom, to the top. You can also add tiny holiday charms, sequins, or colorful pom-poms around the ruffled edges.
If you made the optional animal face, add a small amount of pink blush to the cheeks with a cotton swab.
Finally, attach the metal keyring or lobster clasp to the crocheted hanging loop.
Make It Your Own
The three-tier construction makes this Christmas tree easy to personalize without changing the basic shape. Keep the traditional light and dark greens for a classic tree, or change the colors for a softer pastel version.
For the top tier, light brown, pink, or tan can turn the small upper section into a bear, pig, or capybara-style character. You can also change the decorations on the ruffle edges so each keychain has a slightly different holiday look.
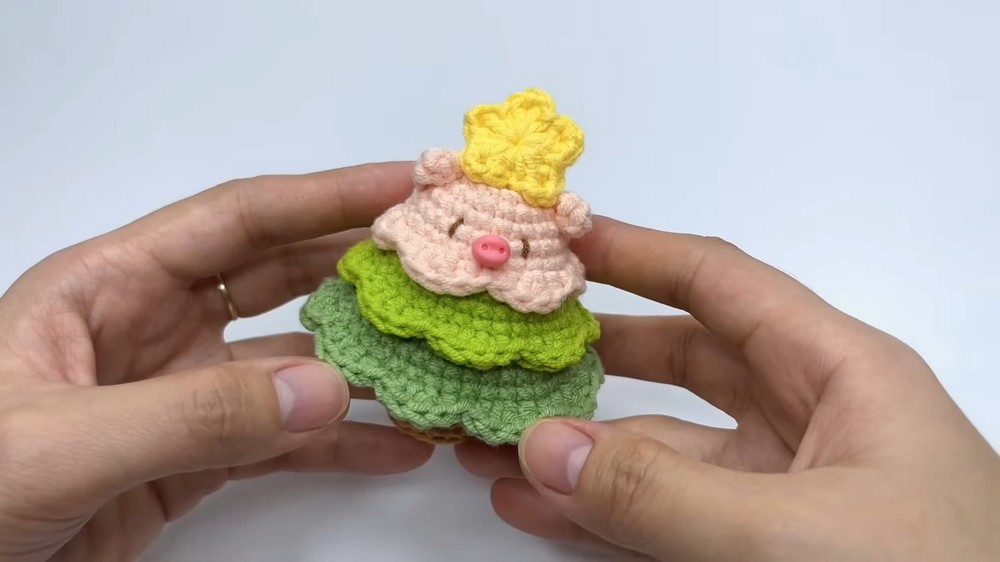
Once the keyring is attached, the finished tree is ready for keys, a backpack, a gift package, or a small Christmas display.