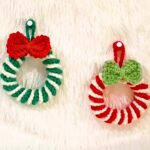
Here’s a tiny festive mushroom ornament that transforms a handful of simple stitches into an adorably charming Christmas keepsake.

Bright colors, a floppy Santa-style cap, and an adorable little face make this crochet Christmas mushroom ornament an instant holiday favorite. The cheerful design comes together beautifully, creating a festive decoration that looks perfect on a Christmas tree, wreath, or holiday display.
Each step builds naturally into the next, bringing this charming crochet ornament to life with neat shaping and delightful finishing touches. From the fluffy pom-pom to the sweet facial details, this handmade crochet creation adds a cozy festive touch to gifts and seasonal décor.
Credit Xuxu Crochet
Supplies List for Your Pattern:
Here’s the detailed list of materials you need for your pattern:
- Yarn: Milk cotton yarn (or similar DK / 4-ply yarn)
- Colors:
- Red: For the cap/hat
- White: For the brim, pom-pom, and stem/body
- Colors:
- Crochet Hook: 2.5 mm size hook.
- Safety Eyes: Two 4 mm black safety eyes or beads.
- Stuffing: Polyester fiberfill stuffing.
- Tapestry Needle: For weaving in ends and joining parts.
- Stitch Marker: To mark the first stitch of each round.
- Extras:
- Hot glue gun (for attaching safety eyes or beads)
- Scissors
- Pink blush or makeup (for adding rosy cheeks)

Pattern Notes:
- This pattern will work in continuous rounds (not joined rounds).
- Use a stitch marker to indicate the beginning of each round for accuracy.
Abbreviations:
MR: Magic Ring
ch: Chain
sl st: Slip Stitch
sc: Single Crochet
inc: Increase (2 sc in the same stitch)
dec/inv dec: Invisible Decrease (sc 2 together using front loops)
FLO: Front Loop Only
BLO: Back Loop Only
popcorn: Popcorn / Bobble stitch (4 unfinished dc worked into same stitch, pulled together)
st(s): Stitch(es)
Rnd: Round
Key Features and Construction
- Amigurumi Technique
- Crafted using classic amigurumi methods, working in continuous or joined rounds to create a sturdy, three-dimensional structure.
- Festive Design
- Features playful color changes (e.g., red and white) to mimic the iconic and cheerful appearance of a mushroom cap.
- Customization Options
- Personalize your pattern with embellishments such as embroidery, beads, or other decorative elements.
- Beginner-Friendly
- Designed with simple stitches and shaping techniques, making it an accessible pattern for beginners while still enjoyable for experienced crocheters.

Pattern Overview & Making Process
The ornament begins with the red cap, worked from a magic ring and gradually increased to create its rounded shape. The last round is crocheted in the front loops only, allowing the white brim to be added while leaving the back loops free for the stem.
Next, the white brim is crocheted onto the front loops, and the stem is worked into the back loops inside the cap. The body is shaped with even rounds, popcorn stitches form the tiny arms, and the final decrease rounds close the stem after it is firmly stuffed.
To finish, a small white pom-pom is attached to the tip of the cap, which is folded over and secured with a few stitches. The safety eyes are placed on the stem, rosy cheeks are added, and the Christmas mushroom ornament is ready to hang or display.
Step-by-Step Pattern
Part 1: Red Santa Cap
Using red yarn and a 2.5 mm hook:
Rounds:
- Rnd 1: 6 sc into MR (Magic Ring). Join with sl st, ch 1. (6 sts)
- Rnd 2: 1 sc in each st around. Join with sl st, ch 1. (6 sts)
- Rnd 3: [2 sc, 1 inc] x 2. Join with sl st, ch 1. (8 sts)
- Rnd 4: 1 sc in each st around. Join with sl st, ch 1. (8 sts)
- Rnd 5: [1 sc, 1 inc] x 4. Join with sl st, ch 1. (12 sts)
- Rnd 6: 1 sc in each st around. Join with sl st, ch 1. (12 sts)
- Rnd 7: [1 sc, 1 inc, 1 sc] x 4. Join with sl st, ch 1. (16 sts)
- Rnd 8: [3 sc, 1 inc] x 4. Join with sl st, ch 1. (20 sts)
- Rnd 9: [2 sc, 1 inc, 2 sc] x 4. Join with sl st, ch 1. (24 sts)
- Rnd 10 (FLO): Front Loops Only – [3 sc, 1 inc] x 6. Join with sl st and fasten off red yarn. (30 sts)
Part 2: Hat Brim (White Accent)
Attach white yarn to Rnd 10’s Front Loop Only (FLO) stitches.
Round:
- Rnd 11: [2 sc, 1 inc, 2 sc] x 6. Join with sl st. (36 sts)
Fasten off and weave in ends inside the cap.
Part 3: Mushroom Stem / Body
Attach white yarn to Rnd 10’s Back Loops Only (BLO) inside the hat.
Rounds:
- Rnd 1: 1 sc in each of the 24 BLO stitches. Join with sl st, ch 1. (24 sts)
- Rnd 2–3: 1 sc in each st around. Join with sl st, ch 1. (24 sts)
Arm Round:
- Rnd 4: 7 sc, 1 popcorn st (Arm 1), 8 sc, 1 popcorn st (Arm 2), 7 sc. Join with sl st, ch 1. (24 sts)
Continue:
- Rnd 5–6: 1 sc in each st around. Join with sl st, ch 1. (24 sts)
- Rnd 7: 9 sc, 1 popcorn st, 5 sc, 1 popcorn st, 8 sc. Join with sl st, ch 1. (24 sts)
- Rnd 8: [Inv dec] x 12. Join with sl st, ch 1. (12 sts)
Stuff the lower stem firmly with fiberfill (leave the upper hat unstuffed).
- Rnd 9: [Inv dec] x 6. Join with sl st. (6 sts)
Fasten off, weave the yarn tail through the front loops of the remaining 6 stitches, pull tight to close, and hide thread ends inside.

Assembly & Finishing Touches
Pom-Pom:
- Bundle white yarn around your fingers.
- Tie securely in the middle.
- Snip loops and trim into a small round pom-pom.
- Sew to the top peak of the red hat.
Cap Fold:
Bend the top half of the red hat downward against the cap side. Secure it with a few hidden stitches.
Face Details:
- Insert or glue 4 mm safety eyes between Rnd 3 and 4 of the white stem. Space 4 stitches apart.
- Apply rosy pink blush below each eye using a cotton swab.
Troubleshooting & Suggestions
Common Issues:
- Gaps between stitches: Use tight tension or a smaller hook size if gaps appear.
- Crooked shape: Stuff evenly to maintain symmetry.
- Color changes: Ensure clean transitions by holding one yarn tightly while switching.
Creative Modifications:
- Colors: Try green and white for a unique twist or use glittery yarn for a snowy effect.
- Size: Scale your mushroom up or down by using bulkier yarn or finer thread with adjusted hooks.
- Extra Details: Add beads, sequins, or miniature stripes for a playful, personalized ornament.
Conclusion & Action Step
Create your own charming holiday décor piece with this crochet Christmas Mushroom Ornament pattern! Share the magic—gift one to a loved one or hang it proudly on your Christmas tree. What will your festive mushrooms look like? Get creative, and let your imagination run wild!