Turn a few simple crochet rounds into a tiny hat keychain, with one shaping detail that helps the flat base begin taking on its miniature hat form.

Crochet a Mini Hat Keychain Pattern
A miniature crochet hat may be small enough to fit in your hand, but a few stitch choices make a noticeable difference to the finished shape. This version begins with a simple circular base before one carefully placed round starts changing the direction of the fabric. That makes it a lovely option for beginners who want to practice shaping without working through a large item.
The stitches themselves stay straightforward, using chains, slip stitches, and double crochet throughout. As you move from the early increase rounds into the back-loop round, you can watch the flat circle begin to change. Keeping an eye on that transition makes the later rounds easier to understand and gives you a better sense of how this tiny crochet keychain develops.
Credit Crochet & knitting
Materials and Tools Needed
- Lightweight yarn in your preferred color, such as acrylic or a cotton blend
- 3.0 mm or 4.0 mm crochet hook, depending on the yarn
- Scissors
- Tapestry needle
- Keyring with chain

Finished Size and Customization Ideas
The finished mini hat measures approximately 1.5-2 inches tall. The exact size can vary depending on your yarn, hook size, and tension.
You can personalize the hat by using different colors for separate rounds, adding stripes, or attaching a small pom-pom at the top. Small beads or a decorative button can also give each hat a different look.
Pattern Abbreviations and Terminology
Ch – Chain
Sl st – Slip stitch
DC – Double crochet
BLO – Back loop only
Increase: Work 2 DC into the same stitch.
Step-by-Step Crochet Mini Hat Pattern
Round 1: Foundation Circle
Create a slip knot and chain 3; the Ch 3 counts as your first DC. Work 9 DC into the ring created by the slip knot, pull the starting yarn tail to tighten the center, then join with a Sl st to the top of the beginning Ch 3. (10 sts)

Round 2: Increase round. Chain 3, counting it as the first DC, then work 2 DC into every stitch around. At the end of the round, complete the final increase at the top of the beginning Ch 3, then join with a Sl st to the top of the Ch 3. (20 sts)
Quick Check: Count your stitches before moving on. You should have 20 stitches, which gives the next round an even base to work from.

Round 3: Work in the Back Loops Only. Chain 3, counting it as the first DC, then work 1 DC into each stitch around using the back loop only. Join with a Sl st to the top of the beginning Ch 3. (20 sts)
This round is worth slowing down for. Working through the back loops leaves a visible ridge and encourages the fabric to turn downward. If you accidentally work through both loops, the piece may stay flatter than expected.

Round 4: Continue Evenly. Chain 3, counting it as the first DC, then work 1 DC into each stitch around using both loops. Join with a Sl st to the top of the beginning Ch 3. (20 sts)
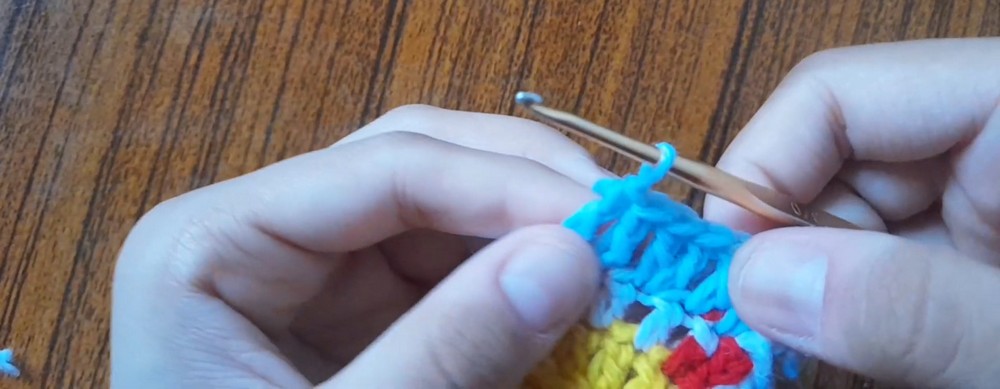
Round 5: Increase Round. Chain 3, counting it as the first DC, then repeat 1 DC in the next stitch, 2 DC in the following stitch around. Complete the repeat around the round and join with a Sl st to the top of the beginning Ch 3. (30 sts)
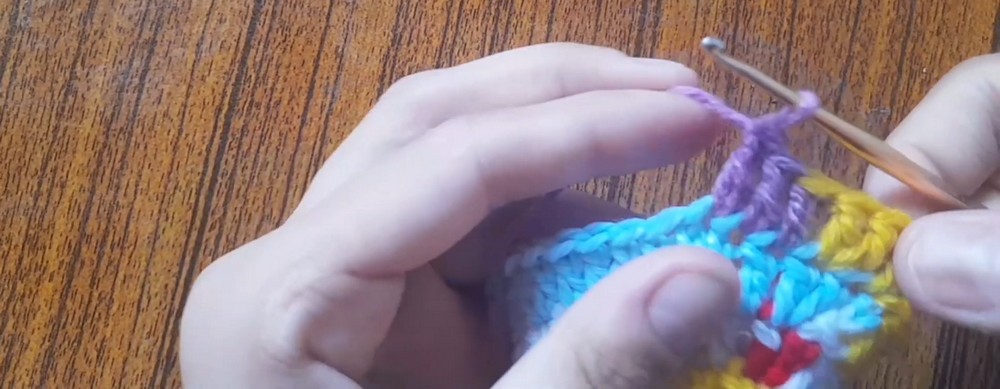
Round 6: Final Increase Round. Chain 3, counting it as the first DC, then repeat 1 DC in each of the next 2 stitches, 2 DC in the following stitch around. Join with a Sl st to the top of the beginning Ch 3. (40 sts)

Finish the Yarn Ends
Use a tapestry needle to weave the starting and ending yarn tails through several nearby stitches on the inside of the hat. Once the ends feel secure, trim away the excess yarn.
Attach the Keyring
Pass a short piece of yarn or strong thread through the top center of the mini hat and then through the chain attached to the keyring. Secure it firmly and weave or hide the remaining ends inside.
Attachment Check: Try to anchor the hanging loop through more than one stitch at the top. This helps the attachment hold more securely when the keychain is moved or pulled during everyday use.

Color and Size Ideas
A single color gives the hat a neat miniature look, while alternating colors between rounds can create stripes without changing the stitch pattern. A small pom-pom can also make the top look more like a traditional winter hat.
To alter the finished size, experiment with yarn thickness and hook size first. Changing the number of rounds or increases will also affect the proportions, so it is best to keep the increase pattern consistent when you want the hat to retain its balanced shape.
Final Look
Before attaching the hat to your keys or bag, check that the center is neatly closed, the BLO round has created the intended ridge, and the keyring loop feels secure. You can then leave the hat simple or add a tiny pom-pom, stripes, or another decorative detail to make it your own.