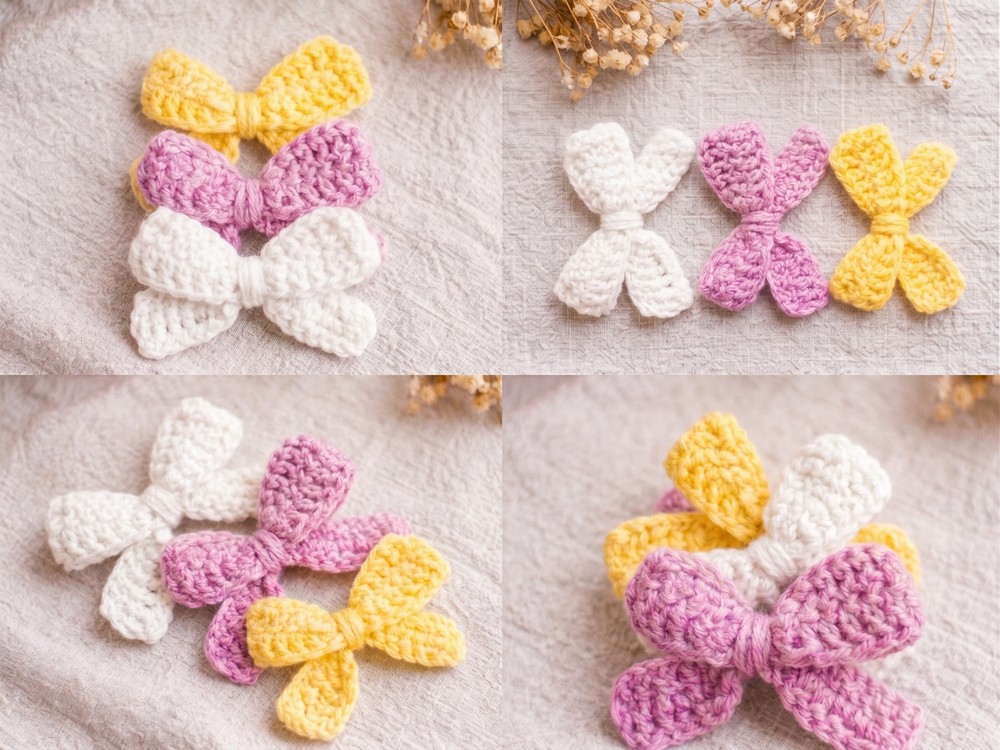
A narrow crocheted strip becomes a soft little bow with just a few rows, while careful folding at the center gives the finished loops their balanced shape.

Crochet a Simple Bow Pattern
A crochet bow is one of those small details that can change the look of an everyday accessory without requiring an elaborate stitch pattern. This version is worked as a simple strip of double crochet, making it easy to adapt for a hair accessory, gift decoration, bag detail, or small charm.
The crocheting itself is straightforward, but the finished bow depends on what happens after the last stitch. Finding the true midpoint and bringing both ends together evenly helps the loops sit at the same height. A little attention at this stage makes the final center wrap look cleaner and keeps the bow from leaning to one side.
Credit Crochet & knitting
Materials & Tools Needed
- Yarn: Purple yarn or any color you prefer
- Crochet Hook: 2.5 mm
- Tapestry Needle: For securing the center and weaving in the ends
Finished Size & Customization Ideas
The finished bow is a compact accessory that can be used on hair clips, bags, keychains, headbands, or gift wrapping.
To change the size, adjust the starting chain while keeping the proportions of the strip in mind. The tutorial uses 53 chains, so if you change the length, make sure the new strip still gives you enough room to form two balanced loops around the center.
Pattern Abbreviations & Terminology
- Ch: Chain
- Dc: Double crochet
- St / Sts: Stitch / Stitches

Step-by-Step Crochet Instructions
Foundation Chain
Begin with a slip knot and chain 53 stitches. Leave an additional yarn tail if you need extra length for the later assembly.
Row 1: Double Crochet Across
Make 1 double crochet into the 4th chain from the hook; the three skipped chains count as the first stitch. Continue working 1 DC into each chain across the row.
Keep your stitches consistent as you move across the foundation chain. The completed row should form one even, narrow strip.
Reader Check: The foundation chain is the length of the finished strip, so avoid making the first few chains noticeably tighter than the rest. Uneven tension here can make one side of the finished bow look different from the other.
Row 2: Complete the Strip
Chain 3, counting it as the first DC, then turn your work. Make 1 DC into the stitch directly beside the beginning Ch 3 and continue working 1 DC into every stitch across the row.
Keep the stitch count consistent from Row 1 to Row 2 so the edges remain straight.

Fasten Off
Fasten off the yarn after completing Row 2, leaving a long tail for forming and securing the bow.
Shape the Bow
Lay the crocheted strip flat and bring the two outer ends toward the center.
Before securing anything, locate the exact midpoint of the strip. Bring both ends to this point so the folded sections on either side are as close to the same length as possible.
Shape Check: Don’t tie the center immediately. First look at the bow from above and compare the two loops. If one side is longer or sits higher, adjust the folds now. Once the center is wrapped, making these corrections becomes much harder.
Gather the Center
Using the tapestry needle and the long yarn tail, pass the needle through the gathered center of the bow to hold the folds together.
Pinch the middle firmly while securing it so the two loops stay defined and the outer edges do not slip apart.

Wrap the Center
Continue using the remaining yarn tail to wrap around the pinched center several times.
Keep the wraps close together to create a neat center band. Pull firmly enough to hold the bow in place, but avoid tightening so much that the loops become completely flat.
Secure the yarn at the back, then weave the remaining end through the stitches and trim away the excess.
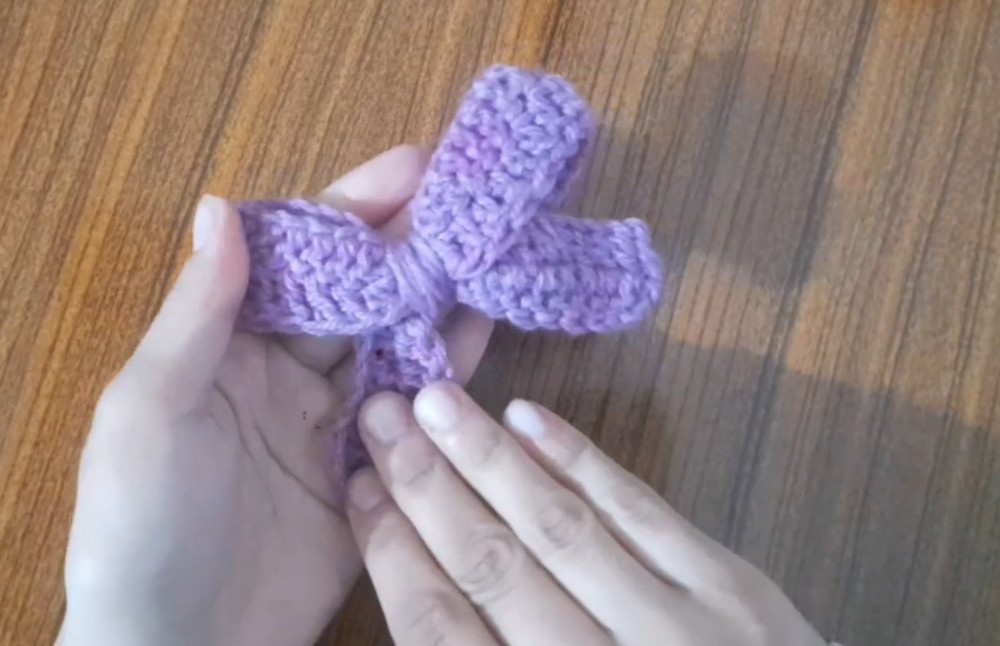
Final Shape
Fluff the two loops gently and straighten the edges with your fingers. Check that both loops are similar in size and that the center band sits directly between them.
If one loop appears larger, loosen the center slightly and reposition the folds before securing it again. This small adjustment can make the finished bow look much more symmetrical.
The completed bow can now be attached to a keychain, hair accessory, bag, headband, or gift wrapping, depending on how you want to use it.