Looking for a tiny handmade sheep that feels cute enough for everyday use? This easy crochet keychain tutorial guides you through fluffy curls, facial details, ears, bow, and secure keyring attachment.
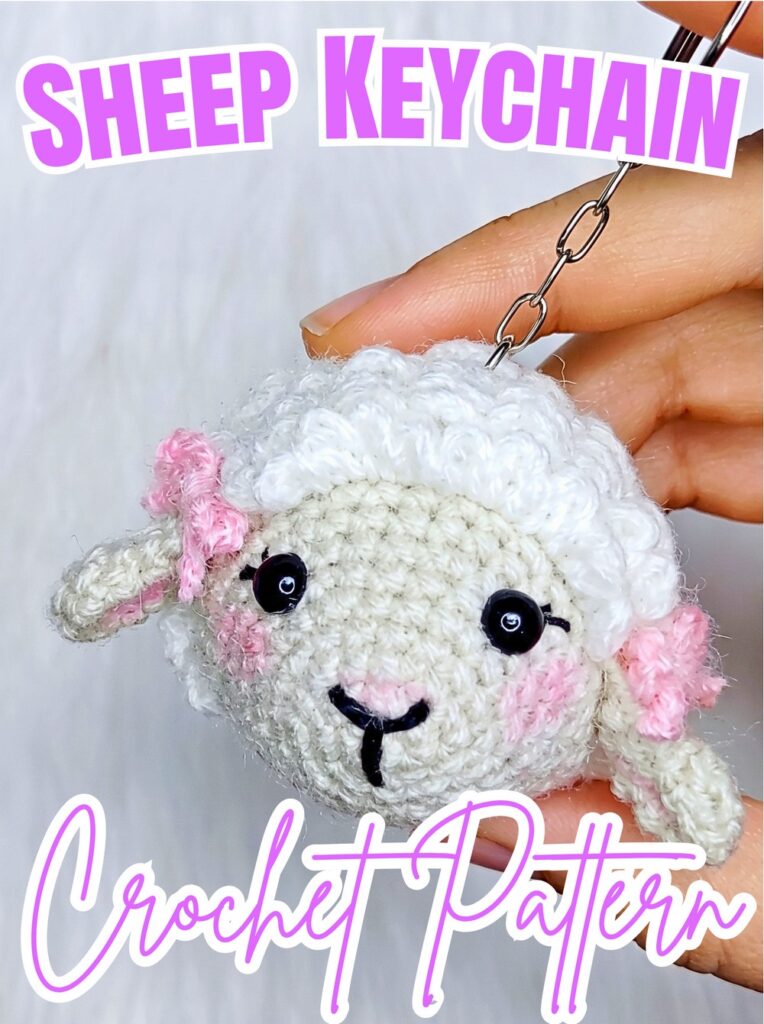
Carrying keys or a bag with a small handmade detail can add instant personality, but tiny crochet pieces can feel tricky when shaping, stuffing, and attaching details all need to work neatly together. This crochet design keeps those details compact while giving beginners clear guidance through each part of construction.
You’ll learn how to build crochet head and body from continuous rounds, create fluffy wool texture from unused front loops, shape two small ears, and finish facial details without losing proportions. Along with crochet instructions, you’ll get practical tips for stuffing, shaping, positioning, and attaching a keychain ring so finished piece is ready to use.
Credit Luaji Crochet
Materials & Tools
- Yarn: White for main body and head, black for facial features and embroidery, plus contrasting color such as pink for decorative bow.
- Crochet Hook: Choose hook size suitable for yarn weight; 2.0mm–2.5mm works well for amigurumi keychain size.
- Notions: Stitch marker, tapestry needle, fiberfill stuffing, safety eyes, keychain ring, and small brush with pink blush or makeup for cheeks and ears.
Finished Size & Customization
Finished Size: Compact keychain size, suitable for hanging on bags or keys.
Customization Ideas:
- Try pastel yarn such as mint green, pastel yellow, or lavender instead of traditional white for curly wool.
- Replace ribbon bow with tiny crocheted flower or small felt heart accessory.
Pattern Abbreviations & Terminology
- st(s): Stitch(es)
- ch: Chain
- sc: Single crochet
- inc: Increase – work 2 single crochets in same stitch
- dec: Decrease – work 2 single crochets together / skip a stitch as demonstrated in tutorial
- BLO: Back loop only
- FLO: Front loop only
- MR: Magic ring
- sl st: Slip stitch

Step-by-Step Crochet Instructions
Step 1: Build Head & Body
Teaching focus: Start with a small magic ring, gradually increase stitch count, then use back-loop sections to prepare both head shape and fluffy texture.
Work from bottom/front of face upward toward back of head. Keep stitch counts consistent while moving through each round.
- Round 1: Make 6 sc in MR. (6 sts)
- Round 2: Work 2 sc in each stitch around. (12 sts) Mark last stitch with stitch marker.
- Round 3: Work (1 sc, 1 inc) 6 times. (18 sts)
- Round 4: Work 18 sc around. (18 sts)
- Round 5: Work [1 sc, 1 inc], then [2 sc, 1 inc] 5 times, finishing with 1 sc. (24 sts)
- Round 6: Work 24 sc around. (24 sts)
- Round 7: Work (3 sc, 1 inc) 6 times. (30 sts)
- Round 8: Work 30 sc around. (30 sts)
- Round 9: Work [2 sc, 1 inc], then [4 sc, 1 inc] 5 times, finishing with 2 sc. (36 sts)
Teaching check: Stitch count should now reach 36. Keeping count accurate here helps later shaping stay balanced.
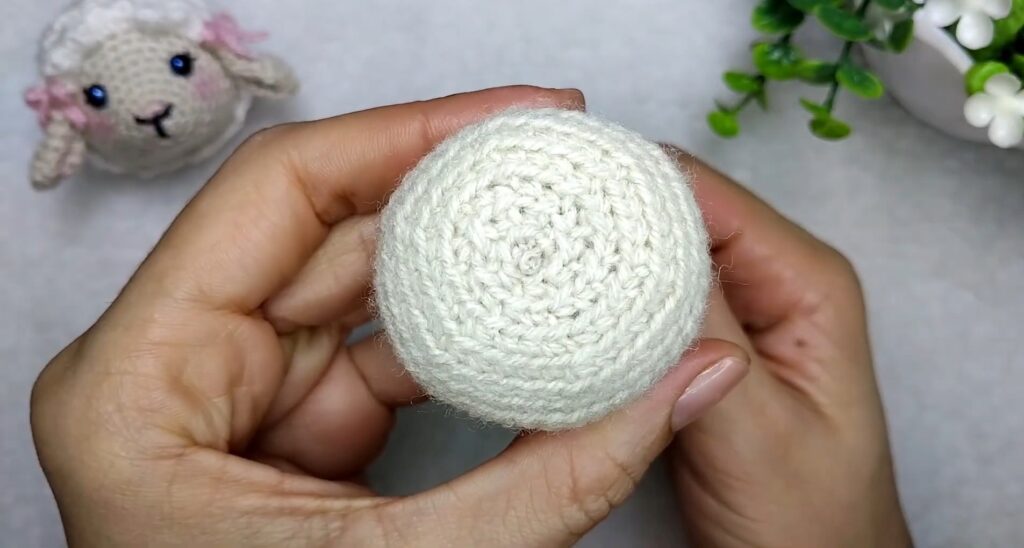
- Round 10: Work two sequences of (5 sc, 1 inc) in both loops, followed by two sequences of (5 sc, 1 inc) in BLO, then finish with two sequences of (5 sc, 1 inc) in both loops. (42 sts)
- Rounds 11–12: Work 13 sc in both loops, 16 sc in BLO, then 13 sc in both loops. (42 sts each round)
From this point through end of head, work all stitches in BLO only.
- Rounds 13–14: Work 42 sc in BLO around. (42 sts)
- Round 15: Work (4 sc, 1 dec) 6 times. (36 sts)Teaching tip: For each decrease, skip one stitch and work next sc, following tutorial method.
- Round 16: Work 36 sc in BLO around. (36 sts)
- Round 17: Work (4 sc, 1 dec) 6 times. (30 sts)
- Round 18: Work (3 sc, 1 dec) 6 times. (24 sts) Begin adding fiberfill firmly into head.
- Round 19: Work (1 sc, 1 dec) 8 times. (16 sts)
- Round 20: Work 8 dec to close down. (8 sts)
Finishing check: Cut yarn and weave remaining tail through front/back loops of final stitches. Pull opening tightly closed, then hide yarn tail securely inside head.
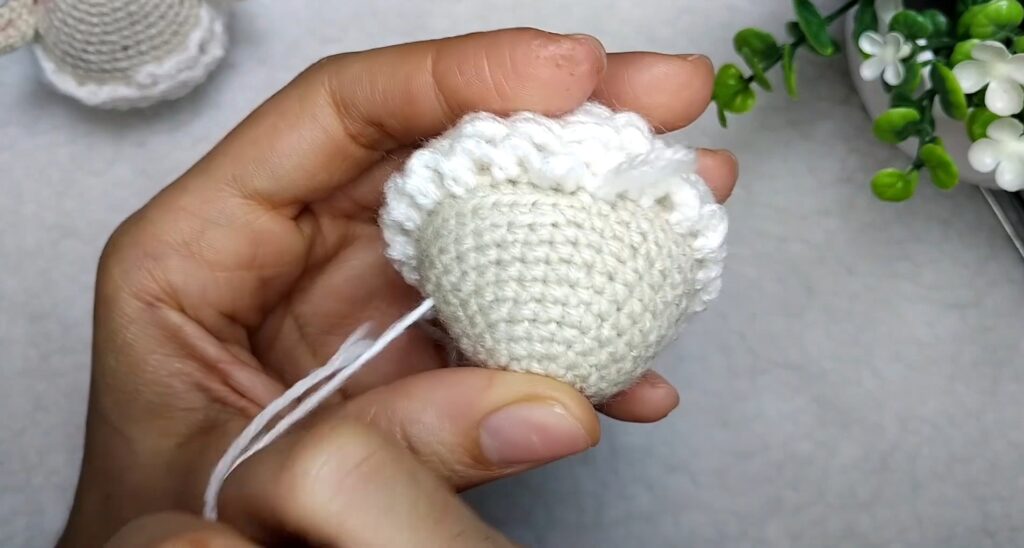
Step 2: Add Fluffy Wool Curls
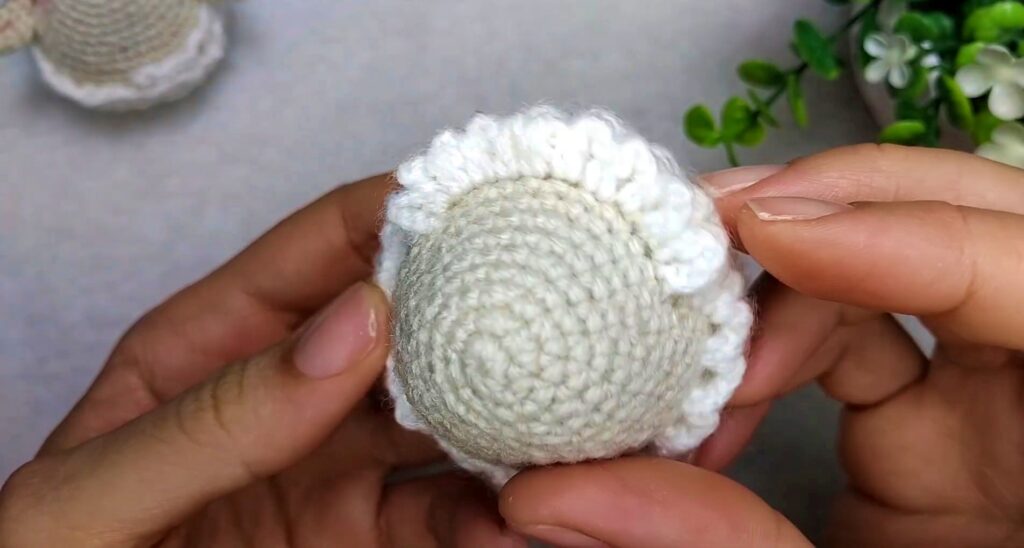
Teaching focus: Use unused front loops to build sheep’s curly wool texture without disturbing head shape.
Attach white yarn with slip knot in first front loop at top of head.
- Chain 1 to secure.
- Chain 4.
- Skip one stitch.
- Make 1 sc in next front loop.
- Continue ch 4, skip 1, sc across all spiral front-loop rows.
Shape check: Curls should form repeated loops across wool sections, giving body a soft, raised texture.
For final front-loop row, change spacing slightly:
- Work ch 4.
- Make sc in immediate next stitch without skipping.
- Repeat around.
- Secure yarn and weave in ends.
Step 3: Shape Two Ears
Teaching focus: Small increases create ear width, while later decreases bring each piece back into compact shape.
Make 2 ears.
- Round 1: Work 6 sc in MR. (6 sts)
- Round 2: Work 6 inc. (12 sts)
- Round 3: Work (1 sc, 1 dec) 4 times. (8 sts)
- Round 4: Work (2 sc, 1 dec) 2 times. (6 sts)
- Rounds 5–6: Work 6 sc around. (6 sts)
Teaching tip: Before closing each ear, pinch and press tip gently. This gives ear shape a cleaner pointed finish.
For finishing, fold opening flat and sew across top edge with 3 sc to close ear. Shape tip before securing stitches.
Step 4: Position Ears
Teaching focus: Ear placement controls sheep’s expression, so position both pieces evenly before sewing permanently.
Place both ears just below lower edge of fluffy wool rows on head.
Check both sides before sewing:
- Keep ears at similar height.
- Compare distance from center.
- Pin or hold pieces temporarily if needed.
- Sew both ears securely once placement looks balanced.
Result check: Both ears should sit evenly beneath wool edge without pulling head fabric out of shape.
Step 5: Embroider Face
Teaching focus: Facial details come after ear placement so expression can be centered against finished head shape.
Embroider cute nose using black sewing thread or embroidery floss.
Insert or glue safety eyes between Rounds 6 and 7, counting downward from top magic ring. Keep approximately 5 stitches between eyes.
Add tiny eyelash strokes with black thread.
Detail check: Step back briefly and compare both eyes before securing them fully. Balanced spacing keeps small facial features looking neat.

Step 6: Add Bow & Cheek Color
Teaching focus: Finish decorative details after facial placement so accessories complement finished expression rather than interfere with positioning.
Using pink yarn, crochet simple chain of roughly 30 stitches.
- Shape chain into ribbon bow.
- Tie bow securely.
- Sew bow onto one ear.
For cheeks and inner ears, gently apply pink blush with small makeup brush.
Helpful tip: Use light pressure when adding blush. Small amounts can build soft color without overwhelming tiny facial features.
Step 7: Secure Keychain Ring
Teaching focus: Finish with attachment point once head, ears, face, and accessories are complete so final placement stays centered.
Attach metal keychain ring securely through stitches at top center of head.
Check attachment before using:
- Ring should pass through firm stitches.
- Connection should sit at head center.
- Pull gently to confirm attachment feels secure.
Final check: Sheep should hang upright from ring, with head centered and decorative details remaining in place.
Finished Crochet Sheep Keychain
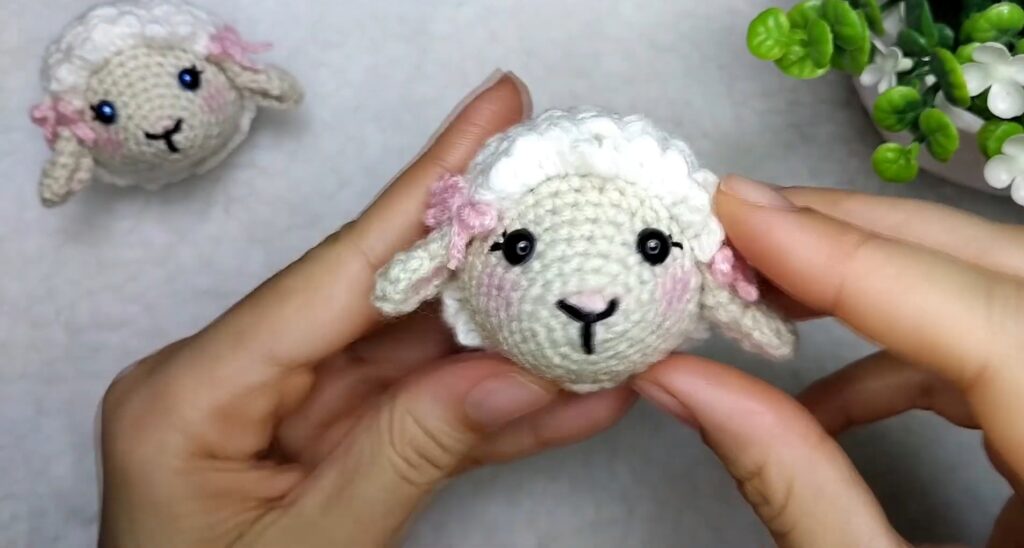
Tiny sheep is now ready to hang from keys or a bag. Fluffy curls give body its signature texture, while small ears, embroidered face, pink bow, and cheek color add personality without making finished piece bulky.
For personalization, try pastel wool colors or replace bow with tiny crocheted flower or felt heart. Small size also makes this design suitable for handmade gifts or craft-market collections.