A tiny crochet fox with bright orange fur begins to take shape through a handful of simple stitches, and each new detail makes it even more charming.
The white accents, little black paws, and tiny tail come together so naturally that the finished crochet fox feels full of character before the final touch is added.
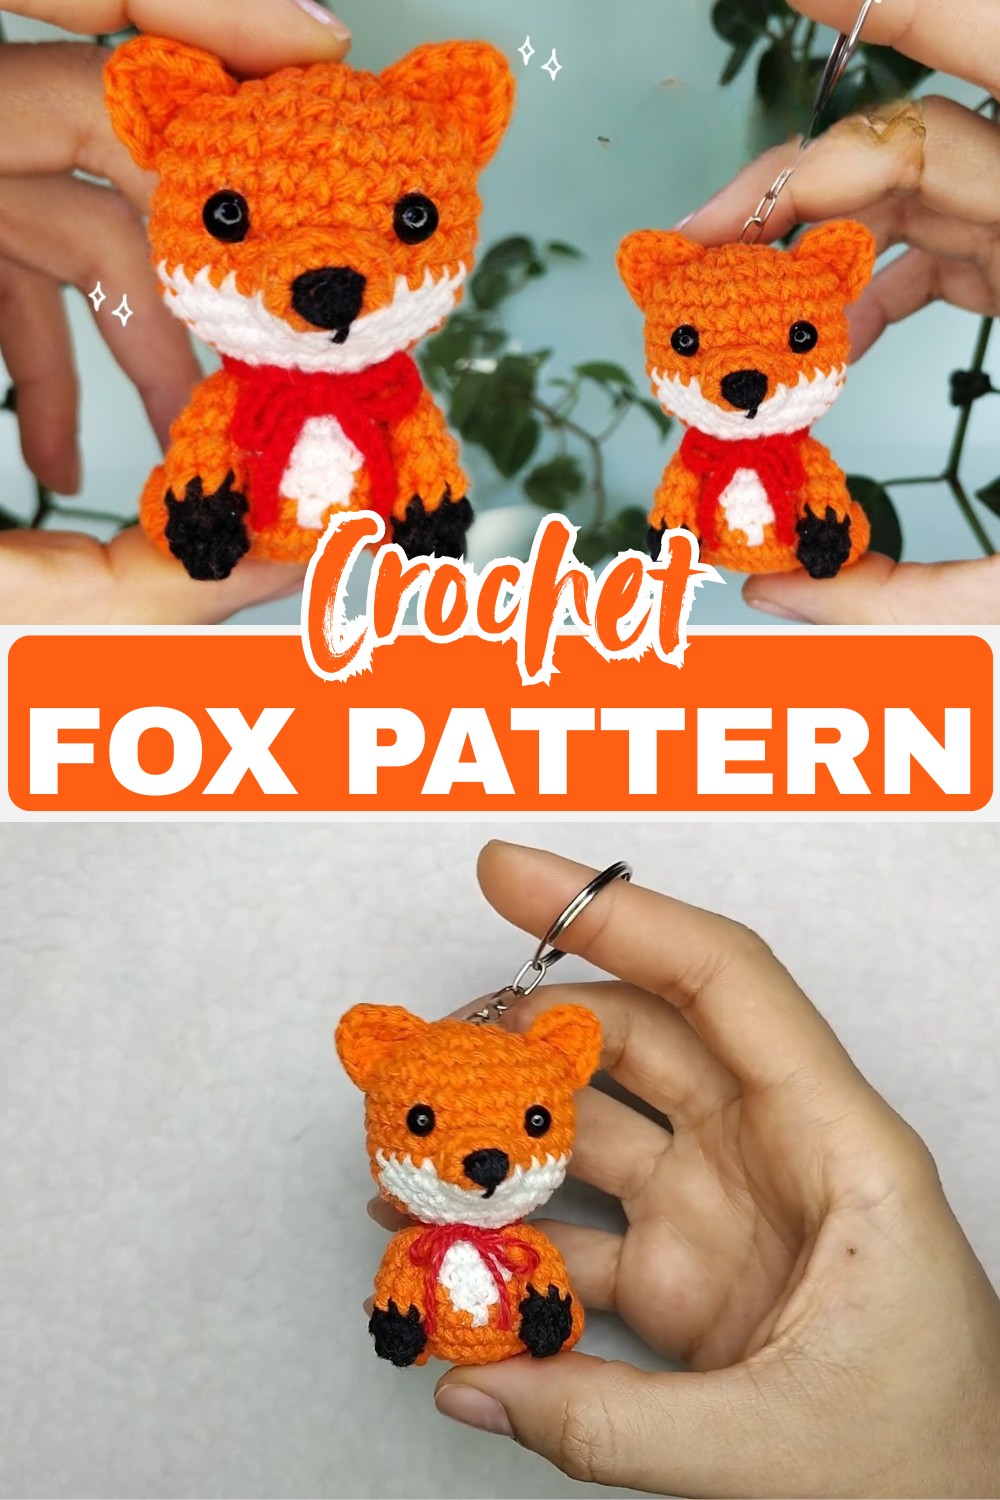
As part of the Mini Animal Collection, this adorable fox is perfectly sized for a desk, shelf, or thoughtful handmade gift. The easy construction keeps every crochet step enjoyable, while the neatly placed details and sweet little bow complete a design that’s hard to stop admiring once it all comes together.
Credit Luaji Crochet
Materials & Tools Needed
- Yarn: Orange, white, and black yarn. Select a sturdy fiber (like cotton or acrylic) to keep your stitches structured and durable.
- Hook: A 2.5mm crochet hook, ideal for a tight and compact fabric.
- Stuffing: Use polyfill or fiberfill to bring your fox to life.
- Extras: Scissors, a yarn needle (for sewing pieces together), and a stitch marker to track your rounds.
Pattern Notes
This is an amigurumi pattern, worked in continuous rounds (do not join at the end of each round). Using a stitch marker is highly recommended.
Gauge:
Gauge isn’t vital for this miniature fox, but ensure stitches are tight enough to hold the stuffing well.
Abberivations
- (SC) single crochet
- (INC) increases
- (DEC) decreases
Finished Size
The completed mini fox measures approximately 4-5 cm tall, depending on your yarn and tension. It’s the perfect size for keychains, desk decor, or even pocket-sized gifts
Key Features of the Pattern
- Compact and Adorable: This miniature fox fits easily in your hand but doesn’t skimp on details.
- Color Work: Smooth, even transitions between orange, white, and black create crisp and lifelike fox markings.
- Modular Construction: Each part is crocheted individually (head, body, legs, tail, ears) for easy assembly and customization.
- Straightforward Assembly: A beginner-friendly design that comes together quickly and beautifully.
Pattern Overview & Making Process
The pattern starts with magic circles for the arms and feet, using single crochet rounds and simple color changes to add the icing details. The separate feet are then joined together as the body begins to take shape.
The body continues with steady rounds, adding colorful bobble stitches for the gumdrops while the arms are crocheted directly onto the body without sewing. This seamless construction keeps the plushie neat and easy to assemble.
The head is shaped with gradual increases and decreases before being firmly stuffed. Safety eyes are added during the final rounds, and the plushie is finished by closing the opening and adding optional details like blush, a smile, or a decorative bow.

Step-by-Step Crochet Pattern
Head and Body
R1: Magic ring, 6 SC.
R2: Increase in each stitch (12 SC).
R3: [1 SC, 1 increase] x 6 (18 SC).
R4: [2 SC, 1 increase] x 6 (24 SC).
R5: [3 SC, 1 increase] x 6 (30 SC).
6–8: Work even, 30 SC each round.
Color Changes:
- Begin round 9 alternating orange and white yarn (tutorial recommends tying knots for clean finishes).
- Repeat similar color alternations through round 17.

Tail
- Start in orange yarn, alternating increases and straight SC rounds to form a pointed tail shape. End with a tuft of white at the tip.
- Stuff lightly to maintain the fox’s fluffy tail form.

Legs and Ears
- Create two front legs and two back legs with small SC rounds in black yarn. Place them symmetrically for balance.
- For the ears, crochet small triangles alternating orange and white to mimic real fox markings.

Assembly and Details
- Stuff all pieces well before sewing to maintain structure.
- Use your yarn needle to sew the head to the body first, ensuring proper alignment.
- Attach the legs evenly to the body. Secure the tail at the back for a fluffy, standing pose.
- Add finishing touches using embroidery thread for the nose and small details.

Troubleshooting and Suggestions
Common Issues and Solutions:
- Color Changes: To create smooth transitions between yarns, complete the last pull-through with the new color. Tidy up by weaving in ends inside the piece.
- Tight Stitches: If your stitches are too tight, try loosening your tension slightly or switching to a slightly larger hook.

Creative Modifications:
- Experiment with yarn colors for a whimsical fox—go for greens or blues for a fantasy character!
- Swap the embroidered eyes with safety eyes for added shine.
- Transform the fox into a keychain or ornament by adding a loop at the top of the head.
Customization Ideas:
- Color Play: Experiment with playful colors like blue, yellow, or pink for a whimsical variation.
- Embellishments: Add a mini bow or scarf for a personalized touch. Safety eyes can replace embroidery for a different look.
- Alternate Use: Attach a jump ring and keychain clasp to turn your mini fox into a cute bag or key accessory.
Conclusion
Whether you’re looking to hone your amigurumi skills or craft an adorable gift, this crochet fox is a fantastic project. Follow Luaji Crochê’s helpful, easy tutorial and bring your creativity to life. Grab your yarn, hook, and let’s get crafting—your tiny fox buddy is waiting.