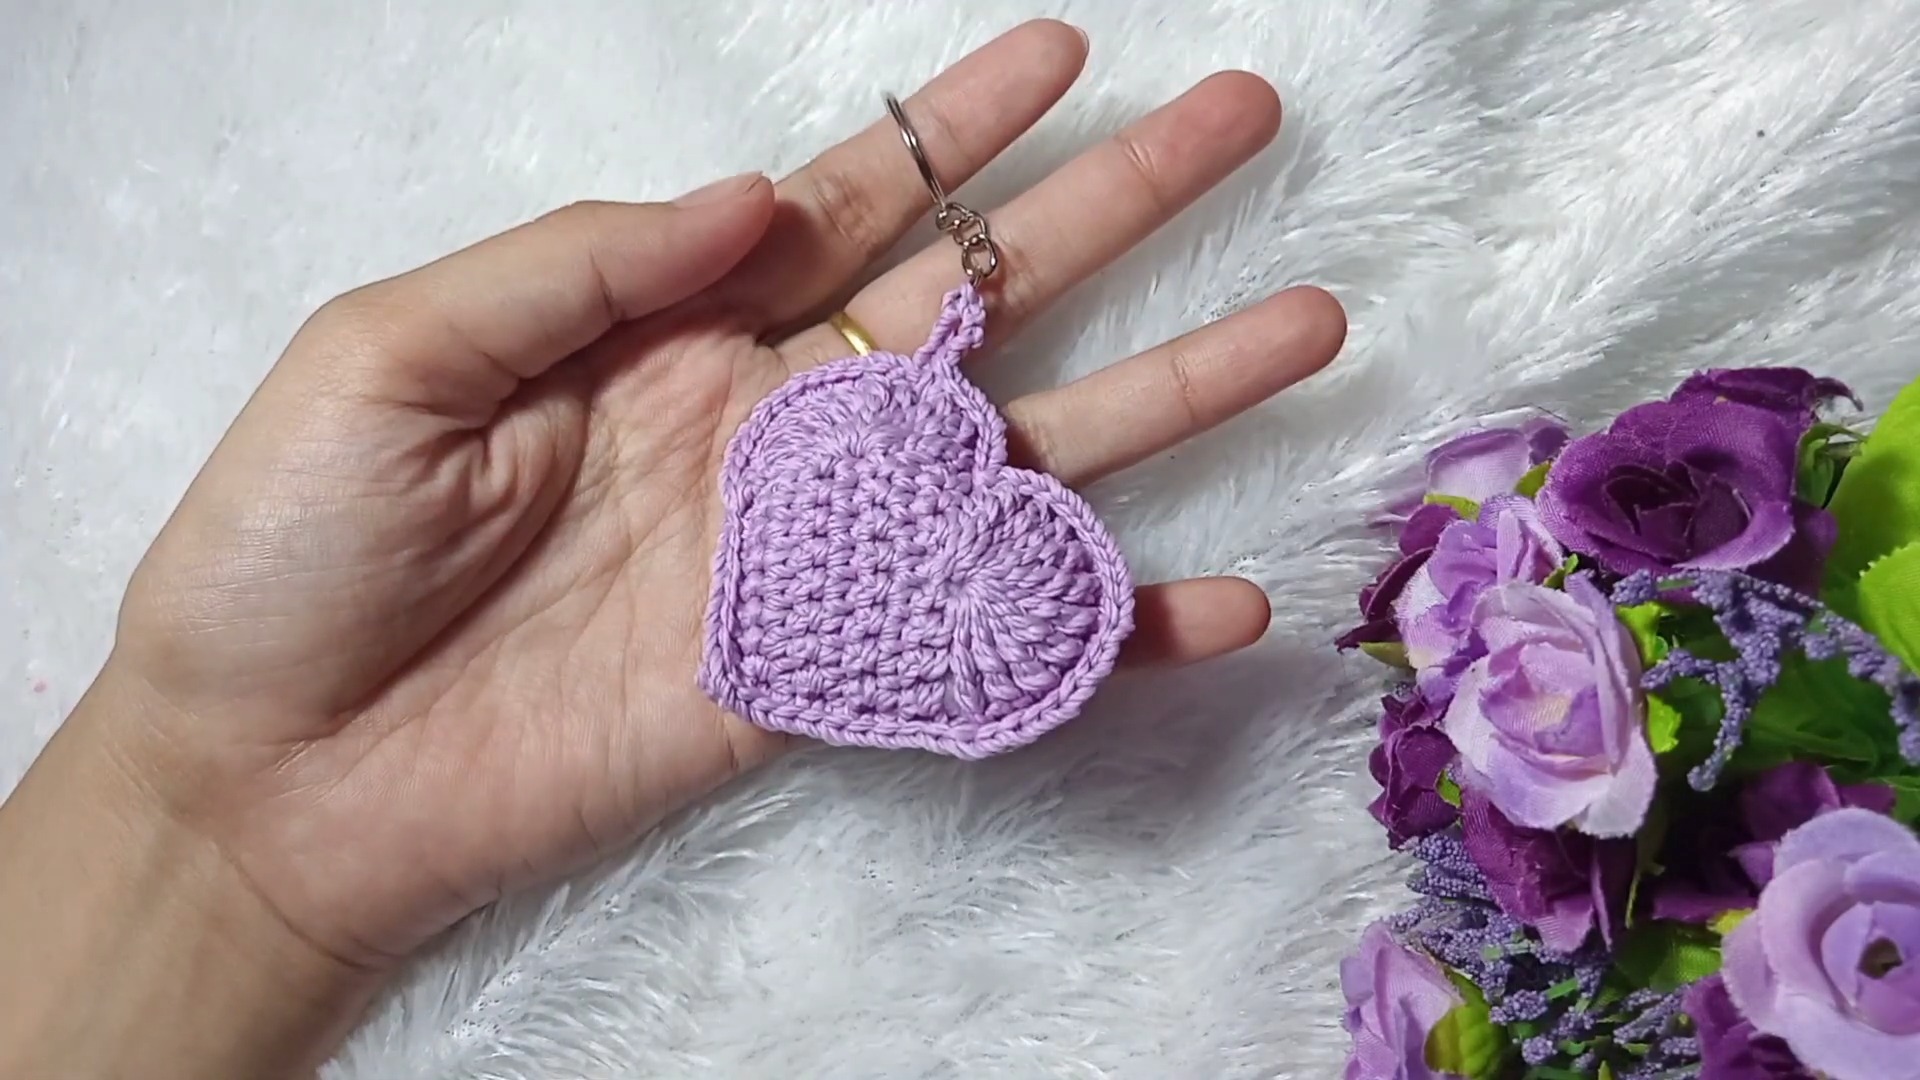
Here’s how to turn simple crochet stitches into cute heart keychain, with clear guidance for shaping two lobes, joining panels, adding gentle stuffing, and securing keychain loop.

Soft heart charms are useful when you want small handmade gifts, bag decorations, or personalized key accessories without working through long crochet patterns. This crochet design keeps finished piece compact, while crochet shaping gives it rounded lobes and puffy finish.
This tutorial walks through two matching panels, heart-lobe shaping, neat edge joining, center dip, stuffing, and final keychain attachment. You’ll also get short teaching notes for stitch placement, corner turns, lobe shaping, and finishing, so each crochet stage has clear purpose before you move forward.
Credit ghazi craft
Materials & Tools
- Yarn: Light purple polyester yarn or color of choice
- Crochet Hook: Appropriate size matching chosen yarn weight
- Stuffing: Polyfill (dacron)
- Hardware: Keychain ring
- Tools: Scissors and yarn needle for finishing
Finished Size & Customization
Finished Size: Compact keychain size, ideal for bags, keys, or handmade gifts.
Customization Ideas:
- Try pink, red, or pastel yarn shades for Valentine’s Day and other occasions.
- Change yarn thickness and hook size to create larger plush charms or smaller bag tags.
Pattern Abbreviations & Terminology
- Ch: Chain
- Sl st: Slip stitch
- Sc: Single crochet
- Inc: Increase – work 2 single crochets in same stitch
- Dtr: Double treble crochet – wrap yarn around hook 3 times, insert into stitch, pull up loop, then work [yarn over and pull through 2 loops] 4 times
- St(s): Stitch(es)

Step-by-Step Crochet Instructions
Step 1: Create First Base Panel
Teaching focus: Begin with flat foundation so both heart panels develop identical width and height before shaping begins.
Create slip knot and chain 10.
- Skip first chain.
- Work 1 sc into each remaining 9 chains.
- You should have 9 sc.
For Rows 2–7:
- Ch 1 and turn.
- Work 1 sc in every stitch across.
- Keep 9 sc in every row.
- Continue until 7 rows are completed.
Check your shape: Panel should remain flat with straight side edges. Consistent 9-stitch rows will make second panel easier to match later.

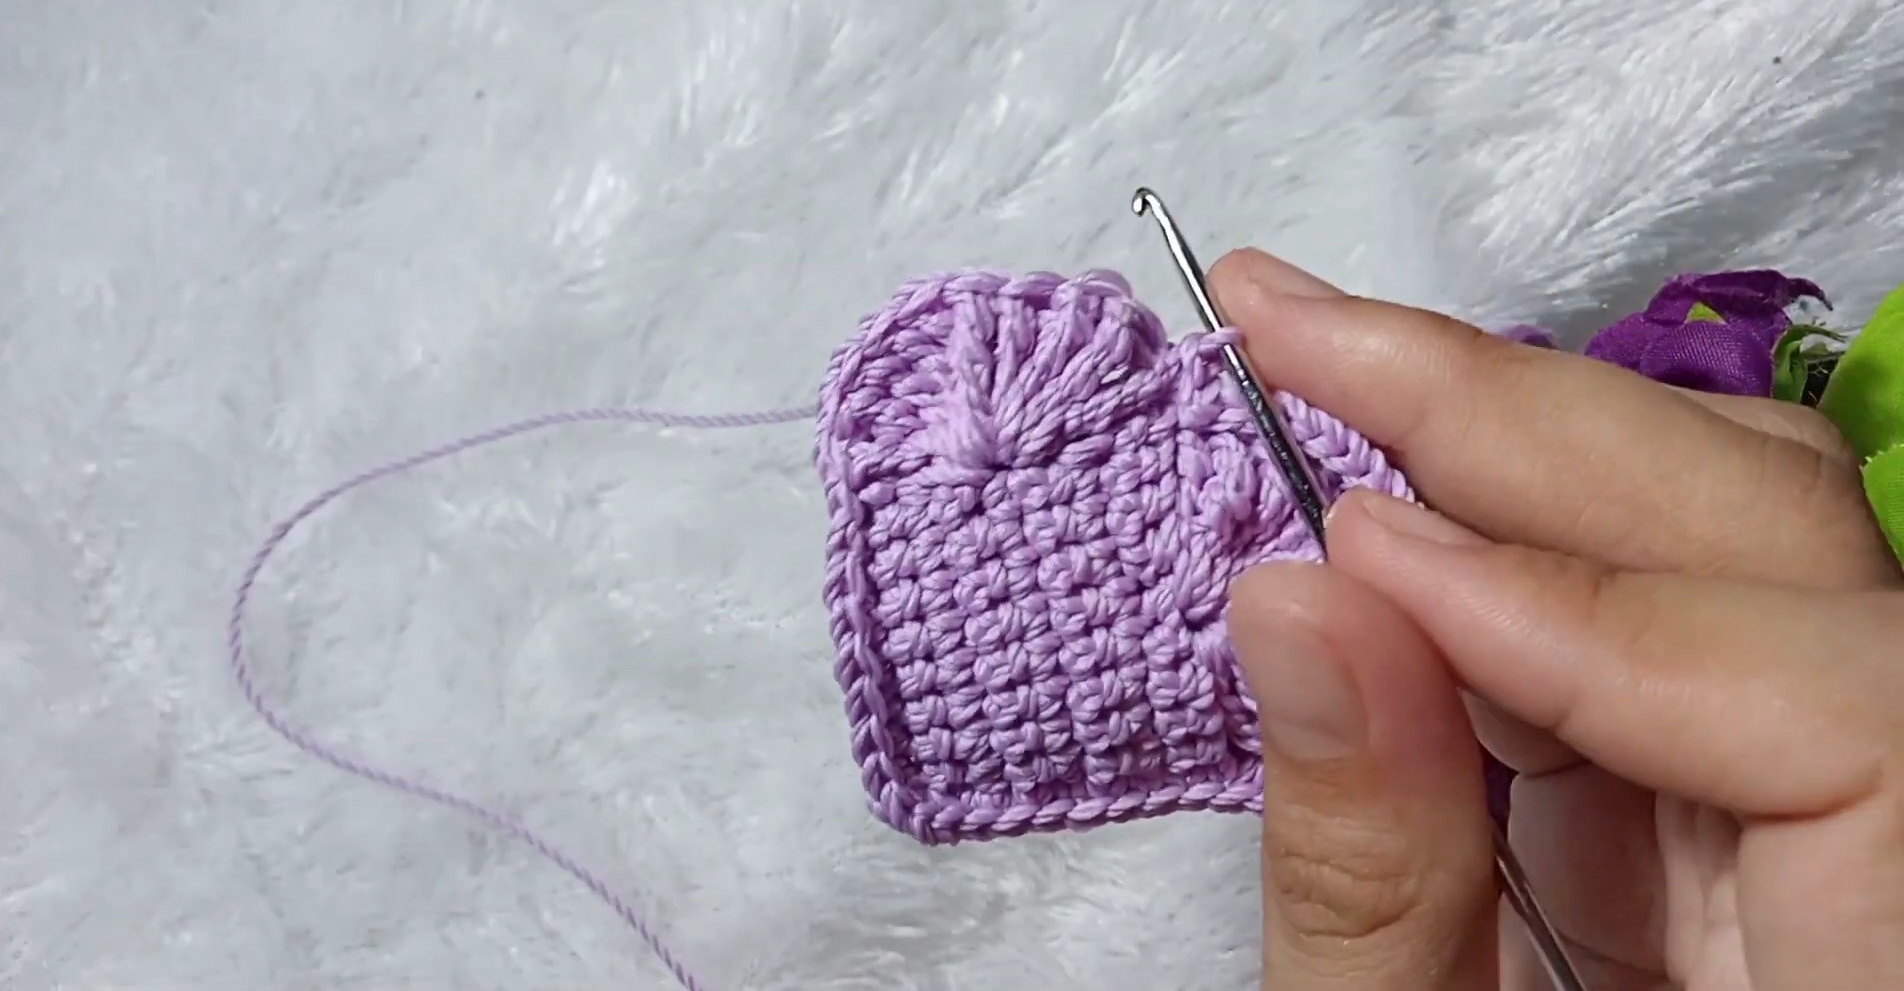
Step 2: Form First Heart Lobe
Teaching focus: Concentrate multiple dtr stitches into one point to create rounded upper lobe instead of extending panel width evenly.
On final row, locate 5th stitch.
Work 10 dtr into same stitch.
After completing 10 dtr, secure first lobe with sl st at bottom corner.
Helpful tip: Keep all 10 dtr in exact same stitch. This concentrated placement creates fullness needed for upper curve.
Step 3: Shape Second Lobe
Teaching focus: Mirror first lobe placement so heart gets balanced top shape.
- Skip 3 stitches.
- Work another 10 dtr into designated stitch.
- Complete shaping with sl st at corner.
Compare both lobes before moving on. Similar height and fullness will help final heart look even after panels are joined.
Step 4: Make Matching Second Panel
Teaching focus: Matching two panels now creates front and back layers that can later be joined into stuffed heart.
Repeat Steps 1–3 to make second identical panel.
For first panel:
- Cut yarn.
- Fasten off.
For second panel:
- Do not cut yarn.
Leave working yarn attached because it will be used immediately for joining both panels.
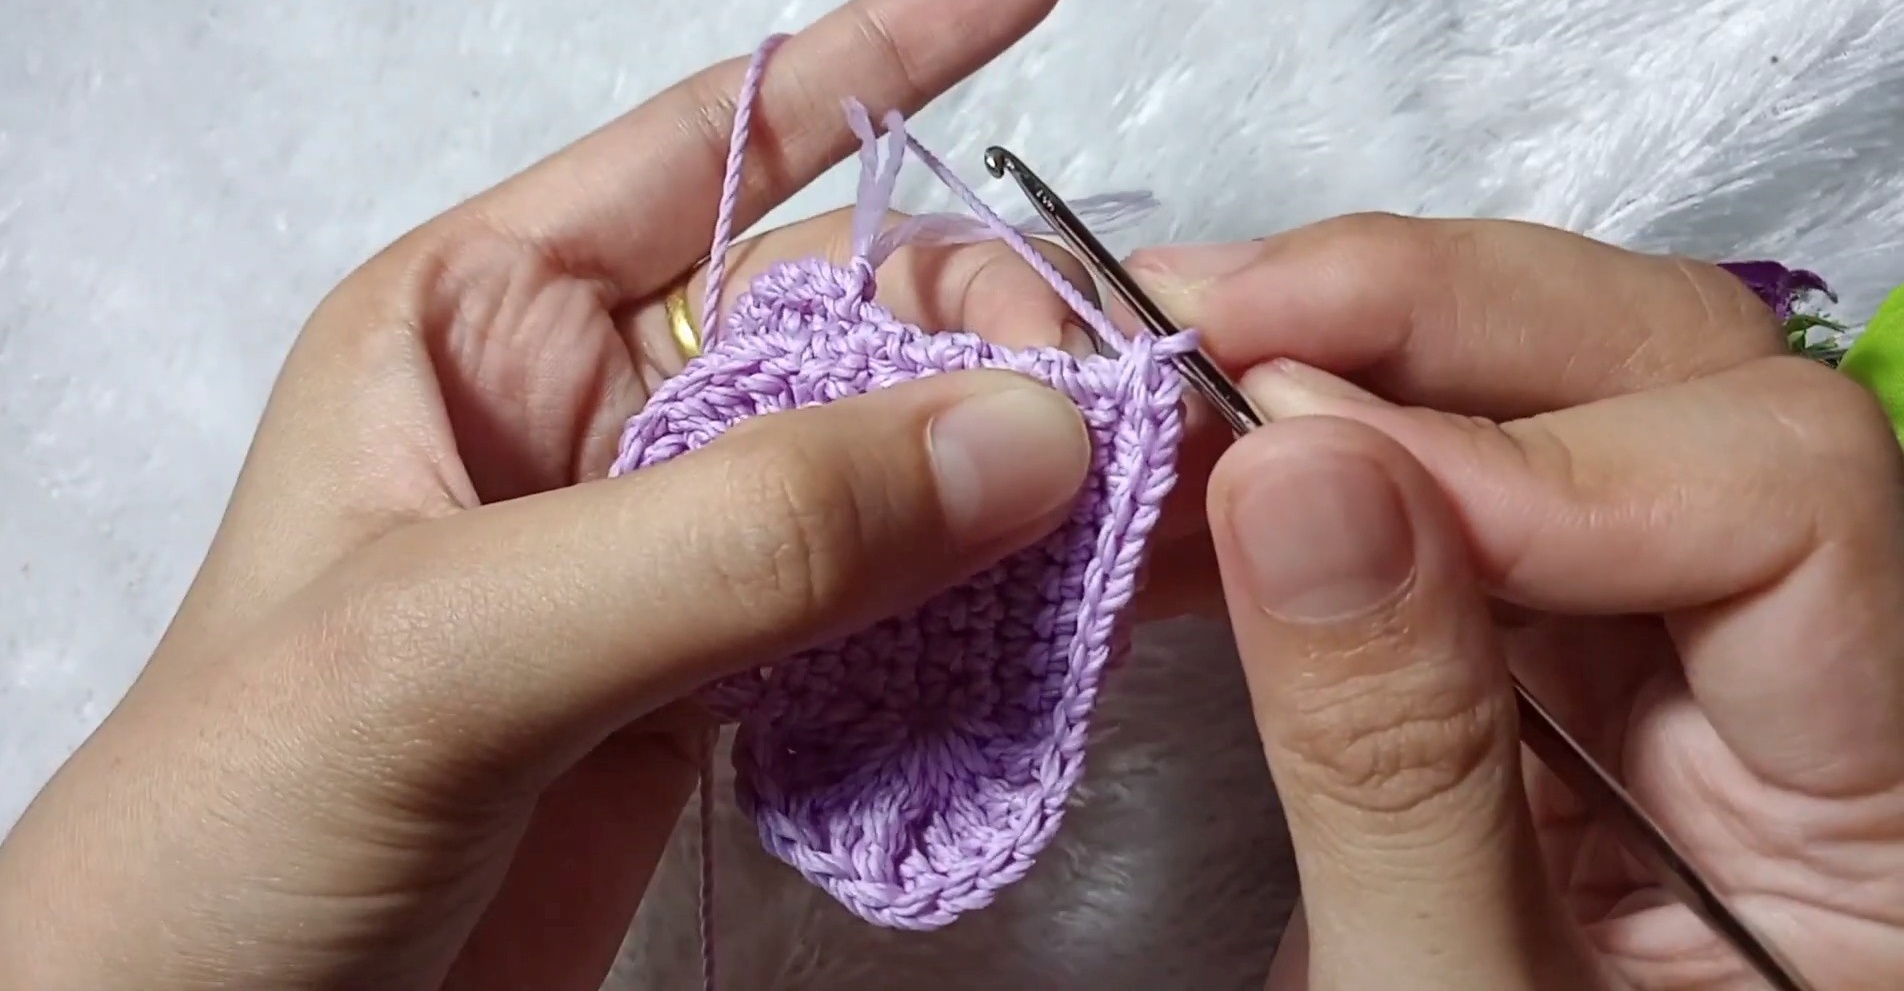
Step 5: Join Heart Panels
Teaching focus: Align panels before edging so outer shape stays consistent and stuffing cavity remains enclosed.
Place both panels together with wrong sides facing inward.
Using attached yarn, join panels by working sc through both thicknesses evenly around outer edges.
Work gradually around perimeter rather than pulling stitches tightly. This keeps edge flexible enough for later shaping.
Step 6: Turn Sharp Bottom Corner
Teaching focus: Extra stitches at pointed corner prevent edge from pulling inward while you turn around bottom point.
When reaching sharp bottom corner, work 3 sc into exact same stitch.
This extra space allows edge to turn smoothly.
Result check: Bottom point should curve neatly without puckering or forcing panels apart.
Step 7: Continue Up Side Edge
Teaching focus: Maintain even border while moving from bottom point toward first upper lobe.
Continue with 1 sc in each stitch up toward top lobes.
Keep both panel edges aligned as you work.
Helpful tip: If layers begin shifting, pause and realign them before continuing. Even alignment now makes final heart outline cleaner.
Step 8: Expand First Lobe Edge
Teaching focus: Increase stitches across dtr section to fan out upper curve and prevent lobe from becoming narrow.
Across first set of 10 dtr stitches, work inc — 2 sc in each stitch.
This increases stitch count across lobe and gives upper curve room to spread.
Shape check: Edge should begin forming rounded lobe rather than pulling inward.
Step 9: Define Center Dip
Teaching focus: Center valley needs firm anchoring so two rounded lobes remain visibly separated.
At deep center valley between lobes, work sl st to anchor shape.
Then continue with inc sc stitches around second lobe.
Work evenly through second lobe while maintaining same increased treatment used on first lobe.
Step 10: Form Keychain Attachment Loop
Teaching focus: Add hardware loop at center valley before final closure so attachment sits naturally at top of finished heart.
At top center valley:
- Chain 4.
- Slide metal keychain ring onto chain.
- Chain 4 more.
- You now have 8 chains total.
- Secure loop with sl st back into same base spot.
Attachment check: Ring should sit freely on loop without pulling heart edge out of shape.
Step 11: Add Light Stuffing
Teaching focus: Fill cavity before final edge closure so heart gains soft rounded volume while opening is still accessible.
Before completing final closure, lightly add polyfill (dacron) inside heart.
Distribute stuffing gently rather than packing it tightly.
Shape check: Finished heart should look puffy and rounded while still retaining defined center dip and two upper lobes.
Step 12: Finish Edge and Hide Ends
Teaching focus: Final border closes remaining opening and gives outer edge consistent finish.
Complete remaining edge stitches with increase scs.
Then:
- Join with sl st to very first sc made at beginning of border.
- Fasten off.
- Cut yarn.
- Use yarn needle to weave in all remaining loose ends neatly.
Final check: Examine outer edge, bottom point, center valley, and keychain loop. Make sure stuffing remains enclosed and yarn ends are secure.