Want a fall decoration with a little more personality? This crochet pumpkin bear combines a plump pumpkin body, tiny ears, and a simple felt face for an especially cute seasonal keepsake.
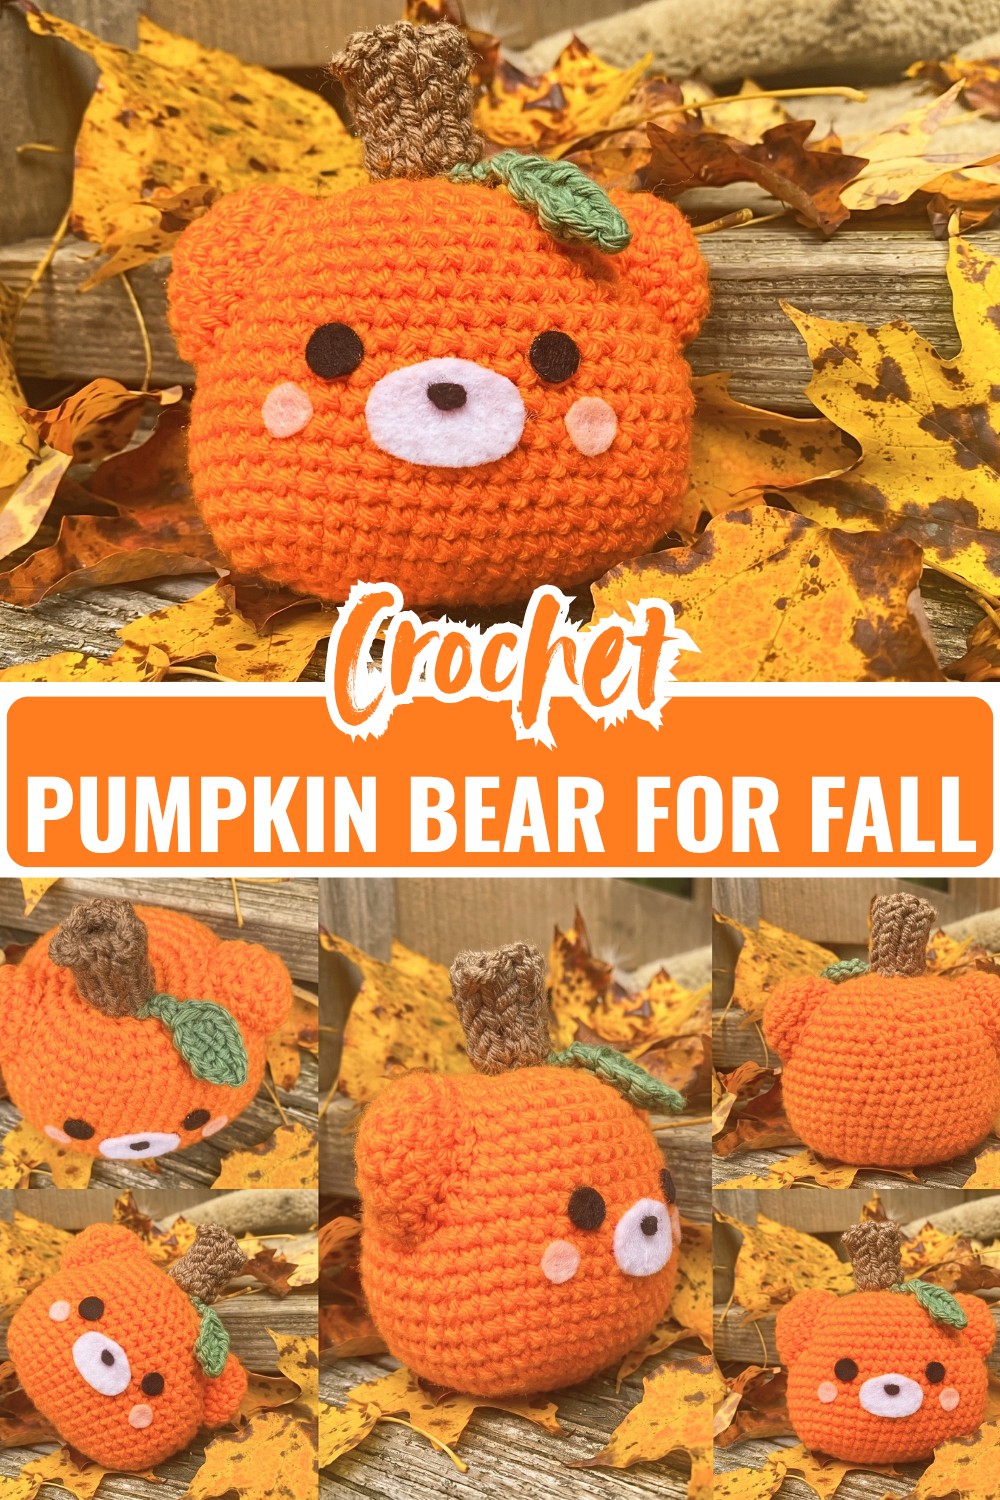
A crochet pumpkin bear is one of those fall decorations where a few small details make all the difference. The rounded orange body already gives you the pumpkin shape, but once the ears and little face are added, it starts to look like a cheerful bear instead of an ordinary crochet pumpkin.
The crochet itself stays fairly simple: you’ll shape the body with increases, work several rounds for its fullness, then use decreases to close the top.
After that, the stem and ears are added separately, and the felt face finishes the character. Taking a moment to check the placement of those pieces before sewing or gluing will help you get a much more balanced expression.
Credit Taylor Peach
Materials & Tools
- Worsted-weight yarn in orange for the body and ears
- Worsted-weight yarn in brown for the stem
- Worsted-weight yarn in green for an optional leaf
- Black felt for the eyes
- White felt for the muzzle
- Pink felt for the cheeks
- 5 mm crochet hook
- Polyfill stuffing
- Yarn needle
- Scissors
- Stitch marker, safety pin, or scrap yarn
- Low-temperature hot glue gun
Finished Size & Customization
Using worsted-weight yarn and a 5 mm hook, the finished Pumpkin Bear will be approximately 5–6 inches tall. The exact size can vary depending on your yarn and crochet tension.
Orange gives the bear its classic pumpkin look, but you can easily change the body color if you want something different. Cream, muted green, teal, or another seasonal shade can give it a completely different feel. Changing the yarn weight and hook size is another simple way to make the bear smaller or larger.
Pattern Abbreviations
- sc: single crochet
- inc: increase – work 2 sc in the same stitch
- dec: decrease – work an invisible decrease over 2 stitches
- ch: chain
- sl st: slip stitch
- MR: magic ring
This pattern uses US crochet terminology.

Crochet the Pumpkin Bear
Shape the Pumpkin Body
Work the body in continuous rounds. Keep a stitch marker in the first stitch of each round so you don’t lose your place as you work around the body.
Round 1: With orange yarn, make a slip knot and chain 11; skip the first chain, sc in the next 10 chains, rotate your work, inc in the last chain, sc in the next 8 chains along the opposite side, then inc in the final stitch — 22 sts.
Round 2: Inc in the first stitch, sc in the next 8 sts, inc in each of the next 3 sts, sc in the next 8 sts, then inc in each of the final 2 sts – 28 sts.
Round 3: Inc in the first stitch, sc in the next 10 sts, inc in each of the next 4 sts, sc in the next 10 sts, then inc in each of the final 3 sts – 36 sts.
Round 4: Sc in the first 14 sts, inc in each of the next 4 sts, sc in the next 14 sts, then inc in each of the final 4 sts – 44 sts.

Rounds 5–10: Sc in every stitch around for each round – 44 sts per round.
At this point, the body should have reached most of its finished width. The next rounds gradually bring the top inward, creating the rounded pumpkin shape.
Round 11: Dec, sc in the next 20 sts, dec, then sc in the final 20 sts – 42 sts.
Round 12: Dec, sc in the next 19 sts, dec, then sc in the final 19 sts – 40 sts.
Round 13: Dec, sc in the next 18 sts, dec, then sc in the final 18 sts – 38 sts.
Round 14: Dec, sc in the next 17 sts, dec, then sc in the final 17 sts – 36 sts.
Round 15: Dec, sc in the next 16 sts, dec, then sc in the final 16 sts – 34 sts.
Round 16: Dec, sc in the next 15 sts, dec, then sc in the final 15 sts – 32 sts.
Round 17: Dec, sc in the next 14 sts, dec, then sc in the final 14 sts – 30 sts.
Round 18: Dec around – 15 sts.
Round 19: Dec around again, working the decreases as evenly as possible – 7–8 sts remaining.
Before closing the opening, check the stuffing. The body should feel firm enough to hold its rounded shape without becoming hard. If you can easily press the sides together or see a hollow area, add a little more stuffing now.
Pull the yarn tail through the remaining stitches and tighten the opening closed.

Make the Stem
With brown yarn, make a slip knot and chain 6 loosely.
Skip the first chain and work 5 sl sts back along the chain. Chain 1, then continue working slip stitches through the front loops, turning the work after each short section until the stem reaches your preferred length.
Leave a yarn tail for attaching the stem to the top of the pumpkin.

Make the Ears
Make 2 ears in orange yarn.
Round 1: Make an MR and work 6 sc into the ring – 6 sts.
Round 2: Inc in every stitch around – 12 sts.
Round 3: Repeat inc, sc around – 18 sts.
Round 4: Sc in every stitch around – 18 sts.
Finish with a sl st and leave a long tail for sewing.
Keep the ears fairly flat rather than heavily stuffed. This makes them easier to position against the rounded body.

Add an Optional Leaf
If you want to add a crocheted leaf, use green yarn and chain 8. Work 4 sc across the chain, turning as needed to shape the leaf, then use slip stitches around the edges to define the shape.
Leave a sewing tail and attach the leaf beside the stem.

Assemble the Pumpkin Bear
Attach the Stem and Ears
Place the stem in the center of the pumpkin’s top and sew it securely with the brown yarn tail. Weave the remaining end into the body.
Next, position the ears on either side of the stem. Look at the bear straight from the front before sewing them down. Check that they are sitting at roughly the same height and that neither one is noticeably closer to the center.
If you’re happy with the placement, sew around the base of each ear with small, secure stitches, catching both the ear and the pumpkin body.

Add the Felt Face
Cut:
- 2 small black circles for the eyes
- 2 small pink circles for the cheeks
- 1 white oval for the muzzle
You can add a small black felt or embroidered nose to the muzzle as well.
Before using the glue, place all of the pieces loosely on the face. This small check is worth doing because even a slight change in eye position can give the bear a different expression.
Once the placement looks balanced, attach the felt pieces with a low-temperature hot glue gun.
Final Finishing Check
Before trimming the remaining yarn tails, check the finished bear from all sides. Make sure the stem and ears are secure, the stuffing is distributed evenly, and the felt pieces are firmly attached.
That’s all it needs. The combination of the rounded pumpkin body, small bear ears, and simple face gives you a seasonal decoration with plenty of personality without adding complicated crochet details.