Give your Halloween décor a playful undead twist with a tiny crochet zombie ghost featuring a stitched eye, a pink brain, and a ruffled ghostly edge.
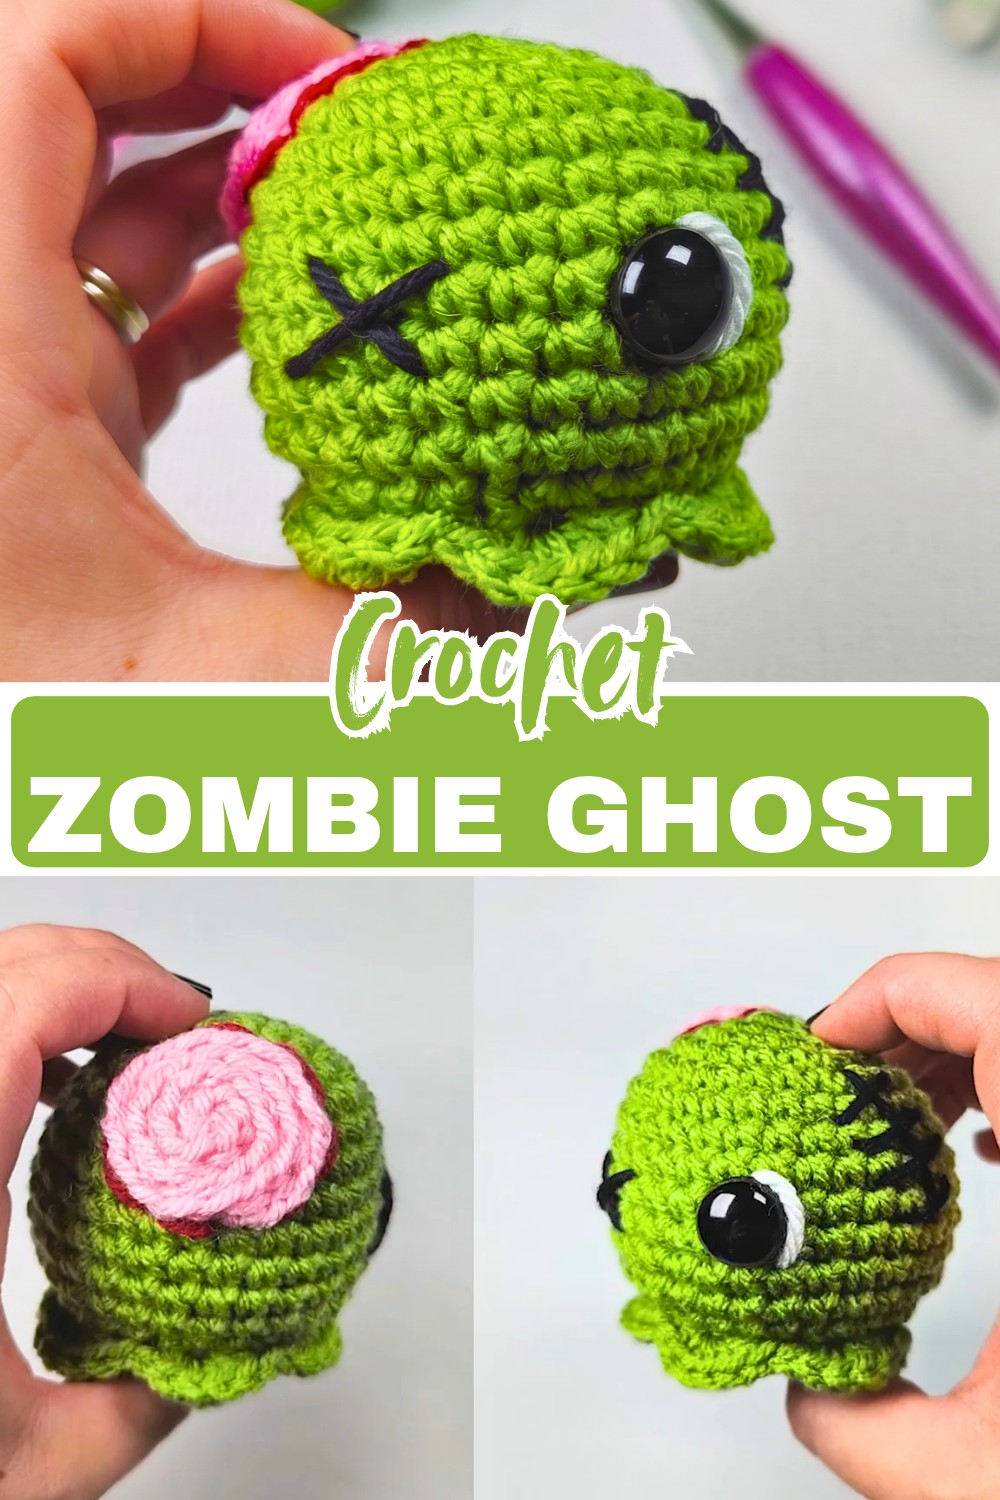
There’s something especially fun about a Halloween character that looks a little spooky without being too scary. This crochet zombie combines a soft green body with an unmistakable stitched eye, a tiny scar, and a pink brain detail, giving it plenty of personality while keeping the overall design cute. The ruffled edge at the bottom adds another playful touch and helps the ghost keep its classic floating shape.
The details are what really bring this little character to life. Once the basic body is crocheted and stuffed, the safety eye, embroidered X, brain, and scar turn a simple amigurumi shape into a recognizable zombie ghost.
With basic crochet stitches and a few small finishing techniques, it’s a fun Halloween make for adding handmade character to a shelf, desk, gift basket, or seasonal display.
Materials & Tools Needed
- Worsted-weight yarn
- Green for the ghost body
- Pink for the brain
- Black for the stitched eye and scar
- Red for the optional brain outline
- White for the optional eye highlight
- 3.5 mm crochet hook
- 12 mm safety eye
- Fiberfill stuffing
- Yarn needle
- Stitch marker
- Scissors
Finished Size & Customization Ideas
The finished zombie ghost will be a small, handheld size when made with the recommended yarn and hook, although the exact size will vary with your yarn weight and crochet tension.
You can also give the character your own Halloween personality:
- Change the green body to gray, purple, white, or another spooky shade.
- Use a different color for the brain detail.
- Add extra embroidered scars or tiny eyebrows.
- Change the placement of the brain for a different expression.
- Use white yarn to give the safety eye a shiny highlight.
- Try different colors for the ruffled bottom edge.
Crochet Abbreviations
This pattern uses US crochet terminology.
- ch: Chain
- sc: Single crochet
- inc: Increase – 2 sc in the same stitch
- dec: Decrease – sc2tog, worked as an invisible decrease through the front loops
- sl st: Slip stitch
- BLO: Back Loop Only
- FLO: Front Loop Only
- HDC: Half double crochet

Step-by-Step Crochet Zombie Ghost Pattern
Crochet the Ghost Body
The main body begins with a magic ring and gradually increases to create a rounded shape. Continue working in rounds, using a stitch marker if needed to keep track of the round.
Round 1
Make a magic ring and work 6 sc into the ring. Pull the yarn tail to close the center. [6 sts]
Round 2
Work 1 inc in each stitch around, placing 2 sc in every stitch. [12 sts]
Round 3
Work (1 sc, 1 inc) around, repeating the sequence 6 times. [18 sts]
Round 4
Work (2 sc, 1 inc) around, repeating the sequence 6 times. [24 sts]
Round 5
Work (3 sc, 1 inc) around, repeating the sequence 6 times. [30 sts]
Rounds 6–12
Work 1 sc in each stitch around for 7 rounds. [30 sts per round]

Begin the Facial Details
The face is easiest to add before you continue with the lower shaping, while the body is still open and accessible.
Round 13
Work (3 sc, 1 dec) around, repeating the sequence 6 times. [24 sts]
Add the Safety Eye
Insert the 12 mm safety eye between Rounds 9 and 10 and secure the backing firmly on the inside of the ghost.
Create the Stitched Eye
For the second eye, use black yarn and a yarn needle to embroider an X on the face.
Begin from the inside of the ghost, bring the yarn through to the front, and make two diagonal stitches that cross in the center. Secure the yarn ends inside the body.

Add an Optional Eye Highlight
For a small shiny effect, use white yarn to add a short diagonal stitch across the safety eye.
Secure the white yarn inside the ghost when finished.
Create the Ruffled Bottom Edge
The ruffled edge gives the ghost its distinctive wavy finish.
Shell Edging
Working in the FLO, make 5 HDC in the next stitch, skip 1 stitch, and sl st into the next stitch. Skip the following stitch and repeat this sequence around the body until you have created 6 shell-shaped ruffles.
The larger groups of HDC will naturally form the scalloped edge.
Work Into the Remaining BLO
After completing the ruffled edging, place your stitch marker at the end of the round. Work into the BLO left unworked from Round 13.
Work 2 sc, then a decrease over the next 2 stitches, and continue this sequence around. [18 sts]
Close and Stuff the Ghost
Final Closing Round
Work (1 sc, 1 dec) around to continue narrowing the opening.
Before completely closing the base, fill the ghost firmly with fiberfill. Add stuffing gradually so the body remains rounded without becoming overly stretched.
After the final stitches, sl st to the next stitch and fasten off, leaving a long yarn tail.
Thread the tail onto a yarn needle and sew through the remaining opening to close it securely. Pull the stitches together, secure the yarn, and weave in the remaining end.

Make the Pink Brain
The brain is created from a simple chain that is sewn onto the top of the ghost.
Using pink yarn, ch 40, leaving a long tail for sewing.
Position the chain near the stitched X eye. Starting around the center of the chain, sew it onto the top of the ghost in a loose spiral pattern.
Secure the chain stitch by stitch with the yarn needle so it stays neatly attached to the surface.

Optional Red Brain Outline
For extra definition, use red yarn to add small embroidery stitches around the outside of the pink brain.
This creates a slightly darker outline that makes the brain detail stand out against the green body.
Secure the ends inside the ghost when finished.
Add the Decorative Scar
Use black yarn to embroider a small scar on the side of the ghost’s face.
Make several short diagonal stitches, then add small perpendicular stitches across them to create a stitched-together appearance.
Keep the scar relatively small, so it complements the embroidered X eye rather than overwhelming the face.
Secure both yarn ends neatly inside the ghost.
Tips for Getting the Details Neat
The basic crochet body is fairly straightforward, but the small decorative details make the biggest difference to the finished character.
Keep the eye placement secure. Make sure the safety-eye backing is firmly attached before closing and stuffing the body.
Don’t pull the brain chain too tightly. A little looseness allows the pink chain to form natural curves instead of looking stiff.
Space the scar stitches evenly. Small, consistent stitches will give the scar a cleaner embroidered appearance.
Stuff gradually. Adding the fiberfill in small amounts makes it easier to keep the ghost evenly rounded and prevents the stitches from stretching.
Check the face before finishing. Once the eye, brain, and scar are attached, take a moment to look at the overall expression. Small adjustments to the decorative details can make the character look much more balanced.

Final Finishing
Before calling your zombie ghost finished, check that:
- The safety eye is securely fastened.
- The embroidered X is firmly attached.
- The ghost is evenly stuffed.
- The bottom opening is completely closed.
- The pink brain is securely sewn down.
- The optional red outline is tidy.
- The scar is firmly embroidered.
- All loose yarn ends are woven in.
Your crochet zombie ghost is now ready for Halloween! The combination of the green body, ruffled bottom, mismatched eye, pink brain, and little stitched scar gives it a fun balance of spooky and adorable. Display it with your other Halloween decorations, add it to a handmade gift, or make several in different colors for your own little collection of zombie ghosts.