Bring a little woodland character to your holiday décor with this palm-sized crochet reindeer, complete with a red nose, branching antlers, tiny ears, and embroidered details.
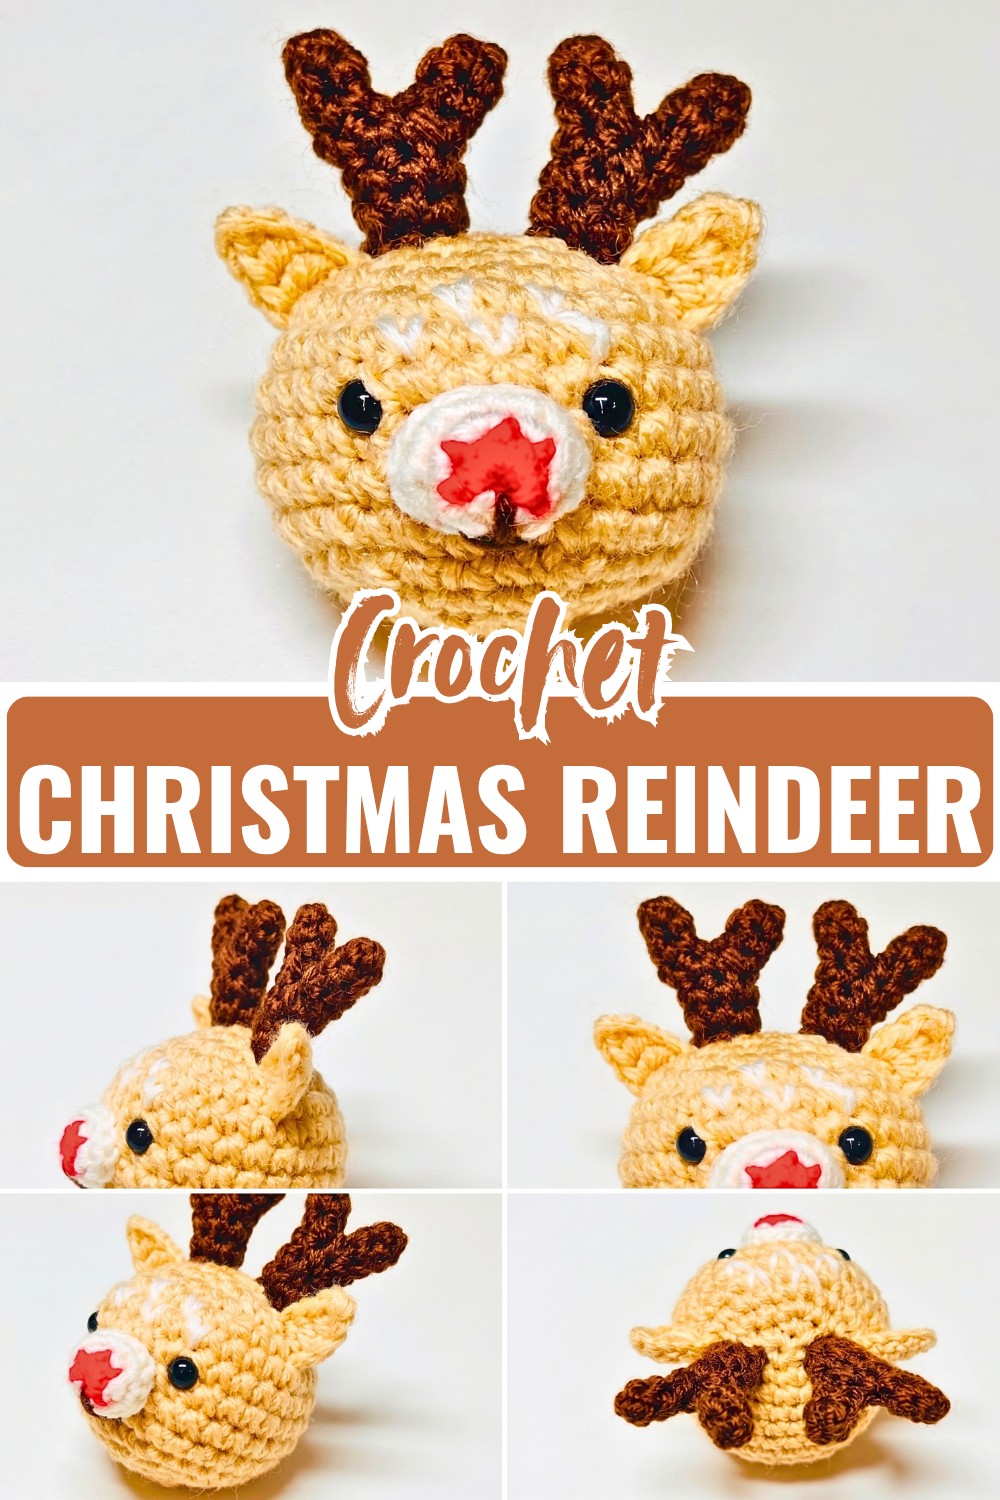
Some crochet decorations become charming because of the little details rather than complicated shaping, and this reindeer is a good example. The rounded head, contrasting snout, small ears, and branching antlers all work together to create a recognizable holiday character in just a few inches.
The head is the main piece, while the nose, antlers, and ears are made separately and sewn on afterward. The antlers require the most attention because their smaller branch is joined to the larger piece during the crochet process. Taking care with that joining round will make the finished antlers easier to position and give the crochet reindeer a more balanced expression.
Credit Heavenly Crochet Amigurumi
Materials
- Light brown or beige yarn for the head and ears
- Off-white or cream yarn for the snout and forehead spots
- Red yarn for the nose
- Dark brown yarn for the antlers and mouth embroidery
- 2.5 mm crochet hook
- Pair of 6 mm safety eyes
- Polyester microfill or fiberfill stuffing
- Tapestry or yarn needle
- Scissors
- Stitch marker
Finished Size
The finished reindeer measures approximately 2.5–3 inches (6–8 cm) tall, depending on your yarn, hook, and tension.
Its small size makes it suitable for a Christmas tree ornament, a little desk decoration, or a festive bag charm.
Ways to Customize Your Reindeer
- Add a gold cord through the top of the head for a hanging ornament.
- Attach a keychain ring or lobster clasp between the antlers.
- Use dark tan, cream, or another warm brown for the head.
- Keep the red nose for a classic Rudolph-inspired look.
- Change the embroidery color to make the facial details softer or more pronounced.
Pattern Abbreviations
This pattern uses US crochet terminology.
- MR – magic ring
- st/sts – stitch/stitches
- ch – chain
- sc – single crochet
- hdc – half double crochet
- dc – double crochet
- inc – increase; work 2 sc in the same stitch
- dec – decrease; crochet 2 stitches together
- SC2TOG – single crochet 2 together
- ( ) × N – repeat the instructions inside the parentheses N times
- [ ] – stitch count at the end of the round

Before You Start
The reindeer is built from one main rounded head and several small pieces. Work the head first, then make the snout, antlers, and ears before moving to assembly.
The head is crocheted in continuous spiral rounds, so use a stitch marker to keep track of the beginning of each round. The safety eyes are inserted before the head is closed, and the stuffing is added while there is still enough opening to distribute it evenly.
For the cleanest result, finish positioning the eyes and shaping the head before attaching the facial pieces. Once the snout, ears, and antlers are sewn on, small placement adjustments become more difficult.
How to Crochet the Reindeer Head
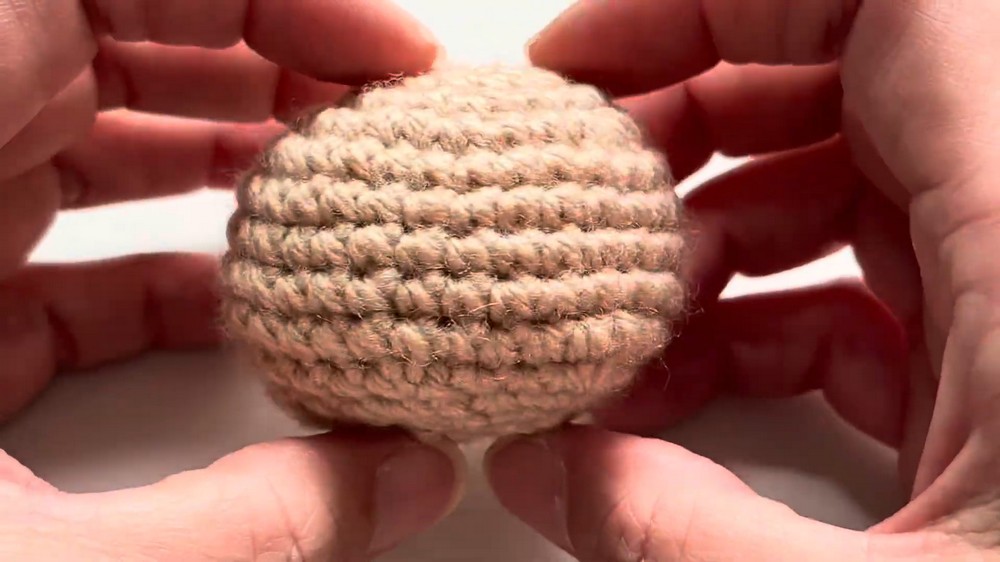
Use light brown or beige yarn and work in continuous spiral rounds.
Round 1: Work 6 sc in a magic ring. [6 sts]
Round 2: Work inc in each stitch around. [12 sts]
Round 3: Inc, sc around; repeat 6 times. [18 sts]
Round 4: Inc, 2 sc around; repeat 6 times. [24 sts]
Round 5: Inc, 3 sc around; repeat 6 times. [30 sts]
Round 6: Work 30 sc around. [30 sts]
Round 7: Work 30 sc around. [30 sts]
Round 8: Work 30 sc around. [30 sts]
Round 9: Work 30 sc around. [30 sts]
Round 10: Work 30 sc around. [30 sts]
Round 11: Dec, 3 sc around; repeat 6 times. [24 sts]
Round 12: Dec, 2 sc around; repeat 6 times. [18 sts]
Round 13: Dec, sc around; repeat 6 times. [12 sts]
Eye Placement
Insert the pair of 6 mm safety eyes between Rounds 7 and 8, leaving 4 stitches between the eyes. Secure the backings firmly on the inside.
Before locking the backings into place, look at the head from the front. The eyes should sit at the same height and remain centered across the face.
Stuff the Head
Firmly fill the head with microfill or fiberfill stuffing.
Add the stuffing gradually rather than putting a large amount in at once. This makes it easier to fill the rounded areas evenly and prevents the face from becoming lumpy around the eyes.
Round 14: Work dec around; repeat 6 times. [6 sts]
Fasten off, leaving a yarn tail. Thread the tail onto a yarn needle, weave it through the front loops only of the remaining stitches, pull to close the opening, and weave in the end.
Make the Nose and Snout
Use red yarn for the beginning of Round 1, then change to off-white for the rest of the snout.
Round 1: With red yarn, work 4 sc into a magic ring. On the 4th sc, change to off-white on the final yarn over, then work 2 sc in off-white into the same ring. [6 sts: 4 red, 2 off-white]
Pull the magic ring tight.
Round 2: Inc, sc around; repeat 3 times. [9 sts]
Round 3: Inc, 2 sc around; repeat 3 times. [12 sts]
Fasten off, leaving a long off-white yarn tail for sewing.
Color-Change Check
The color change happens while completing the fourth red sc, so the red and off-white sections are established directly in the first round. Keeping this transition neat will help the red nose remain visually distinct from the cream snout.
Make the Antlers
Make 2 antlers in dark brown yarn.
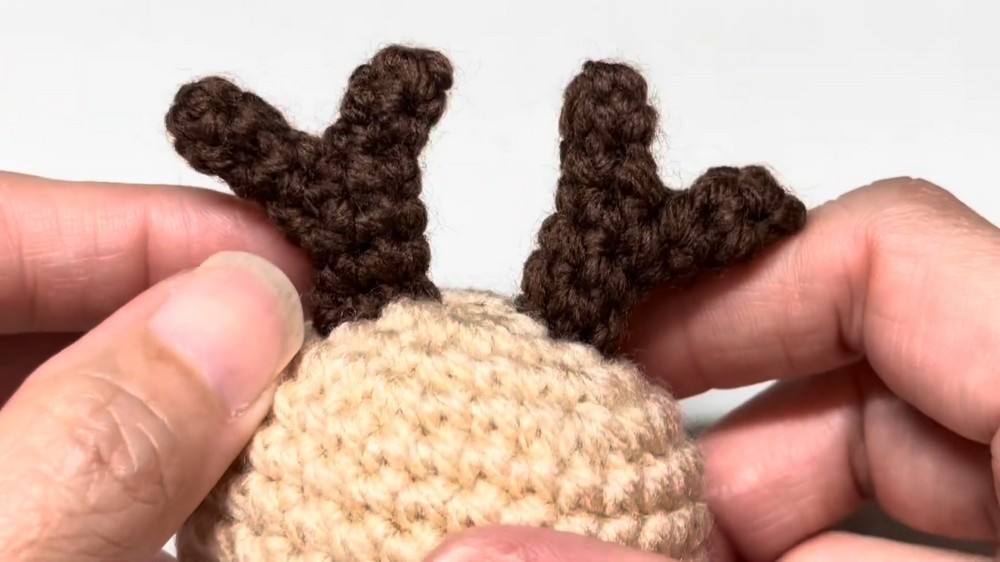
Each antler is built from a smaller branch and a larger main piece. The two pieces are joined during the fourth round of the larger piece.
Smaller Branch – Make 2
Round 1: Work 4 sc in a magic ring. [4 sts]
Round 2: Work 4 sc around. [4 sts]
Fasten off and cut the yarn short.
Larger Antler – Make 2
Round 1: Work 4 sc in a magic ring. [4 sts]
Round 2: Work 4 sc around. [4 sts]
Round 3: Work 4 sc around. [4 sts]
Joining Round
Position one small branch beside the larger piece before beginning the joining round.
Round 4: Work 3 sc on the larger piece, use SC2TOG to join into 1 stitch of the smaller piece, work the remaining joining stitches into the smaller piece, then continue around the larger piece as instructed. [8 sts]
Important Antler Check
This is the most technical part of the reindeer. Keep the smaller branch in its intended position while joining rather than letting it rotate around the larger piece. The goal is for the branch to project outward from the main antler instead of becoming twisted into it.
If the branch is positioned incorrectly during this round, the antler may still crochet successfully but sit at an awkward angle when sewn onto the head.
Round 5: SC2TOG, 2 sc around; repeat 2 times. [6 sts]
Round 6: Work 6 sc around. [6 sts]
Round 7: Work 6 sc around. [6 sts]
Fasten off, leaving a long tail for attaching the antler to the head.
Repeat to make the second antler.
Make the Ears
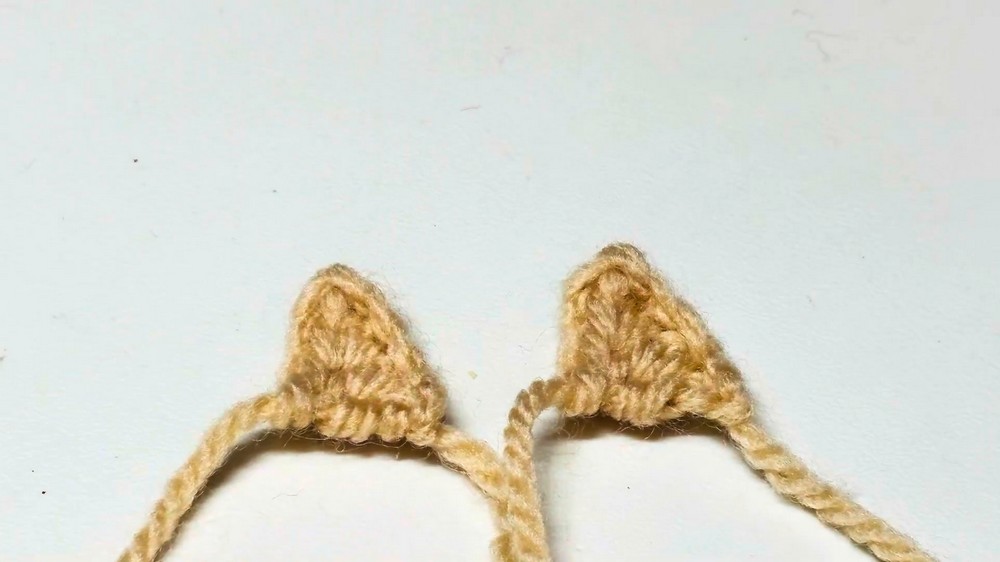
Make 2 ears in light brown or beige yarn.
Step 1: Chain 5.
Step 2: Skip the first chain from the hook and work 1 sc in the 2nd ch, 1 hdc in the 3rd ch, 1 dc in the 4th ch, and 1 hdc in the 5th ch.
Fasten off, leaving a long yarn tail for sewing.
The combination of stitch heights creates the small tapered ear shape. Keep both ears worked with similar tension so they match when attached.
Assemble the Reindeer
Lay out the head, snout, ears, and antlers before sewing them into place. This gives you a chance to check the facial proportions before the pieces become permanent.
1. Attach the Snout
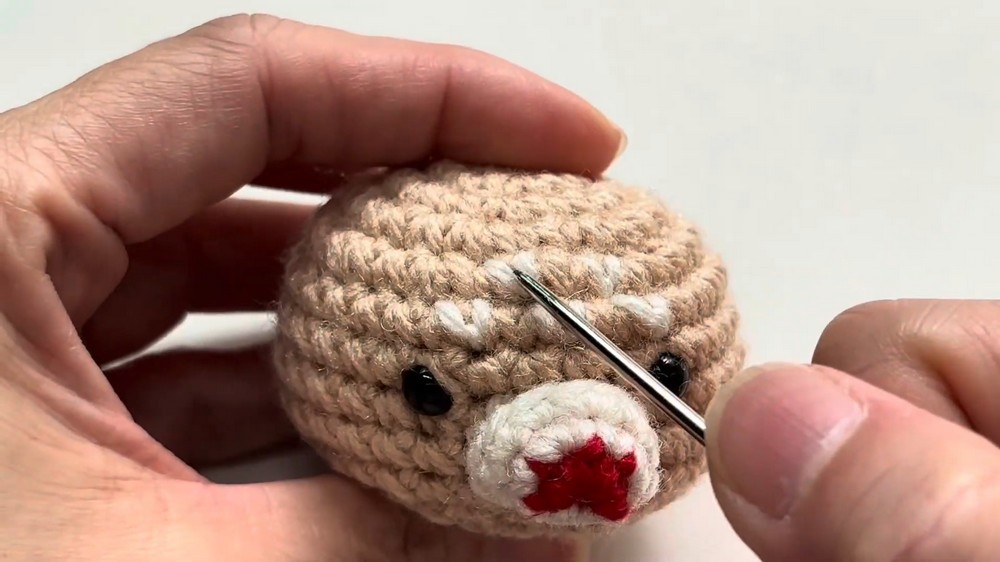
Center the snout between the safety eyes, positioning it over Rounds 7–10 of the head.
Sew around the edge with the long off-white yarn tail. Before completely closing the seam, add a small amount of stuffing inside the snout.
A little stuffing is enough here. The snout should have gentle dimension without becoming so full that it pushes the eyes apart.
2. Add the Forehead Spots
Using off-white yarn, embroider small V-shaped spots on the forehead between Rounds 4 and 6.
Keep the marks light and evenly spaced. Since these details sit above the eyes, they can noticeably change the expression if placed too close together or too far to one side.
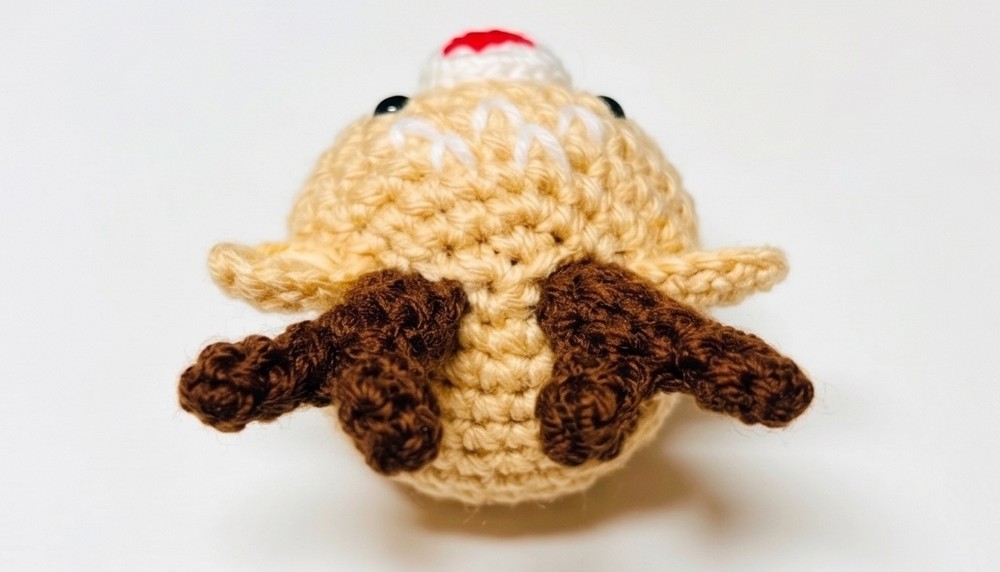
3. Attach the Antlers
Sew the two antlers to the top of the head between Rounds 1 and 3.
Space them evenly on either side of the head. Check their angles from the front before securing the long yarn tails.
The small branches should face outward so they remain visible rather than disappearing behind the head.
4. Attach the Ears
Pinch the base of each ear slightly to give it a more defined shape.
Sew the ears to the sides of the head between Rounds 3 and 5, just below and beside the antlers.
Try to mirror the placement on both sides. Small differences in ear angle are fine, but the attachment points should remain at approximately the same height.
5. Embroider the Mouth
With dark brown yarn, embroider a short vertical line extending downward from the red nose onto the cream snout.
Keep this line centered beneath the nose. A single clean stitch line is enough to define the mouth without overwhelming the small face.
Turn It Into an Ornament or Charm
Once the reindeer is completely assembled, you can adapt the top attachment to suit how you want to use it.
For a tree ornament, add a small gold cord loop through the top area of the head.
For a bag charm or keyring, attach a keychain ring or lobster clasp between the antlers, making sure the attachment is securely fastened.
Because the reindeer is only a few inches tall, lightweight attachments work best and keep the head from being pulled out of shape.
Final Finishing Check
Before displaying your reindeer, gently check each sewn component. The snout should remain centered between the eyes, the ears should sit at similar heights, and the antlers should branch outward rather than leaning heavily to one side.
The facial embroidery is the final detail that brings everything together. Once the mouth and forehead spots are positioned, give the head a gentle shaping with your fingers and smooth any visible stuffing beneath the crochet fabric.
Your little crochet reindeer is now ready to decorate a Christmas tree, sit among your holiday displays, or become a cheerful handmade gift.

Video Tutorial