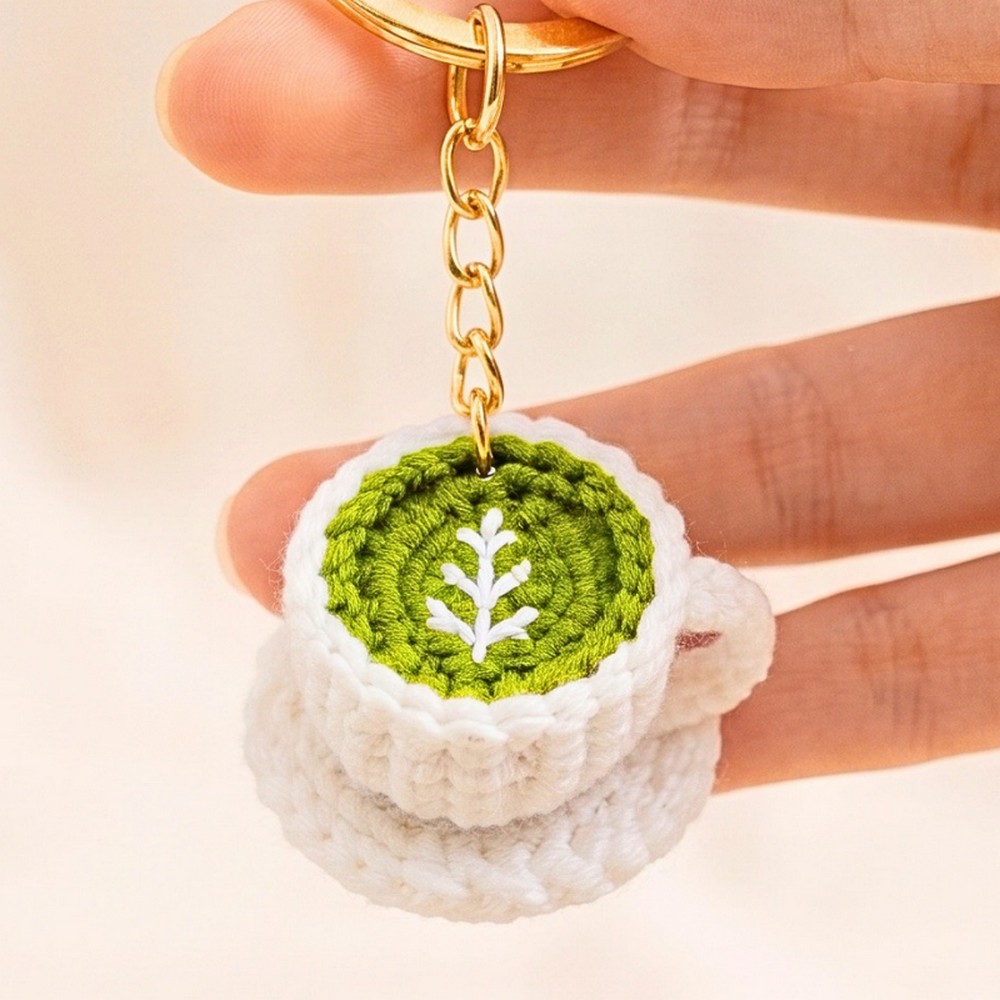
Want a tiny, handmade coffee-themed accessory? This miniature crochet cup features a white saucer, a neat handle, and embroidered latte art, perfect as a sweet keychain or bag pendant.
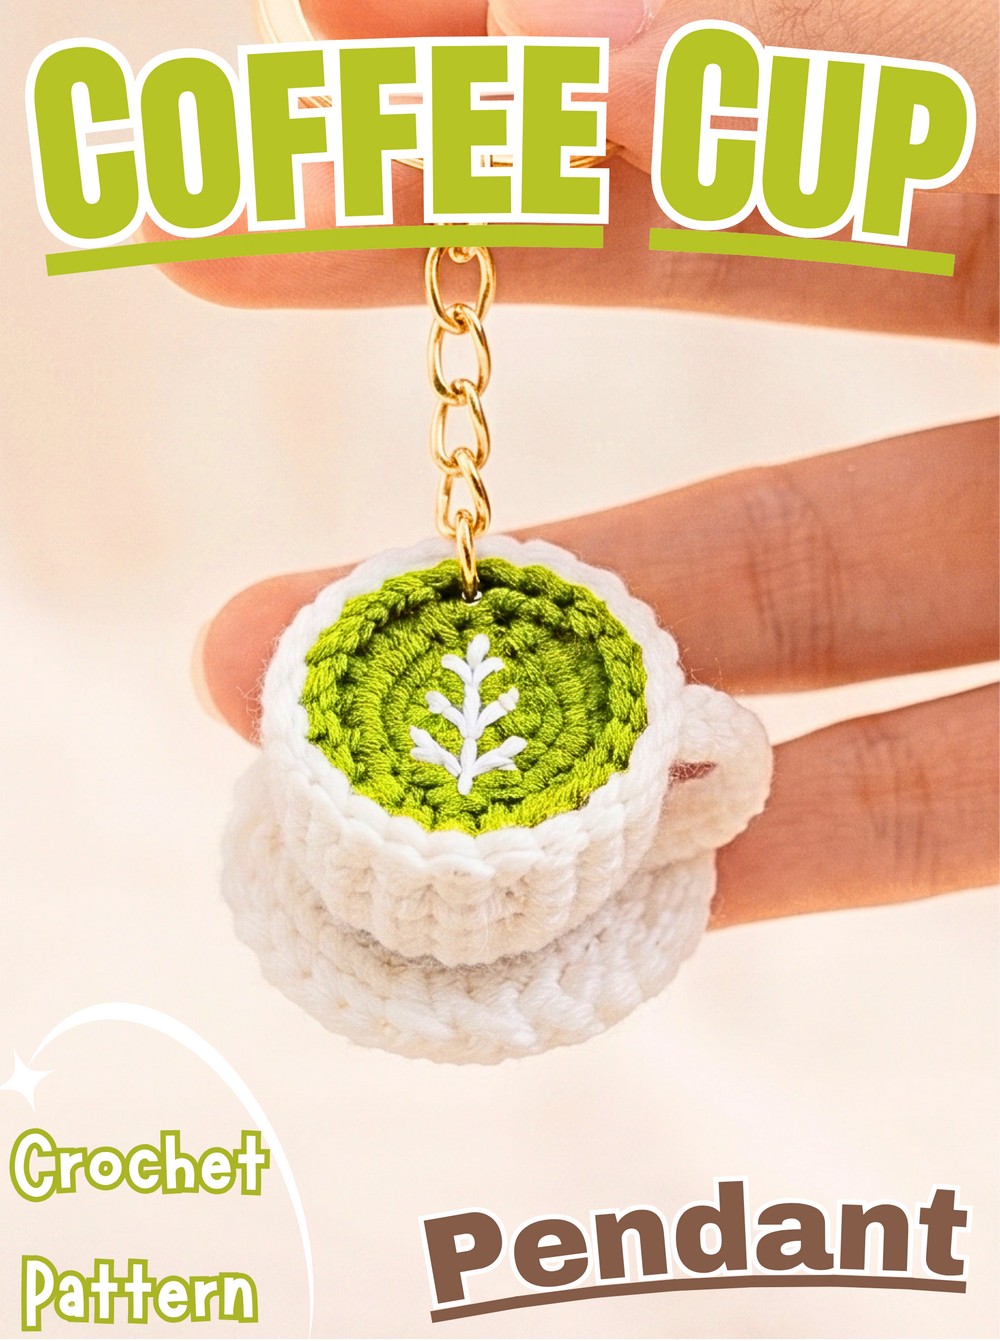
Miniature crochet pieces come with their own challenges, especially when small circles need to become neat, upright shapes. This coffee cup design uses simple single crochet rounds and a back-loop ridge to shape its body, while contrasting yarn turns the top into a tiny latte or matcha drink.
Follow the pattern to crochet the saucer, build the cup walls, form its handle, and stitch a delicate leaf design onto the coffee surface. Then assemble the pieces with light stuffing and secure the pendant hardware to create a tiny café-inspired accessory with plenty of room for personal touches.
Credit Crochet Joy
Materials & Tools
Yarn: 4-ply combed cotton yarn in two colors:
White: Cup, saucer, handle, and latte art embroidery
Dark brown or matcha green: Coffee or latte surface
Crochet hook: 1.8 mm
Tapestry or yarn needle: For weaving in ends
Fine embroidery needle: Or a small yarn needle for latte art
Sharp scissors
Tweezers: For positioning the stuffing
Fiberfill stuffing
Hot glue gun and glue sticks
Pendant hardware: Jump ring, keychain clasp, split ring, or pendant ring
Finished Size & Customization Ideas
– Finished dimensions: Approximately 1.2 inches (3 cm) wide, including the saucer and handle, and 0.8 inches (2 cm) tall.
Choose Your Mini Drink
Espresso or mocha: Use dark brown yarn for the drink surface.
Matcha latte: Choose matcha green for a café-inspired green tea cup.
Milk tea: Try light brown yarn for a softer tea color.
Strawberry milk: Use blush pink yarn for a playful variation.
Personalize the Latte Art
Leaf or rosetta: Embroider a central stem with small diagonal branches.
Tiny heart: Use two curved or angled stitch groups to suggest a heart shape.
Smiley face: Add small embroidered eyes and a curved smile.
For a coordinated accessory, pair the coffee cup with a miniature crocheted cake charm on the same split ring.
Pattern Abbreviations & Terminology
US crochet terms
MR: Magic ring
ch: Chain stitch
sc: Single crochet
sl st: Slip stitch
inc: Single crochet increase; work 2 sc into the same stitch
BLO: Back loop only
[ ]: Stitch count at the end of the round
Step-by-Step Crochet Coffee Cup Pendant Instructions
The pendant has three crocheted components: a flat white saucer, a small cup with a handle, and a colored drink disc. The cup is worked in joined rounds, with one back-loop-only round creating a ridge that helps define the bottom edge.
Step 1: Crochet the White Saucer
The saucer begins as a small circle and expands to 30 stitches. Keep your increases even so the finished piece sits flat beneath the cup.
Work in joined rounds. At the beginning of each round, ch 1; it does not count as a stitch. Finish each round with a sl st into the first sc, then ch 1 to prepare for the next round.
Round 1
Make a magic ring.
Work 6 sc into the ring.
Pull the ring tight.
Sl st into the first sc to join, then ch 1.
Stitch count: 6 sts.
Round 2
Work 2 sc into each stitch around.
Sl st into the first sc to join, then ch 1.
Stitch count: 12 sts.
Round 3
Repeat
(1 sc, inc)six times around.Sl st into the first sc to join, then ch 1.
Stitch count: 18 sts.
Round 4
Repeat
(1 sc, inc, 1 sc)six times around.Sl st into the first sc to join, then ch 1.
Stitch count: 24 sts.
Round 5
Repeat
(3 sc, inc)six times around.Sl st into the first sc to join.
Stitch count: 30 sts.
Fasten off and pull the yarn through. Thread the tail onto a tapestry needle and weave it into the wrong side of the saucer.
Check the shape: Place the saucer on a flat surface. If its edge curls or forms ruffles, check your stitch tension and increase placement before attaching the cup.

Step 2: Crochet the White Cup Base
The cup begins with the same first three rounds as the saucer, but the next round is worked through the back loops only to create a defined ridge.
Round 1
Make a magic ring.
Work 6 sc into the ring.
Pull tight, sl st into the first sc, and ch 1.
Stitch count: 6 sts.
Round 2
Work 2 sc into each stitch around.
Sl st into the first sc and ch 1.
Stitch count: 12 sts.
Round 3
Repeat
(1 sc, inc)six times around.Sl st into the first sc and ch 1.
Stitch count: 18 sts.
Step 3: Form the Bottom Ridge and Cup Walls
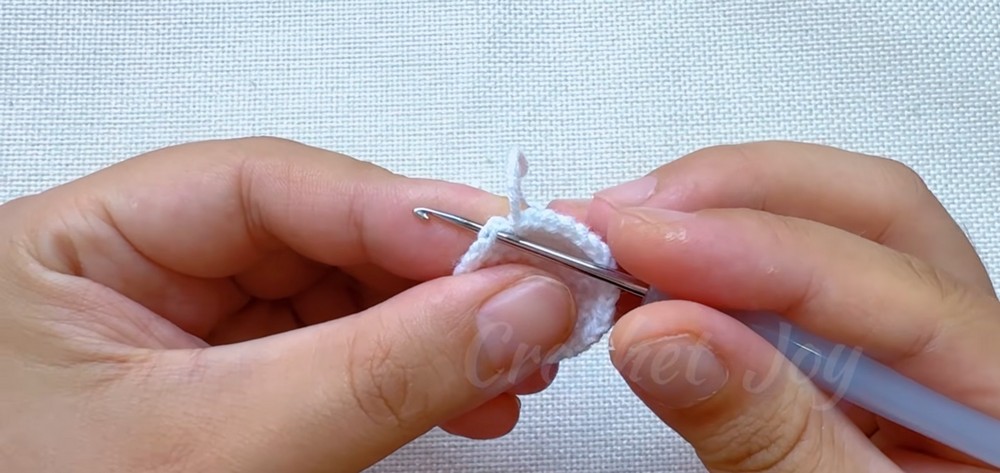
This part turns the small circle into an upright cup. The BLO round leaves the unused front loops visible as a ridge, while the following rounds build the sides.
Round 4 – Bottom ridge
Working in BLO only, make 1 sc in each stitch around.
Sl st into the first sc to join, then ch 1.
Stitch count: 18 sts.
Rounds 5-7 – Cup walls
Work 1 sc in each stitch around, using both loops as normal.
Sl st into the first sc to join.
Ch 1 at the end of Rounds 5 and 6 to begin the next round.
At the end of Round 7, join with a sl st into the first sc, but do not fasten off.
Stitch count: 18 sts per round.
Keep your tension firm and consistent so the cup walls stand upright rather than flaring outward. The cup should be small and sturdy enough to hold a little stuffing beneath the drink disc.

Step 4: Make the Cup Handle
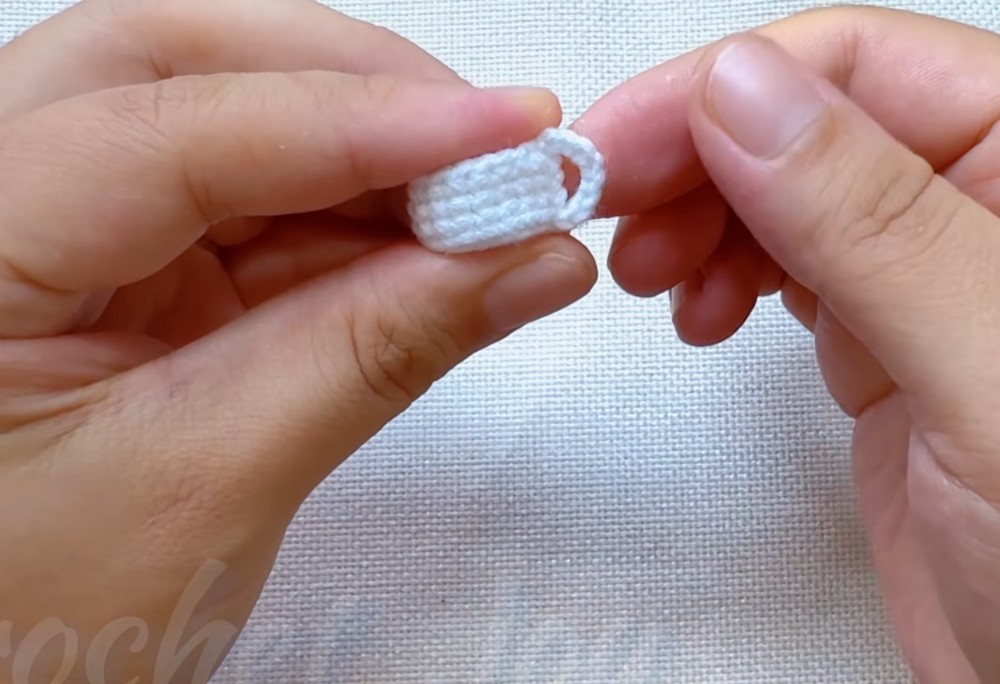
The handle is formed from a chain attached between the upper rim and the unused front loops along the bottom ridge.
Starting from the working loop at the top of Round 7, ch 8.
Bring the chain down along the side of the cup, aligning it vertically with the ridge formed by Round 4.
Insert the hook from bottom to top into a remaining front loop along the Round 4 ridge.
Work 1 sl st to attach the chain.
Sl st into the adjacent front loop for extra stability.
Pull through, cut the yarn leaving a short tail, and weave the end into the inside of the cup wall.
Arrange the chain into a small, even loop before securing the end. It should resemble a miniature cup handle without pulling the side of the cup out of shape.
Step 5: Crochet the Coffee or Matcha Surface
Choose dark brown yarn for coffee or matcha green for a tea latte. This small disc sits at the top of the cup and provides a flat surface for the embroidered design.
Round 1
Make a magic ring.
Work 6 sc into the ring.
Pull tight, sl st into the first sc, and ch 1.
Stitch count: 6 sts.
Round 2
Work 2 sc into each stitch around.
Sl st into the first sc and ch 1.
Stitch count: 12 sts.
Round 3
Repeat
(1 sc, inc)six times around.Sl st into the first sc to join.
Stitch count: 18 sts.
Fasten off and weave in the tail neatly. Keep the disc flat so it will sit evenly inside the cup rim.
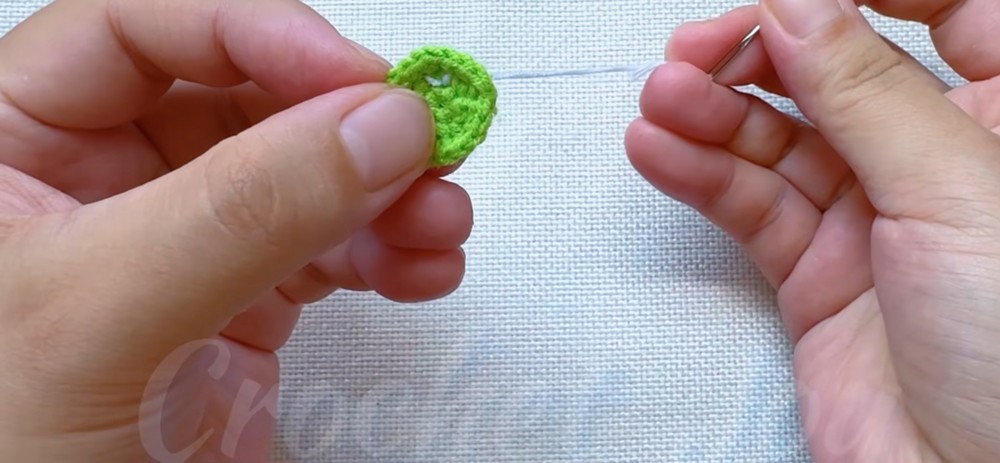
Step 6: Embroider the Latte Art
A small white leaf or rosetta design gives the drink surface its café-inspired finish. Use white yarn or embroidery thread and a fine needle.
Bring the needle from the back to the front near the lower center of the disc.
Make a straight stitch upward to form the central stem.
Add two or three pairs of short diagonal stitches branching upward from either side of the stem.
Finish with a small straight stitch near the top to complete the leaf-like design.
Knot and trim the thread on the reverse side, keeping the ends flat.
Because the disc is small, delicate stitches work better than thick embroidery. If the pattern looks crowded, shorten the branches or leave slightly more space between them.
Step 7: Lightly Stuff the Cup
Before closing the cup with the drink disc, add a small amount of fiberfill to give the miniature body some shape.
Use tweezers to place a small puff of fiberfill inside the cup.
Spread it evenly around the interior.
Keep the stuffing approximately 1–2 mm below the upper rim.
Check that the cup walls remain upright and the top edge is not stretched.
Use just enough filling to support the shape. Too much stuffing can push the drink disc upward or prevent it from sitting flush with the rim.
Step 8: Attach the Coffee Surface Disc
The embroidered disc closes the cup and creates the visible drink surface.
Apply a small amount of hot glue along the underside edge of the coffee disc or around the upper inner wall of the cup.
Position the disc above the opening with the embroidered side facing upward.
Press it gently into the rim until it sits flush and level.
Hold it in place until the adhesive sets.
Use glue sparingly to avoid visible residue around the rim. Take care when handling hot glue, and allow it to cool completely before moving to the next step.
Step 9: Mount the Cup onto the Saucer
The saucer gives the miniature cup a finished base and makes the pendant resemble a tiny café drink.
Apply hot glue across the bottom of the cup.
Center the cup over the white saucer.
Press down gently but firmly until the adhesive sets.
Check that the saucer remains flat and that the cup stands upright.
If the cup looks off-center, adjust its position before the glue hardens. A balanced placement makes the tiny accessory look more polished.
Step 10: Attach the Pendant Hardware
Complete the miniature coffee cup by adding a jump ring and your chosen clasp or keyring.
Open a metal jump ring carefully.
Slip it through the top curve of the cup handle. If needed, attach it through the upper rim stitches just behind the handle.
Close the jump ring securely.
Attach a lobster clasp, ball chain, split keyring, or pendant ring.
Check that the metal ring is closed completely and that the crochet handle is secure before attaching the pendant to a bag, planner, or set of keys.

Finishing Touches
Inspect the cup, saucer, and handle before using your pendant.
Weave in any loose yarn ends.
Make sure the coffee disc is level with the rim.
Check that the handle remains attached at both ends.
Confirm that the saucer lies flat.
Let all adhesive cool and set fully before handling.
Final Result
Your miniature crochet coffee cup pendant is complete. The white cup and saucer create a clean base for the contrasting coffee or matcha surface, while the tiny embroidered rosetta adds a distinctive finishing detail. Experiment with different drink colors and latte-art designs to create a matching set of café-inspired charms.