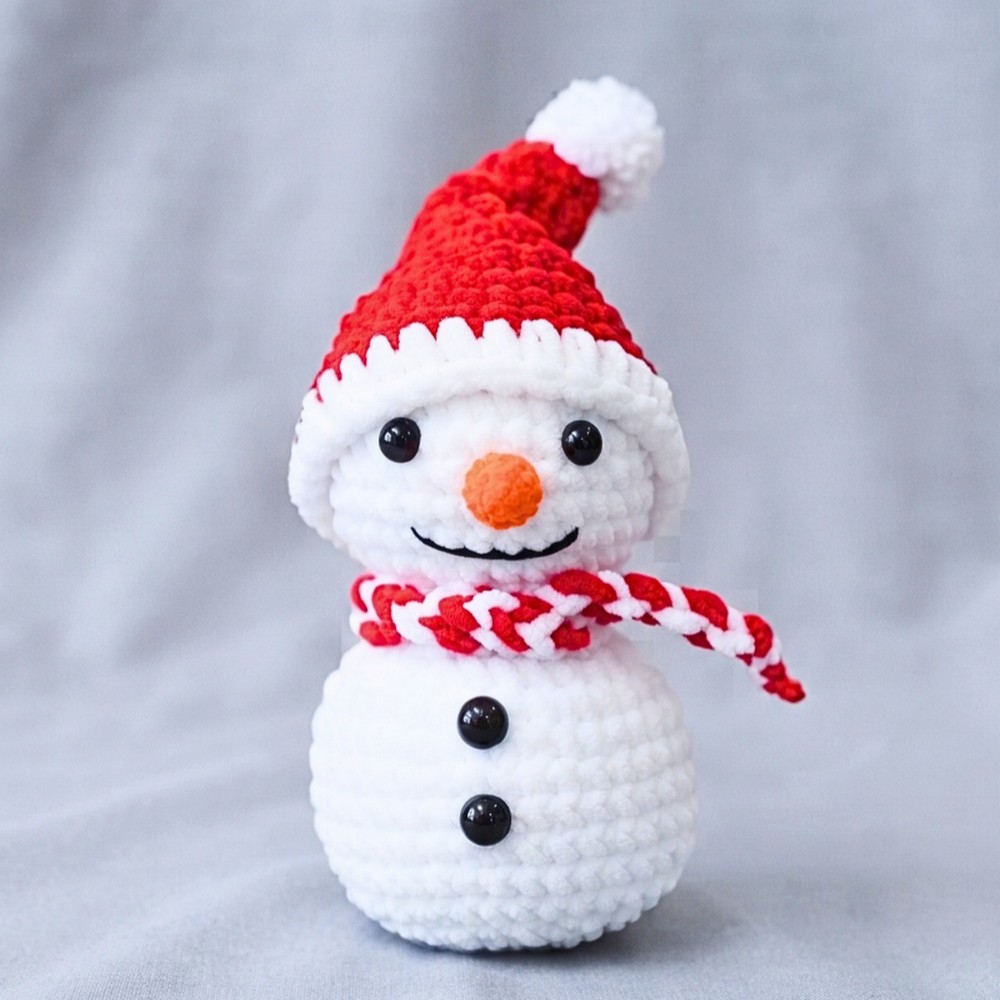
This little crochet snowman brings Christmas cheer with a rounded white body, a festive hat, a braided two-color scarf, and a sweet smiling face.
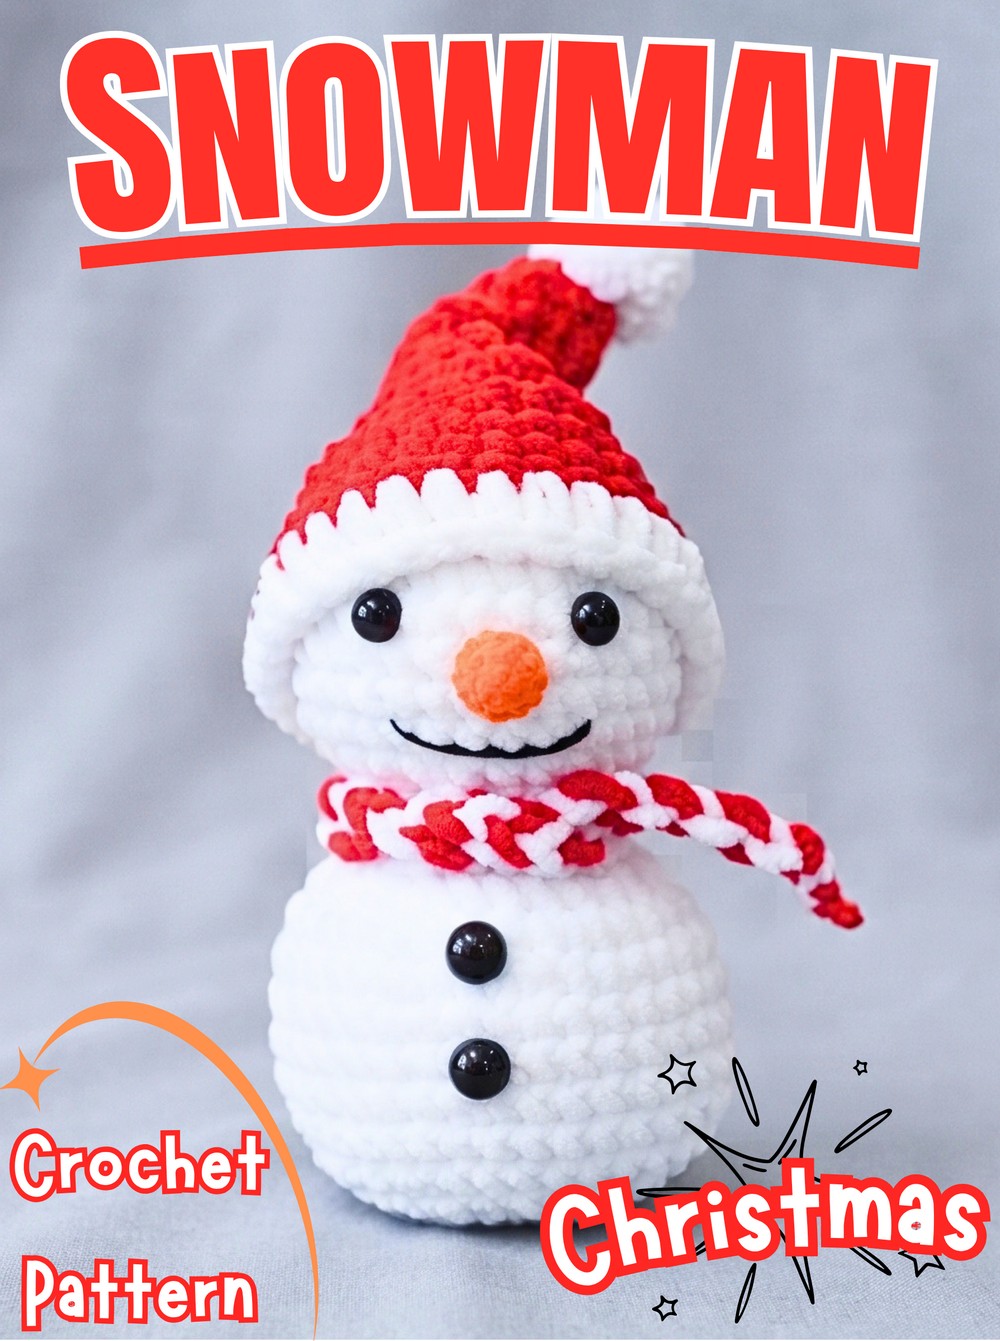
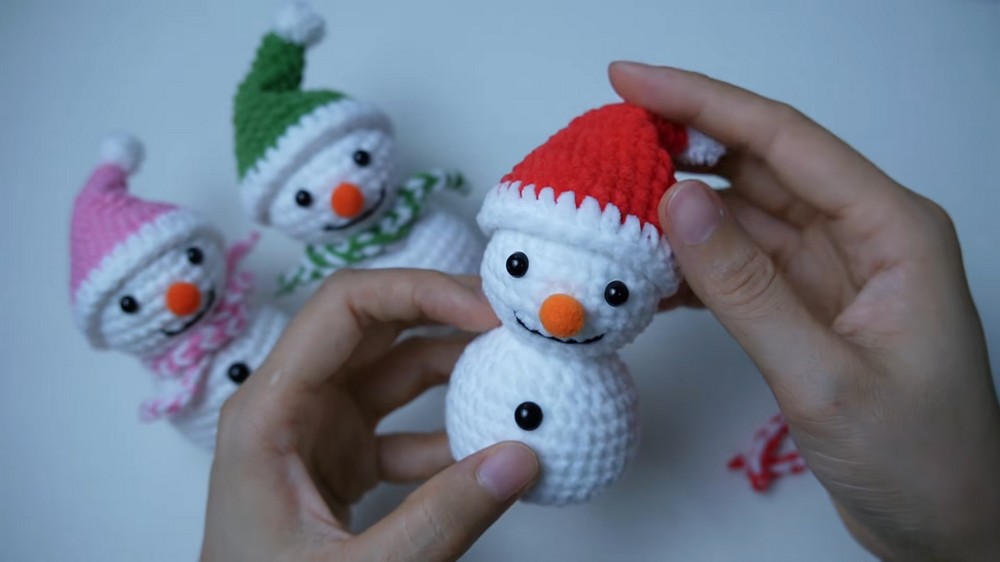
A pair of tiny crochet snowman can make a Christmas display feel even more welcoming. One wears a red Santa hat, while the other can be styled in green for a different festive look. Their orange pom-pom noses, black smiles, and little buttons give them the familiar crochet snowman charm that looks lovely on a holiday shelf or beside a decorated tree.
Even if you are new to crochet, this snowman uses simple stitches and clearly separated parts. You will crochet the head and body as one piece, make the small Santa hat, create a two-color chain scarf, and finish the face with a few easy details. The tutorial includes a step-by-step video to make shaping and assembly easier to follow.
Credit Young DIY
Why This Snowman Is Perfect for Christmas
This mini snowman combines classic Christmas colors with a soft, rounded shape. Its red Santa hat, white brim, orange nose, and black smile create a traditional holiday look, while changing the hat and scarf colors gives you room to make each snowman unique.
The head and body are crocheted directly together, so you do not need to sew two large body sections together. The hat and scarf are made separately and attached at the end. These manageable parts make the pattern suitable for beginners who are comfortable with basic crochet stitches and want to practice increases, decreases, and simple finishing techniques.
Materials and Tools Needed
- Main yarn: White 5-ply milk cotton yarn or thin chenille yarn.
- Hat yarn: Red yarn for the Santa hat. Green can be used for a color variation.
- Scarf yarn: Two contrasting colors of your choice.
- Nose: One orange pom-pom, approximately 1 cm.
- Hat tip: One small white pom-pom.
- Eyes: Two 6 mm plastic safety eyes.
- Body buttons: Small plastic safety eyes or buttons, as shown in the supplied tutorial.
- Crochet hook: 2.5 mm hook.
- Stuffing: Fiberfill.
- Tools: Hot glue gun, darning or tapestry needle, scissors, and a stitch marker.
The supplied tutorial uses milk cotton or thin chenille yarn with a 2.5 mm hook. Your finished snowman may be larger or smaller if you change the yarn thickness or hook size.
Safety note: Plastic safety eyes, small buttons, pom-poms, and hot-glued pieces can become choking hazards if they detach. For young children, use embroidered eyes and securely stitched details instead, and keep the finished snowman out of reach of children who may mouth small parts.
Finished Size and Customization
The supplied pattern describes the snowman as a small-to-medium amigurumi suitable for tree ornaments, Christmas home decor, and gifts. It does not give an exact height or width.
You can adjust the finished appearance in a few simple ways:
- Use 5-ply milk cotton yarn for a more defined stitch texture.
- Choose thin chenille yarn for a softer, plush appearance.
- Make the hat red for a traditional Santa style or green for another festive version.
- Change the two scarf colors to match your Christmas decorations.
- Make a matching pair with different hat and scarf combinations.
Crochet Abbreviations
US crochet terminology is used throughout.
- st / sts: Stitch / stitches
- ch: Chain
- mr: Magic ring
- sc: Single crochet
- hdc: Half double crochet
- inc: Single crochet increase – work 2 sc into the same stitch
- dec: Single crochet decrease using the front loops only of the next 2 stitches
- sl st: Slip stitch
- FLO: Front loop only
Part 1: Crochet the Snowman Head and Body
The head and body are worked as one continuous piece of shaping, so there is no need to crochet a separate head and sew it onto the body. The supplied tutorial uses joined rounds, ending each round with a slip stitch and beginning the next with a chain 1 unless the instructions say otherwise.
Head
Round 1: Make a magic ring with white yarn and work 6 sc into the ring. Pull the yarn tail tightly to close the center, then join with a slip stitch into the first stitch. (6 sts)
Round 2: Ch 1 and work 1 sc into the same joining stitch. Place a stitch marker in this stitch. Work 1 inc in each stitch around. Skip the small extra slip stitch from the previous round and sl st into the first marked stitch to join. (12 sts)
Round 3: Ch 1. Work 1 sc in the first stitch and 1 inc in the next stitch. Repeat (1 sc, 1 inc) six times around, then sl st to join. (18 sts)
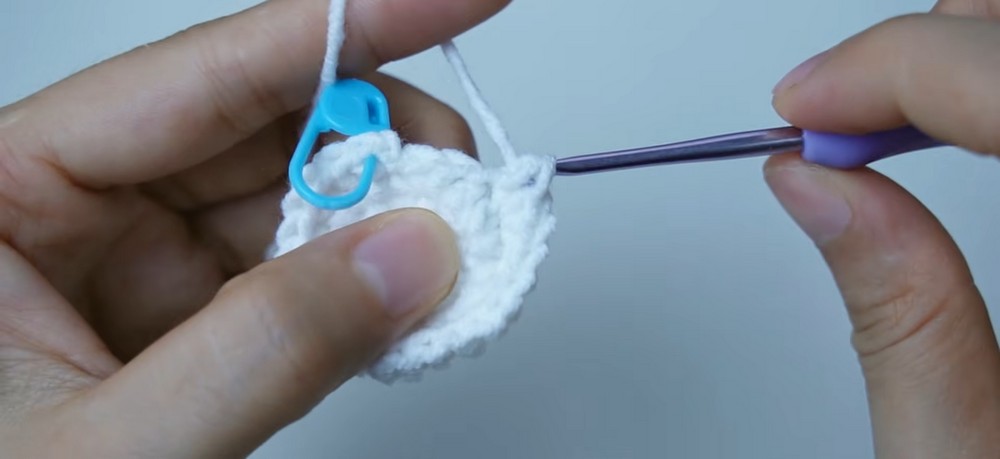
Round 4: Ch 1. Work 2 sc, 1 inc six times around, then sl st to join. (24 sts)
Round 5: Ch 1. Work 3 sc, 1 inc six times around, then sl st to join. (30 sts)
Rounds 6-9: Ch 1 and work 1 sc in every stitch around. Sl st to join at the end of each round. (30 sts per round)
These rounds build the height of the head without increasing its width. Keep your stitches even so the head stays rounded.
Round 10: Ch 1. Work 3 sc, 1 dec around, repeating the pattern six times in total, then sl st to join. (24 sts)
Round 11: Ch 1. Work 2 sc, 1 dec six times around, then sl st to join. (18 sts)
Round 12: Ch 1. Work 1 sc, 1 dec six times around, then sl st to join. (12 sts)
Stuff the head: Add fiberfill before moving on to the body. Use small amounts at a time and distribute the stuffing evenly so the head remains round rather than lumpy.
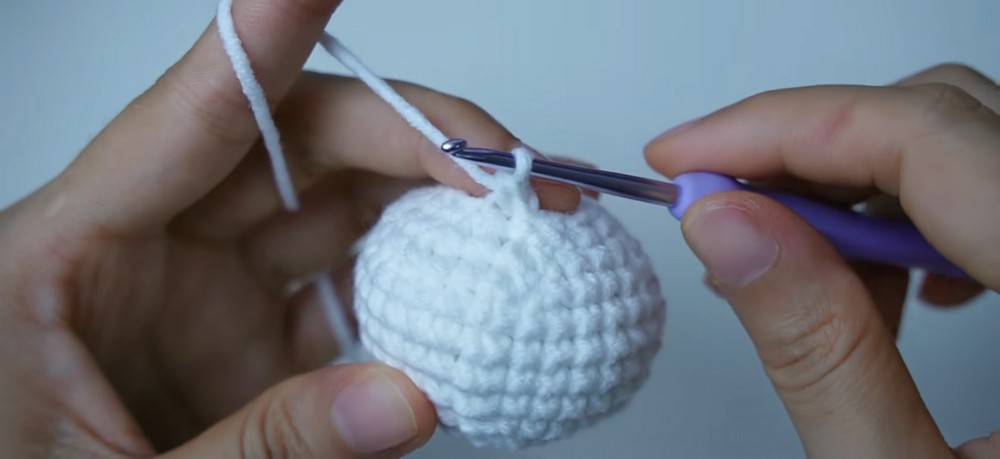
Body – Continue Directly from the Head
Round 13: Ch 1 and work this entire round in the FLO. Repeat (1 sc, 1 inc) six times around, then sl st to join. (18 sts)
The front-loop-only stitches create a ridge between the head and body, helping define the snowman’s shape.
Round 14: Ch 1. Working through both loops, repeat (2 sc, 1 inc) six times around, then sl st to join. (24 sts)
Round 15: Ch 1. Repeat (3 sc, 1 inc) six times around, then sl st to join. (30 sts)
Round 16: Ch 1. Repeat (4 sc, 1 inc) six times around, then sl st to join. (36 sts)
Rounds 17-21: Ch 1 and work 1 sc in every stitch around for five rounds. Sl st to join each round. (36 sts per round)
These straight rounds give the snowman’s body its rounded width. Check the stitch count at the end of each round before continuing.
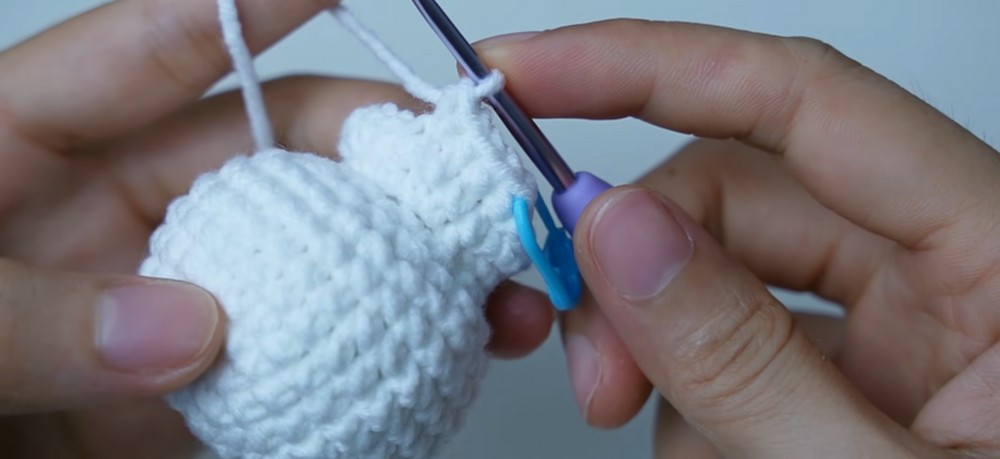
Round 22: Ch 1. Work 7 sc, 1 dec four times around, then sl st to join. (32 sts)
Round 23: Ch 1. Work 2 sc, 1 dec eight times around, then sl st to join. (24 sts)
Round 24: Ch 1. Work 1 sc, 1 dec eight times around, then sl st to join. (16 sts)
Stuff the body: Fill the lower section firmly enough to hold its shape, but avoid overstuffing it so much that the stitches stretch apart.
Round 25: Work 8 consecutive decreases around. Sl st to join, ch 1, and fasten off, leaving a long tail for closing. (8 sts)
Thread the tail onto a darning needle and pass it through the front loops of all 8 stitches. Pull the yarn firmly to close the opening. Insert the needle through the center and out through a few other places two or three times to secure and bury the tail.
Part 2: Make the Christmas Santa Hat
The hat is crocheted separately, beginning with a small ring and gradually increasing to form a cone. Red yarn creates the traditional Santa look; green yarn can be substituted for a different Christmas variation.
Round 1: With the hat yarn, make a magic ring and work 6 sc into it. Pull closed and mark the last stitch. (6 sts)
Round 2: Work 1 sc in each stitch around. (6 sts)
Round 3: Repeat (1 sc, 1 inc) three times around. (9 sts)
Round 4: Work 1 sc in each stitch around. (9 sts)
Round 5: Repeat (2 sc, 1 inc) three times around. (12 sts)
Round 6: Repeat (3 sc, 1 inc) three times around. (15 sts)
Round 7: Repeat (4 sc, 1 inc) three times around. (18 sts)
Round 8: Repeat (5 sc, 1 inc) three times around. (21 sts)
Round 9: Repeat (6 sc, 1 inc) three times around. (24 sts)
Round 10: Repeat (7 sc, 1 inc) three times around. (27 sts)
Round 11: Repeat (8 sc, 1 inc) three times around. (30 sts)
Rounds 12-13: Work 1 sc in every stitch around for two rounds. Sl st to join, ch 1, and fasten off the hat yarn. (30 sts per round)
Add the White Hat Brim
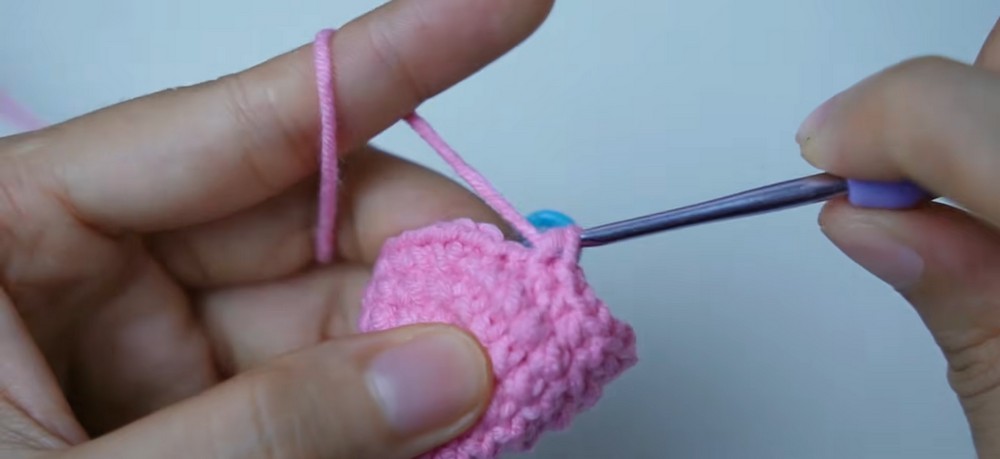
Insert the hook into the first stitch and attach white yarn.
Round 14: Ch 2, then carry the yarn tails along as you work 1 hdc in every stitch around. Sl st to join. (30 hdc)
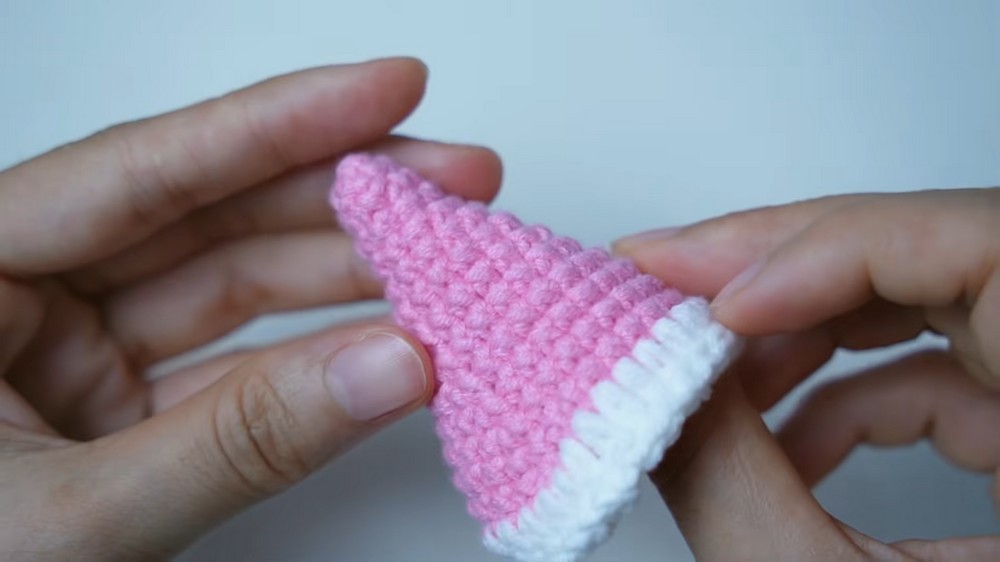
Round 15: Ch 1 and work 1 sl st in each stitch around. Sl st to join, ch 1, fasten off, and weave in the ends. (30 sl sts)
Glue a small white pom-pom to the tip of the hat. Fold the top portion gently to create a soft crease, then position the hat on the snowman’s head. The supplied tutorial uses glue to attach the hat; stitching it in place is an alternative if you prefer not to use hot glue.
Part 3: Crochet the Two-Color Scarf
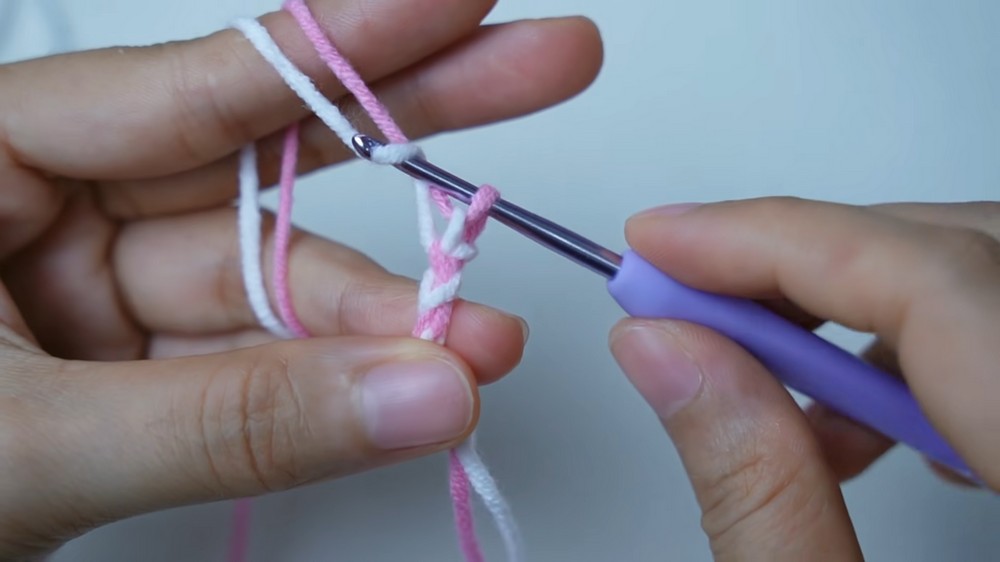
This scarf uses two strands of contrasting yarn and a simple chain technique. The alternating colors give the scarf a braided or striped appearance without needing a complicated stitch pattern.
- Hold two contrasting strands together and make a slip knot.
- Keep the strands separate as you work. Make 1 chain with strand A, then 1 chain with strand B.
- Continue alternating between the two strands until the scarf reaches the length you want.
- Cut the yarn and tie a secure knot at the end.
Check the length by wrapping the scarf loosely around the snowman’s neck before finishing it. It should sit comfortably without covering the face or pulling tightly around the body.
Wrap the scarf around the neck and secure it in place, following the supplied tutorial. Arrange the two colors so both remain visible from the front.
Part 4: Add the Nose, Smile, and Buttons
The small face details give the snowman its cheerful expression. Arrange them before gluing or sewing anything permanently so you can check the placement.
Attach the Eyes
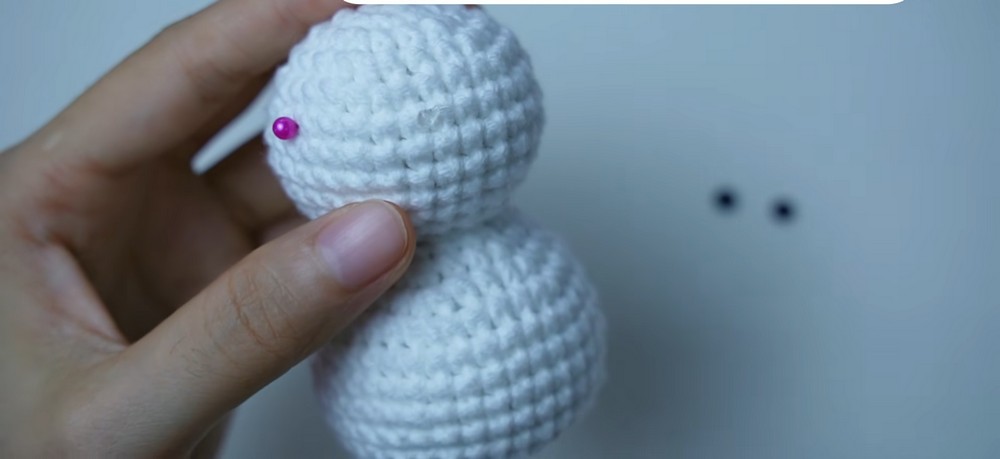
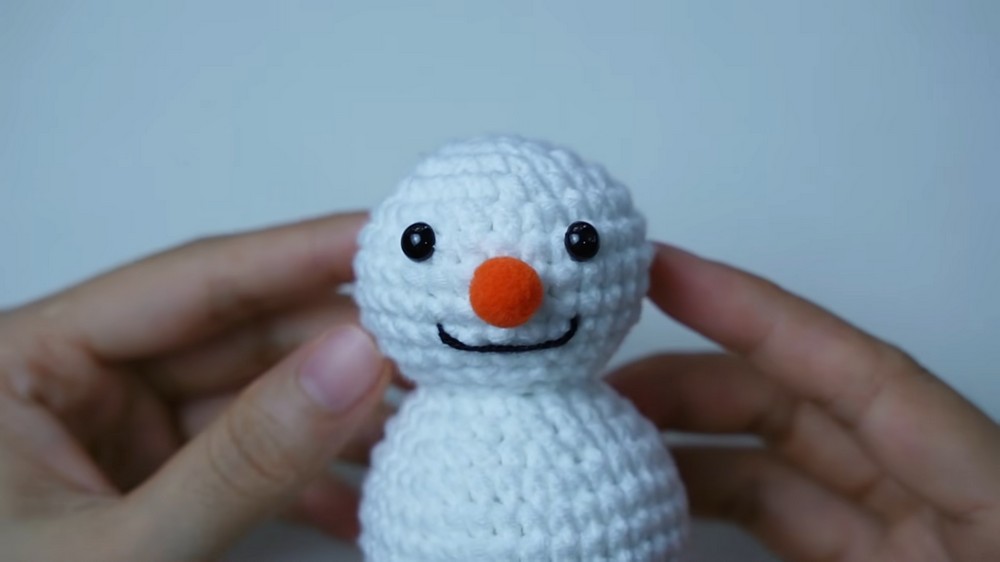
The supplied tutorial places two 6 mm plastic safety eyes on Round 6 of the head, approximately five stitches apart. Position both eyes evenly on either side of the center line.
The source demonstrates attaching the eyes with hot glue. If you are using safety eyes with their original locking backs, follow the manufacturer’s attachment method instead. For a child-safe version, embroider the eyes rather than using plastic pieces.
Add the Orange Nose
Place the 1 cm orange pom-pom on Round 7, centered between the eyes. The tutorial attaches it with hot glue. Allow the glue to cool fully and check that the nose is secure before handling the snowman.
Embroider the Smile
Separate two strands of black yarn and use a darning needle to embroider a small smile across Round 9. Keep the stitches small and evenly spaced so the smile looks neat against the white yarn.
Tie off the yarn inside the head and tuck the tail out of sight.
Attach the Body Buttons
The supplied tutorial uses small plastic safety eyes or buttons as body buttons. Arrange them down the center front of the body, leaving a little space between each one.
If you use glue, let it set completely before moving the snowman. For a version intended for young children, choose securely embroidered buttons instead of small detachable pieces.
Assembly: Bring the Snowman Together
Once the body, hat, scarf, and face details are ready, complete the final assembly.
- Close and shape the body. Confirm that the bottom opening is closed securely and the stuffing is evenly distributed.
- Position the hat. Place the hat on the head, adjust the fold at the top, and secure it with glue or stitches.
- Finish the face. Check that the eyes, nose, and smile are centered and balanced.
- Add the body buttons. Place them in a neat vertical line down the front.
- Wrap the scarf. Set the two-color scarf around the neck and secure it so the ends sit neatly.
- Inspect the finished snowman. Weave in any loose yarn ends and make sure all details are firmly attached.
A final front-facing check is helpful: the eyes should sit at the same height, the nose should be centered, and the scarf should not hide the smile.
Red Hat or Green Hat: Christmas Variations
A red hat with a white brim gives the snowman a classic Santa-inspired look. A green hat offers a fresh alternative that works well with red, cream, gold, or striped scarf colors.
You can make a matching pair by keeping the white body and orange nose the same while changing the hat and scarf colors. The supplied source gives a red Santa hat pattern; the green version is a color substitution rather than a separate hat pattern.
Christmas Decor and Gift Ideas
Display the snowman on a mantel, place it beside a small Christmas tree, or add it to a festive shelf with pinecones and seasonal greenery. Its compact amigurumi shape also makes it a thoughtful handmade gift for someone who enjoys crochet decorations.
For a coordinated display, make one snowman with a red hat and another with a green hat, then give each a different two-color scarf. If you want to use one as a tree ornament, add a securely attached hanging loop suited to the weight of the finished piece; this attachment is not included in the supplied pattern instructions.
A Final Finishing Note
The best part of this snowman is how a few familiar details turn a simple crocheted shape into a festive character. Take your time with the decreases, keep the face centered, and adjust the scarf before securing it. The result is a small handmade decoration that can bring a little extra Christmas cheer to your seasonal display.