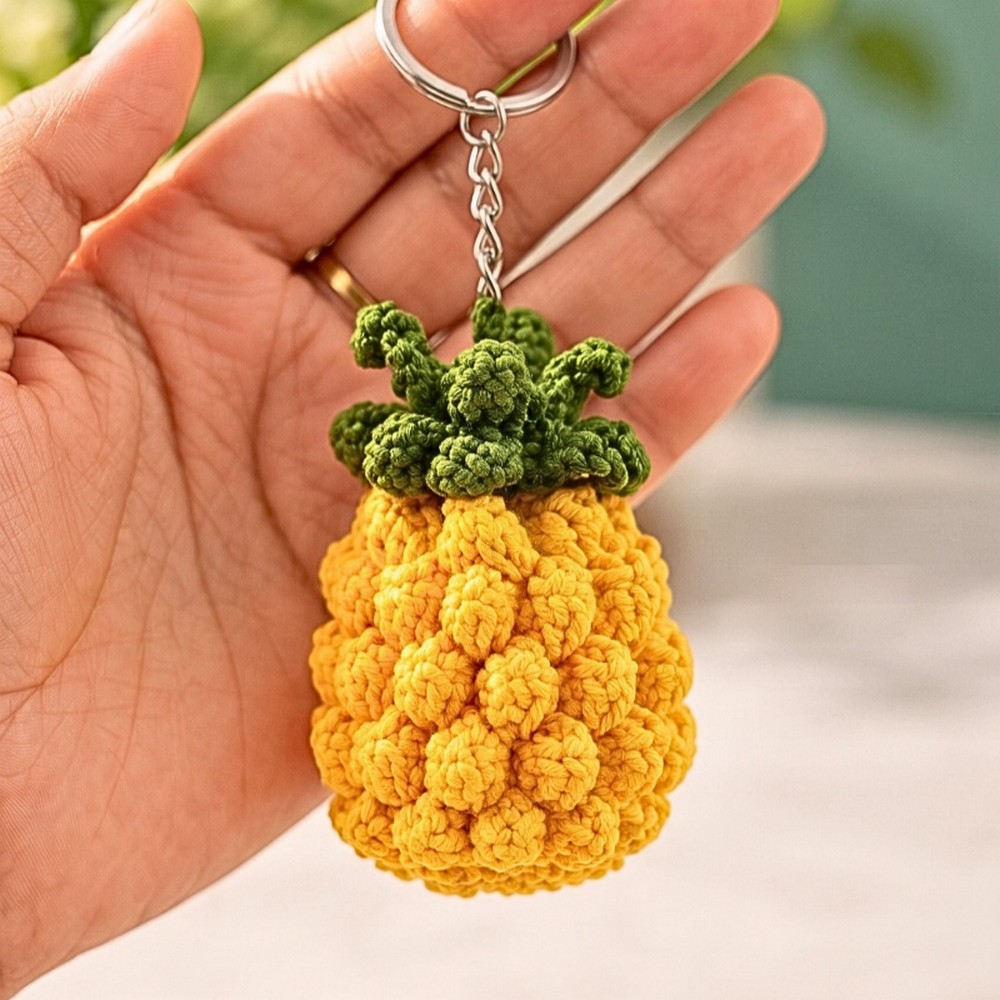
Looking for a cheerful little handmade accessory? This crochet pineapple features a bumpy yellow body, two layers of green leaves, and a cute tropical look.

Golden yellow yarn gives this crochet pineapple a cheerful, textured body, while two full layers of olive green leaves rise from the top. Raised popcorn stitches create its bumpy, fruit-like surface, giving this small crochet charm a playful, tropical look.
Made with 4-ply cotton yarn and a 2 mm hook, this crochet keychain is a sweet accessory for keys, backpacks, or handbags. The pattern uses a magic ring, popcorn stitches, simple decreases, and chain-based leaves, so each crochet section builds on the last before you add fiberfill and secure the keychain ring.
Credit: Knit Bucket By Pinki Mehta
Materials & Tools Needed
- Yarn: 4-ply cotton yarn in yellow for the pineapple body and olive green for the leaves.
- Crochet Hook: 2 mm.
- Fiberfill: For stuffing the pineapple body.
- Tapestry Needle: For weaving in loose ends and securing the finished details.
- Keychain Ring: For attaching the pineapple to keys or using it as a bag charm.
- Scissors: For cutting yarn when needed.
Crochet Abbreviations
- MR: Magic ring
- ch: Chain
- sc: Single crochet
- dc: Double crochet
- hdc: Half double crochet
- sl st: Slip stitch
- st(s): Stitch(es)
- yo: Yarn over
Step-by-Step Pineapple Keychain Pattern
Part 1: Crochet the Yellow Pineapple Body
Work the body in rounds, starting with a small circle and building its distinctive bumpy texture with popcorn stitches. Use the same yellow yarn throughout this section.
Round 1 – Make the Starting Ring
- Create a magic ring with yellow yarn.
- Work 6 single crochets into the ring.
- Pull the yarn tail to tighten the center.
- Join with a slip stitch into the first single crochet.
You should have 6 stitches in this round.

Round 2 – Increase the Stitch Count
- Chain 1.
- Work 2 single crochets into every stitch around.
- Continue until all 6 stitches have been increased.
- Join with a slip stitch.
You should now have 12 stitches. This wider round forms the base for the textured pineapple body.

Round 3 – Create the Popcorn Stitches
- Chain 3; this counts as the first double crochet.
- Work 5 more double crochets into the same stitch, giving you 6 double crochets in that stitch group.
- Following the tutorial’s popcorn-stitch method, pull the working loop through the starting stitch group and chain 1 to secure the popcorn.
- Repeat the popcorn stitch in each remaining stitch around.
- Complete 12 popcorn stitches in total.
Each popcorn creates a raised bump on the surface. Keep the stitches consistent so the pineapple develops an even texture.
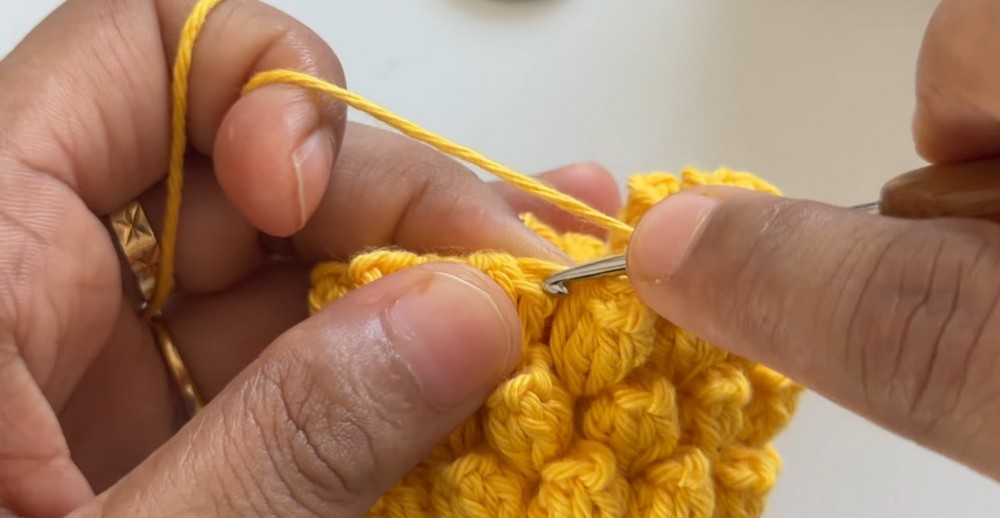
Rounds 4–6 – Build the Textured Body
- Begin the next round according to the tutorial’s joining method.
- Work one popcorn stitch into each chain-1 space between the popcorn stitches from the previous round.
- Continue around the entire body, keeping 12 popcorn stitches in each round.
- Repeat the same process for Rounds 4, 5, and 6.
The repeated popcorn texture gives the yellow body its recognizable pineapple appearance. Check that each round contains 12 popcorn stitches before moving on.
Round 7 – Decrease the Body
- Follow the tutorial’s decrease method, combining the stitch groups around the round.
- Continue decreasing until 6 popcorn stitches remain.
- Join with a slip stitch and fasten off the yellow yarn.
This round narrows the body toward its top. Keep the opening accessible for stuffing and attaching the green leaves.

Part 2: Stuff the Pineapple Body
- Add fiberfill through the opening.
- Distribute the stuffing evenly inside the body, including the lower edges.
- Add enough fiberfill to give the pineapple a firm, rounded shape without stretching the stitches excessively.
- Keep the top accessible so you can work the green leaf base into the opening.
Stuffing before you finish the top helps the small pineapple hold its shape while staying manageable to finish.

Part 3: Make the Green Leaf Base
Switch to olive green yarn for the pineapple crown.
- Attach the green yarn to the top opening of the pineapple.
- Work 6 single crochets around the top opening.
- Join with a slip stitch.
This small ring forms the foundation for both leaf layers. Keep the stitches secure because the keychain ring will eventually be attached near this area.

Part 4: Crochet the First Layer of Leaves
Work each leaf into a chain of 7, using different stitch heights to create a tapered shape.
- Chain 7.
- Skip the first chain.
- Work a slip stitch into the next chain.
- Work 1 single crochet into each of the next 2 chains.
- Work 1 half double crochet into each of the next 2 chains.
- Work 1 double crochet into the last chain.
- Slip stitch into the next stitch on the green base ring to secure the leaf.
- Repeat this sequence around the base until you have made 6 leaves.
The shorter stitches shape one end of each leaf, while the taller stitches give the opposite end more height. Gently spread the leaves as you work so they form a crown around the top.

Part 5: Add the Second Layer of Leaves
The second layer fills the spaces behind the first layer and makes the pineapple crown look fuller.
- Work another round of 6 leaves behind the first layer.
- Follow the same leaf pattern for every leaf: chain 7, skip the first chain, then work a slip stitch, 2 single crochets, 2 half double crochets, and 1 double crochet along the chain.
- Secure each leaf to the base as you did in the first layer.
- Check that the second layer sits behind the first rather than directly covering all the front leaves.
- Fasten off the green yarn and use a tapestry needle to weave in loose ends.
Gently arrange the two layers so the leaves fan out around the pineapple top.
Part 6: Attach the Keychain Ring
- Position the keychain ring at the top of the green leaves.
- Secure it firmly through a sturdy part of the leaf base so it can support the pineapple when hanging.
- Make sure the ring is securely attached before using the charm.
For a bag charm, crochet a longer yarn chain instead and attach it securely to the green top.

Helpful Tip for a Neat Finish
Before attaching the keychain ring, make sure the pineapple is firmly stuffed, the top is secure, and both leaf layers are evenly spread. Attach the ring to the sturdy base rather than a delicate leaf so your finished charm can withstand everyday handling.