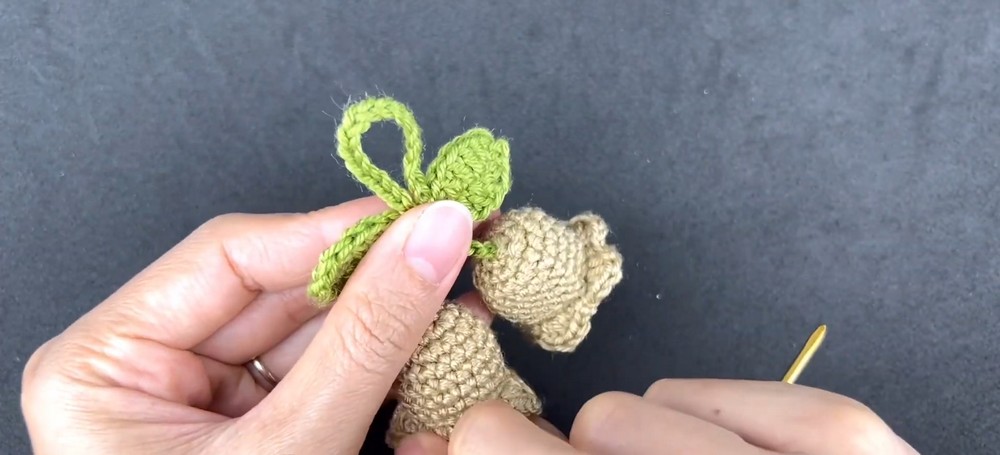
Want a tiny holiday accent with a scalloped bell edge and leafy green bow? These crocheted bells can hang together as ornaments, garlands, or festive charms.
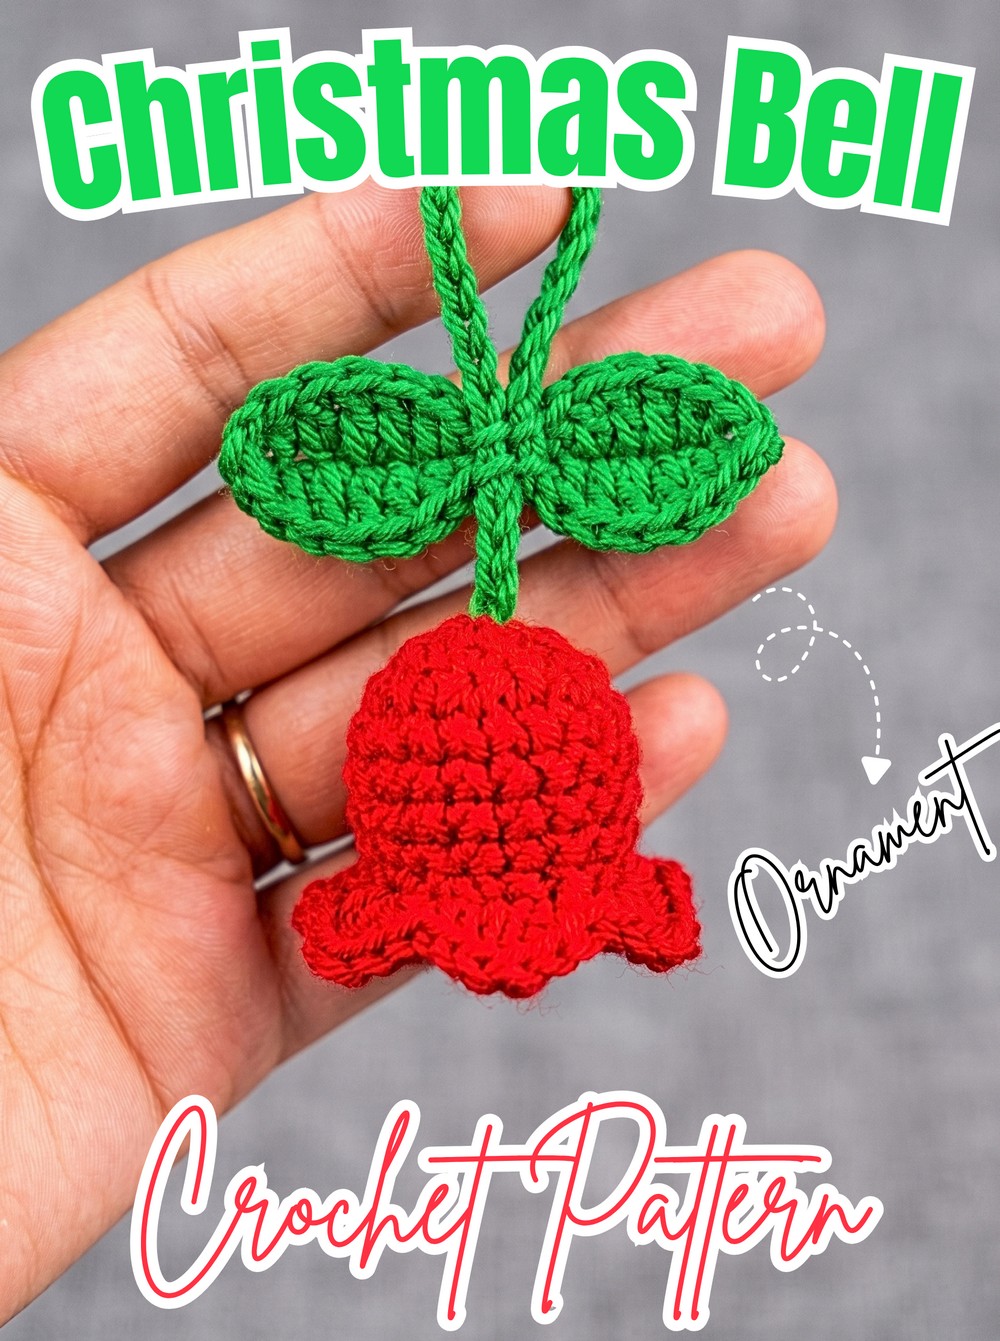
Gold, beige, and green yarn come together in these petite crochet bells for a decoration that feels festive without requiring a complicated stitch pattern. The softly flared ruffle around each bell gives the lower edge its decorative shape, while the green leaf-like crochet piece adds a neat bow at the top.
You’ll make two matching bells in joined rounds, then crochet the leafy bow and a simple hanging cord separately. The pattern is beginner-friendly, with the stitch counts kept clear through the bell shaping and the ruffle worked directly around the final round. You can keep the traditional holiday palette, switch to chunkier yarn for larger bells, or change the colors completely for another season.
Credit Rin Crochet
Materials & Tools
- 4-ply yarn
- Gold or beige for the bells
- Green for the leaves and hanging cord
- Red can be used for an alternative holiday version
- 2.5 mm crochet hook
- Scissors
- Yarn or tapestry needle
Finished Size & Customization
These petite bells are suitable for Christmas tree ornaments, keychain charms, and festive garlands.
For larger bells, switch to a chunkier yarn and a larger crochet hook. The colors can also change the entire feel of the finished decoration. Traditional gold or beige with green keeps it holiday-ready, while deep purple, orange, and black can turn the same basic shape into a spooky Halloween variation.
For a longer decoration, make several pairs of bells in alternating colors and string them along a longer chain.
Abbreviations
- ch: Chain
- sc: Single Crochet
- hdc: Half Double Crochet
- dc: Double Crochet
- sl st: Slip Stitch
- inc: Increase – 2 sc in the same stitch
- st(s): Stitch(es)

Crochet the Bell
Make 2 bells in your chosen bell color.
The bell is worked in joined rounds, so each round ends with a slip stitch and ch 1 before the next round begins. The first eight rounds create the rounded bell body; Round 9 changes the edge into the decorative ruffle.
Round 1: Make a magic ring, work 6 sc into the ring (6 sts), sl st to the first sc to join, then ch 1.
Before continuing, make sure the center ring is pulled closed and that you can clearly identify the first stitch. This gives you a clean starting point for the joined rounds.
Round 2: Work 2 sc in each st around (12 sts), sl st to join, ch 1.
The stitch count doubles here, widening the base of the bell. Count 12 stitches before beginning Round 3 so the increases remain evenly distributed.
Round 3: Work 1 sc in the next st, 2 sc in the following st; repeat around (18 sts), sl st to join, ch 1.
At the end of this round, the bell has reached its full working width. The remaining body rounds maintain these 18 stitches rather than continuing to increase.
Rounds 4-7: Work 1 sc in each st around (18 sts), sl st to join and ch 1 at the end of each round.
These four even rounds build the height of the bell. The sides should begin looking like a small rounded cup rather than a flat circle.
Round 8: Work 1 sc in each st around (18 sts), sl st to join, ch 1.
This is the final plain round before the decorative edge. Check that you still have 18 stitches and that the bell opening is facing outward in preparation for the ruffle.
Shape the Bell Ruffle
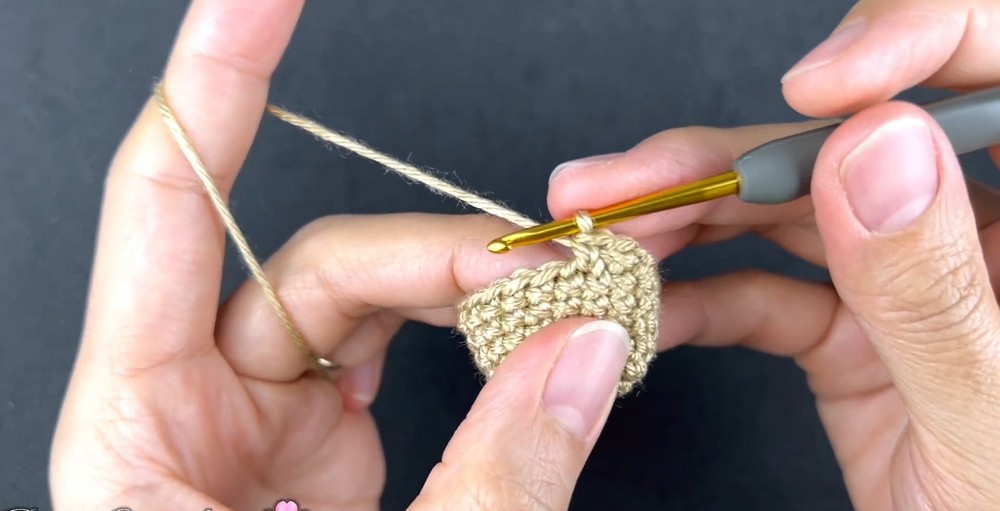
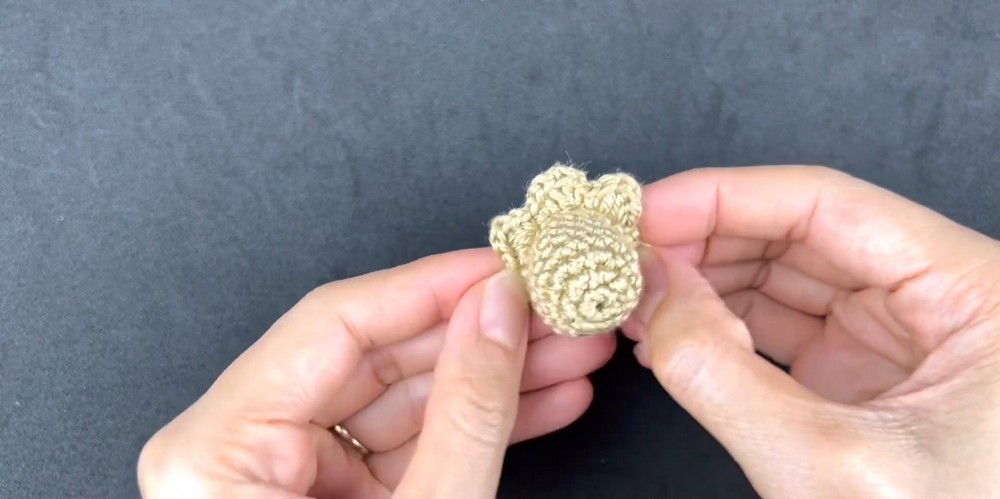
Round 9 creates the scalloped lower edge. Each pair of neighboring stitches receives a different sequence: the first rises from sc to dc, while the next works back down from dc to sc.
Round 9: In the first st, work (1 sc, 1 hdc, 1 dc) all in the same st; in the next st, work (1 dc, 1 hdc, 1 sc) all in the same st; repeat this 2-stitch sequence around the entire edge.
Work carefully into the actual stitches of Round 8 rather than the spaces between them. The taller dc stitches create the high points of the ruffle, while the sc stitches create the lower dips between them.
As you work around, the edge should begin to look softly scalloped. If the ruffle appears uneven, check that each two-stitch repeat has been worked into two consecutive stitches before continuing.
Finish with a sl st into the first stitch of the round, ch 1, and fasten off. Weave the yarn tail securely toward the inside of the bell.
Repeat all bell rounds to make the second matching bell.
Crochet the Green Leaf Bow
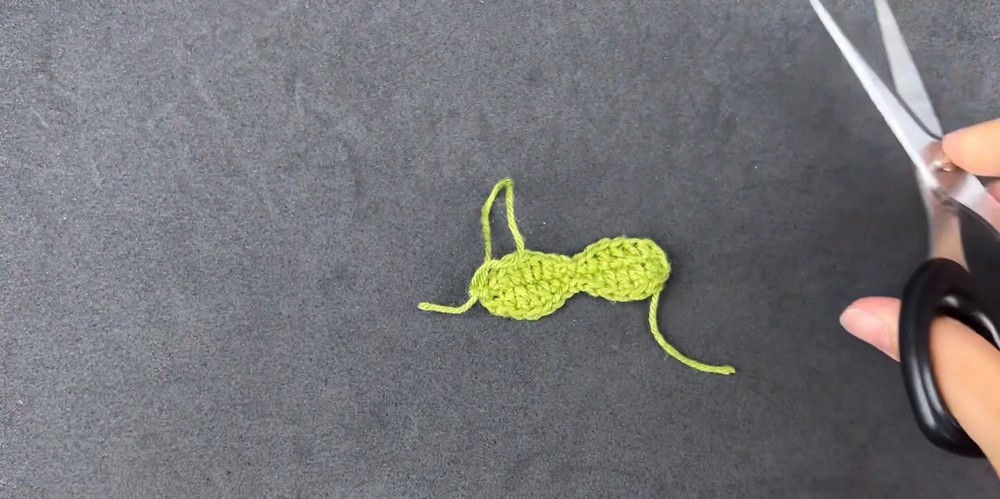
The green component is worked from a 16-chain foundation, with the leaf shape built along both sides of that chain. The center point turns the work so the second side can be crocheted back in the opposite direction.
Foundation: Ch 16.
First leaf half: Starting in the 2nd ch from the hook, work 1 sc, 1 hdc, 1 dc in each of the next 3 chs, 1 hdc, 1 sc, 1 sl st.
The stitches gradually increase in height toward the middle, giving this side of the leaf its tapered, pointed appearance. Keep the foundation chain oriented in front of you so you can easily identify the next chain as you progress.
Center point: In the next ch, work (1 sc, 1 sl st, 1 sc) all into the same stitch.
This compact group forms the turning point. It is what allows the piece to continue along the opposite side of the foundation chain instead of ending after the first half.
Second leaf half: In the remaining chains, work 1 hdc, 1 dc in each of the next 3 chs, 1 hdc, 1 sc, 1 sl st.
At this stage, you should have a narrow leaf-like piece with the taller stitches creating its fuller middle section.
Opposite side: Rotate the work and crochet back along the opposite side of the foundation chain: work 1 sc, 1 hdc, 1 dc in each of the next 3 chs, 1 hdc, 1 sc, 1 sl st, ch 1.
Working this second side thickens the shape and gives the finished piece enough body to sit like a small bow above the bells.
Finish the leaves: Fasten off, leaving a long tail. Pinch the center area and use the yarn needle to sew a few stitches through it. Pull gently to define the gathered, bow-like shape without flattening the leaves completely.
Make the Hanging Cord
Using green yarn, ch 40.
Fasten off and cut the yarn, leaving small tails at both ends.
The 40-chain length becomes the connection between the two bells and also provides the hanging loop, so avoid pulling the chain excessively tight while making it.

Assemble the Two Bells
Attach the Cord to the First Bell
Thread the yarn needle with one end of the green chain.
Insert the needle straight through the top center hole of the first bell, where the original magic ring was made. Pull the cord through far enough to work inside the bell, then tie a thick, secure knot on the inside.
Check the knot from the outside before moving on. The cord should remain firmly in place without slipping back through the center opening.
Attach the Second Bell
Take the opposite end of the green cord and pass it through the top center hole of the second bell.
Tie another secure knot on the inside. When both bells are attached, check their spacing and make sure they hang naturally from the same cord.
Add the Leaf Bow
Position the green leaf component directly above the bells. Use the long green tail left from the leaf piece to sew it securely onto the cord.
Pinching the center slightly as you sew helps preserve the gathered bow shape instead of allowing the leaves to spread completely flat.
Create the Hanging Loop
Bring the center of the green cord to the top and tie it into a loop large enough to fit comfortably over a tree branch, hook, or other hanging point.
Before trimming the ends, give the complete decoration a gentle lift from the loop. The bells should hang securely, with the green bow positioned above them.
Color & Display Ideas
For a traditional Christmas arrangement, use gold or beige bells with green leaves. A red version can add another classic holiday accent.
For a Halloween display, replace the traditional colors with combinations such as deep purple, orange, and black.
Several pairs can also be made in alternating colors and connected along a longer chain to create a festive garland. Because each bell is small, changing colors is an easy way to make the same pattern suit different displays.
Once assembled, the two bells, gathered green bow, and hanging loop create a compact seasonal decoration that can move from a Christmas tree to a garland, gift wrapping, or another small festive display.