
Want a tiny Christmas keepsake with a cake-inspired shape? This crochet box combines a ribbed white base, red lid, green wreath, and embroidered snowflake.
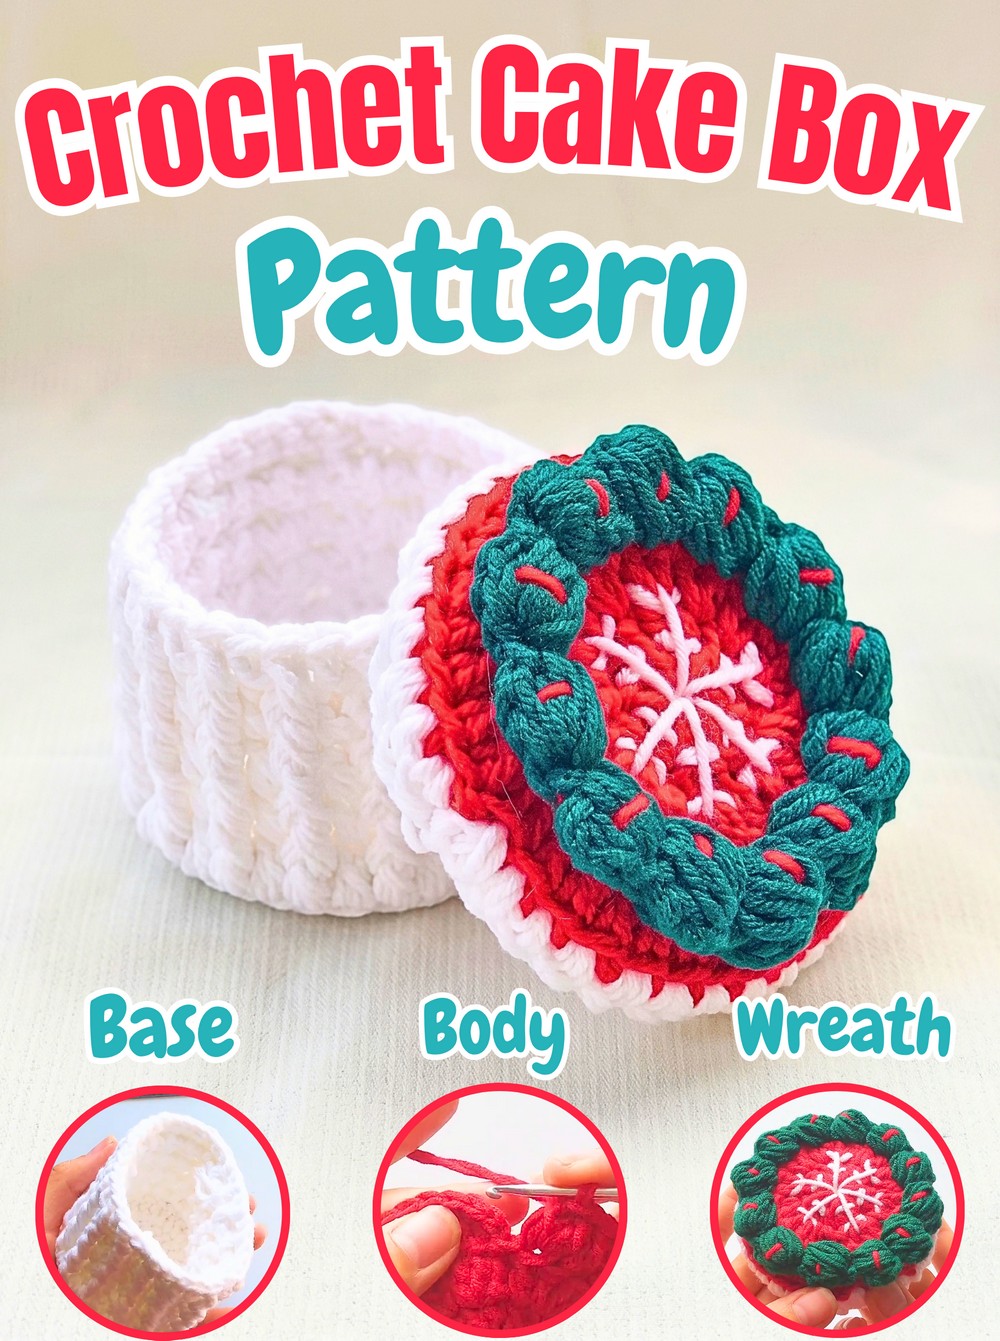
Picture a miniature celebration crochet cake that opens to reveal a little storage space underneath. The white crocheted base gets its texture from front-post stitches, while the red lid carries a raised green wreath and a small white snowflake for a distinctly festive finish.
You’ll crochet the base and lid separately, reinforce both pieces with sturdy cardboard circles, and then add the wreath and snowflake details. The pattern uses joined rounds, BLO stitches, and FPDC, so paying attention to where each stitch is worked will help the finished box keep its neat cylindrical shape.
Credit Tiệm Bé Con
Materials & Tools Needed
- Yarn: Milk Cotton (125g) in white, red, and green
- Crochet Hook: 3.0 mm
- Cardboard: 3 mm thick, sturdy cardboard for the base and lid structure
- Other Tools: Tapestry/yarn needle, scissors, stitch markers, and a hot glue gun
Finished Size & Customization Ideas
The finished box is a small, palm-sized miniature cake box measuring approximately 5–7 cm in diameter. It can hold small trinkets or be displayed as a Christmas ornament.
For different cake-inspired versions, replace the red lid color with brown for chocolate or pink for strawberry. Seed beads can also be added to the top as sprinkle details, or a keychain ring can be attached to the center of the lid.
Pattern Abbreviations
- Ch: Chain
- Sc: Single crochet
- Inc: Increase – usually 2 single crochets in the same stitch; this pattern also uses dc inc, meaning 2 double crochets in the same stitch
- Dc: Double crochet
- Hdc: Half double crochet
- Skip: Skip stitch
- Slst: Slip stitch
- BLO: Back Loop Only
- FPDC: Front Post Double Crochet
- 4hdc tog: 4 half double crochets worked together in the same stitch to create a puff or bobble

Crochet the White Cake Base
Use white Milk Cotton yarn and the 3.0 mm hook. The base starts as a flat circle and then turns upward once you work into the back loops. From there, the alternating dc and FPDC stitches create the textured sides.
Round 1: Create a magic ring. Ch 2, then work 12 dc into the magic ring. Slst into the first dc to join. (12 sts)
The 12 double crochets form the center of the circular base. Pull the magic ring closed neatly, then make sure your join is secure before beginning the next round.
Round 2: Ch 2. Work 2 dc in each stitch around (12 dc inc). Slst to join. (24 sts)
Every stitch receives an increase, doubling the circle from 12 to 24 stitches. Keep the increases evenly distributed so the base stays round rather than developing a wavy edge.
Round 3: Ch 2. 1 dc in the first stitch, 2 dc in the next stitch (inc). Repeat this (dc, inc) pattern 12 times around. Slst to join. (36 sts)
The circle should now be noticeably wider and relatively flat. Before continuing, place the crocheted piece over a piece of 3 mm cardboard and trace a circle that is slightly smaller than the crocheted base. Cut this circle out and set it aside for the assembly stage.

Making the cardboard insert now lets you match it to the crocheted base while the circular shape is easy to see.
Round 4: Ch 2. Working in the BLO, work 1 dc in each stitch around. Slst to join. (36 sts)
This is the turning point from flat base to raised sides. Work only into the back loop of each stitch; the unused front loops will help define the transition while the fabric begins rising upward.
Check the edge after this round. You should have 36 stitches, with the fabric beginning to form a vertical wall rather than continuing as a flat circle.
Round 5: Ch 2. 1 dc in the first stitch, 1 FPDC in the next stitch. Repeat this (dc, FPDC) pattern 18 times around. Slst to join. (36 sts)
The alternating stitches create the first section of the ribbed texture. For each FPDC, work around the post of the designated stitch rather than into its top loops. This placement is what gives the side its raised vertical texture.
Rounds 6-8: Repeat Round 5 exactly. Ch 2, (dc, FPDC) around. Slst to join. (36 sts)
As the three rounds build, the alternating posts should become clearly visible around the entire circumference. Keep checking that you still have 36 stitches after each round and that the raised ribs remain vertically aligned.
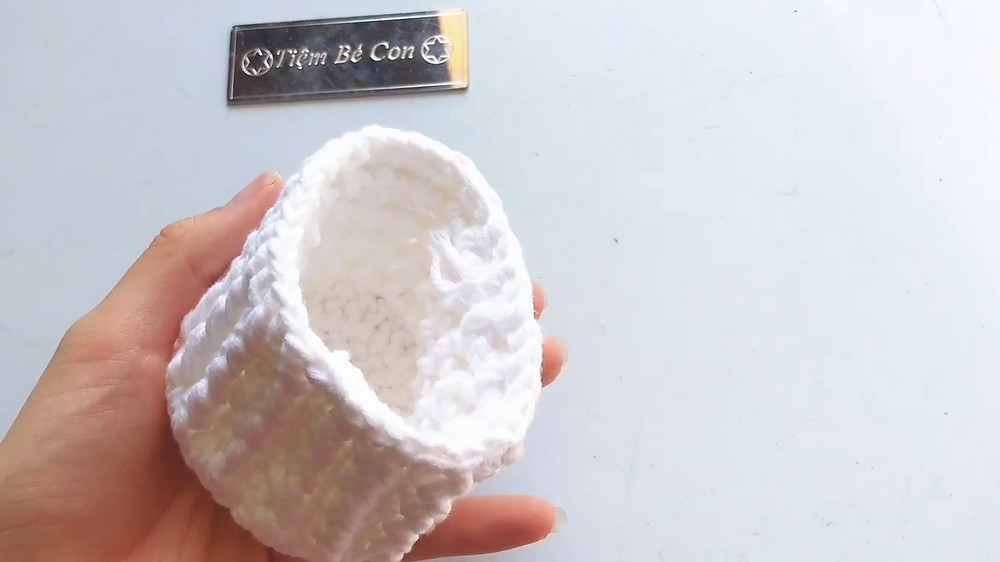
Finish the Cake Base
Cut the yarn, leaving a tail. Pull it through and thread the tail onto your tapestry needle. Invisibly weave the end through the top stitches to secure it.
Set the completed base aside while you prepare the lid. The sides should now have a firm ribbed appearance and enough height to form the lower half of the box.
Crochet the Red Cake Lid
Switch to red yarn with the same 3.0 mm hook. The lid begins with another flat circular section, but its third round is worked in the back loops so the unused front loops remain available for the green wreath.
Round 1: Create a magic ring. Ch 2, work 12 dc into the magic ring. Slst to join. (12 sts)
Round 2: Ch 2. Work 2 dc in each stitch around (12 dc inc). Slst to join. (24 sts)
The circle has now doubled from 12 to 24 stitches. Keep the increases even so the lid remains flat and circular.
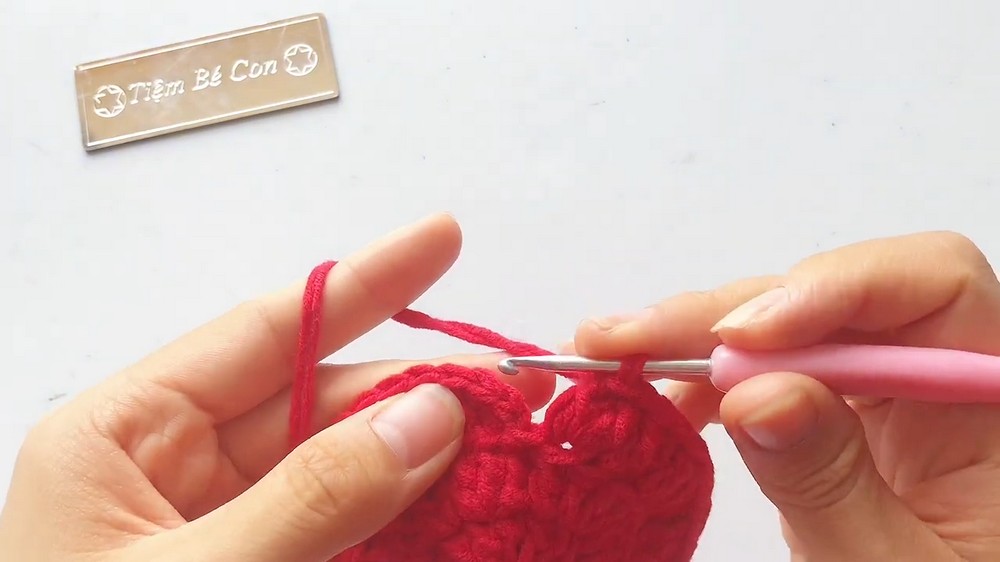
Round 3: Ch 2. Working in the BLO, work 1 dc in the first stitch, 2 dc in the next stitch (inc). Repeat this (dc, inc) pattern 12 times around. Slst to join. (36 sts)
This round brings the lid to 36 stitches while deliberately leaving the front loops unworked. Those exposed front loops are important later because they provide the attachment points for the green wreath.
Before moving on, cut a second piece of cardboard that is slightly smaller than the red crocheted circle. Keep it nearby for assembly.
Fasten off the red yarn and weave in the tail.
Add the White Lid Edge
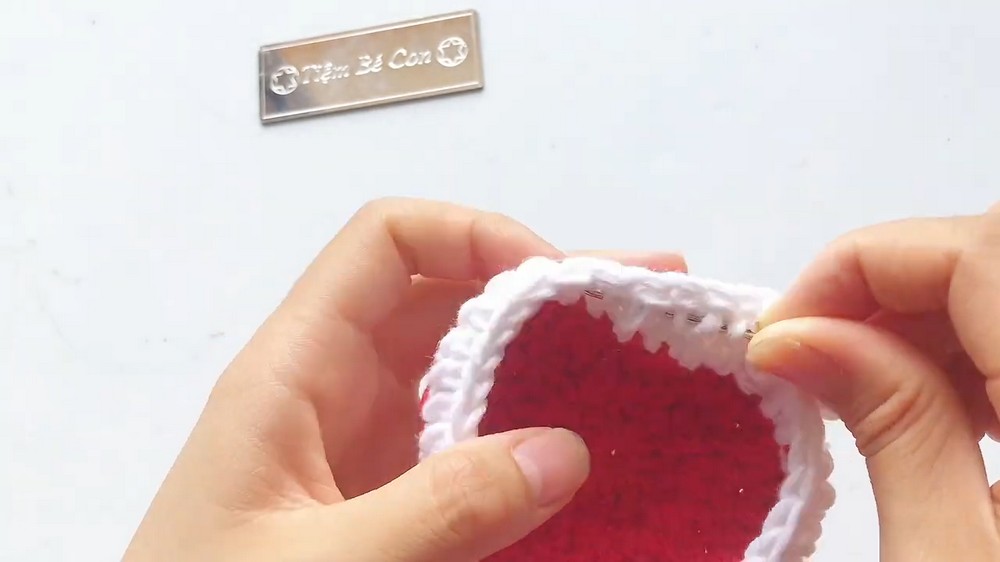
Attach white yarn to the BLO of the red stitches from Round 3.
Round 4: Ch 2, work 1 dc in each stitch around in the back loops. Slst to join. (36 sts)
Work around all 36 stitches evenly. The white edge gives the lid its contrasting border while maintaining the same circular stitch count.
Fasten off the white yarn and weave in the ends.
Crochet the Green Christmas Wreath
Use green yarn for the raised wreath detail. This part is worked into the exposed front loops left from Round 3 of the red lid, so turn your attention back to those unused loops rather than attaching the yarn to the newest white round.
Attach the green yarn to the exposed front loop of Round 3.
Wreath Round: Ch 2. In the same stitch, work 4hdc tog (yarn over, insert into the stitch, pull up a loop; repeat 4 times in the same stitch, then pull through all loops on the hook to create a puff), ch 1, skip 1 stitch, then slst into the next stitch. Repeat this sequence – ch 2, 4hdc tog, ch 1, skip 1, slst — all the way around the rim of the cake lid.
The puff stitches form the raised leafy-looking texture around the lid. Keep each puff in its designated stitch and maintain the skip-one rhythm between them so the wreath does not become crowded.
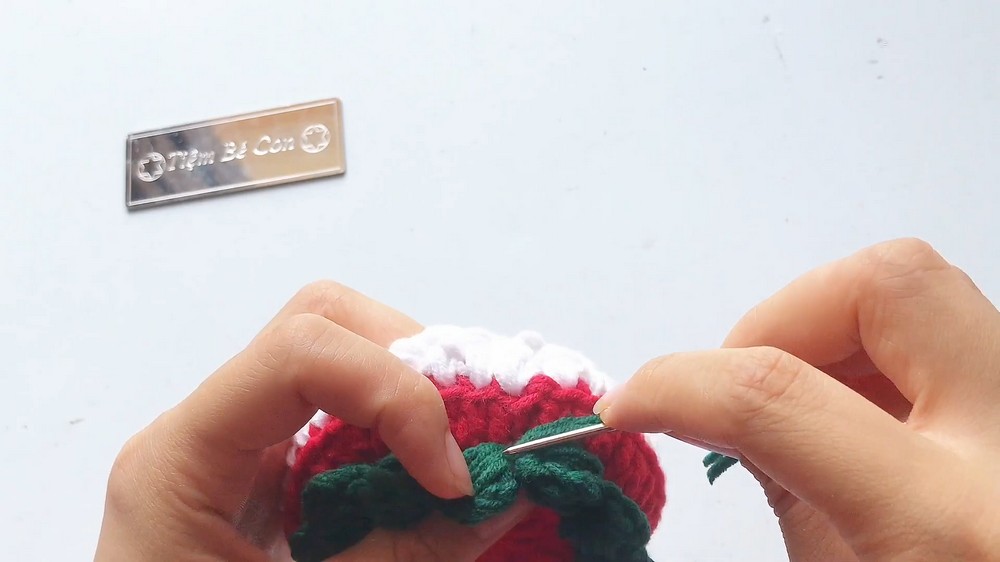
As you work around the lid, check that the green detail follows the circular rim rather than drifting toward the center. The exposed front loops should remain the attachment line for the wreath.
Fasten off and weave the green tail securely inside the lid.
Embroider the Snowflake
Use a long piece of white yarn and a tapestry needle to decorate the center of the red lid, inside the green wreath.
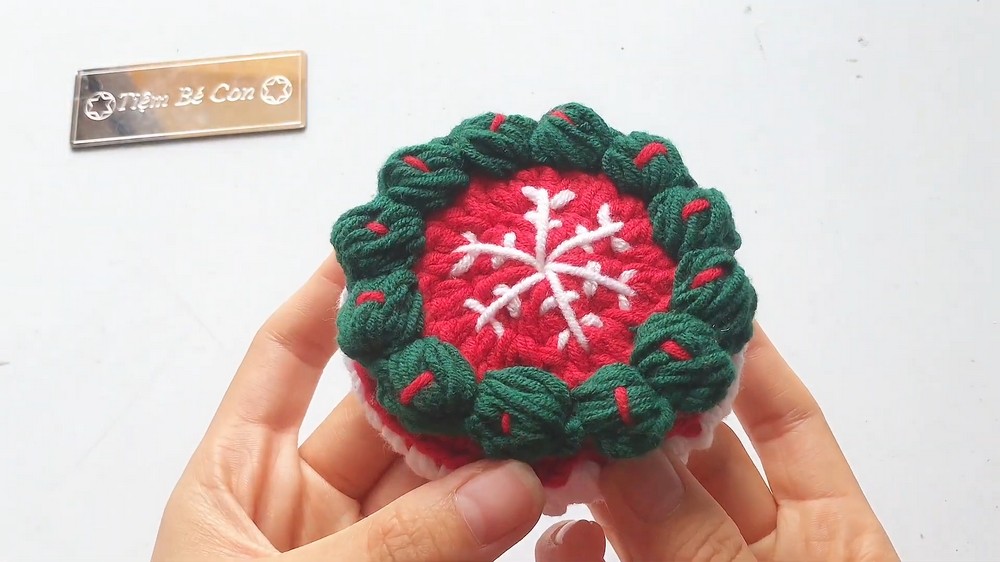
Start by embroidering a cross, then add an “X” through the middle. Finish the snowflake by adding small “V” shapes at the tips.
Keep the snowflake centered within the green wreath. Since this detail sits on the red circular area, checking its position before making the final stitches helps prevent the design from appearing noticeably off-center.
Add the Cardboard Structure
The crocheted pieces are soft, so the cardboard inserts give the miniature box the firmness needed to hold its shape.
Heat the hot glue gun and apply hot glue around the edges of one side of the cardboard circles you cut earlier.
For the white cake base, push one glued cardboard circle firmly down into the bottom of the crocheted piece. Press it evenly so the cardboard sits flat and stabilizes the base.
For the red lid, push the second glued cardboard circle into the underside of the lid. Position it flat and securely so the lid does not flex excessively when placed over the base.
Give the glue enough time to dry before testing the fit. The cardboard should stay in place without creating a noticeable bulge through the crochet.

Put the Cake Box Together
Once the glue has dried completely, simply slide the red lid onto the white cake base.
Check the fit around the entire circumference. The lid should sit evenly over the ribbed white body, with the green wreath visible around its edge and the snowflake centered on top.
The completed miniature box can hold small trinkets, serve as a festive display piece, or be adapted into an ornament by adding a keychain ring to the center of the lid.






One Comment