Need a tiny treat for your keys or bag? This crochet ice cream cone keychain pairs a textured cone with a fluffy cream scoop and colorful sprinkle details.

Soft chenille cream, a warm brown cone, and tiny embroidered sprinkles turn this little crochet ice cream into a cheerful charm that looks good enough to eat. Its compact size makes it especially cute for a keyring, backpack, pouch, or small handmade crochet gift.
For this pattern, you’ll crochet the cone and scoop separately, then join them with hot glue rather than sewing. The tutorial uses different hook sizes for each yarn, so the cone stays firm while the chenille scoop keeps its rounded, plush shape. Clear stitch counts and shaping checks will help you keep both pieces on track before assembly.
Credit Tiệm Bé Con
Materials & Tools Needed
- Yarn 1 (Cone): Brown or tan Milk Cotton Yarn, 125g thickness
- Yarn 2 (Cream): White chunky chenille or velvet yarn (Len đũa)
- Embroidery Yarn: Small scraps of pink, yellow, green, or other bright colors for sprinkles
- Crochet Hooks: 3.0 mm for the cone and 6.0 mm for the cream
- Other Tools: Tapestry/yarn needle, scissors, polyfill stuffing, hot glue gun, and a keychain ring or clasp
Pattern Abbreviations
- MR: Magic Ring
- sc: Single crochet
- inc: Increase – 2 single crochets in the same stitch
- dec: Decrease – single crochet 2 stitches together
- ( ) * #: Repeat the instructions inside the parentheses the specified number of times
- FO: Fasten off

Crochet the Ice Cream Cone
Use the brown or tan Milk Cotton yarn with the 3.0 mm hook. The cone is worked in continuous rounds, gradually widening as increases are added. Keep your stitches reasonably firm so the finished cone can hold its shape once stuffed.
Round 1: Make a Magic Ring, 6 sc into the ring. (6 sts)
Starting with six stitches gives you the narrow base of the cone. After completing the round, check that the center is closed neatly and that you have six visible stitches to work into next.
Round 2: (1 sc, 1 inc) * repeat 3 times. (9 sts)
Each increase adds one stitch to the round, taking the count from 6 to 9. Space the increases according to the repeat so the cone widens evenly instead of developing a lopsided edge.
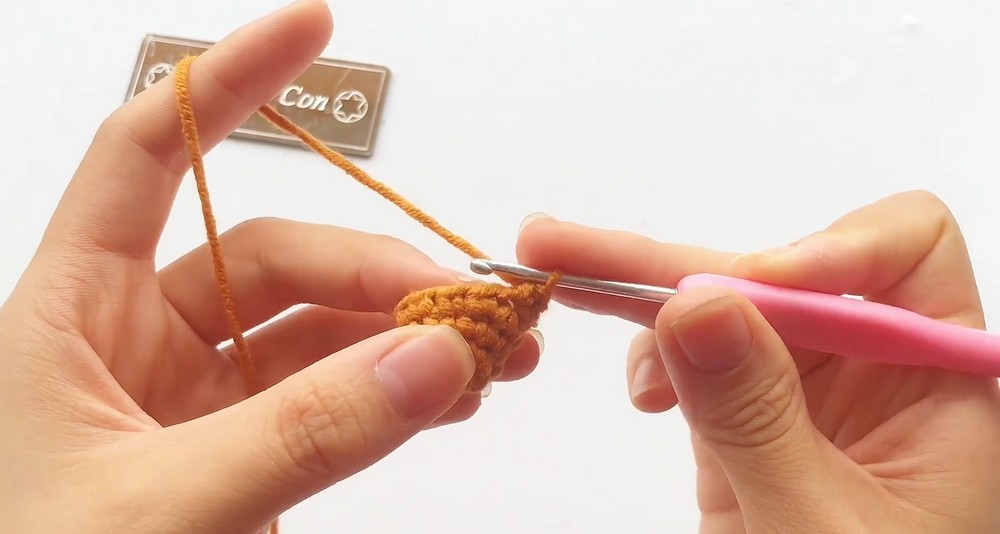
Round 3: 1 sc in each stitch around. (9 sts)
This plain round maintains the new width without adding flare. You should now see the cone beginning to extend upward while keeping a controlled, narrow shape.
Round 4: (2 sc, 1 inc) * repeat 3 times. (12 sts)
The three increases bring the round to 12 stitches. As you work around, keep an eye on the opening: it should continue widening gradually rather than suddenly becoming flat.
Round 5: 1 sc in each stitch around. (12 sts)
Work evenly around all 12 stitches. This extra plain round gives the cone some height before its next increase round.
Round 6: (3 sc, 1 inc) * repeat 3 times. (15 sts)
The three increases take the count to 15 stitches. At this point, the cone should look noticeably broader toward the top while still keeping its tapered profile.
Round 7: 1 sc in each stitch around. (15 sts)
Finish the final round evenly. Before fastening off, check that the upper opening looks wide enough to receive the cream scoop and that the cone has maintained a neat, tapered shape.
Finish and Stuff the Cone
Fasten off, leaving a short tail. Thread the tail onto the tapestry needle and weave it through the last stitch to create a clean, seamless finish along the top edge, then cut the excess yarn.
Stuff the cone firmly with polyfill. The firm stuffing is important here because the cone needs enough support to keep its shape beneath the plush scoop. Add the stuffing gradually rather than forcing it in all at once, then check that the cone remains evenly filled without becoming misshapen.

Crochet the Cream Ice Cream Scoop
Switch to the white chunky chenille or velvet yarn and the 6.0 mm hook. This piece is much shorter than the cone, but the larger hook works with the thick yarn to create a soft, rounded scoop.
Round 1: Make a Magic Ring, 6 sc into the ring. (6 sts)
Begin with the same six-stitch center used for the cone. Make sure the magic ring is pulled closed enough that the center does not leave a large hole.
Round 2: 6 inc. (12 sts)
Place one increase in every stitch around, doubling the count from 6 to 12. Because chenille can hide individual stitches, feel for each stitch carefully as you work so none are skipped.
Round 3: 1 sc in each stitch around. (12 sts)
Work evenly around all 12 stitches. This round holds the scoop at its new width and starts giving the piece a fuller, rounded middle.
Round 4: 6 dec. (6 sts)
Make six decreases evenly around to reduce the opening back to six stitches. Once complete, the scoop should have a compact rounded form with a small remaining opening.
Finish the Cream Scoop
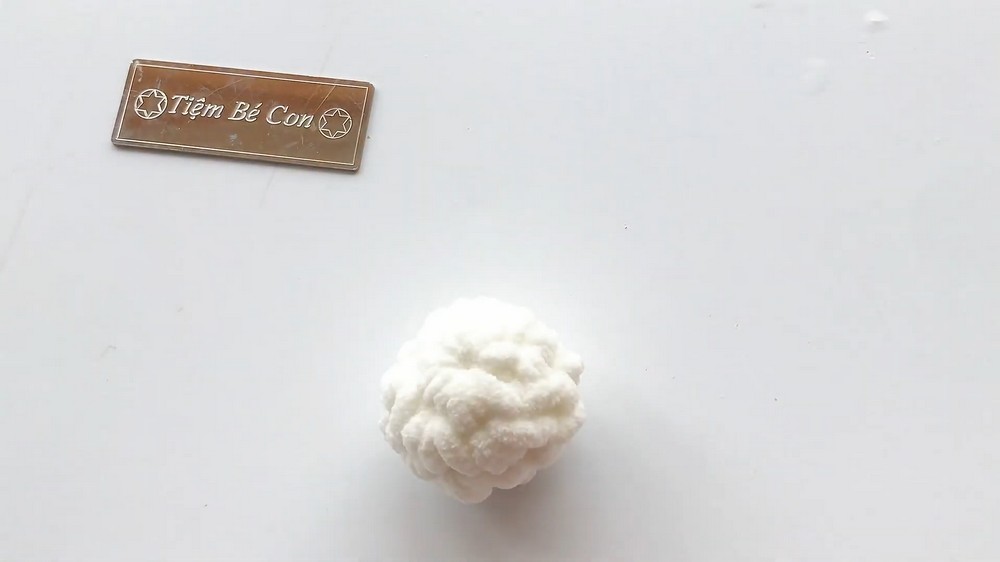
Fasten off, leaving a medium tail. Lightly stuff the inside of the cream ball with polyfill. The stuffing should fill out the scoop without making it overly firm, since the cream is meant to keep a soft, plush appearance.
Thread the yarn tail onto your needle and weave it through the front loops of the remaining 6 stitches. Pull the tail tightly to cinch the bottom opening closed, then tie off and hide the yarn tail inside the scoop.
Check the shape before moving on. The cream should look rounded and full rather than flattened, with the cinched area positioned at the bottom where it will sit inside the cone.
Add the Colorful Sprinkles
Thread small scraps of yellow, pink, green, or other colorful yarn onto your tapestry needle. Embroider simple random straight lines across the top of the white cream scoop to create the sprinkle effect.
Keep the sprinkle marks varied rather than placing every strand at the same angle. This gives the scoop a more playful, scattered appearance. Once the decoration is finished, hide the knots and yarn tails inside the cream piece.
If you plan to add the optional 6 mm safety eyes and embroidered smile, this is also the stage to position those facial details on the scoop before its final placement in the cone.

Join the Cone and Cream
Unlike many amigurumi pieces, these two parts are not sewn together in this tutorial. Instead, the connection is made with hot glue.
Heat the hot glue gun and apply a ring of hot glue around the inner rim of the brown cone. Press the bottom of the white cream scoop firmly into the cone to secure it.
Work carefully while positioning the scoop. The cream should sit centered, not leaning to one side, and the cone should remain visibly tapered beneath it. Give the glue time to secure the two pieces before handling the finished shape.

Attach the Keychain Hardware
Attach the keychain ring or clasp to the top center of the ice cream scoop. Check that the hardware sits securely and that the finished ice cream hangs in the intended upright position.
Once attached, gently lift the charm by the hardware and inspect the balance. The scoop should remain centered over the cone rather than tipping noticeably to one side.
Finished Size & Flavor Ideas
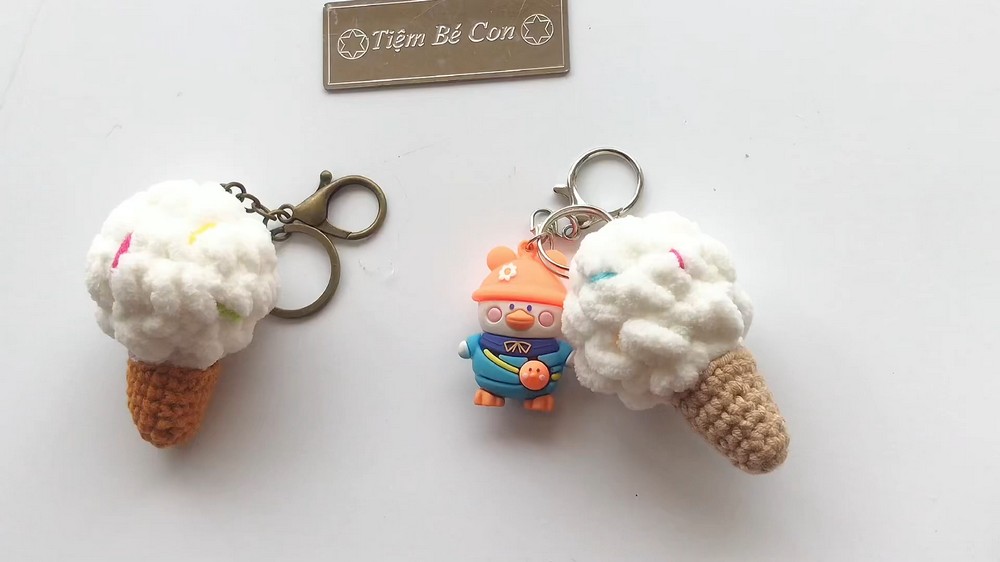
The completed keychain measures roughly 2 to 2.5 inches tall, based on the specified 125g Milk Cotton yarn and jumbo chenille yarn.
For different ice cream flavors, change the cream color:
- Strawberry: Pink chenille
- Mint: Light green chenille
- Chocolate: Brown chenille
- Vanilla: White or cream chenille
You can also give the scoop a kawaii personality with 6 mm safety eyes and a small embroidered smile. A few different sprinkle colors can make each finished charm look like a different flavor combination.