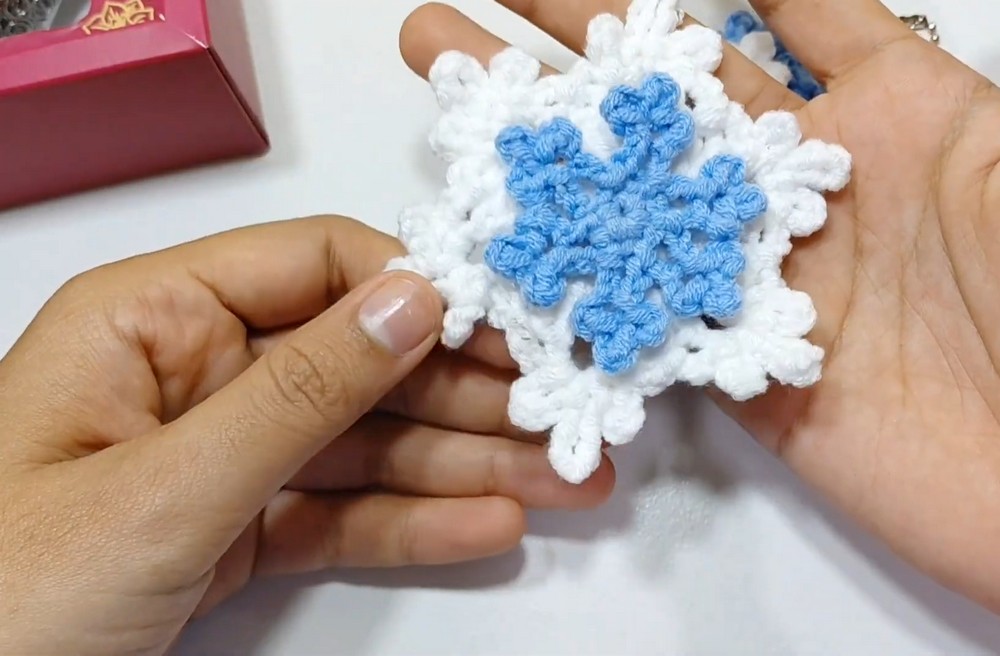
Want a frosty crochet accent with extra dimension? This two-layer snowflake pairs a baby-blue six-point base with a tiny white snowflake for a crisp winter finish.

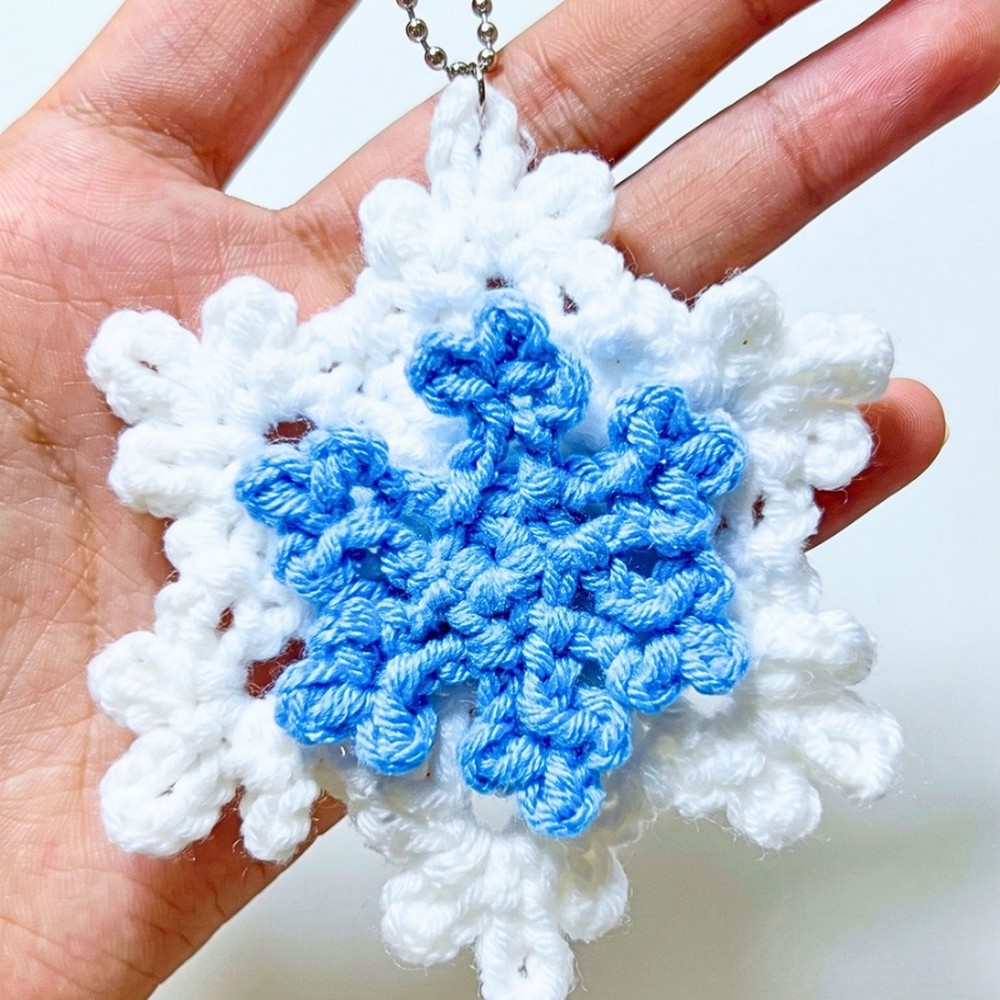
Baby blue yarn gives the larger crochet snowflake an icy foundation, while the smaller broken-white layer sits neatly in its center for a raised, detailed look. The long and short picot tips make each point stand out, giving the finished crochet piece plenty of texture despite its simple round construction.
You’ll first crochet the six-point blue base, then make the smaller white snowflake separately and place it over the center. The final steps show how to secure the layers, add a jump ring through the top ch-7 loop, and finish the piece with a ball chain for a keychain or bag charm.
Credit Shine Hook
Materials & Tools Needed
- Yarn: Milk Cotton Yarn, 5-ply, in baby blue and broken white
- Crochet hook: 3.00 mm
- Scissors
- Tapestry or yarn needle
- Stitch marker
- Jump ring
- Ball chain: For a keychain or bag charm
- Long-nose pliers
- Hot glue gun and glue sticks
Finished Size & Customization
The finished snowflake measures approximately 3–4 inches in diameter, depending on your tension.
Baby blue and white create an icy winter appearance, but the same design can be made in deep red, forest green, metallic yarn, or other festive combinations. Instead of attaching one to a ball chain, make several for a winter garland or use them as handmade Christmas tree ornaments.
Pattern Abbreviations
US crochet terminology is used:
- MR = Magic Ring
- ch = Chain
- sc = Single crochet
- dc = Double crochet
- sl st = Slip stitch
- sk = Skip
- sp = Space
- st(s) = Stitch(es)
Crochet the Blue Snowflake Base
The large snowflake is worked in baby blue yarn. Round 1 establishes six sections around the magic ring, Round 2 expands those sections, and Round 3 turns them into the six pointed tips.
Round 1
Start with a MR. Ch 5-this counts as the first dc and ch-2 space—then work (2 dc into the MR, ch 2) 5 times, followed by 1 dc into the MR. Join with a sl st into the 3rd ch of the starting ch-5 and pull the magic ring closed. Stitch count: 12 dc and 6 ch-2 spaces.
Before continuing, check that you can clearly see six evenly spaced ch-2 gaps around the center. These gaps become the working spaces for the next round.
Round 2
Sl st into the first ch-2 space; ch 3 (counts as 1 dc), 3 dc in the same sp, ch 3; in each of the next 5 ch-2 spaces, work 4 dc, ch 3; sl st to the top of the beginning ch-3. Stitch count: 6 groups of 4 dc separated by 6 ch-3 spaces.
You should now have six larger groups arranged like spokes around the center. The ch-3 spaces between them are important because they separate the future snowflake points.

Round 3: Form the Six Snowflake Points
This is the most detailed round because each point is built from a series of picot-like loops. The center ch-7 loop creates the longest tip, while the surrounding ch-5 and ch-3 loops create the smaller branches.
For each point, ch 3, sk the next 2 dc, sl st into the space between the 2nd and 3rd dc of the 4-dc group; in that same sp work ch 3, sl st in the same sp, ch 5, sl st in the same sp, ch 7, sl st in the same sp, ch 5, sl st in the same sp, ch 3, sl st in the same sp; ch 3, move to the next large ch-3 space and sl st into it. Repeat this sequence 6 times around.
The ch-7 loop should become the longest tip of each point. If one point looks shorter than the others, check that all five center loops were made in the same space before moving on.
After the sixth point, sl st to the base of the first starting chain, fasten off, and weave in the ends.
Lay the blue snowflake flat and gently spread its six points. The points should radiate evenly from the center without needing to be forced into place.

Crochet the Small White Snowflake
The inner snowflake is much smaller and is worked separately in broken-white yarn. It begins with six sc and then uses six repeated chain-and-picot groups to form its points.
Round 1
Make a MR and work 6 sc into the ring. Pull the ring completely closed and sl st into the first sc to join. Stitch count: 6 sc.
Keep the center tight because this small circle will sit directly over the center of the larger snowflake.

Round 2: Six Small Points
Sl st into the next sc; ch 5, sk the 2 chains closest to the hook, sl st into the 3rd ch; ch 3, sl st back into that same 3rd-chain base; ch 3, sl st into the same base again; ch 2 to travel back toward the center. Repeat this sequence 6 times, working each point into the next available sc. Sl st to the first sc, fasten off, and weave in the ends.
The three small loops made from the same chain base form the decorative tip of each white point. Work all three into the same base so each point stays compact and symmetrical.
Layer the Two Snowflakes
Place the finished blue snowflake flat with its six points spread evenly. Position the smaller white snowflake directly over the center.
Rotate the white layer until its six points line up with the center of the corresponding blue points. This alignment gives the finished piece a balanced, symmetrical appearance rather than making the white layer look slightly twisted.
Once you are happy with the placement, prepare your hot glue gun.
Apply a moderate amount of hot glue to the back center of the white snowflake and press it firmly onto the center of the blue layer. Hold it in place until the adhesive sets completely.
Keep the glue concentrated at the center. The outer white points should remain free so they can sit visibly above the blue snowflake and create the two-layer effect.

Add the Keychain Hardware
Find the top point of the blue snowflake and locate its ch-7 picot loop.
Using long-nose pliers, open a jump ring and carefully pass it through this loop. Pinch the jump ring closed securely.
Thread the ball chain through the closed jump ring and fasten the chain. The long top loop gives you a convenient attachment point without needing to add another crocheted hanging loop.
Before You Attach It
Give the jump ring a gentle check to make sure it is completely closed. Then hold the snowflake by the ball chain and make sure the glued white center remains firmly attached.
For an ornament or garland, you can stop with the jump ring or replace the ball chain with another hanging method. For a bag charm or keychain, keep the chain securely clasped before putting the snowflake into use.