Create a cozy pumpkin pie crochet coaster with a tapered orange slice and six fluffy cream popcorn stitches that look just like whipped cream.

Handmade autumn table accessories can bring a little seasonal charm to everyday moments. This crochet pumpkin pie coaster recreates a classic dessert with a warm orange triangular base and a soft, textured cream topping, making it a sweet addition to Thanksgiving and fall décor.
Starting with a simple chain, you will shape the pie slice through gradual single crochet decreases, frame its edges with a neat border, and finish the top with six popcorn stitches. The instructions also cover weaving in the yarn ends and adapting the finished crochet coaster for other autumn decorations.
Credit Julie Sherwood
Materials & Tools Needed
- Yarn: Medium-weight Worsted / #4 / 10-ply acrylic yarn in two colors:
- Color A – Pumpkin: Warm orange for the pie filling.
- Color B – Cloud: Creamy off-white for the whipped cream crust.
- Example: Loops & Threads Impeccable yarn.
- Crochet Hook: 4.5 mm (US 7).
- Tapestry/Yarn Needle: For weaving in the yarn ends.
- Scissors: For cutting yarn.
Finished Size
Using worsted-weight yarn and a 4.5 mm crochet hook, the finished coaster measures approximately:
- Top Width: 4.5-5 inches.
- Height: 5-5.5 inches from the top edge to the bottom tip.
Pattern Abbreviations & Terminology
All instructions follow standard US Crochet Terminology.
- ch: Chain stitch
- sl st: Slip stitch
- sc: Single crochet
- dc: Double crochet
- sc2tog (Decrease): Single crochet decrease across 2 stitches. Insert the hook into the first stitch, yarn over, and pull up a loop (2 loops on hook). Insert the hook into the second stitch, yarn over, and pull up another loop (3 loops on hook). Yarn over and pull through all 3 loops.
- Popcorn Stitch (5-dc Pop): Work 5 dc into the specified stitch or space. Drop the loop from the hook. Insert the hook from front to back through the top of the first dc made in the group, or into the 3rd chain of the starting ch-3. Pick up the dropped working loop and pull it through the first stitch to cinch the popcorn closed.
- st(s): Stitch(es)
- [ … ]: Total stitch count at the end of the row or round.

How to Crochet a Pumpkin Pie Coaster
The coaster is worked in three main components: the triangular Pumpkin pie body, the single crochet perimeter border, and the Cloud whipped cream topping.
Part 1: Triangular Pie Body
Use Color A (Pumpkin) to crochet the triangular base. Work flat in rows, starting at the wide top edge and gradually decreasing toward the bottom point.
Foundation Chain: Ch 17.
Row 1: Insert the hook into the 2nd ch from the hook and work 1 sc. Work 1 sc into each of the remaining 15 chains across. Turn. [16 sc]
Row 2: Work 1 sc2tog over the first 2 stitches, then work 1 sc in each stitch across to the end of the row. Turn. [15 sts]
Row 3: Work 1 sc2tog over the first 2 stitches, then work 1 sc in each stitch across. Turn. [14 sts]

Row 4: Work 1 sc2tog over the first 2 stitches, then work 1 sc in each stitch across. Turn. [13 sts]
Row 5: Work 1 sc2tog over the first 2 stitches, then work 1 sc in each stitch across. Turn. [12 sts]
Row 6: Work 1 sc2tog over the first 2 stitches, then work 1 sc in each stitch across. Turn. [11 sts]
Row 7: Work 1 sc2tog over the first 2 stitches, then work 1 sc in each stitch across. Turn. [10 sts]
Row 8: Work 1 sc2tog over the first 2 stitches, then work 1 sc in each stitch across. Turn. [9 sts]
Row 9: Work 1 sc2tog over the first 2 stitches, then work 1 sc in each stitch across. Turn. [8 sts]
Row 10: Work 1 sc2tog over the first 2 stitches, then work 1 sc in each stitch across. Turn. [7 sts]
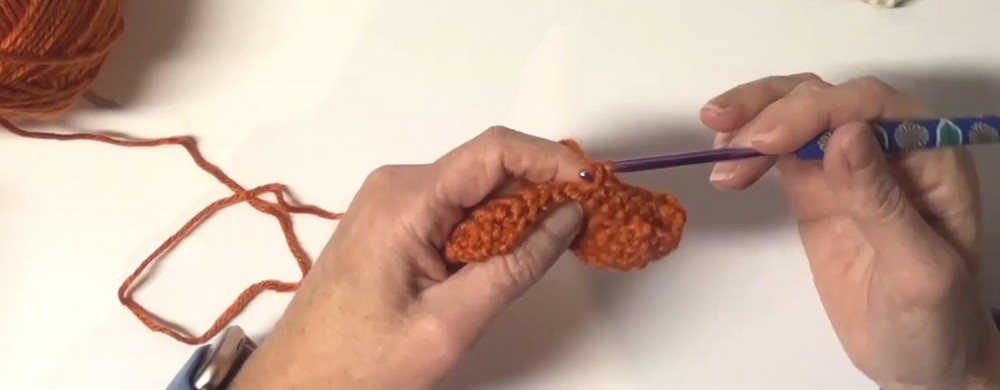
Row 11: Work 1 sc2tog over the first 2 stitches, then work 1 sc in each stitch across. Turn. [6 sts]
Row 12: Work 1 sc2tog over the first 2 stitches, then work 1 sc in each stitch across. Turn. [5 sts]
Row 13: Work 1 sc2tog over the first 2 stitches, then work 1 sc in each stitch across. Turn. [4 sts]
Row 14: Work 1 sc2tog over the first 2 stitches, then work 1 sc in each stitch across. Turn. [3 sts]
Row 15: Work 1 sc2tog over the first 2 stitches, then work 1 sc in the last stitch. Turn. [2 sts]
Row 16: Work 1 sc2tog over the remaining 2 stitches. [1 st remaining at the bottom tip]
Do not fasten off after Row 16. Keep Color A attached because you will continue directly into the perimeter border.
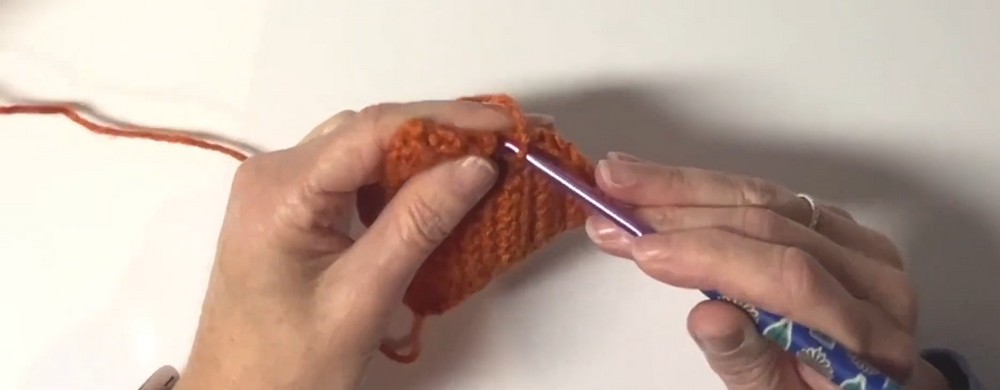
Part 2: Perimeter Border
Work continuously around the outer raw edges of the triangle to create a clean, uniform border. Keep Color A attached after completing Row 16.
Side Edge 1 – Right Slanted Edge: Pivot the triangle 90 degrees to work along the rough row ends. Work 15 sc evenly spaced along this edge, moving up toward the top corner. Place approximately 1 sc per row-end. [15 sc]
Top Corner Turn: Ch 1 in the top-right corner.
Top Edge: Work 1 sc into each of the 16 unused bottom loops of the foundation chain across the top edge. Maintain moderate tension and avoid pulling these stitches too tightly because the whipped cream stitches will be anchored into them later. [16 sc]
Top Corner Turn: Ch 1 in the top-left corner.
Side Edge 2 – Left Slanted Edge: Work 15 sc evenly spaced down the second rough edge toward the bottom point. You can crochet over the initial foundation tail if desired. [15 sc]
Join & Fasten Off: Work a sl st into the very first sc made on Side Edge 1 at the pie point. Cut the yarn, pull it through, and fasten off Color A.

Part 3: Whipped Cream Crust Border
Use Color B (Cloud) to create the whipped cream topping. Work across the top edge only, making six popcorn stitches.
Color Join: Locate the ch-1 corner space at the top-right corner of the pie slice. Insert your hook into this space, draw up a loop of Color B, and work a sl st to secure the yarn.
Popcorn 1:
- Ch 3. This counts as the first dc.
- Work 4 dc directly into the same ch-1 corner space, making 5 dc in total when the starting ch-3 is included.
- Drop the working loop from your hook.
- Insert the hook through the 3rd chain of the beginning ch-3.
- Pick up the dropped loop and pull it completely through to cinch the popcorn closed.
- Skip the next single crochet along the top row.
- Work a sl st into the next stitch to secure the popcorn. [1 popcorn completed]

Popcorn 2:
- Work 5 dc into the very next stitch.
- Drop the working loop from the hook.
- Insert the hook from front to back through the top loops of the first dc in this group.
- Pick up the dropped loop and pull it through to close the popcorn.
- Skip the next stitch along the top edge.
- Work a sl st into the following stitch. [2 popcorns completed]
Popcorn 3:
- Work 5 dc into the next stitch.
- Drop the working loop and insert the hook into the first dc.
- Catch the dropped loop and pull it through to close the popcorn.
- Skip the next stitch.
- Work a sl st into the following stitch. [3 popcorns completed]
Popcorn 4:
- Work 5 dc into the next stitch.
- Drop the working loop and insert the hook into the first dc.
- Catch the dropped loop and pull it through to close the popcorn.
- Skip the next stitch.
- Work a sl st into the following stitch. [4 popcorns completed]

Popcorn 5:
- Work 5 dc into the next stitch.
- Drop the working loop and insert the hook into the first dc.
- Catch the dropped loop and pull it through to close the popcorn.
- Skip the next stitch.
- Work a sl st into the following stitch. [5 popcorns completed]
Popcorn 6:
- Work 5 dc into the next stitch.
- Drop the working loop and insert the hook into the first dc.
- Catch the dropped loop and pull it through to close the popcorn.
- Work a sl st directly into the final top-left corner ch-1 space. [6 popcorns completed total]
Fasten Off: Cut Color B, leaving a 4-to-5-inch tail. Pull the working loop all the way through and snug it down.
Popcorn Stitch Tip
For each popcorn, keep the five double crochets grouped in the same stitch or space before closing them. After dropping the working loop, insert your hook through the specified first double crochet—or through the 3rd chain of the starting ch-3 for the first popcorn—and pull the loop through. This gathers the stitches into a raised puff.
Remember to skip the next stitch and secure each popcorn with a slip stitch in the following stitch, as directed. This creates the separated whipped cream details along the top edge.

Assembly & Finishing Techniques
Because the pattern is worked directly onto the pie wedge, there is no need to sew or seam separate crochet pieces together. Finish the coaster by securing the yarn tails and shaping the popcorn stitches.
1. Thread the Tails: Thread each yarn tail onto your tapestry needle one at a time.
2. Weave in the Orange Ends: Weave the Orange tails, including the foundation tail and border fasten-off tail, through the back posts of the single crochet border stitches along the side edges.
3. Weave in the Cream Ends: Discreetly weave the Cream tails, including the color-join tail and crust fasten-off tail, through the dense base loops of the popcorn stitches along the top edge.
4. Pop the Puffs: Use your fingers to push each popcorn stitch outward toward the front of the coaster. Adjust all six whipped cream puffs so they sit plump and rounded along the top rim.
5. Block (Optional): If the coaster corners or edges curl slightly because of tight tension, lightly steam block it with an iron held 2 inches away. Do not press the iron directly onto acrylic yarn. Alternatively, pin the coaster flat and mist it with cool water, then leave it pinned until dry.
Customization Ideas
Once the basic pumpkin pie coaster is finished, you can change the crust detail or adapt the shape for other autumn decorations.
Traditional Crust Tone: Add a row of Tan, Camel, or Light Brown single crochet along the top foundation row before switching to Cream. This creates the appearance of a baked pastry crust beneath the whipped cream.

Standalone Whipped Cream Dollop: Instead of making a row of popcorn stitches across the top, fasten off after the Orange border. Crochet one separate 3D whipped cream swirl or popcorn cluster and position it right in the center of the pie face.
Bunting or Garland: Crochet 6–8 pie slices, leave yarn loops at the corners, and string them along twine for Thanksgiving or autumn home décor.
Pot Holder or Hot Pad: For extra thickness, double the yarn strands or use 100% cotton yarn. Increase the hook size to 5.5 mm or 6.0 mm, make two identical triangle panels, and single crochet them together.
Enjoy Your Pumpkin Pie Coaster
Your crochet pumpkin pie coaster is complete, with its warm triangular Pumpkin base, neatly framed edges, and six textured whipped cream puffs along the top. Use it as a practical drink coaster or make several slices for a charming Thanksgiving table accent.