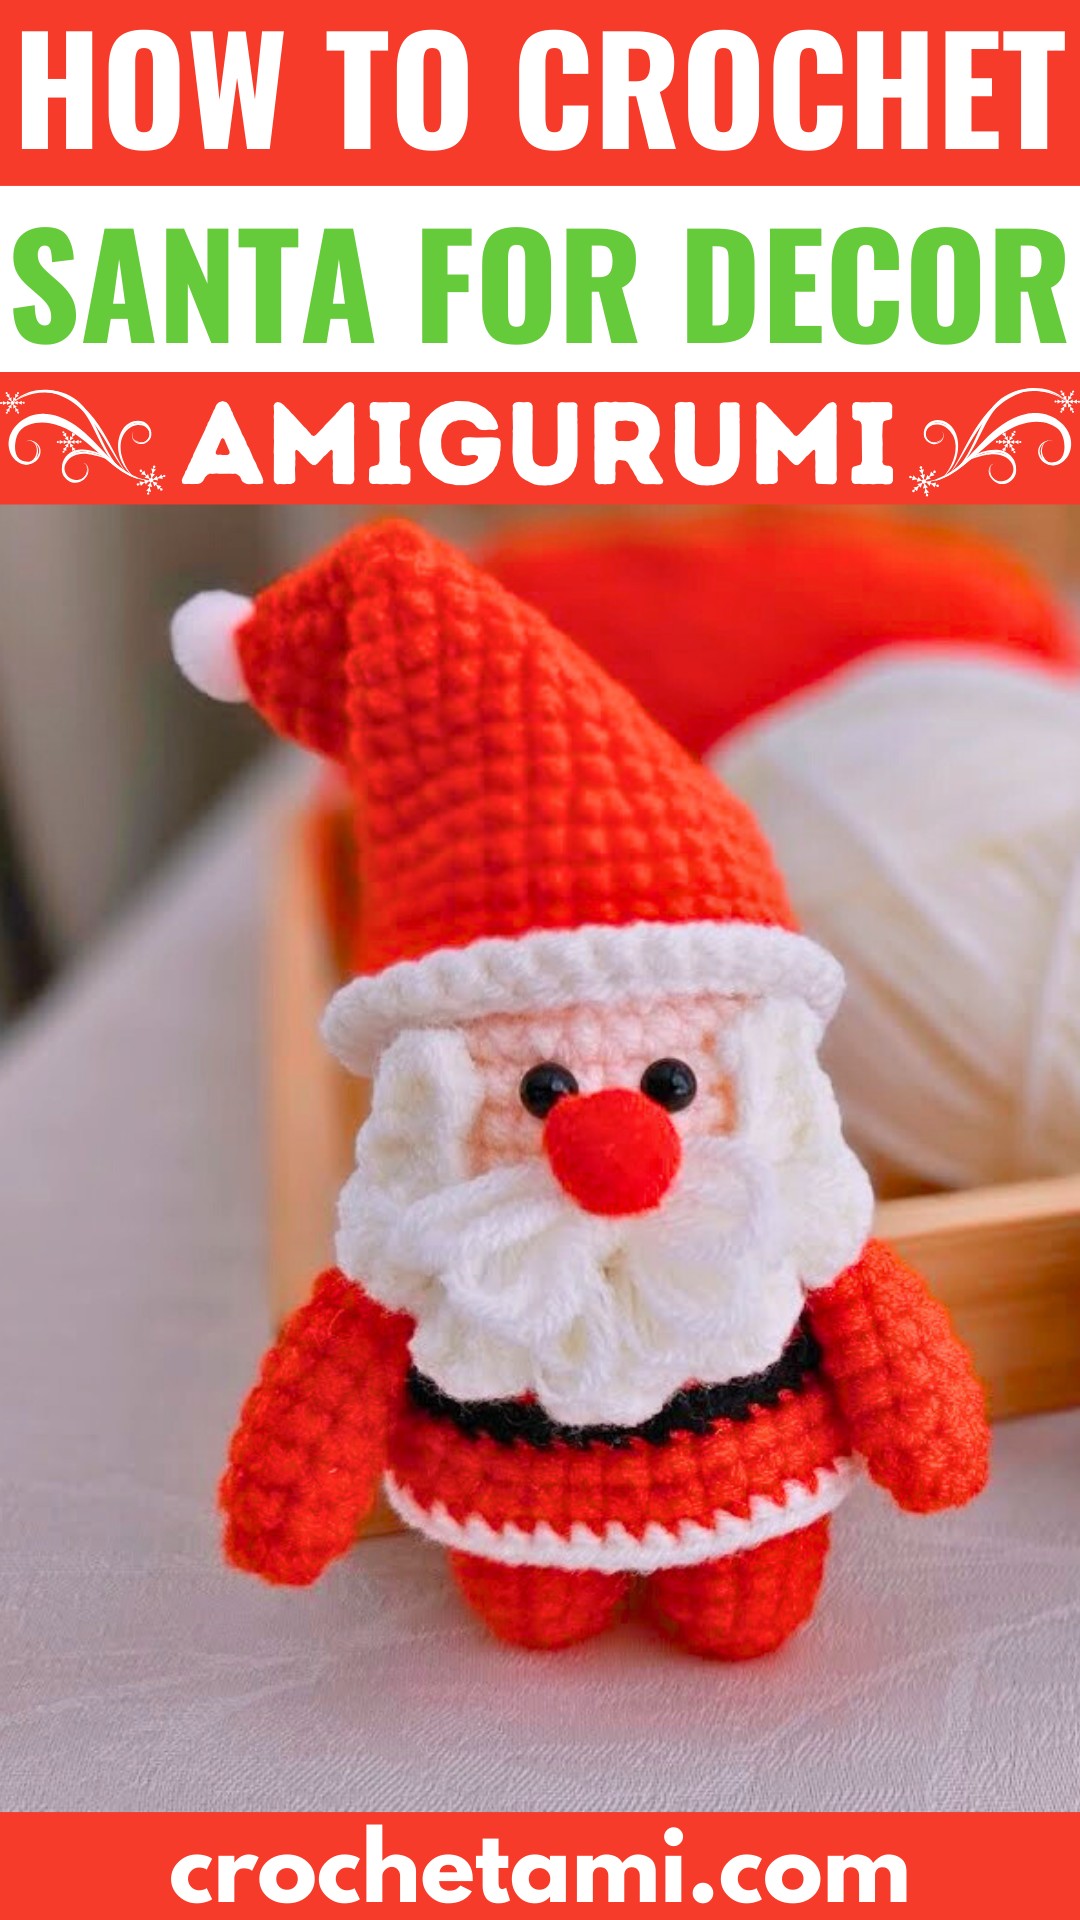
Bring a little Christmas magic to your home with this adorable crochet Santa you’ll enjoy making from the very first stitch.

This cheerful Santa brings timeless Christmas charm with its bright red suit, fluffy white beard, and festive little details. Whether displayed on a mantel, shelf, or holiday table, this crochet decoration adds a warm handmade touch that feels special year after year. As each section comes together, the familiar crochet Santa shape slowly begins to appear
The crochet pattern keeps the process simple while building every part in a clear order, making it enjoyable for beginners and experienced makers alike.
From the joined legs and shaped body to the beard, belt, hat, and final accents, every step adds another festive detail. By the final assembly, the crochet Santa is ready to become a keepsake decoration or a thoughtful handmade Christmas gift.
Credit Eny’s crochet
Key Features:
- Body Construction: Legs merge seamlessly to form the continuous base of the torso and head, with back-loop and dress overlays enhancing its structure.
- Textures: Includes puff-stitch beard loops, smooth facial scaling, layered dress folds, and small 5mm safety eyes.
- Holiday Style: Classic Christmas colors (red, white, black) with a detailed belt and festive accents.
Techniques & Stitches
- Working in the round
- Magic Ring (MR)
- Stitches: Single Crochet (sc), Increase (inc), Decrease (dec), Slip Stitch (slst), Half Double Crochet (hdc), Double Crochet (dc), Triple Crochet (tr)
- Back-loop and front-loop crocheting
Materials Required
- Yarns: Red, white, black, flesh-toned
- 5mm safety eyes
- Small red pom-pom (nose) and small white pom-pom (hat tip)
- Fiberfill stuffing
Tools:
- 2.0mm crochet hook
- Stitch markers
- Scissors
- Sewing needle
- Hot glue gun
Finished Size
Miniature amigurumi Santa suited for ornaments or decorations.
Gauge
No specific gauge provided; ensure tight, consistent stitches to prevent stuffing visibility.
Helpful Tips
- Use stitch markers to track rounds and stitch counts.
- Avoid tight crocheting on the lower border for a natural-looking dress overlay.

Step-by-Step Crochet Pattern Instructions
1. The Body & Head Structure
- First Leg
- Round 1: Using red yarn, work 5 sc into a magic ring.
- Round 2: Work 5 inc (10 sc). Place a stitch marker in the first stitch.
- Rounds 3–4: Work 10 sc around.
- Round 5: Work 5 sc, inc, 4 sc (11 sc). Fasten off thread.
- Second Leg:
- Repeat Rounds 1–5 from the first leg, but do not cut the thread after completing Round 5.
- Connecting the Legs:
- Round 6:
- Crochet 2 chains from the second leg to connect it to the first leg.
- Work 11 sc around the first leg.
- Work 2 sc across the chain bridge.
- Work 11 sc around the second leg.
- Work 2 sc across the other side of the chain loop (26 sc total).

- Building the Body & Head Shape:
- Round 7: 5 sc, inc, 12 sc, inc, 7 sc (28 sc).
- Rounds 8–9: Work 28 sc around.
- Round 10: Change to black yarn. Work 28 sc in back loops only.
- Round 11: Continue with black yarn; work 28 sc in back loops only.
- Stuff the legs and lower torso with fiberfill at this stage.
- Change to flesh/skin-toned yarn:
- Rounds 12–13: Work 28 sc around.
- Round 14: Work 28 sc in back loops only.
- Rounds 15–19: Work 28 sc around.
- Reducing the Head Shape:
- Round 20: (3 sc, dec) repeat 5 times, then 3 sc (23 sc).
- Round 21: Follow the reduction pattern sequence and make 3 sc around.
- Round 22: (2 sc, dec) repeat 5 times, then 3 sc (18 sc).
- Round 23: (sc, dec) repeat 5 times, then 3 sc (13 sc).
- Stuff the head cavity completely with fiberfill.
- Round 24: Work 6 dec, followed by a final sc. Fasten off and weave in ends.

2. Dress Overlay
- Locate the exposed front-loop ridges from the body setup.
- Round 1: Attach red yarn to front loops. Work 28 sc around.
- Round 2: (3 sc, inc) repeat 7 times (35 sc).
- Round 3: Switch to white yarn. Work 35 sc around to finish the hem of the dress.

3. Belt Detail
- Switch back to black yarn and attach it to the front loops of the black waist section.
- Work a clean row of slip stitches along the front loop around the torso to form the belt.

4. Santa’s Beard
- Initial Chain: Using white yarn, chain 18.
- Row 1:
- Turn and start in the second chain from the hook.
- Work: sc, hdc, slst, then repeat 【(3 dc in the same stitch), slst in the next stitch】 across the row for 6 loops.
- Work backward: hdc, then sc. Chain 1 and turn.
- Row 2:
- Work 6 slst across.
- Repeat 【(3 dc), 3 slst】 two times.
- At the center, make (3 tr) for a prominent loop.
- Repeat 【3 slst, (3 dc)】 twice to mirror the design.
- Finish with 6 slst across.
- Weave the needle through the back loops to tighten the beard into shape.

5. Small Accents
- Hands (Make 2):
- Round 1: Work 6 sc in a magic ring.
- Round 2: (sc, inc) repeat 3 times (9 sc).
- Rounds 3–4: Work 9 sc.
- Round 5: dec, 7 sc (8 sc).
- Round 6: Work 8 sc.
- Round 7: dec, 6 sc (7 sc). Fasten off, leaving a long tail for attachment.

- Pointed Hat:
- Round 1: Work 6 sc in a magic ring.
- Round 2: (sc, inc) repeat 3 times (9 sc).
- Round 3: Work 9 sc.
- Round 4: (sc, inc, sc) repeat 3 times (12 sc).
- Rounds 5–19: Continue increasing as specified in the pattern, ending at (33 sc).
- Round 20: Switch to white yarn. Work 33 sc in back loops only.
- Round 21: Work 33 sc in front loops only to create the rim. Fasten off.

Assembly Instructions
- Beard Placement:
- Attach the beard around the lower face (cheeks and jawline) using glue.
- Facial Features:
- Attach eyes above the beard fringe.
- Secure a small red pom-pom as the nose between and slightly below the eyes.
- Attach the beard around the lower face (cheeks and jawline) using glue.
- Hat Placement:
- Attach the white pom-pom to the hat tip and glue the hat onto the brow line of the head.
- Hands:
- Sew each hand onto the body just below the head, ensuring they are evenly placed on both sides.
Customization Options
- Swap jacket colors to create festive elves using the same framework.
- For pom-poms, crochet small yarn balls with 6 sc patterns for seamless ornament accents.

Troubleshooting
- Hat Rim Distortion: Loosen back-loop and front-loop tension during the hat’s rim rounds to prevent unnatural twisting.
Pattern Variations & Modification Ideas
All variations, structural adjustments, and steps match the core tutorial layout exactly. You can switch up the classic Christmas theme by swapping out the primary jacket colors to make custom festive holiday elves using the identical assembly framework.
Final Notes
Shape your fiberfill evenly, ensuring a smooth, plush finish. Your festive Santa amigurumi is now ready to spread holiday cheer.