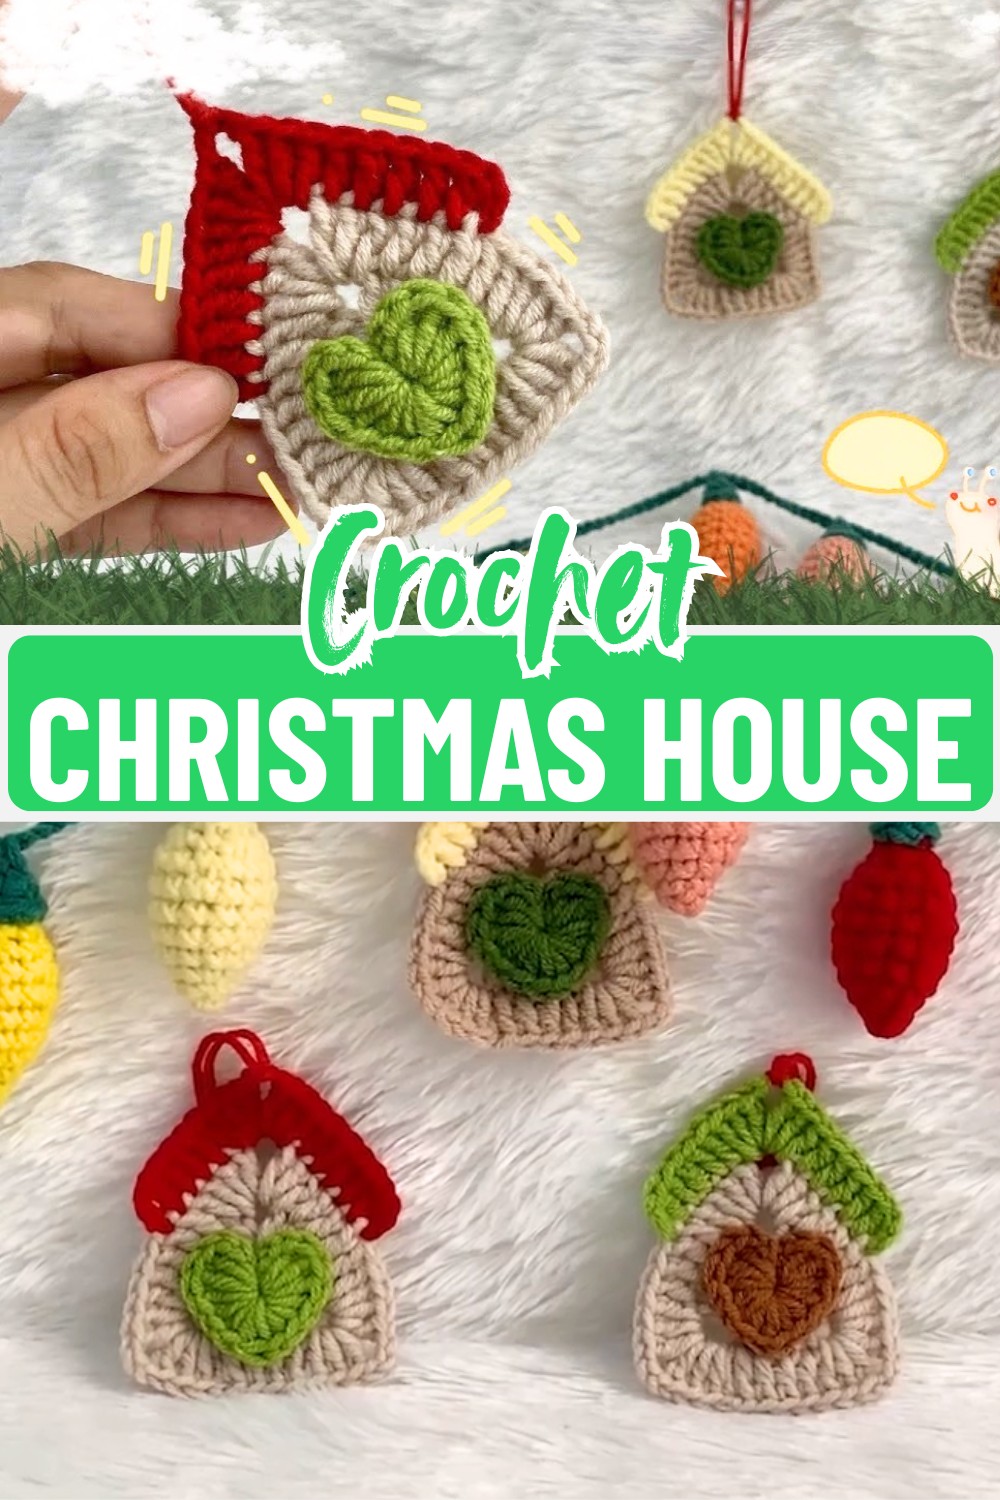
Add a handmade holiday accent to your Christmas collection with this charming crochet house ornament. This tiny gingerbread-inspired design measures 7.5 cm tall and 5.5 cm wide, making it a lovely choice for shelves, table displays, or tree decorations.
The layered house shape and heart detail create a festive crochet piece that feels special in every corner of your holiday space.
This crochet pattern is a simple way to create a miniature Christmas decoration while practicing basic stitches like magic ring, chain, double crochet, half double crochet, and slip stitch. Using a 3 mm hook and 2 mm cotton yarn, you’ll shape the house base, add the contrasting roof overlay, and complete it with a small heart accent. The step-by-step instructions show how these simple elements come together into a sweet handmade ornament.
Credit Bua Crochet
Design Details
- Theme: Festive Gingerbread House Ornament
- Structure: A layered, flat-lay design featuring a triangular body for the house with a contrasting color roof overlay.
- Embellishments: A delicate heart accent at the center front, to symbolize either a door or a welcoming window display.
Techniques & Key Stitches Used
- Magic Ring (mr)
- Chain Stitch (ch)
- Double Crochet (dc)
- Half Double Crochet (hdc)
- Slip Stitch (slst)
- Color switching between panels
- Working and joining directly along edges
Materials Needed
- Yarn: Cotton yarn, size 2 mm (suggested colors: beige for the house, yellow/green for the heart, and festive contrasts for the roof).
- Tools:
- Crochet hook (size 3 mm)
- Yarn needle (for assembly and weaving in loose tails)
- Scissors
Finished Size / Measurements
- Height: 7.5 cm
- Width: 5.5 cm
Abbreviations
- mr: Magic ring
- ch: Chain
- dc: Double crochet
- hdc: Half double crochet
- slst: Slip stitch
Helpful Tips Before You Start
- Ensure your magic ring is pulled tight to avoid any open holes.
- Maintain consistent tension to align all elements during assembly.
- Block individual pieces if needed for a polished look.

Pattern Overview & Making Process
The making process starts with the central heart detail, which is created using a magic ring followed by chain stitches, double crochet, and half double crochet stitches. After completing the stitch sequence, the heart is secured by tightening the magic ring and closing the center.
The house base is then worked from a magic ring using double crochet stitches and chain spaces to build the main triangular structure. The second round adds more stitches around the edges and corners, creating the complete base shape for the ornament.
For the final part, the roof overlay is added with contrasting yarn by working along the top and side edges of the house base. After finishing the roof, the heart piece is attached to the center, loose ends are secured, and an optional yarn loop can be added to transform the design into a hanging Christmas decoration.
Step-by-Step Pattern Instructions
1. Central Heart Detail
Round 1: Begin with a magic ring. Work:
- Tighten the magic ring and secure the yarn.
- Work: 2 ch, 3 dc, 3 hdc, dc, 3 hdc, 3 dc, 2 ch.
- Secure the round with a slst into the center of the ring.
- Pull yarn tail tightly to close the center hole and secure the heart.

2. House Base
- Round 1: Begin with a magic ring. Chain 2 (counts as your first dc). Then work:
- [5 dc, 3 ch] a total of 3 times.
- Finish with a slst to join the round.
- Round 2: Ch 3 (counts as 1st dc). Work:
- 5 dc, then [3 dc, 3 ch, 3 dc] in each corner chain space.
- Continue around the perimeter 3 times.
- Join the round with a slst to close.

3. Roof Overlay
- Row 1: Attach contrasting yarn at the top corner of the house base. Work:
- 3 ch
- 5 dc across the side edge
- [3 dc, 3 ch, 3 dc] in the center peak corner
- 5 dc across the opposite side
- 3 ch and fasten with a slst.
Secure and cleanly fasten off the yarn.

Assembly Instructions
- Using your yarn needle: Place the heart piece at the center of the house base.
- Sew around the edges of the heart to attach it.
- Weave in all loose ends securely at the back.
- Optional: Add a top yarn loop to transform the ornament into a hanging decoration.

Customization Options
- Colors: Personalize by experimenting with vibrant reds, greens, or even pastels for a softer holiday theme.
- Hanging Loop: Use metallic or shiny yarn for added festive sparkle.
Troubleshooting & Tips
- Loose Magic Ring: Securely weave the tail through the ring stitches in opposite directions multiple times to ensure it stays tight.
- Alignment Issues: Double-check tension and ensure all pieces are blocked (shaped and sized) before assembly.
Pattern Variations
- Adjust by using unique colors for your heart or your roof to create a variety of festive designs.
- Use beads, mini pompoms, or embroidery to embellish further.
Conclusion & Final Notes
Once complete, your festive Gingerbread House ornament is ready to spread joy! Decorate your tree, give it as a handmade gift, or hang one anywhere that needs extra cheer this holiday season.