Want a handmade snowman with plenty of personality? Crochet the stuffed figure, then finish it with a beanie, scarf, buttons, and smile.
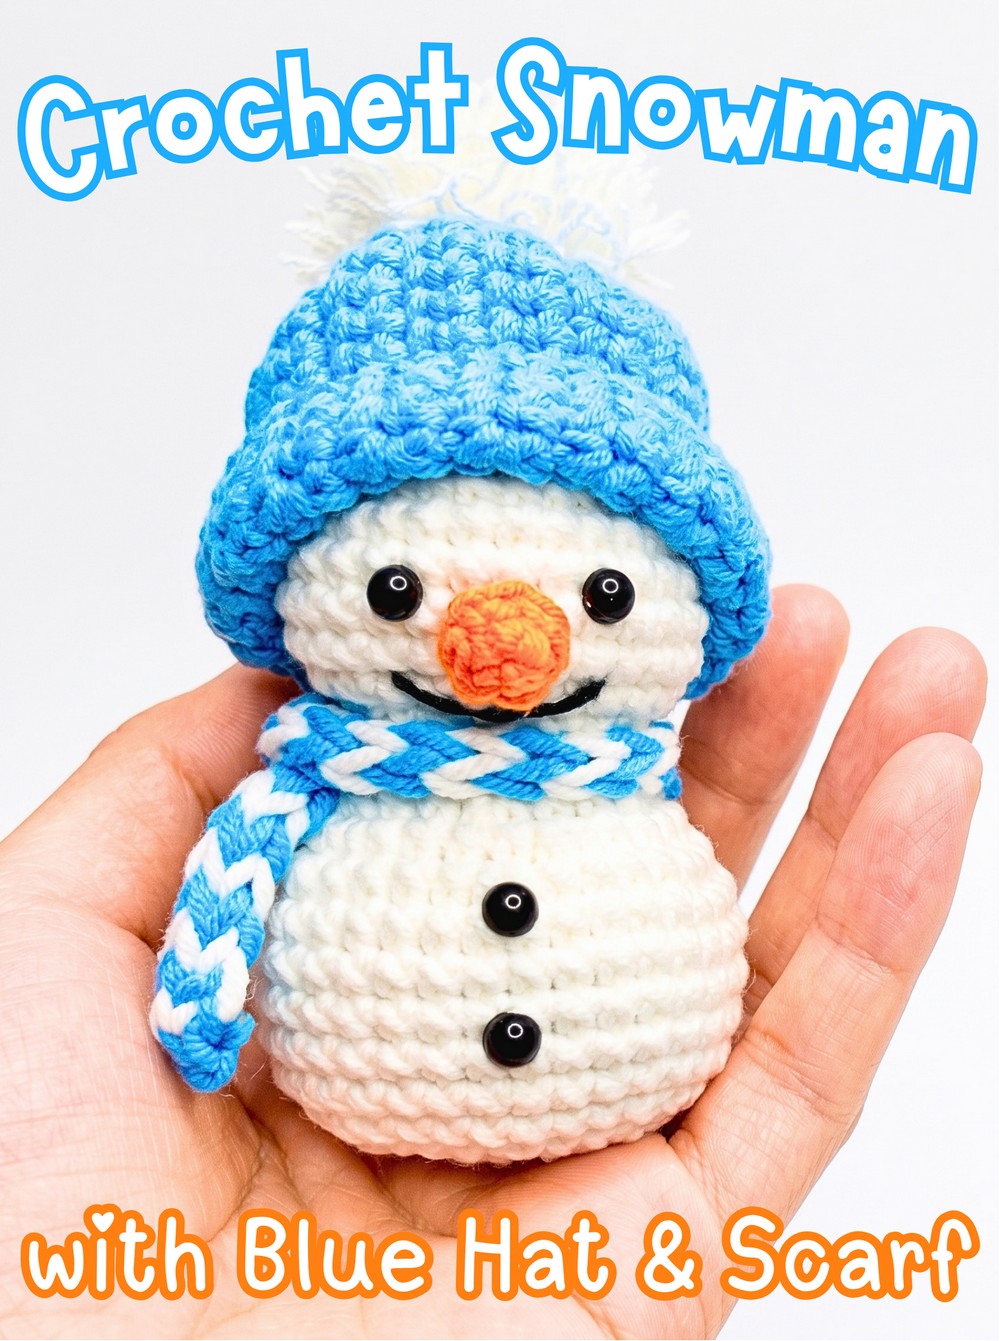
Winter details give this little crochet snowman most of his personality. His rounded white shape provides a simple base, while the orange nose, blue beanie, striped scarf, buttons, and embroidered smile turn it into a recognizable seasonal crochet snowman character.
Following the crochet pattern takes you through the shaping in a natural order, beginning with the head and body before moving to the nose, hat, and scarf. You’ll also get the stitch counts for each shaping round, guidance for working the body in front loops only at the transition, and practical direction for placing the facial features and finishing the winter accessories.
Credit Xuxu Crochet
Materials Needed
- Milk cotton yarn, size 2 mm
- White for the main body and head
- Orange for the nose
- Blue and white for the hat and scarf
- Black thread for facial details
- 2.5 mm crochet hook
- 4 safety eyes or 5 mm small beads
- Polyester stuffing (fiberfill)
Abbreviations
- R – round
- SC (sc) – single crochet
- FLO – front loops only
- inc – increase
- dec – decrease
- ch -chain
- sl st – slip stitch

Shape the White Head First
The head starts small and gradually widens before narrowing again. This increase-and-decrease sequence creates the rounded stuffed shape, so keeping track of the stitch count at the end of each round is especially useful.
Head – White Yarn
R1: Make a magic ring and work 6 sc into the ring.
R2: Work 2 sc in each st around – 12 sts.
R3: Repeat (1 sc, 1 inc) around – 18 sts.
R4: Repeat (1 sc, 1 inc, 1 sc) around – 24 sts.
R5: Repeat (3 sc, 1 inc) around – 30 sts.
R6–R9: Work 1 sc in each st around – 30 sts.
R10: Repeat (3 sc, 1 dec) around – 24 sts.
R11: Repeat (1 sc, 1 dec, 1 sc) around – 18 sts.
R12: Repeat (1 sc, 1 dec) around – 12 sts.
Stuff the head firmly with fiberfill, then fasten off.
Shape Check
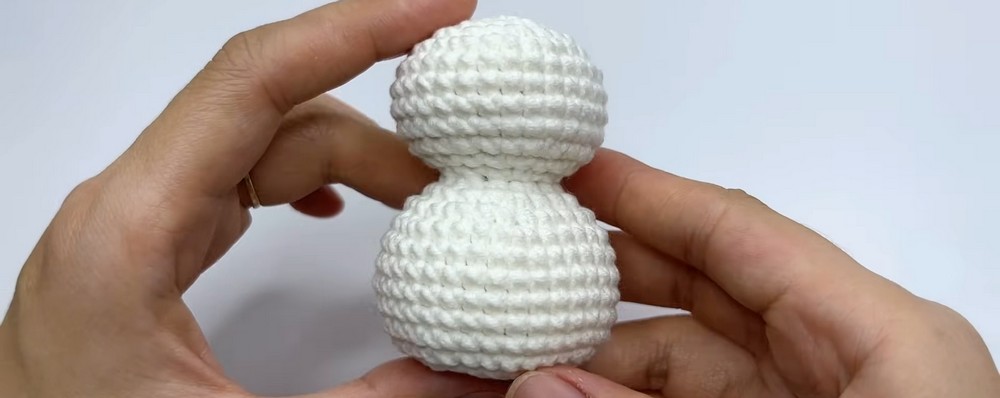
The head should be rounded after the increase rounds and the four even rounds. When the decreases begin, the opening should gradually become smaller rather than closing suddenly.
Stuffing at this point is important because the opening becomes smaller through R10–R12. Filling the head firmly before fastening off makes it much easier to distribute the fiberfill evenly while you can still reach the inside.
Build the Body From the Head
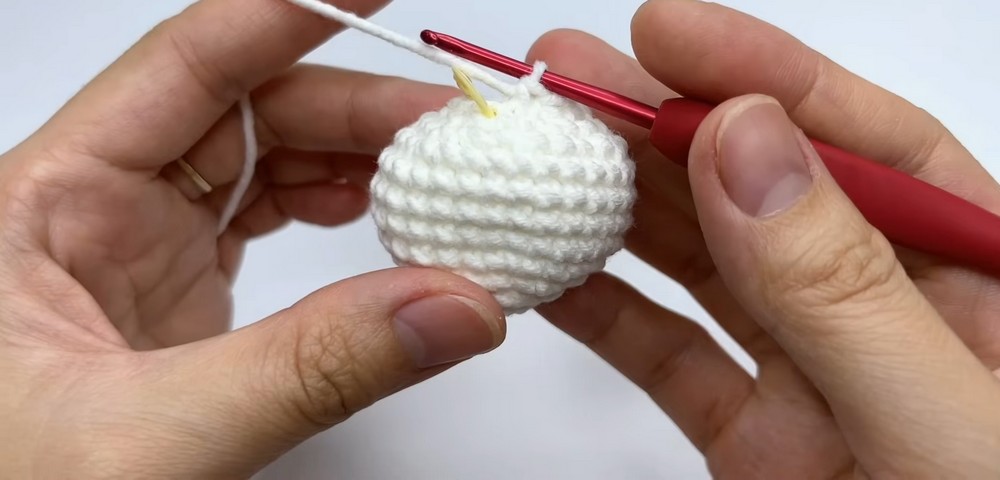
The body continues from the head, beginning with a special front-loop-only (FLO) round. This transition is worth watching closely because R13 is the point where the body shaping starts.
Body – White Yarn
R13: Working in FLO, repeat (1 sc, 1 inc) around.
R14: Repeat (1 sc, 1 inc, 1 sc) around.
R15: Repeat (3 sc, 1 inc) around.
R16: Repeat (2 sc, 1 inc, 2 sc) around.
R17–R21: Work 1 sc in each st around.
R22: Repeat (7 sc, 1 dec) around.
R23: Repeat (2 sc, 1 dec) around.
R24: Repeat (1 sc, 1 dec) around.
Stuff the body fully with fiberfill.
R25: Work 8 dec to close the opening, fasten off, and weave in the yarn tail.
Keep the Body Firm but Even
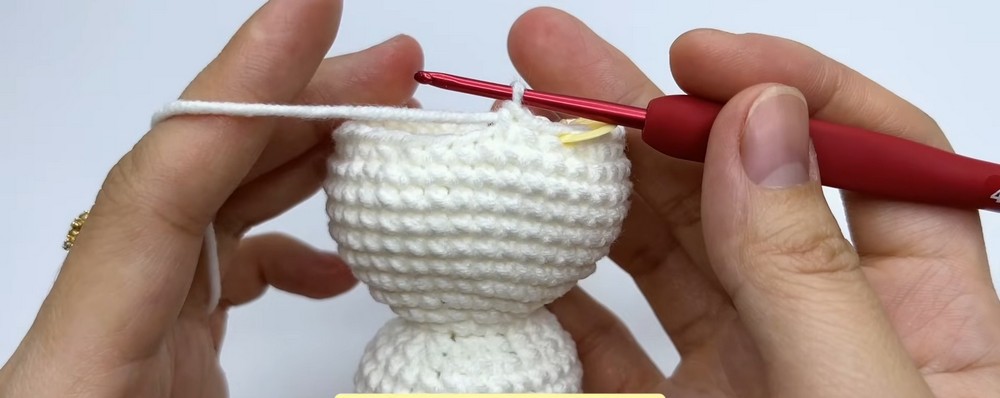
Add the fiberfill fully before working R25, because the final decrease round closes the opening. Firm stuffing helps the finished snowman hold its rounded body shape, but distribute it evenly so one side does not become noticeably fuller than the other.
The decrease sequence from R22 through R25 gradually reduces the opening. Following the stitch counts carefully helps prevent an unexpectedly wide or narrow ending.
Give the Snowman His Orange Nose
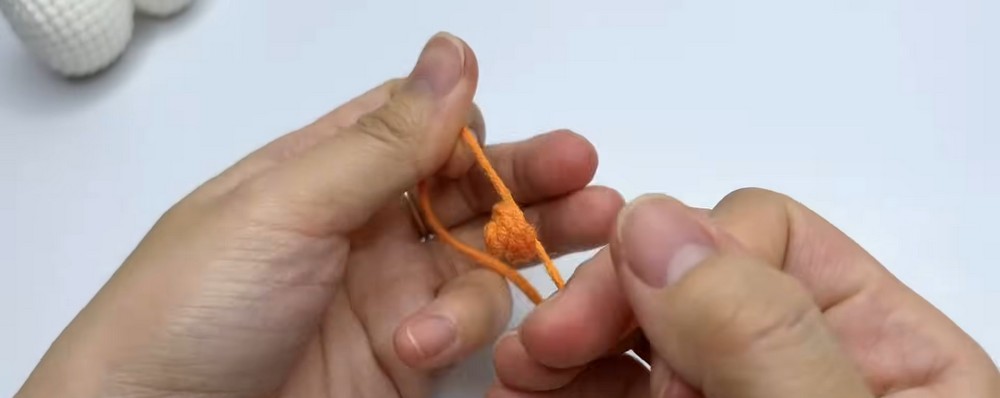
The nose is a very small shaped piece, so its five-stitch count in R2 is easy to check before fastening off.
Nose – Orange Yarn
R1: Make a magic ring, work 4 sc, and pull the ring closed.
R2: Sl st to join, ch 1, work 1 sc in each of the first 3 sts, then 1 inc in the last st — 5 sts.
Sl st to join, turn the nose right side out, fasten off, and leave a yarn tail for sewing.
Turning the nose right side out before fastening gives you the correct orientation for attaching it to the face. Keep the sewing tail long enough to position and secure the small piece without needing an additional strand.
Make the Blue Beanie
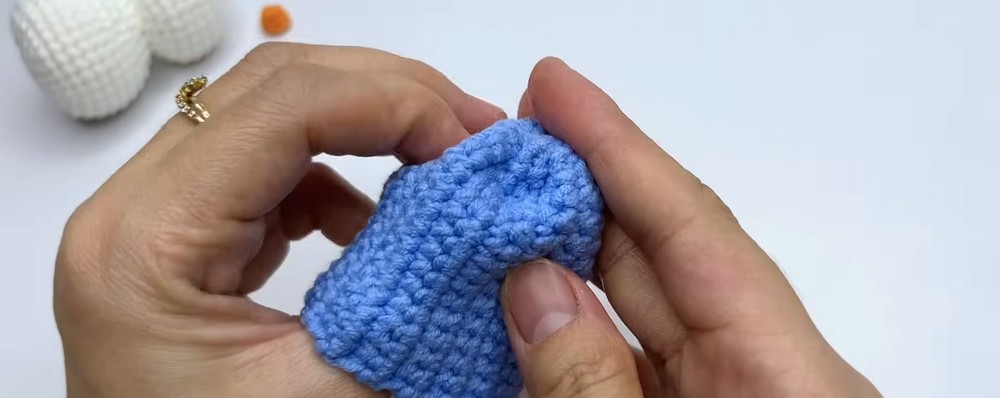
Unlike the rounded head and body, the hat starts as a flat rectangle. Its width comes from the 15 sc rows, while its length is adjusted by continuing the rows until the band matches the head circumference.
Hat – Blue Yarn
Foundation: Ch 16.
Row 1: Sk first ch and work 15 sc across.
R2–R30: Ch 1, turn, and work 15 sc in each row until the band matches the head circumference.
The stated pattern works through R30, but the important fitting point is that the completed band should match the head circumference. Check the band around the head before seaming so the hat is not joined noticeably too tight or loose.
Turn the Hat Into a Beanie
Fold the completed blue rectangle and seam the side edges together. This changes the flat strip into a circular band.
Next, stitch the top end closed to form the crown of the beanie, then turn the hat right side out.
Make a small white pom-pom and attach it to the top.
Hat Shape Check
After turning the beanie right side out, check that the side seam sits neatly and the closed top creates a recognizable crown. The pom-pom should be attached at the top rather than along the side so it finishes the beanie shape.
Add the Striped Scarf
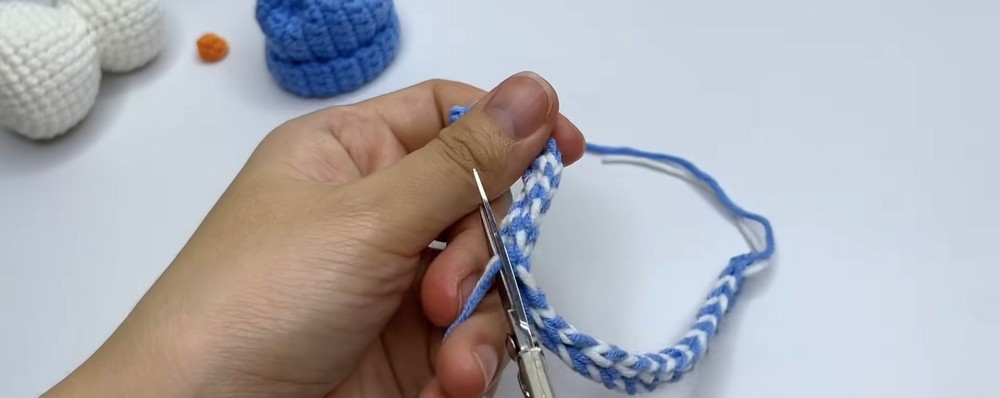
The scarf uses both blue and white yarn and is worked in Tunisian-style color-switching rows.
Foundation: Ch 3.
Continue alternating blue and white every row for approximately 40 rows, or until the scarf reaches a comfortable length around the snowman’s neck. Finish off and weave in the ends.
Because the supplied instructions specify the Tunisian-style color switching but do not provide individual stitch instructions for each row, keep the scarf work to that stated method rather than substituting another stitch pattern.
The main fitting check is its length: wrap the completed scarf around the neck before finishing if you want to confirm that approximately 40 rows gives the desired amount of coverage.
Bring the Snowman to Life
Once the main pieces and accessories are ready, the remaining work is mostly about placement. Small details make a noticeable difference here, so position each feature before permanently securing it when possible.
Face and Buttons
- Wrap the scarf around the neck.
- Place the blue beanie on the head.
- Glue or sew the orange nose onto the face.
- Attach safety eyes or beads on either side of the nose.
- Add two more beads down the front of the body as buttons.
- Embroider a smile with black thread.
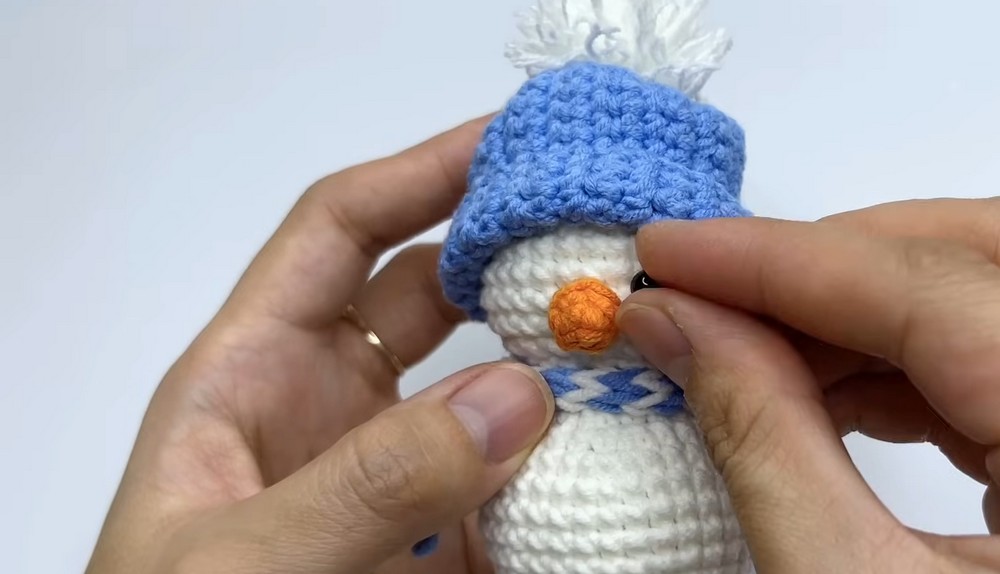
The nose provides the central reference point for the face. Placing the eyes on either side of it helps keep the features balanced, while the two body beads can then be arranged vertically below.
If using beads or safety eyes, make sure they are securely attached. For items intended for very young children, choose finishing methods and components appropriate for the intended use.

Check the Finished Details
Before considering the snowman finished, look at the small elements together rather than checking them one at a time:
- The orange nose should sit clearly at the center of the face.
- The eyes or beads should frame the nose.
- The black embroidered smile should remain visible below it.
- The two body buttons should run down the front.
- The blue beanie should sit securely on the head with the white pom-pom at the top.
- The blue-and-white scarf should wrap naturally around the neck.
These final placement checks help the accessories work together as one character instead of looking like separate pieces added at random.