Turn simple crochet stitches, colorful beads, and tiny wings into a charming dragonfly keychain with this beginner-friendly step-by-step guide.

A handmade dragonfly keychain adds a playful touch to your keys, handbag, or backpack without requiring a large crochet pattern. Its two pairs of decorative wings, dangling beads, and delicate shape make it a lovely little crochet accessory, especially when you choose colors that reflect your own style.
This tutorial guides you through making the larger and smaller wing crochet pieces, joining them with beads and thread, and attaching the keychain hardware. You will also find helpful guidance for keeping the wing pieces oriented correctly and securing the hanging details so your finished crochet dragonfly looks neat and ready to use.
Credit Dhita Rajut
Materials & Tools Needed
Gather your materials before beginning so you can move smoothly from crocheting the wings to assembling your dragonfly.
- Yarn: Sport- or DK-weight cotton yarn, or another yarn weight of your choice, in your preferred colors for the dragonfly wings and body.
- Crochet Hook: Choose a hook suitable for your yarn. A 2.0 mm to 2.5 mm hook is an example for small crochet thread or sport-weight yarn.
- Tapestry Needle: Use this to weave in yarn ends after completing each wing piece.
- Stitch Markers: These help identify the foundation-chain turning point.
- Beading Wire or Thread Helper: Use this to guide the string through the small beads.
- Small Beads: Prepare beads in different sizes for the hanging tail and the area above the wings.
- Jump Ring: This connects the crocheted decoration to the keychain finding.
- Keychain Finding: Choose a keychain attachment suitable for your finished pattern.
- String or Thread: Use this to connect the wings, beads, and keychain hardware.
Finished Size & Customization Ideas
The finished dragonfly consists of two pairs of crocheted wings, with the larger pair measuring approximately 14 foundation chains in length and the smaller pair measuring approximately 12 foundation chains in length.
The final size will depend on your yarn weight, crochet hook, and individual tension.
Make the design your own:
- Choose contrasting colors: Use one color for the large wings and another for the small wings to create a bright, multicolored dragonfly.
- Adjust the dangling beads: Add more or fewer beads to change the length and appearance of the hanging tail.
- Experiment with yarn sizes: Different yarn weights and appropriate hook sizes can create smaller or larger wing pieces.
Pattern Abbreviations & Terminology
- Ch: Chain
- St / Sts: Stitch / Stitches
- Sl St: Slip Stitch
- SC: Single Crochet
- DC: Double Crochet
- Rnd / Row: Round / Working round
A helpful stitch reminder: A single crochet is shorter than a double crochet. The double crochet stitches create the fuller, rounded sections of the wings, while the single crochet stitches form narrower transitions between them.

How to Crochet a Dragonfly Keychain
You will make two separate wing pieces: one larger piece and one smaller piece. After fastening off both pieces, you will thread them with beads and attach the keychain hardware.
Part 1: Crochet the Large Wings
The large wing piece begins with a foundation chain of 14 stitches. A marker helps you identify the turning point before you start forming the wing shape.
Step 1: Make the foundation chain
Start with a slip knot and chain 14.
Place a stitch marker in the 14th chain to identify the turning point. Keep the chain untwisted as you prepare for the next step.
Step 2: Add the turning chain
Chain 3 additional stitches.
These extra chains form the starting section described in the pattern. Keep track of them because you will return to the first chain of this three-chain addition near the end of the wing.

Step 3: Crochet the first side
Working back down into the marked 14th chain space, make 6 double crochet stitches (DC).
Keep all 6 double crochets in the specified chain space, as directed by the pattern. Stitch count: 6 DC.
Step 4: Make the center transition
In the next consecutive stitch, work 1 single crochet (SC).
This shorter stitch creates the transition between the two fuller sections of the wing. Stitch count: 1 SC.
Step 5: Crochet the second side
Continue along the opposite side of the chain, working 6 double crochet stitches.
Keep your work positioned so you can continue around the foundation chain without twisting the crocheted piece. Stitch count: 6 DC.
Step 6: Shape the wing tip
At the very last loop or stitch space at the end of the chain, work 6 double crochet stitches into the same space.
Putting all 6 stitches into one space creates the rounded, fuller tip of the wing. Stitch count: 6 DC in one loop.
Step 7: Work along the return path
Mirror the opposite side by working the following stitches in order:
- 6 DC
- 1 SC
- 6 DC
Follow the same direction and placement shown in your source tutorial so the two sides form the intended wing shape. Stitch count: 6 DC, 1 SC, 6 DC.
Step 8: Complete the base
In the first chain of the initial three-chain addition, work 5 double crochet stitches into the same stitch space.
This completes the base section according to the supplied pattern instructions. Stitch count: 5 DC in one space.
Step 9: Join and fasten off
Join with a slip stitch into the very first double crochet.
Cut the yarn, pull the tail through to secure it, and use a tapestry needle to weave in the remaining ends at the back of the wing.
Helpful Technical Note for the Large Wings
The written instructions use the marked 14th chain as a turning point and then describe working along the opposite side of the foundation chain. This wording can be confusing if you are unfamiliar with crocheting around a chain.
Keep your stitch marker in place until you have completed the section it identifies, and pay close attention to the exact chain space used in the video. The written notes do not fully clarify every loop placement, so do not move the stitches to a different space simply to make the written sequence seem more familiar.

Part 2: Crochet the Small Wings
The smaller wing piece follows the same general construction as the large one, but it starts with a shorter foundation chain and uses fewer double crochets along its sides.
Step 1: Make the foundation chain
Start with a slip knot and chain 12.
Place a stitch marker in the 12th chain to mark the turning point.
Step 2: Add the turning chain
Chain 3 additional stitches.
Keep these chains easy to identify, as the pattern returns to the first chain of this addition when completing the base.
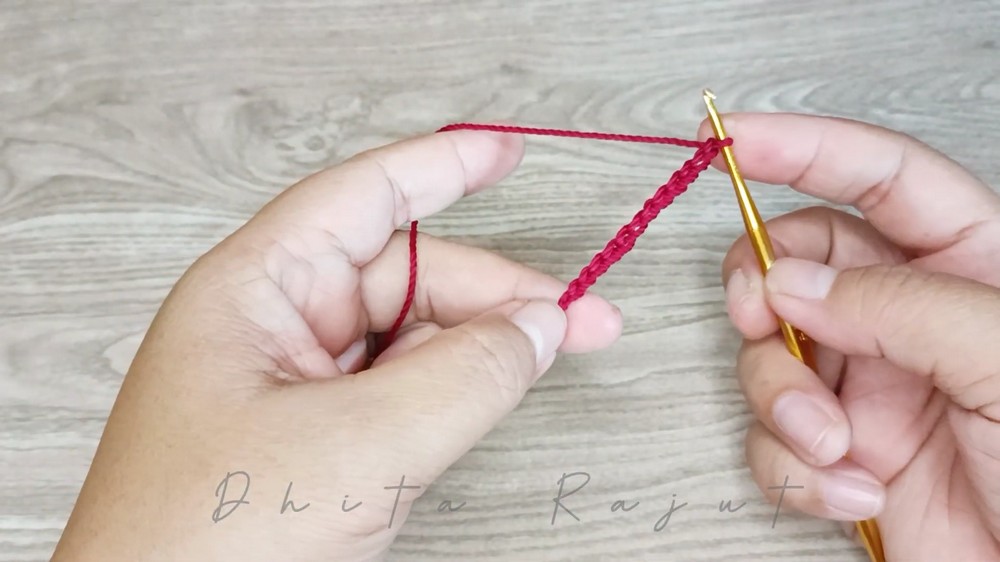
Step 3: Crochet the first side
Starting from the marked chain, work 5 double crochet stitches. Stitch count: 5 DC.
Step 4: Make the center transition
In the next stitch, work 1 single crochet. Stitch count: 1 SC.
Step 5: Crochet the second side
Continue along the chain as instructed, working 5 double crochet stitches.
Keep the foundation chain positioned correctly so the wing can be worked around it without twisting. Stitch count: 5 DC.
Step 6: Shape the wing tip
In the final loop or stitch space, work 6 double crochet stitches into the same space.
These stitches create the fuller tip of the smaller wing. Stitch count: 6 DC in one loop.
Step 7: Work along the return path
Work the following stitches in order:
- 5 DC
- 1 SC
- 5 DC
Keep the stitch placement consistent with the source tutorial. Stitch count: 5 DC, 1 SC, 5 DC.
Step 8: Complete the base
In the first chain of the initial three-chain addition, work 5 double crochet stitches into the same stitch space. Stitch count: 5 DC in one space.

Step 9: Join and fasten off
Join with a slip stitch into the first double crochet.
Fasten off, pull the yarn tail to the back, and weave in all remaining ends neatly with a tapestry needle.
You should now have two separate crocheted pieces: one larger wing piece and one smaller wing piece.
Check the Wing Pieces Before Assembly
Before threading the pieces, lay the large and small wings next to each other. Check that both pieces are securely fastened off and that their shape matches the intended design.
If one piece looks twisted or its rounded tip faces the wrong direction, arrange it correctly before attaching the beads. This small check makes assembly easier and helps you avoid having to untie the finished hanging section later.
Assembly: Add the Beads and Keychain Hardware
Once both wing pieces are ready, use a separate piece of string or thread to connect the decorative components.
Step 1: Cut the string
Cut a piece of string or thread to a comfortable working length.
Use a beading wire or thread helper to guide it through the small beads more easily.

Step 2: Thread the first three beads
Thread 3 beads onto the string first.
These beads form the initial hanging section of the design.
Step 3: Add the smaller wing piece
Thread the smaller crocheted wing piece onto the string after the first group of three beads.
Position it carefully so it sits in the intended direction.
Step 4: Add the larger wing piece
Add the larger crocheted wing piece above or below the smaller wings, according to your preferred layout.
Before tightening anything, check how the two pieces sit together. Adjust their orientation until the dragonfly has the appearance you want.
Step 5: Add the individual bead
Thread 1 individual bead above the wings.
This bead adds another decorative detail between the crocheted pieces and the keychain attachment.

Step 6: Attach the jump ring and keychain finding
Attach the jump ring and the keychain finding as described in the supplied assembly instructions.
Check that the connection is secure and that the crocheted pieces hang in the intended direction.
Step 7: Secure the body
Pull and adjust the components until they sit snugly together.
Tie a secure double knot just beneath the initial group of 3 beads to lock the arrangement in place.
For extra security, wrap and tie a second stacked knot over the first. Make sure the knots hold firmly before trimming any excess thread.
One Useful Assembly Tip
Arrange the two wing pieces and check their orientation before tightening the knots. Once the beads and thread are secured, changing the position of the wings may require undoing part of the assembly. Taking a moment to check the layout first helps you achieve a neater finish.
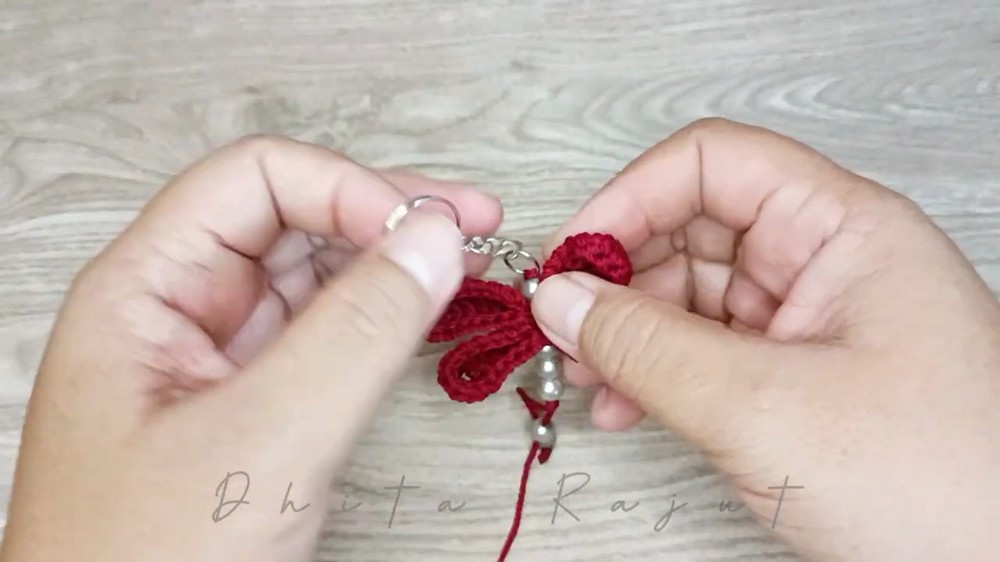
Finishing Touches: Customize the Dragonfly Tail
Your crocheted dragonfly keychain is almost complete. The final details let you adjust the hanging section to suit your preferred style.
Step 1: Decide how to finish the dangling threads
You can leave the two dangling bottom tail threads plain for a simple look.
Alternatively, string additional beads of varying lengths onto them to create a longer, more decorative hanging tail.
Step 2: Secure and trim the ends
Check that all end knots are firmly secured.
Trim any excess threads cleanly, taking care not to cut too close to a knot that needs to hold the assembly together.
Your handmade crochet dragonfly keychain is now ready to use or give as a small handmade gift.
Display and Use Your Finished Dragonfly
Attach your dragonfly to your keys, backpack, purse, or another suitable accessory. You can also make several versions in different color combinations for handmade gifts or a coordinated set.
For a bright design, contrast the large and small wings. For a softer look, choose two similar shades and coordinate the beads with the yarn.
The most important finishing detail is a secure connection between the string, beads, wings, and keychain finding. Check the knots and attachment before using the keychain, especially if it will be handled frequently.