Meet the sweetest little crochet ghost for Halloween, complete with rosy cheeks, a tiny smile, and playful accessories you can switch up with a flower crown or cowboy hat.
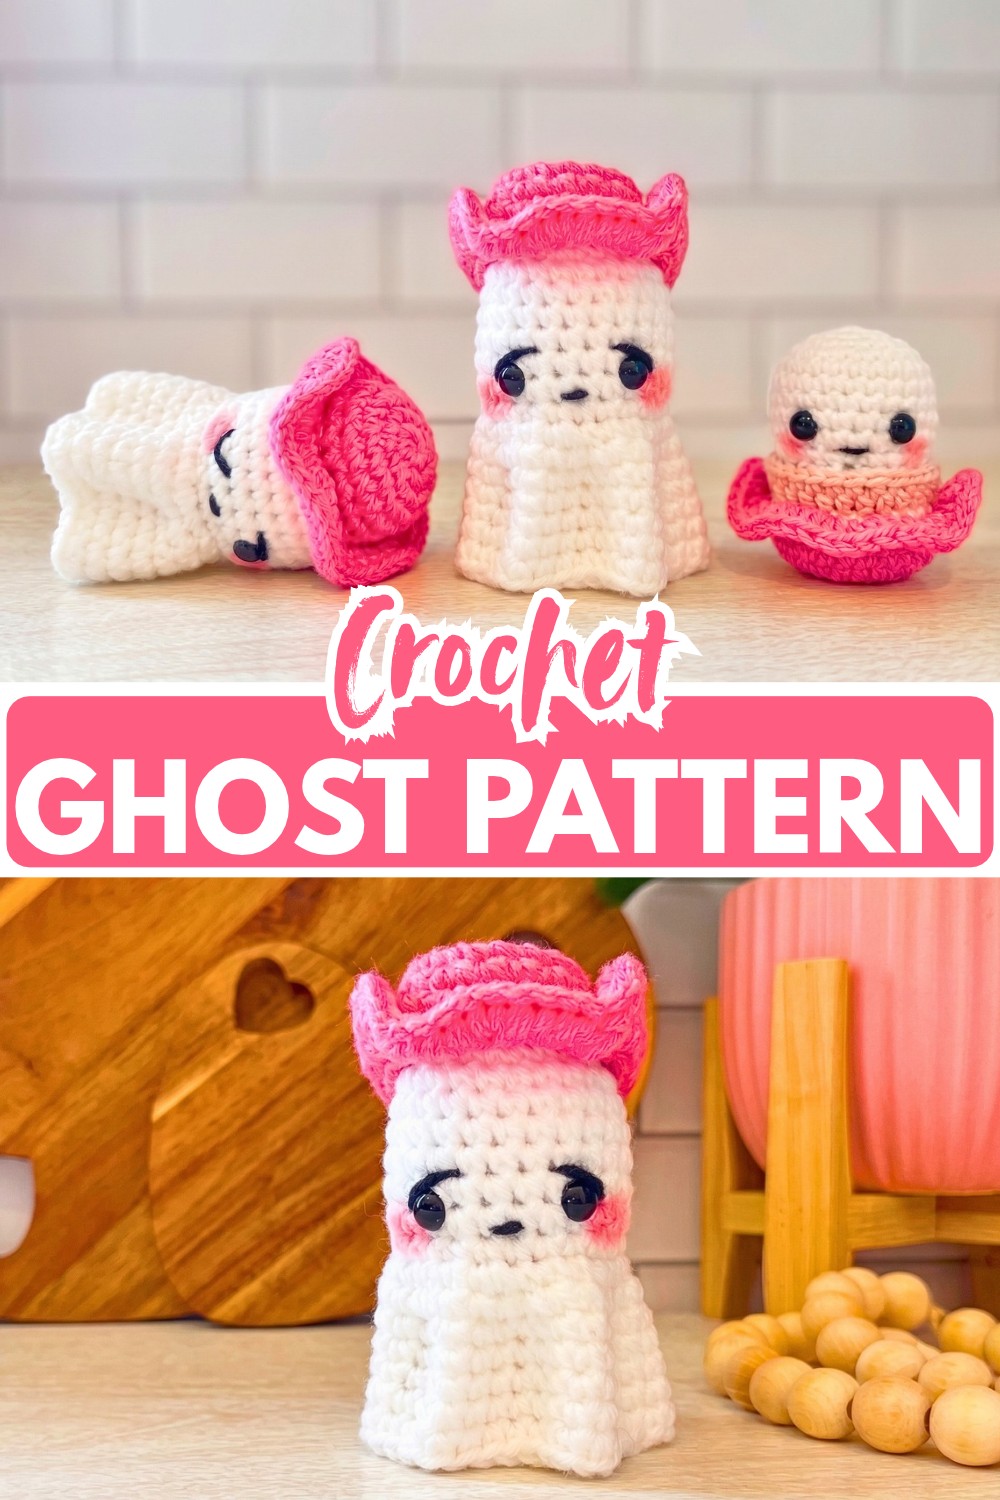
Some Halloween decorations are meant to look spooky, while others are much too cute to be frightening. This tiny crochet ghost falls into the second group, with its rounded shape, sweet little face, and soft white finish making it an easy addition to a shelf, desk, or Halloween display.
I especially like how much personality you can give this little crochet ghost with just a few small details. A touch of blush makes the face sweeter, while three tiny flowers or a cowboy hat can completely change its look. The accessories are optional, so you can keep the crochet ghost simple or dress it up for your own Halloween style.
Credit Crimson & Wool
Materials & Tools
- White worsted-weight acrylic yarn, size 4
- Small amount of black yarn for the facial details
- Yellow yarn for the flowers, if desired
- Pink yarn for the cowboy hat, if desired
- 4 mm crochet hook for the ghost and cowboy hat
- 2.75 mm crochet hook for the flowers
- 9 mm safety eyes with backings
- Black embroidery floss or yarn
- Tapestry needle
- Scissors
- Stitch marker
- Fiberfill stuffing
- Blush, optional
- Hot glue and glue sticks, optional for attaching the flowers
Finished Size
The finished ghost is approximately 4 inches tall, not including the cowboy hat. Your finished size may vary slightly depending on your yarn, hook, and crochet tension.
Before You Start
This pattern uses US crochet terminology and is worked in rounds. Keep a stitch marker at the beginning of the round so it is easier to keep track of your place, especially through the repeated single crochet rounds.
There is one construction detail to watch carefully: Round 12 of the ghost body is worked in the back loop only (BLO). The unused front loops are needed later when you return to make the ghost’s base, so make sure you are working through the correct loop before continuing.
Pattern Abbreviations
- st: stitch
- ch: chain
- sc: single crochet
- HDC: half double crochet
- DC: double crochet
- inc: increase – work 2 sc in the same stitch
- dec: decrease – work 2 stitches together
- BLO: back loop only
- FLO: front loop only

Step-by-Step Instructions
Crochet the Ghost Body
Begin with the white yarn and make a magic circle.
Round 1: Work 6 sc into the magic circle. (6 sts)
Round 2: Work 2 sc in each stitch around. (12 sts)
Round 3: Repeat [1 sc, inc] around. (18 sts)
Round 4: Repeat [2 sc, inc] around. (24 sts)
Rounds 5–11: Work 1 sc in each stitch around. (24 sts)
Keep your stitch marker in place as you work these rounds. Since there are no increases or decreases here, your stitch count should stay at 24 stitches from Round 5 through Round 11.

Add the Safety Eyes
Place the 9 mm safety eyes between Rounds 9 and 10.
Starting from the beginning of Round 9, count 4 visible stitches apart and position the eyes. Once they look even, push the eyes through the stitches and secure them with their backings.
Because this ghost is quite small, eye placement has a big effect on its expression. Before securing the backings completely, look at the face straight on and make any small adjustment needed to keep the eyes level.
Shape the Top of the Ghost
The next rounds begin closing the upper part of the ghost.
Round 12: Working in the BLO, repeat [2 sc, dec] around. (18 sts)
Teaching Tip: Only use the back loop in this round. The front loops are intentionally being left unused because they will become the starting point for the ghost’s base later. This is an important construction step, so check your stitches before moving on.
Add the stuffing before closing the top. Start with small amounts and work them evenly into the body. The ghost should feel full and rounded without being packed so tightly that the stitches stretch.

Round 13: Working in the FLO, work the decreases around until 9 stitches remain. (9 sts)
Cut the yarn, leaving a long tail. Thread the tail onto a tapestry needle and weave it through the FLO of the remaining 9 stitches. Pull gently to close the opening, secure the yarn, and weave in the remaining tail.
Build the Ghost Base
Now return to the front loops that were left unused from Round 12.
Reattach the white yarn to these loops with a slip stitch. These loops form the foundation for the lower part of the ghost, so work carefully around the entire circle to keep the base even.
Round 12: Repeat [3 sc, inc] around. (30 sts)
Round 13: Repeat [4 sc, inc] around. (36 sts)
Rounds 14–18: Work 1 sc in each stitch around. (36 sts)
Fasten off by skipping one stitch and slip stitching into the next. Cut the yarn, leaving a tail, and weave in the end securely.
Teaching Tip: Once the base is finished, look at the ghost from the front and side. If the body needs a little shaping, gently adjust it with your fingers. Avoid pulling tightly on the stitches, as this can distort the rounded body.
Add the Facial Details
Use black yarn or embroidery floss to finish the ghost’s expression.
Add small diagonal accents around the eyes, then stitch a small smiling mouth between them. Secure the yarn at the back and weave in the ends neatly.
You can make the smile slightly wider or smaller depending on the expression you want. Since the face is small, even a tiny change can make the ghost look more playful or more delicate.

For rosy cheeks, apply a small amount of blush to each side of the face. Start lightly and build the color gradually so the cheeks stay soft rather than overpowering the face.
Make the Flower Crown
The flower crown gives the ghost a softer, more cheerful look. Make 3 small flowers using the 2.75 mm crochet hook.
Flower: Chain 2 and work 1 DC into the magic circle. Chain 2 and slip stitch into the magic circle to complete one petal. Repeat this sequence 4 more times to make 5 petals in total.
Tighten the magic circle and secure the yarn. Weave the ends into the back of the flower so they stay hidden.
Make two more flowers in the same way.
Arrange the three flowers before attaching them to the ghost. Try placing them in a row, slightly to one side, or across the top until you find an arrangement you like.
Use a small amount of hot glue to attach the flowers, or stitch them into place if you prefer a sewn finish. Small pom-poms can also be added to the flower centers for another decorative touch.

Make the Cowboy Hat
For a completely different personality, make the optional cowboy hat using pink yarn and a 4 mm crochet hook.
Round 1: Make a magic circle and work 6 sc into the magic circle. (6 sts)
Round 2: Work 2 sc in each stitch around. (12 sts)
Round 3: Repeat [1 sc, inc] around. (18 sts)
Round 4: Work 1 sc in the BLO of each stitch around. (18 sts)
Round 5: Repeat [2 sc, inc] around. (24 sts)
Rounds 6–7: Work 1 sc in each stitch around. (24 sts each round)
Round 8: Working in the FLO, work [3 HDC increases, 6 DC increases, 6 HDC increases, 6 DC increases, 3 HDC increases] around. (60 sts)

Fasten off by skipping one stitch and slip stitching into the next. Cut the yarn, leaving a tail, and weave it through the stitches with a tapestry needle to secure the edge. Backtrack across the final stitch through the back loop to help smooth and secure the edge.
Teaching Tip: The final round is what creates the wider brim of the hat. When finishing this edge, avoid pulling the yarn too tightly, or the brim may lose some of its shape.

Assemble the Ghost
Once the ghost body and accessories are complete, give the piece a final check before attaching anything permanently.
Place the flower crown on the top or side of the ghost and secure it if you want it to stay in one position.
For the cowboy version, place the hat over the ghost’s head and adjust it until it sits evenly. If you want the hat to remain permanently attached, stitch or glue it carefully to the head.
You can also leave the accessories removable. This makes it easy to change the ghost’s look without making another body.
Finally, check the face from the front and make any small adjustments to the blush, smile, flowers, or hat so everything looks balanced.
Simple Ways to Customize Your Ghost
The basic ghost shape gives you plenty of room to change the finished look.
Try:
- Using different colors for the flowers
- Making the cowboy hat in another color
- Placing the flower crown slightly to one side
- Making the embroidered smile wider or smaller
- Adding a little more or less blush
- Changing the color of the facial details
- Adding a small decorative detail to the hat
The accessories are especially useful if you want several ghosts with different personalities while keeping the same basic body pattern.
Final Check
Before displaying your finished ghost, make sure the safety eyes are secure, the top opening is completely closed, the base is firmly fastened, and all yarn ends have been woven in.
If you attached the flowers or hat permanently, check that they are firmly secured as well.
Your little crochet ghost is ready to bring a soft, playful touch of Halloween charm to a shelf, desk, party display, or handmade gift.