This crochet Halloween ghost adds a soft and playful touch to seasonal decorating with its sweet expression, cozy hood, and simple amigurumi shape.
Small enough for shelves, desks, gift baskets, or keychains, it brings festive charm without looking too spooky. The contrast between the bright white head and dark hood gives this little crochet ghost its delightful Halloween character from the very first glance.
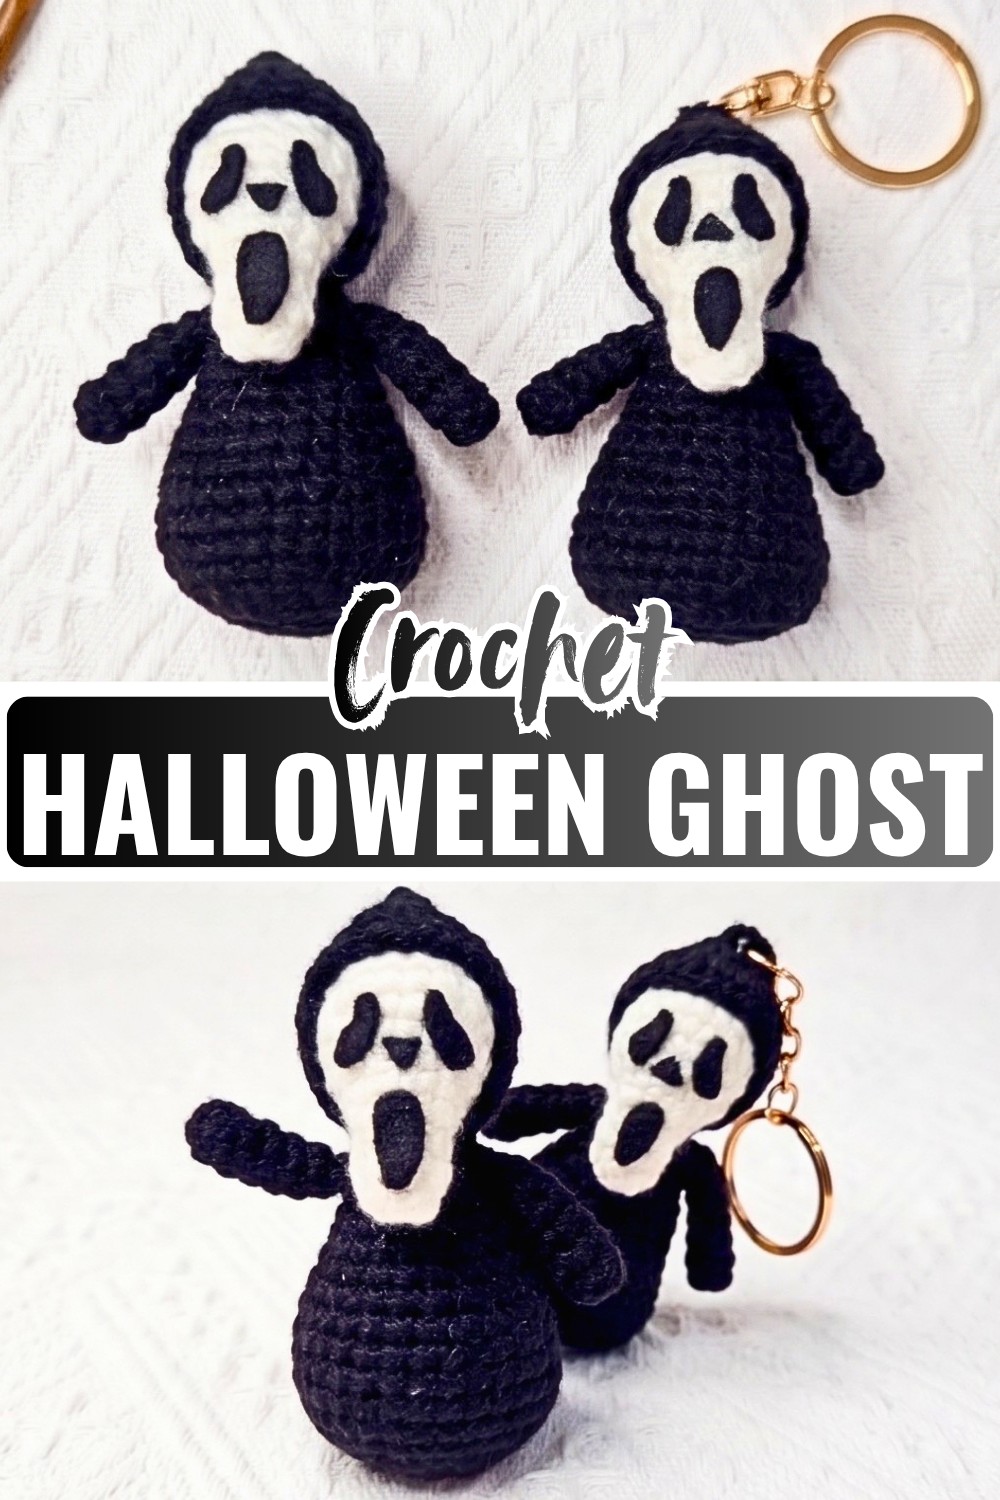
The crochet design is made in separate pieces, allowing each section to come together smoothly before the final assembly.
From shaping the rounded head and body to adding the hood and felt facial features, every stage gradually brings this friendly crochet ghost to life. As the pieces come together, its playful personality begins to shine, making the finished decoration even more rewarding to complete.
Credit Eny’s crochet
Pattern Information
Skill Level
Beginner to intermediate.
Pattern Type
Amigurumi (crochet ghost keychain or decorative figure).
Finished Size
Small; suitable for a keychain or festive decoration.
Construction Method
Parts are crocheted separately and sewn together for assembly.
Worked in Spiral or Rows
- Head, body, and arms: Worked in spirals.
- Hood: Worked flat in rows.
Materials Supplies
- Yarn
- White: head
- Black: body, hood, arms
- Optional: grey or other “spooky” colors
- Hook
- 2.0 mm crochet hook
- Stuffing
- Polyester fiberfill
- Facial Features
- Black felt (eyes, nose, mouth)
- Craft/fabric glue
- Tools
- Stitch markers
- Yarn needle
- Scissors
- Tweezers (for stuffing small parts)
Gauge: Not specified. Finished size is a small amigurumi / keychain.
Crochet Abbreviations
- MR – Magic ring
- sc – Single crochet
- inc – Increase (2 sc in same st)
- dec – Decrease
- hdc – Half double crochet
- slst – Slip stitch
- ch – Chain
- rep – Repeat
- st – Stitch
All rounds are worked in a spiral unless otherwise stated. Use a stitch marker in the first stitch of each round.
Important Notes
- All rounds are worked in spiral unless otherwise stated.
- Use a stitch marker in the first stitch of each round for accuracy.

Step-by-Step Pattern Instructions
Head (White Yarn)
Round 1: 6 sc in MR (6). Slst to first sc, ch 1.
Round 2: 6 sc (6)
Round 3: (2 sc, inc) rep 2 (8)
Round 4: 8 sc (8)
Round 5: 2 inc, 4 sc, 2 inc (12)
Round 6: (sc, inc) rep 2, 4 sc, (sc, inc) rep 2 (16)
Round 7: (inc, 7 sc) rep 2 (18)
Rounds 8–10: 18 sc (18)
Round 11: (sc, dec) rep 6 (12)

Stuff head firmly with fiberfill.
Round 12: 6 dec (6)
Fasten off. Weave tail through front loops of remaining sts, pull tight to close, secure and hide end.
Body (Black Yarn)
Round 1: 6 sc in MR (6)
Round 2: 6 inc (12)
Round 3: (sc, inc) rep 6 (18)
Round 4: (2 sc, inc) rep 6 (24)
Round 5: (3 sc, inc) rep 6 (30)
Rounds 6–8: 30 sc (30)
Round 9: (3 sc, dec) rep 6 (24)
Rounds 10–11: 24 sc (24)
(Round numbers in the video skip 12, but stitch counts continue as follows)
Rounds 13–14: 18 sc (18)
Round 15: (sc, dec) rep 6 (12)
Rounds 16–17: 12 sc (12)
Fasten off, leaving a long tail for sewing. Stuff body with fiberfill.

Hood / Hat (Black Yarn)
Worked flat in rows.
Row 1: Ch 20. Starting in 3rd ch from hook, 18 hdc (18)
Row 2: Ch 2, turn, 18 hdc (18)
Rows 3–4: Repeat Row 2 (total 4 rows of 18 hdc)
Fold the rectangle in half so short edges meet. Sew the top edges together to form a hood.
Leave a long tail to sew the hood onto the figure.
Arms (Black Yarn – Make 2)
Round 1: 6 sc in MR (6)
Rounds 2–6: 6 sc (6)
Fasten off, leaving a tail for sewing. Lightly stuff if desired (or leave unstuffed for floppier arms).

Assembly
- Attach Head to Body
- Thread the long tail from the body onto a yarn needle.
- Sew the top opening of the body to the base of the head, going around evenly. Secure and weave in the tail.
- Attach Hood
- Place the hood over the head so the seam is centered at the back.
- Sew around neck and upper body to fix hood in place.
- Attach Arms
- Position arms on either side of the body at an appropriate height.
- Sew securely using each arm’s yarn tail.
- Face (Felt)
- Cut small shapes from black felt: eyes, nose, mouth.
- Glue onto the front of the white head. Let it dry fully.

Easy Customizations Ideas
- Add a metal keychain loop to the top of the hood for a bag charm/keychain.
- Use grey, purple, or other colors for alternative ghost styles.
- Embroider details instead of felt if you prefer no glue.
Helpful Tips
- Use a stitch marker in the first st of each round to keep track.
- Leave long yarn tails on head, body, and arms for easier sewing.
- If black yarn is hard to see, practice once in light-colored yarn before switching to black.
Finished Ghost
Enjoy your cute and spooky Ghost character! Whether you’re looking for a festive display piece, a Halloween accessory, or a fun keychain souvenir, this charming creation is sure to delight. Let its playful, spooky vibe add a touch of Halloween magic to your decorations or everyday items!