Here’s a petite crochet Christmas tree that folds a colorful granny square into a layered 3D shape, making a festive ornament from just a few simple rounds.
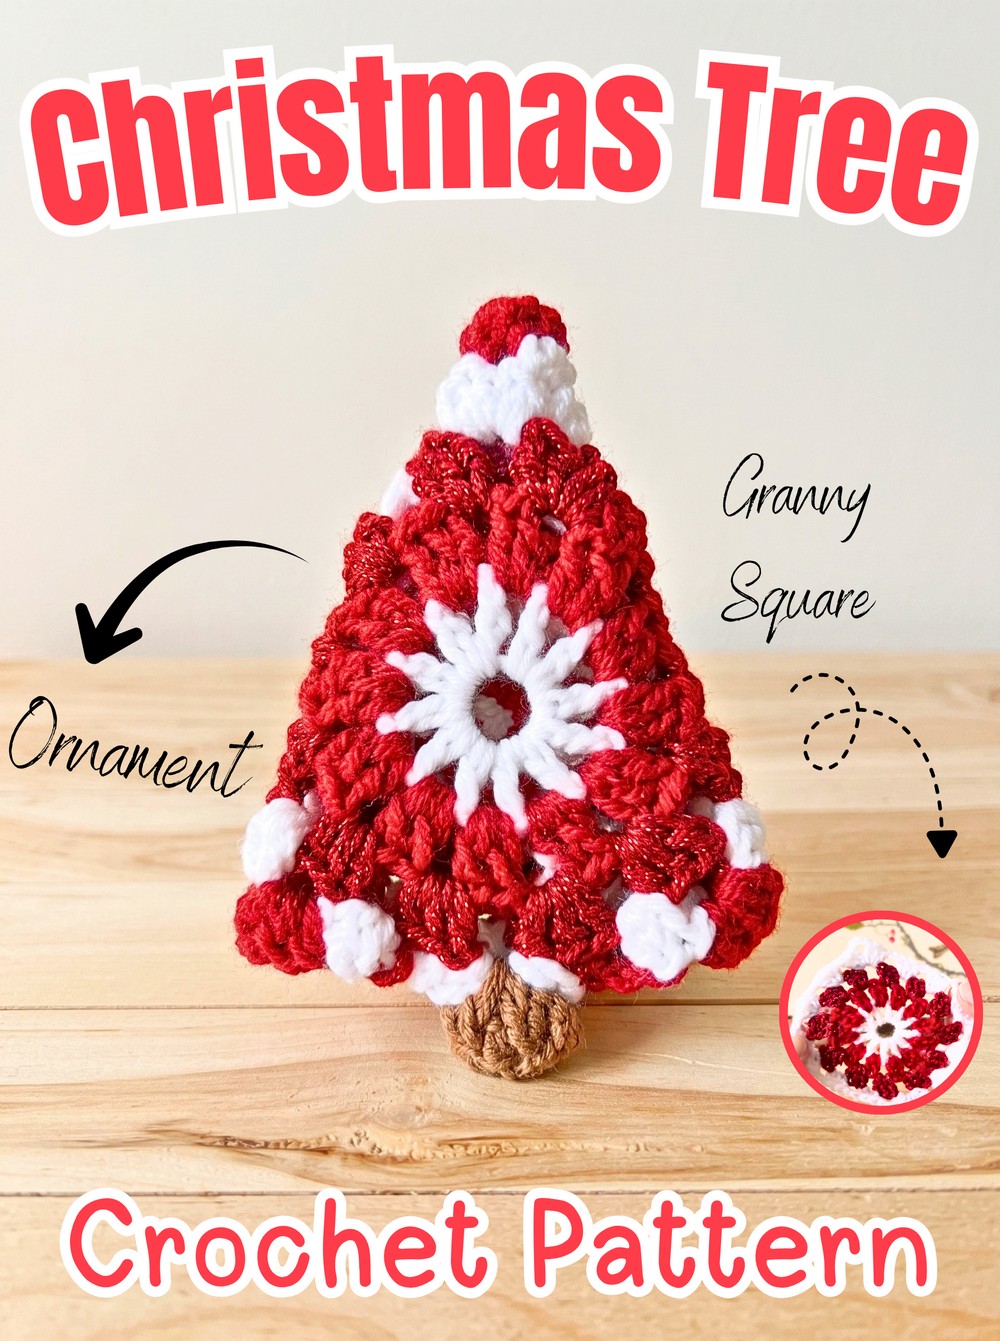
Folded corners give this crochet Christmas tree an unexpectedly dimensional shape, turning an ordinary-looking granny square into a petite holiday decoration. The sparkly red rounds add a festive touch, while the brown trunk gives the finished crochet tree a recognizable little silhouette.
This crochet pattern is suitable for a small, lightweight ornament and can also be adapted for bunting, gift toppers, or keychains.
The tutorial moves from the white center through three expanding rounds, shows exactly how the final square is folded and seamed, and finishes with a simple crocheted trunk. Color changes and tiny embellishments also make it easy to give each tree its own holiday style.
Credit CrochetMagic Channel
Materials & Tools
- Worsted or light worsted weight yarn
- White
- Sparkly or metallic red
- Brown
- 3.0 mm crochet hook
- Yarn needle for seaming and weaving in ends
- Scissors
Finished Size & Customization
The finished piece creates a petite, lightweight Christmas tree ornament.
The same tree shape can be used beyond a hanging ornament. Add several together for holiday bunting, attach one to a wrapped gift as a decorative topper, or add suitable hardware to turn it into a keychain.
For the colors, keep the sparkly red for a bright holiday effect, or replace it with evergreen, snowy blue, or neon shades. Tiny beads, buttons, or embroidered French knots can also be sewn onto the finished tree to resemble miniature Christmas ornaments.
Abbreviations
- MR: Magic Ring
- ch: Chain
- dc: Double Crochet
- sl st: Slip Stitch
- sp: Space
- st(s): Stitch(es)

How the Crochet Tree Takes Shape
Before beginning, it helps to know that the tree does not start as a triangle. You will first crochet a four-round granny-square shape. The first three rounds expand the circle, the fourth round creates four corners, and those corners are then folded inward to create the layered tree silhouette.
Pay particular attention to the ch-1 spaces throughout the rounds. They are the spaces where the next round’s clusters are placed. In Round 4, four of those spaces become corners by receiving a larger chain-3 opening between two 3-dc clusters.
Once the square is finished, resist the temptation to cut or fold randomly. The tree shape comes from using two adjacent corners and bringing their edges toward the center. The long white tail from Round 4 is then used to secure that fold.
Round 1: Crochet the White Center
The first round establishes the circular center and creates the 12 chain-1 spaces that the red yarn will use in Round 2.
Step 1: Make a MR with white yarn.
Step 2: Ch 4; this counts as the first dc and a ch-1 space.
Now, Step 3: Work (1 dc, ch 1) into the MR 11 times.
Step 4: Pull the starting yarn tail tightly to close the center hole.
Step 5: Join with a sl st into the 3rd chain of the initial ch-4.
Fasten off the white yarn and weave in the end.
Round 1 check: You should have 12 dc and 12 ch-1 spaces. The circle should be closed neatly in the middle without a large opening.

Round 2: Expand with Sparkly Red
Round 2 increases the amount of fabric around the center by placing two double crochets into every chain-1 space.
Step 1: Attach the sparkly red yarn into any ch-1 space from Round 1.
Step 2: Ch 3, counting as the first dc; work 1 dc into the same space, then ch 1.
Now, Step 3: In each of the remaining 11 ch-1 spaces, work (2 dc, ch 1).
Step 4: Join with a sl st to the top of the initial ch-3.
Round 2 check: You should now have 24 dc, arranged as twelve 2-dc clusters, plus 12 ch-1 spaces. These spaces remain important because Round 3 will build its larger clusters into them.

Round 3: Build the Larger Clusters
The third round increases each cluster from two double crochets to three. The short slip-stitch positioning at the beginning places your yarn directly into the first chain-1 space.
Step 1: Sl st into the next dc, then sl st into the first ch-1 space.
Step 2: Ch 3, counting as the first dc; work 2 dc into the same space, then ch 1.
Now, Step 3: Work (3 dc, ch 1) into each ch-1 space around the circle.
Step 4: Join with a sl st to the top of the initial ch-3.
Fasten off the red yarn and weave in the end.
Round 3 check: You should have 36 dc, arranged as twelve 3-dc clusters, and 12 ch-1 spaces. At this point the fabric is still circular; the square shape will appear in the next round.

Round 4: Turn the Circle into a Square
White yarn returns for the final round. Most spaces receive an ordinary 3-dc cluster, but four selected spaces receive two clusters separated by a ch-3 corner space. Those four larger openings create the square’s corners.
Step 1: Attach white yarn in any ch-1 space.
Step 2: Ch 3, counting as the first dc; work 2 dc into the same space, then ch 1.
Now, Step 3: In the next space, work (3 dc, ch 1).
Step 4: In the following space, make the first corner: (3 dc, ch 3, 3 dc, ch 1).
Step 5: Work (3 dc, ch 1) into each of the next two spaces.
Now, Step 6: In the next space, make the second corner: (3 dc, ch 3, 3 dc, ch 1).
Step 7: Work (3 dc, ch 1) into each of the next two spaces.
Step 8: In the next space, make the third corner: (3 dc, ch 3, 3 dc, ch 1).
Now, Step 9: Work (3 dc, ch 1) into each of the next two spaces.
Step 10: In the final space, make the fourth corner: (3 dc, ch 3, 3 dc, ch 1).
Step 11: Join with a sl st to the top of the initial ch-3.
Fasten off the white yarn, leaving a long tail of approximately 10–12 inches for the assembly.
Round 4 check: You should now have a completed granny square with 16 three-dc clusters and 4 ch-3 corner spaces. Lay it flat before folding so you can clearly identify all four corners.
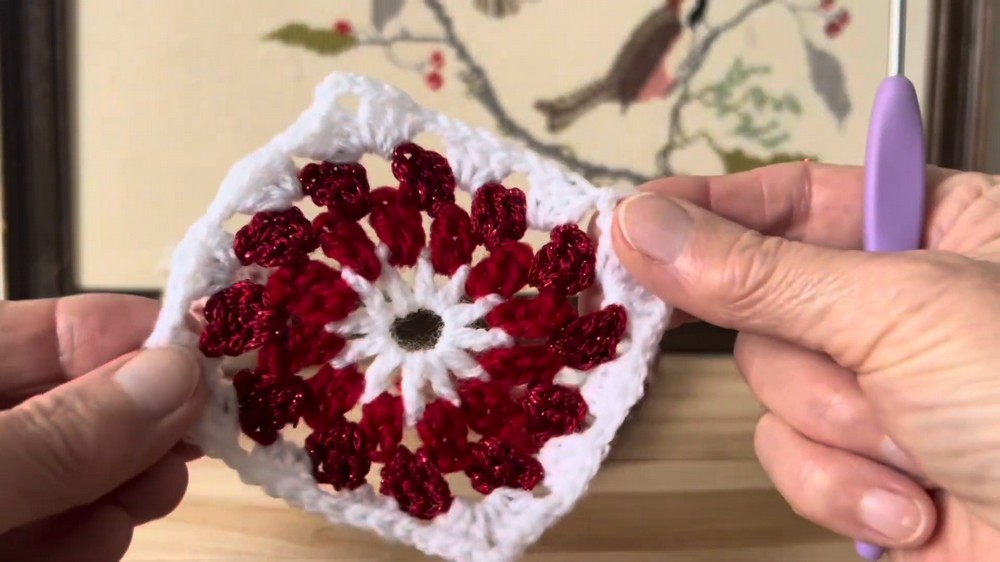
Fold the Square into a Tree
This is where the flat granny square becomes the finished tree shape. The folding direction matters, so work slowly and keep the square flat while positioning it.
Step 1: Place the finished granny square right-side down on your work surface.
Step 2: Choose two adjacent corners of the square. Fold both corners inward toward the center so their edges meet neatly in the middle.
The folded layers should create a compact triangular tree silhouette. If the edges do not meet cleanly, unfold and reposition them rather than forcing the seam.
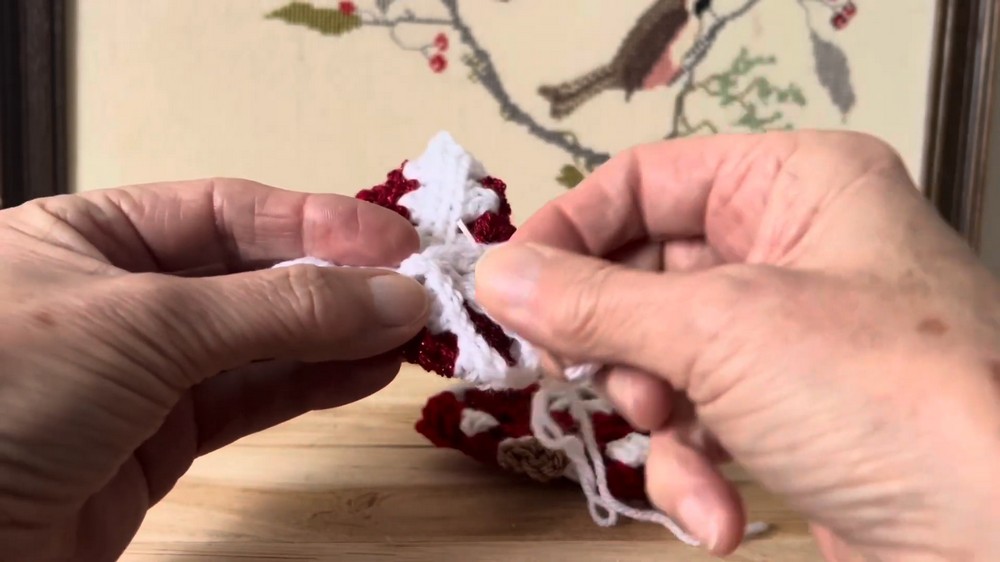
Step 3: Thread your yarn needle with the long white tail left from Round 4.
Step 4: Whip stitch or seam down the center line where the two folded edges meet. Catch only the inner loops so the seam remains as discreet as possible.
Step 5: Fasten off the white yarn securely.
Shape check: From the front, the folded piece should now read as a layered triangular tree rather than a flat square. The center seam should hold the two folded edges together while leaving the outer tree silhouette visible.
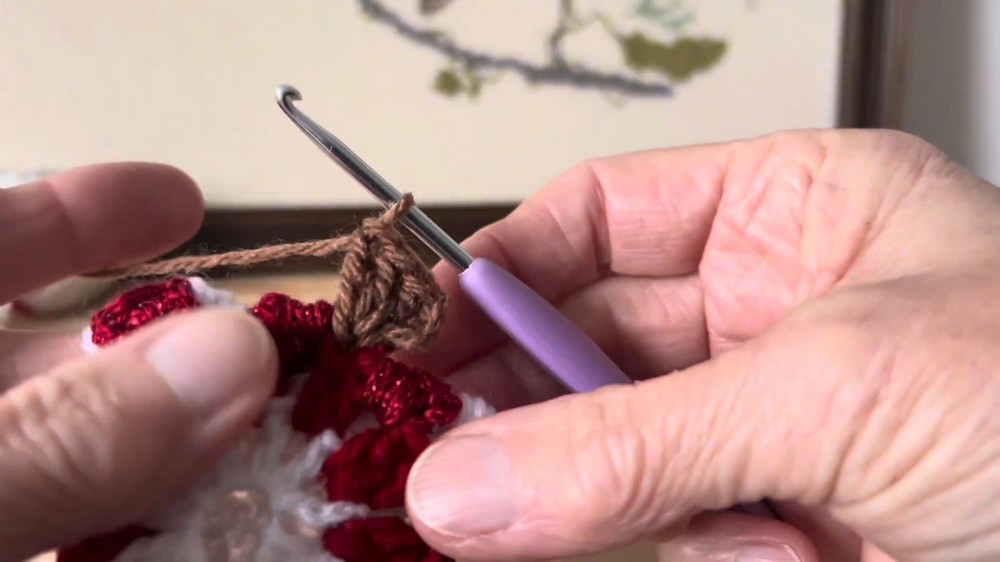
Crochet the Brown Tree Trunk
The trunk is worked directly onto the bottom center of the folded tree.
Step 1: Attach brown yarn to the bottom center of the tree, right where the folded edges meet at the base.
2: Work 5 dc directly into the designated center stitch/space to form the small textured, squared-off trunk.
Step 3: Fasten off and weave the brown yarn tails securely into the back of the trunk.
Check the base from the front before trimming the yarn ends. The brown stitches should sit beneath the triangular tree and give the lower edge a clear trunk detail.
Final Finishing
Once the tree is assembled, gently arrange the folded layers so they sit evenly and the center seam is not pulling the fabric to one side. Weave in any remaining ends securely and trim the excess yarn.
For a hanging ornament, attach a piece of twine or a chained loop to the top point. The same finished shape can then be adapted for seasonal bunting, gift decoration, or other small holiday uses.
Tiny beads, buttons, or French knots can be added afterward to create ornament-like details across the tree. Keep embellishments small enough that they do not overwhelm the layered shape.
The result is a petite 3D Christmas tree made from a simple granny-square base, with the four corner spaces doing the clever work of creating the shape once the square is folded.