Need festive Christmas décor with handmade charm? This crochet Christmas tree tutorial combines textured green leaf rings, simple yarn wrapping, and crocheted star details for seasonal display.
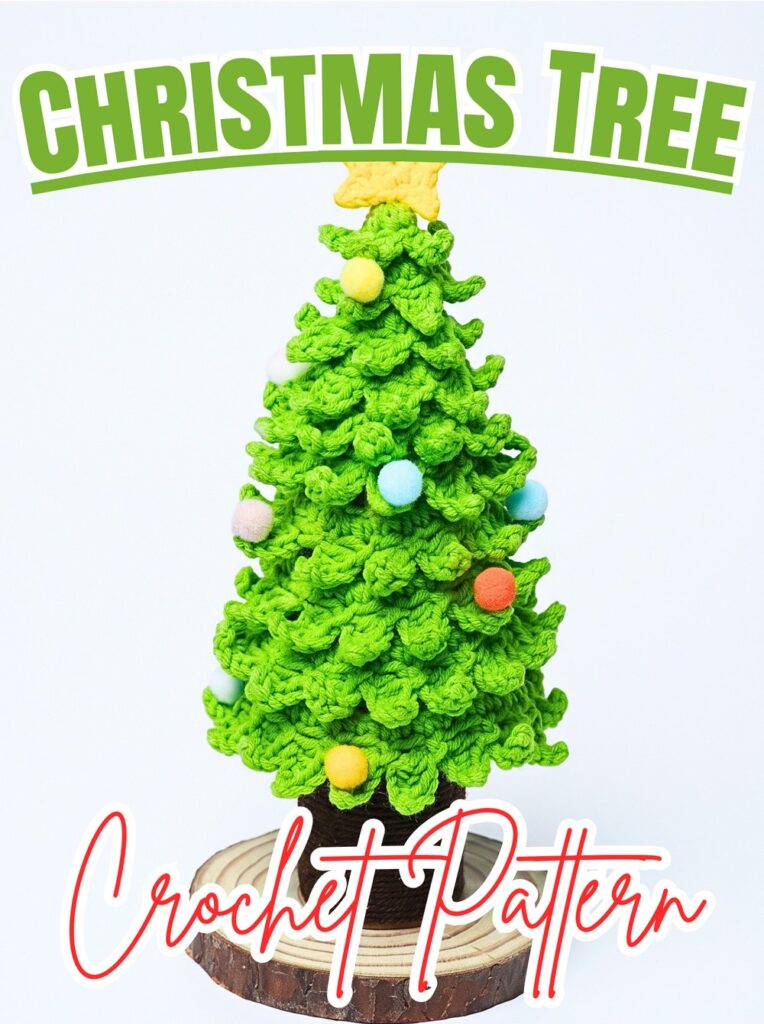
Flat holiday decorations can feel limiting when you want something that stands upright. This crochet Christmas tree combines layered crochet leaves with a lightweight cone and wrapped trunk, giving beginners and experienced makers an opportunity to create dimensional seasonal décor.
Inside, this crochet tutorial explains how to shape cardstock support, prepare graduated leaf rings, crochet tree top and star, and assemble each layer securely. You’ll also find practical sizing guidance and decorating ideas for your finished Christmas display. Let’s begin!
Credit Young DIY
Materials & Tools
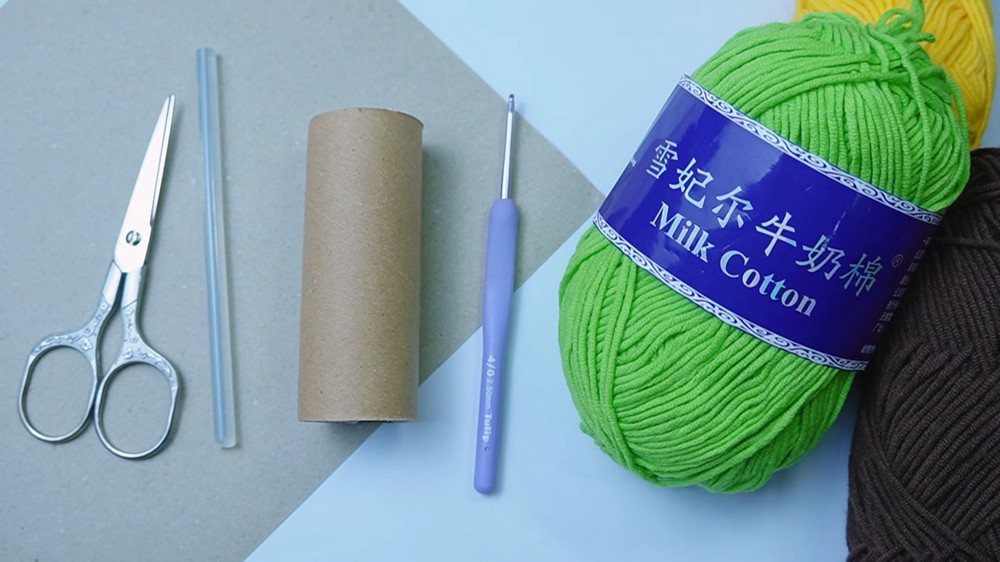
- Green 5-ply milk cotton yarn: For leaf rings and tree top.
- Brown 5-ply milk cotton yarn: For wrapping trunk.
- Yellow or contrasting yarn: Optional, for star.
- Crochet hook: 2.5 mm.
- Empty toilet paper tube: For trunk support.
- Cardstock: For forming cone.
- Hot glue gun and glue sticks: For securing cone, trunk, and crochet layers.
- Scissors: For cutting yarn and cardstock.
- Stitch marker: For marking first stitch when working in rounds.
- Optional decorations: Small beads, sequins, or battery-operated fairy lights suitable for decorative use.
Finished Size & Customization
Finished height and width depend on cardstock cone dimensions and sizes of crocheted leaf rings. No exact finished measurements were provided in the source pattern.
- For a taller tree: Roll a longer cardstock cone and increase ring sizes accordingly.
- For a shorter display: Use a smaller cone and fewer graduated rings.
- For fuller branches: Make additional leaf rings that fit closely around cone.
- For festive finishing: Add beads, sequins, or small decorative lights after assembly.
Pattern Abbreviations
- ch: Chain
- sc: Single crochet
- hdc: Half double crochet
- sl st: Slip stitch
- st(s): Stitch(es)
- MR: Magic ring
- Rnd: Round
Pattern note: Leaf-ring foundation chains are measured against your actual cone, so fixed stitch counts are not provided. Test each ring against its intended position before completing its decorative edge.
Step-by-Step Crochet Christmas Tree Pattern
Phase A: Prepare Cardstock Cone and Trunk
Step 1: Shape the Cardstock Cone
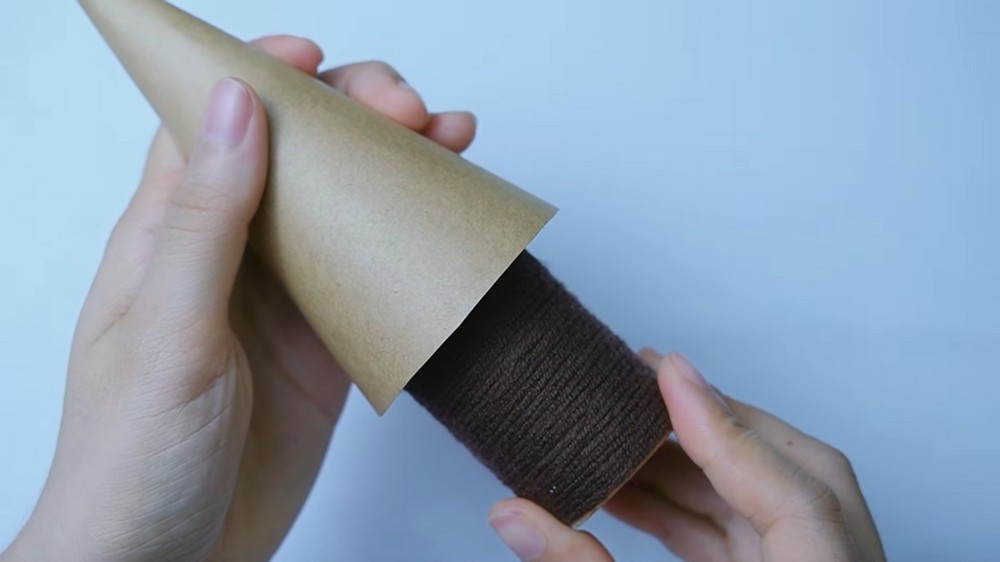
Cut cardstock into a curved piece that can roll into a cone. Bring both edges together, adjust the shape, and secure the overlap with hot glue.
Check the cone from its base to its tip before allowing glue to set. Keep its base wide enough to support graduated leaf rings, while leaving enough room at its tip for crocheted tree top and star.
Teaching tip: Test the cone’s balance on a flat surface. If its base is uneven, adjust the cardstock before moving on, because uneven support can make finished tree lean.
Step 2: Wrap the Trunk with Brown Yarn
Apply a small amount of hot glue to one end of empty toilet paper tube. Press brown yarn into place, then wrap yarn continuously around tube until cardboard is fully covered.
Keep each wrap close to previous one so no large gaps remain. Add small dots of glue where needed, and secure final yarn end neatly.
Check your work: Trunk should have an even brown covering without loose loops. Let glue cool before handling.
Step 3: Attach Trunk to Cone
Apply hot glue around upper edge of wrapped tube. Center bottom opening of cardstock cone over tube and press firmly into place.
Hold both parts steady until glue sets. Check from several angles to make sure cone stands straight above trunk.
Next: Once support is stable, you can prepare crocheted leaf rings to cover cone with layered green texture.
Phase B: Crochet Graduated Leaf Rings
Make several green leaf rings in different sizes. Each ring needs to fit snugly around its intended section of cone, with largest ring near bottom and progressively smaller rings toward top.
Step 4: Create Foundation Ring
Start with green yarn and make slip knot. Form loop, position working yarn above yarn tail, insert hook through loop, and pull working yarn through to create adjustable starting loop.
Crochet foundation chain long enough to wrap around cone at chosen height. Bring chain ends together and join with sl st into first chain, forming ring.
Sizing tip: Test chain around cone before continuing. It should fit around cone without stretching excessively or hanging loosely. Make separate rings for different cone levels rather than assuming one chain length will fit every layer.
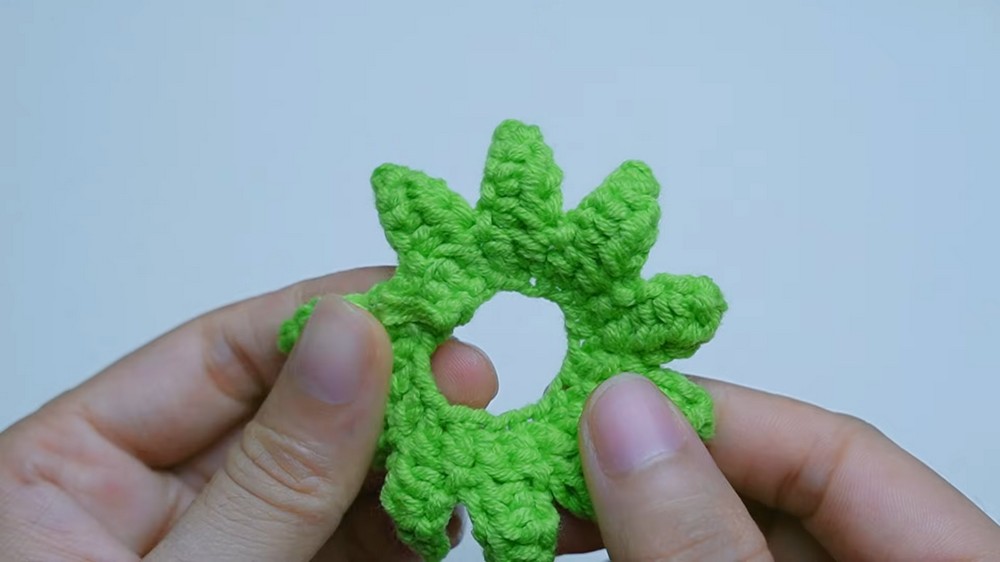
Step 5: Work Base Single Crochet Round
Ch 1, then work 1 sc into each chain around ring.
For each sc:
- Insert hook into next stitch.
- Yarn over and pull up loop, leaving 2 loops on hook.
- Yarn over again and pull through both loops.
Continue around foundation ring. Join final stitch to first sc with sl st.
Check your work: Ring should lie evenly without twisting. If chain has twisted before joining, undo join and straighten it now; twisted foundation will affect how leaf layer sits around cone.
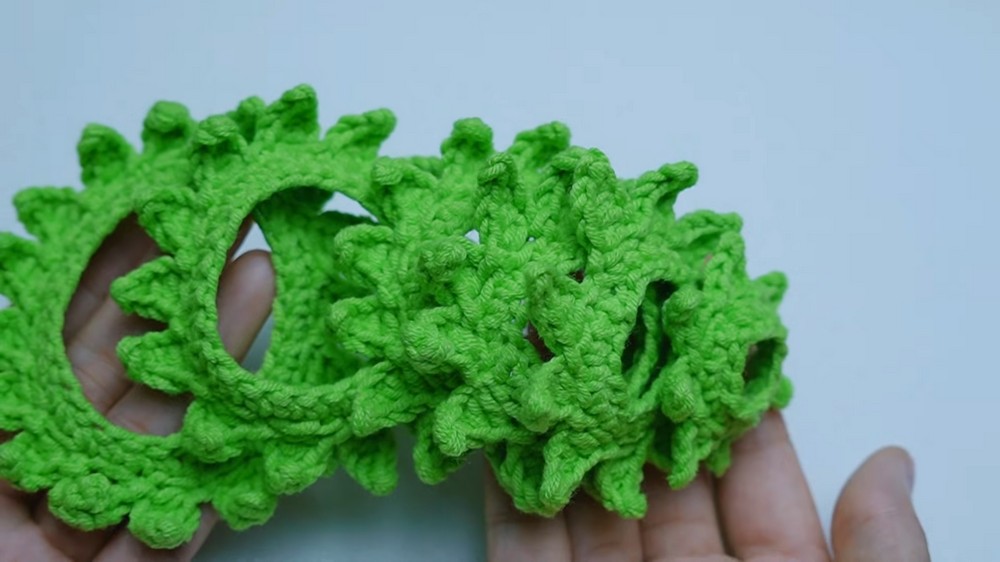
Step 6: Add Textured Leaf Edges
This round creates repeated pointed leaf-like sections around ring.
For each repeat:
- Ch 5.
- Work sl st into second chain from hook.
- Work 1 sc into next chain.
- Work 1 hdc into each of last 2 chains.
- Skip 1 stitch on base ring.
- Work sl st into next stitch on ring to secure leaf section.
Repeat sequence around ring.
If 1 or 2 unworked stitches remain at end, work sl st into final stitch as described in source instructions. Ch 1, fasten off, and cut yarn, leaving short tail.
Teaching tip: Keep leaf sections consistent by following same chain and stitch sequence each time. Avoid pulling securing slip stitches too tightly, since tight joins can make decorative edge curl inward.
Fit check: Place completed ring around its intended position on cone. Leaf points should extend outward, while base ring sits around cone without bunching. Adjust foundation chain length for remaining layers as needed.
Step 7: Repeat Leaf Rings in Graduated Sizes
Repeat foundation, base round, and leaf texture for each additional ring. Work largest ring for bottom, then create progressively smaller rings for middle and upper sections.
Test each ring against cone before finishing decorative edge. The exact number of rings depends on cone height and desired fullness; original instructions do not specify fixed count.
Teaching tip: Arrange finished rings in order before gluing. This makes it easier to spot size gaps or misplaced layers before assembly begins.
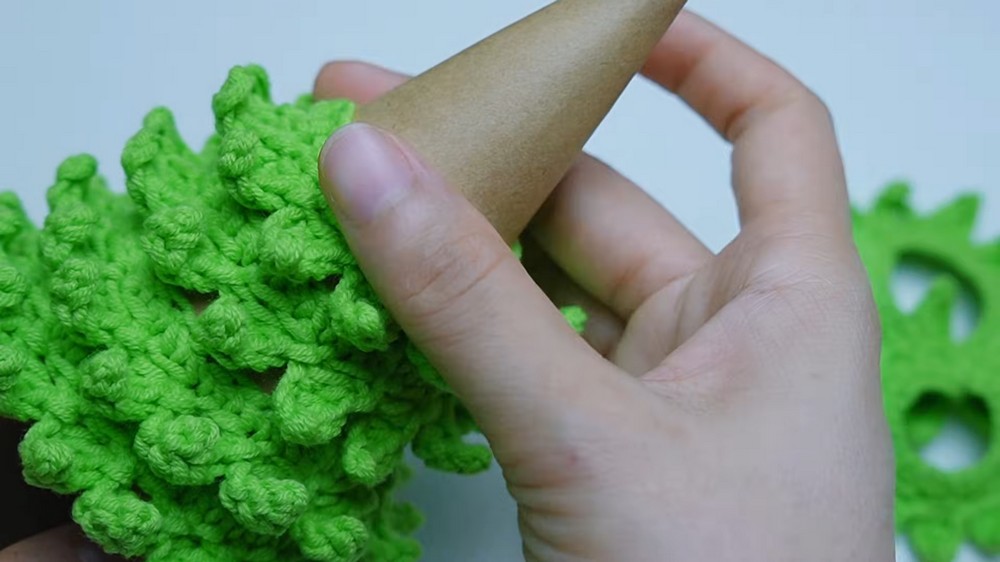
Phase C: Crochet Tree Top
Step 8: Form Magic Ring
Using green yarn, wrap yarn around index and middle fingers so strands cross. Pinch crossing point, insert hook beneath loop, and pull working yarn through.
Twist hook clockwise, yarn over, and pull through loop to secure starting loop as described in source tutorial.
Keep loop adjustable until first round is complete.
Step 9: Work First Round
Ch 1, then work 5 hdc into MR. Place stitch marker in first hdc so joining point remains easy to identify.
Pull yarn tail to close ring, then join with sl st into marked first stitch.
Check your work: Five hdc should form small circular base. If center remains open, pull yarn tail more firmly before proceeding.
Step 10: Add Small Leaf Points
Ch 4.
- Work sl st into second chain from hook.
- Work 1 sc into each of remaining 2 chains.
- Work sl st into next base stitch on ring to secure point.
Repeat sequence around ring. Finish with sl st into last stitch, ch 1, fasten off, and cut yarn.
Teaching tip: Keep each point similar in length by using same chain count throughout. Place completed tree top aside until cone and leaf layers are assembled.
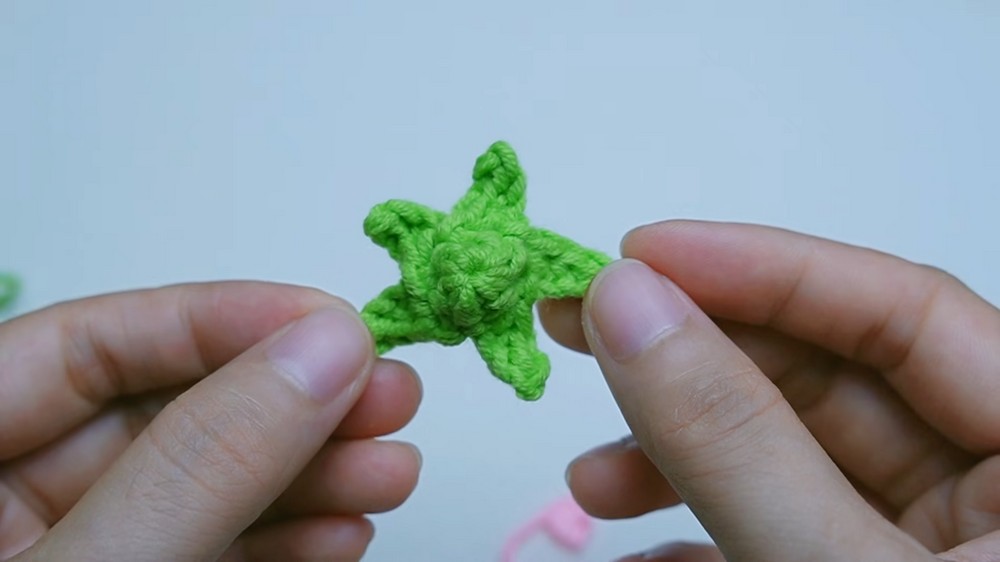
Phase D: Crochet Star
Step 11: Start Star Center
Using yellow or contrasting yarn, make MR. Work 10 sc into ring and mark first stitch.
Pull yarn tail tightly to close center, then join with sl st into first sc.
Check your work: Center should form compact circle with 10 stitches around edge. Count stitches before beginning points, as incorrect count can affect star shape.
Step 12: Shape Star Points
Repeat following sequence around center:
- Ch 3.
- Work sl st into second chain from hook.
- Work 1 sc into last chain.
- Skip 1 stitch on base ring.
- Work sl st into next stitch to secure point.
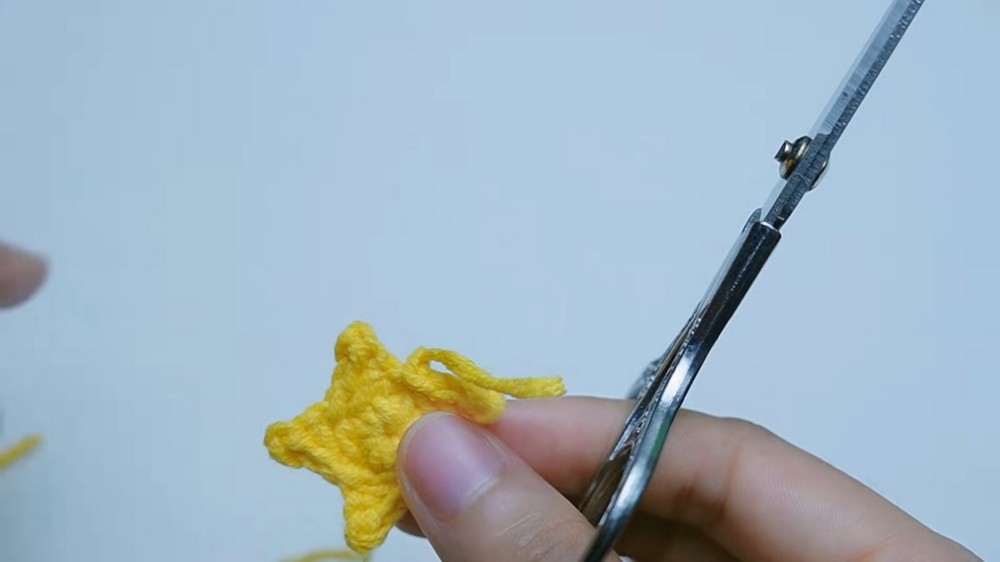
Continue around ring to create star points. Finish with sl st into last stitch, ch 1, fasten off, and cut yarn.
Teaching tip: Keep tension consistent when securing points. If one point looks tighter or shorter than others, adjust it gently before weaving in yarn end.
Phase E: Assemble Christmas Tree
Step 13: Arrange Leaf Rings Around Cone
Place largest leaf ring around bottom of cone, near trunk. Add remaining rings in descending size order, moving upward toward tip.
Before gluing, check that each ring covers enough cone to create layered foliage. Adjust spacing so cardstock does not show through large gaps.
Important: Keep hot glue away from fingers and work on a protected surface. Follow glue gun safety instructions while securing layers.
Step 14: Glue Leaf Layers in Place
Lift one ring at a time and apply small amounts of hot glue to cardstock cone where ring will sit. Press ring gently into position and hold until adhesive sets.
Continue from bottom upward, checking alignment after each layer. Avoid applying excessive glue, which may seep through yarn or create hard visible patches.
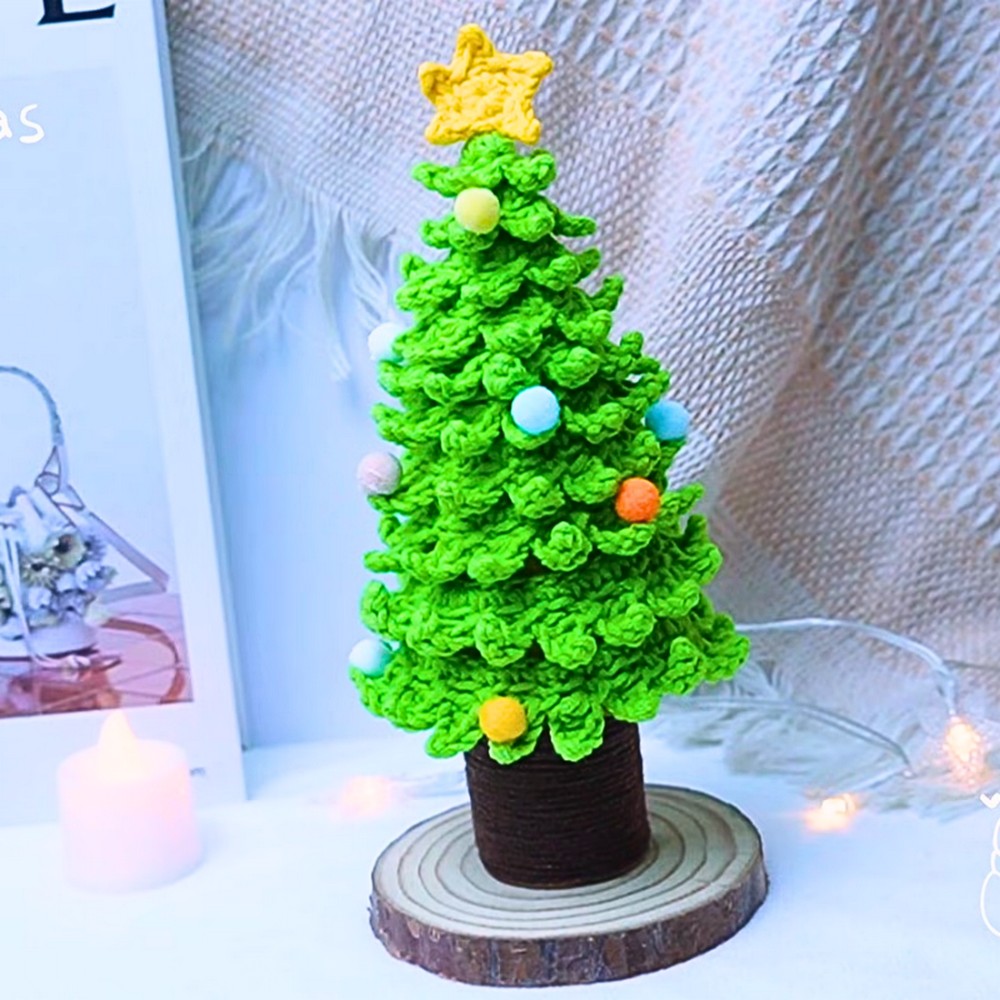
Result check: Leaf rings should form graduated layers, with wider foliage near bottom and narrower layers toward tip. Tree should remain upright without loose rings.
Step 15: Attach Crocheted Tree Top
Position green crocheted top over cone apex. Apply small amount of hot glue to contact area and press piece into place.
Check from front and sides to ensure tree top follows cone’s vertical line rather than leaning.
Step 16: Secure Star and Finish Decoration
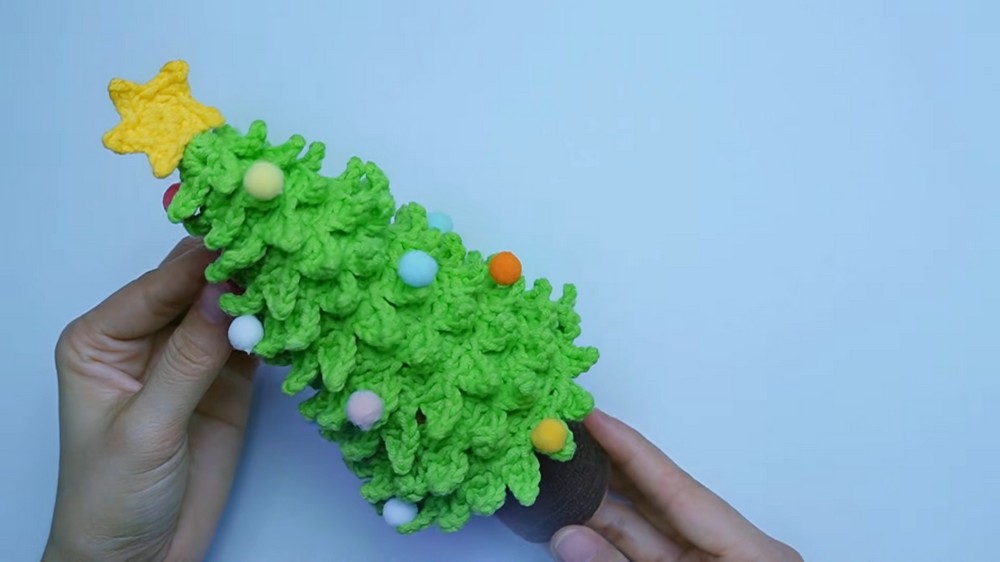
Apply small amount of hot glue to back or base of crocheted star. Attach it directly to highest point of tree top and hold until secure.
Allow glue to cool completely before adding optional beads or sequins. If using fairy lights, choose battery-operated decorative lights and keep wiring clear of hot glue and exposed adhesive.
Final check: Confirm trunk is firmly attached, leaf rings are secure, top sits straight, and star remains fixed at apex. Your layered crochet Christmas tree is now ready for seasonal display.