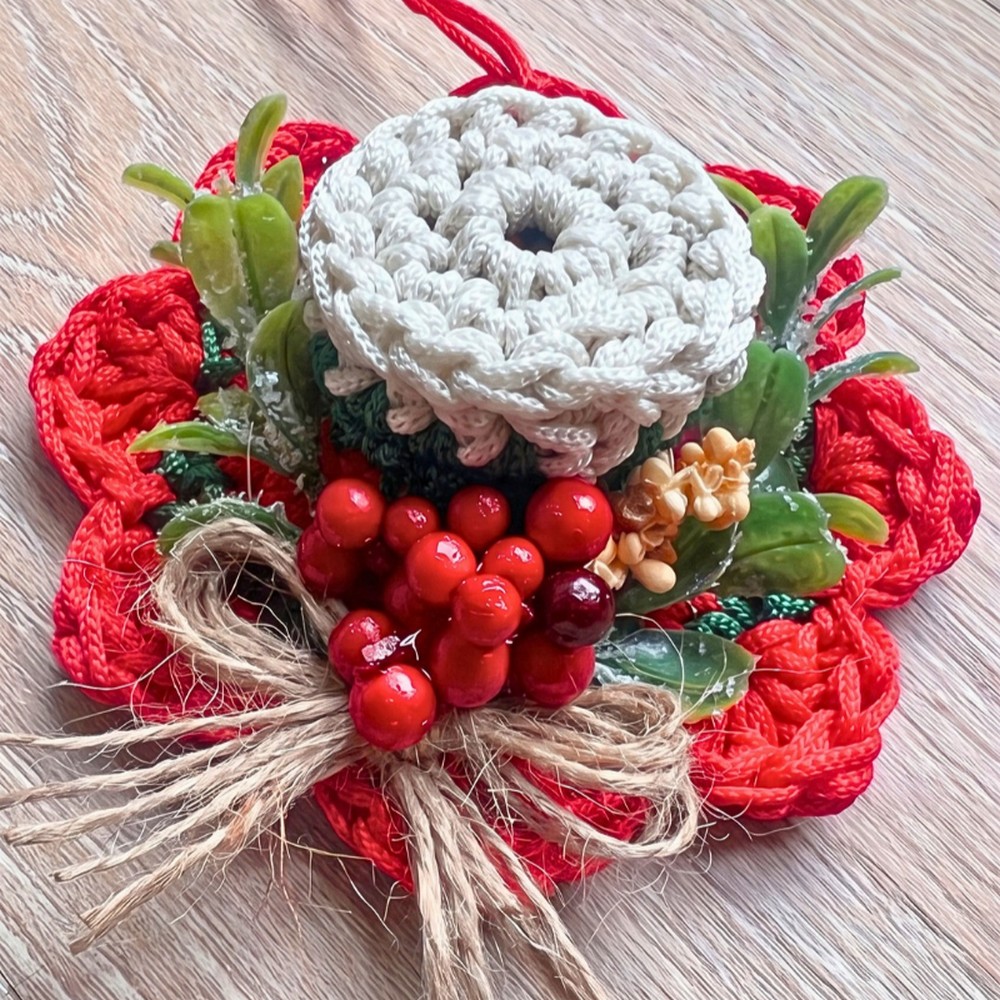
Want a festive handmade touch for your Christmas tree? This crochet mini hat ornament combines striped colors, a decorative shell-stitch brim, greenery, berries, and a charming twine bow.
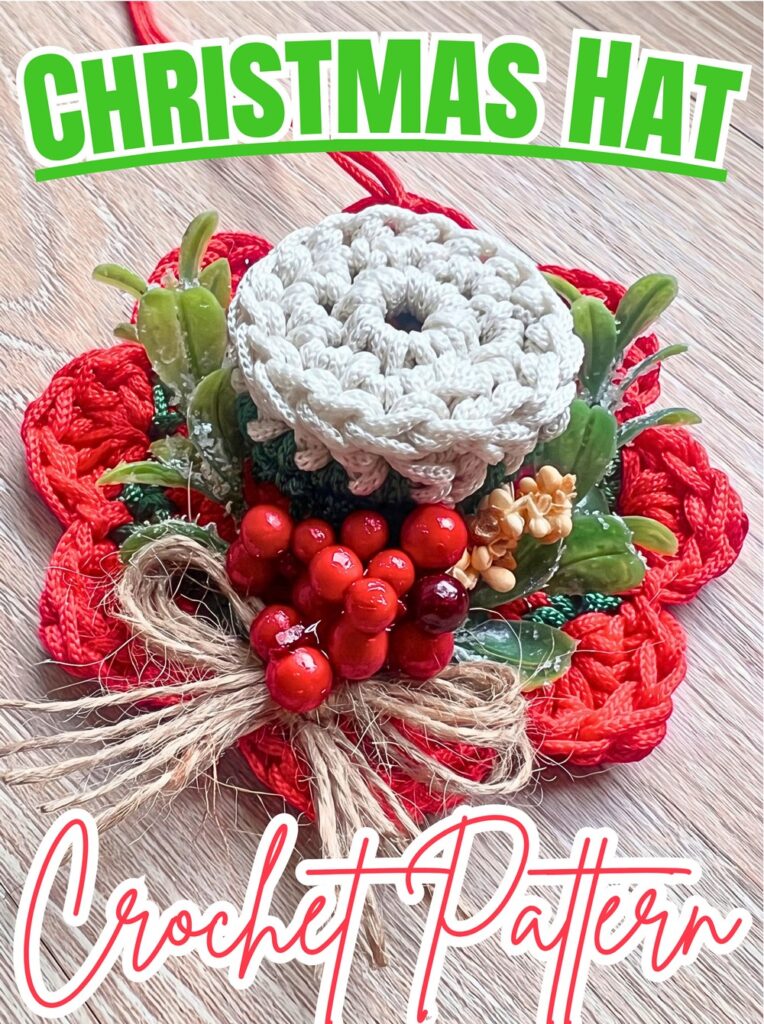
Small holiday decorations can bring personality to a Christmas tree without taking up much space. This crochet mini hat uses simple rounds and three yarn colors to create a tiny festive beanie, with a textured crown and flared brim for extra character.
Follow this crochet tutorial to shape the crown, change colors, widen the brim, and finish your ornament with a hanging loop and seasonal embellishments. You’ll also find ideas for adapting its colors and decorations. Let’s get started!
Credit Zhielle’s Creation
Materials & Tools
- Yarn: Medium-weight size 4 yarn or thread in three colors:
- Color A: Ivory or white
- Color B: Green
- Color C: Red
- Crochet hook: F / 3.75 mm.
- Yarn needle: For securing and weaving in yarn ends.
- Scissors: For trimming yarn and twine.
- Hanging loop: One 10-inch piece of thread, yarn, or cord.
- Twine or ribbon: Approximately 4 feet for the decorative bow.
- Glue gun and glue sticks: For attaching embellishments.
- Holiday embellishments: Miniature artificial greenery leaves and small red berries.
- Optional stuffing: A small amount to help the ornament retain its shape.

Material note: The instructor uses nylon thread from Macro City in the video. Your finished ornament may vary in size and texture depending on the material used.
Finished Size & Customization
This miniature hat is designed as a lightweight Christmas ornament for a tree, holiday wreath, or handmade seasonal gift. Exact dimensions will depend on yarn thickness and tension.
For a different look, try pastel shades, winter blues, or colors inspired by your favorite team. Tiny jingle bells, buttons, or a miniature pom-pom can replace or supplement the decorative details. Changing yarn weight and hook size will also affect the finished size.
Pattern Abbreviations
- ch: Chain
- sc: Single crochet
- dc: Double crochet
- tr: Treble crochet
- sl st: Slip stitch
- st(s): Stitch(es)
- Rnd / Row: Round or row
Step-by-Step Crochet Mini Christmas Hat Pattern
Step 1: Create the White Crown Center
Round 1
Start with Color A, using ivory or white yarn. This small center forms the top of the hat, so close the magic ring firmly to avoid a visible hole.
- Make a magic ring.
- Chain 1.
- Work 8 single crochet stitches into the ring.
- Pull the yarn tail to close the center.
- Join with a slip stitch to the first single crochet.
Stitch count: 8 sts
Teaching tip: Keep the starting tail accessible until the ring is fully tightened. A snug center gives the ornament a neater crown.
Step 2: Widen the Crown
Round 2
The next round increases the circumference, allowing the crown to expand evenly.
- Chain 1.
- Work 2 single crochet stitches into every stitch around.
- Join with a slip stitch to the first single crochet.
Stitch count: 16 sts
Check that you have doubled the original stitch count. If the circle begins to cup slightly, that can help the top develop depth as the following rounds build the hat shape.

Step 3: Add Texture to the White Section
Round 3
This round maintains the 16-stitch count while introducing the alternating stitch technique demonstrated in the source video.
- Chain 1.
- Work 1 single crochet in each stitch around, alternating between the back-to-front and front-to-back working technique shown in the demonstration.
- Join with a slip stitch to the first single crochet.
Stitch count: 16 sts
Change to green: During the final joining slip stitch, drop Color A and pick up Color B. Pull the green yarn through to complete the stitch, then secure the yarn ends at the back and cut the white yarn.
Teaching tip: Keep the textured stitches consistent throughout the round. Because this technique is specific to the demonstration, refer to the original video if the back-to-front and front-to-back movement is unclear.
Step 4: Crochet the First Green Section
Round 4
Green creates the first colored band of the hat.
- Chain 1.
- Work 1 single crochet in every stitch around.
- Join with a slip stitch to the first single crochet.
Stitch count: 16 sts
Keep the stitches even so the green band sits neatly beneath the white crown.
Step 5: Complete the Green Band
Round 5
Repeat the green round to give the hat body a clearly visible section of color.
- Chain 1.
- Work 1 single crochet in each stitch around.
- Join with a slip stitch to the first single crochet.
Stitch count: 16 sts
Change to red: During the final joining slip stitch, switch to Color C and pull the red yarn through to complete the stitch. Secure the color-change ends at the back and cut the green yarn.
Check your work: The white crown should sit above an even green section, ready for the red body.
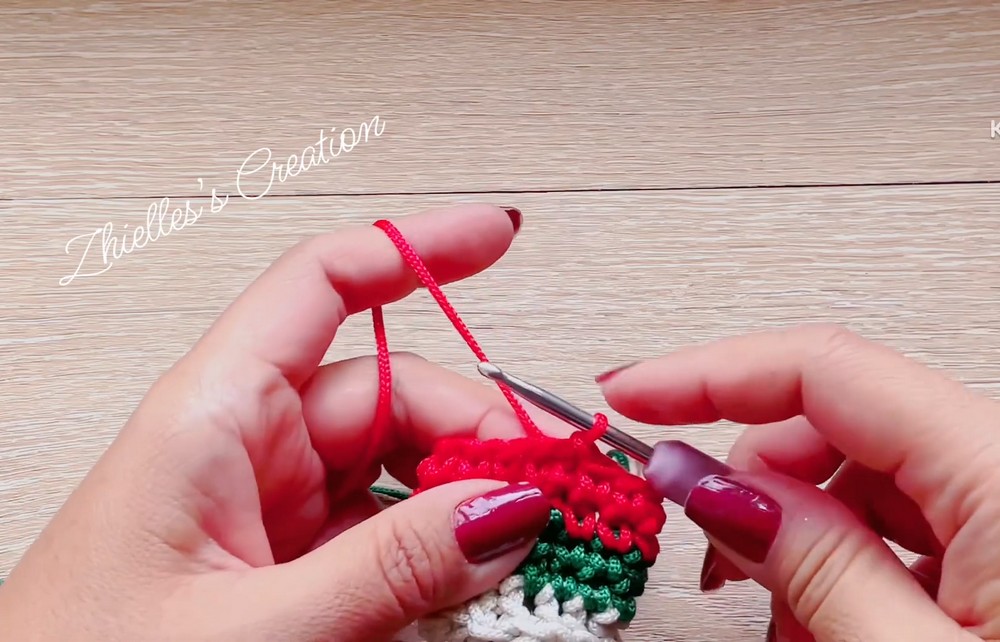
Step 6: Build the Red Hat Body
Round 6
- Chain 1.
- Work 1 single crochet in every stitch around.
- Join with a slip stitch to the first single crochet.
Stitch count: 16 sts
This round continues the straight-sided section of the hat without changing its circumference.
Step 7: Extend the Red Section
Round 7
- Chain 1.
- Work 1 single crochet in each stitch around.
- Join with a slip stitch to the first single crochet.
Stitch count: 16 sts
Keep the red rounds aligned with the green section above. Consistent tension helps the miniature hat retain a balanced shape.
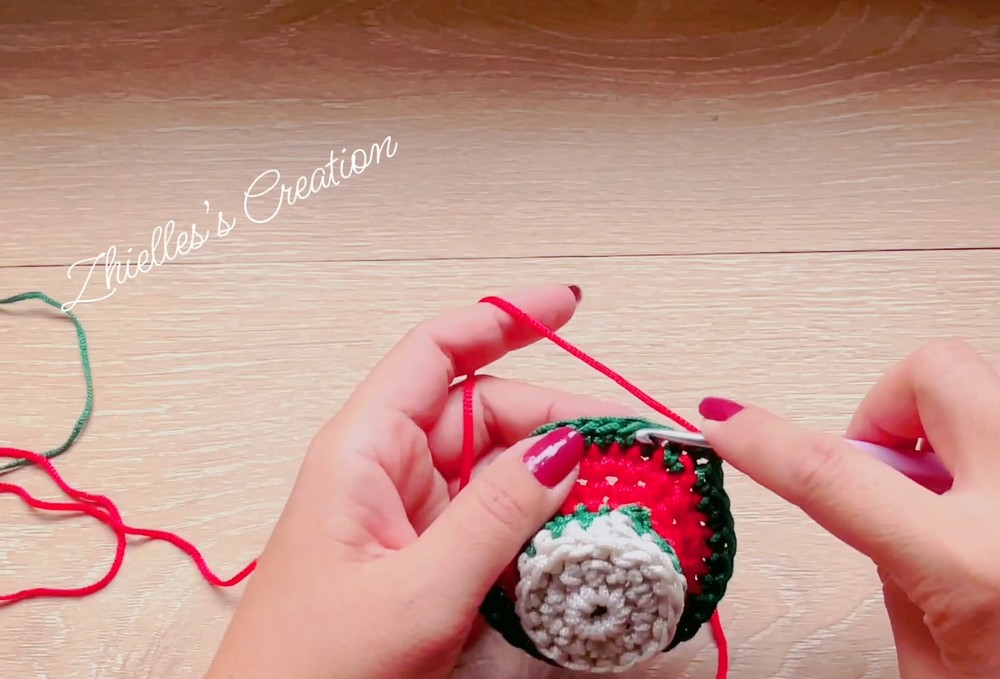
Step 8: Flare Out the Brim
Round 8
This is the main shaping round for the brim. Increasing every stitch doubles the circumference and creates a wider edge.
- Chain 1.
- Work 2 single crochet stitches into every stitch around.
- Join with a slip stitch to the first single crochet.
Stitch count: 32 sts
Change to green: During the final joining slip stitch, switch to Color B and pull through to complete the join. Cut the red yarn after securing the change.
Teaching tip: Lay the hat flat after this round. The brim should spread outward rather than remain the same width as the body.
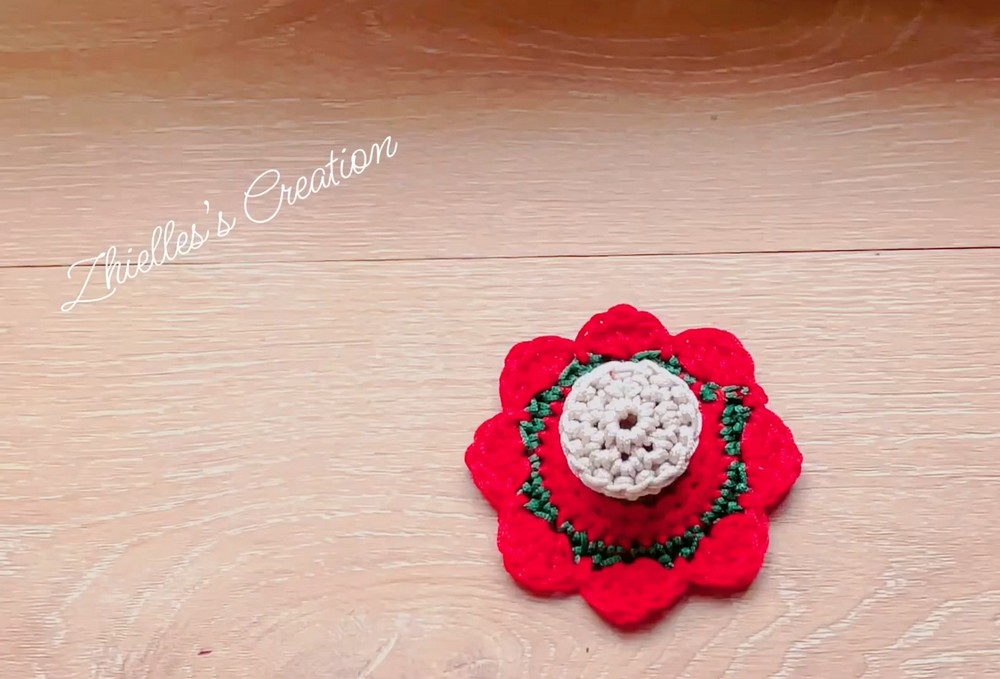
Step 9: Add the Green Accent Band
Round 9
The green round sits above the decorative border, providing a contrast between the red brim and the shell edging.
- Chain 1.
- Work 1 single crochet in every stitch around.
- Join with a slip stitch to the first single crochet.
Stitch count: 32 sts
Change back to red: During the final joining slip stitch, pick up Color C and pull through to complete the stitch. Cut the green yarn after securing the color change.
Check your work: The brim should now have a wider shape, with a green accent band ready for the final decorative edge.
Step 10: Crochet the Shell-Stitch Border
Round 10
The final red edging gives the hat a scalloped, festive finish.
Follow this shell sequence around the brim:
- Skip 1 stitch.
- In the next stitch, work 2 dc, 1 tr, and 2 dc all into the same stitch.
- Skip 1 stitch.
- Work 1 slip stitch into the next stitch.
- Repeat the sequence around the brim.
Each shell forms a raised scallop, while the slip stitch between shells creates a separation.
Fasten off when the round is complete. Weave the remaining yarn ends neatly into the inside or back of the hat.
Teaching tip: Keep each shell grouped into a single stitch. Spreading its stitches across multiple spaces will change the intended shape of the border.
Pattern check: The supplied instructions do not specify how the final repeat joins back to the beginning or how any leftover stitches are handled. Follow the source demonstration for the exact finishing placement.
Step 11: Shape the Miniature Hat
Once the crochet work is complete, check its silhouette before adding decorations.
- Gently arrange the crown and brim with your fingers.
- If needed, insert a small amount of stuffing or suitable structure material inside the hat.
- Keep the stuffing light so the ornament remains compact.
- Check that the brim still flares outward and the crown retains its rounded form.
Teaching tip: Avoid packing the hat tightly. Excessive stuffing can distort the brim and make the ornament look bulky.
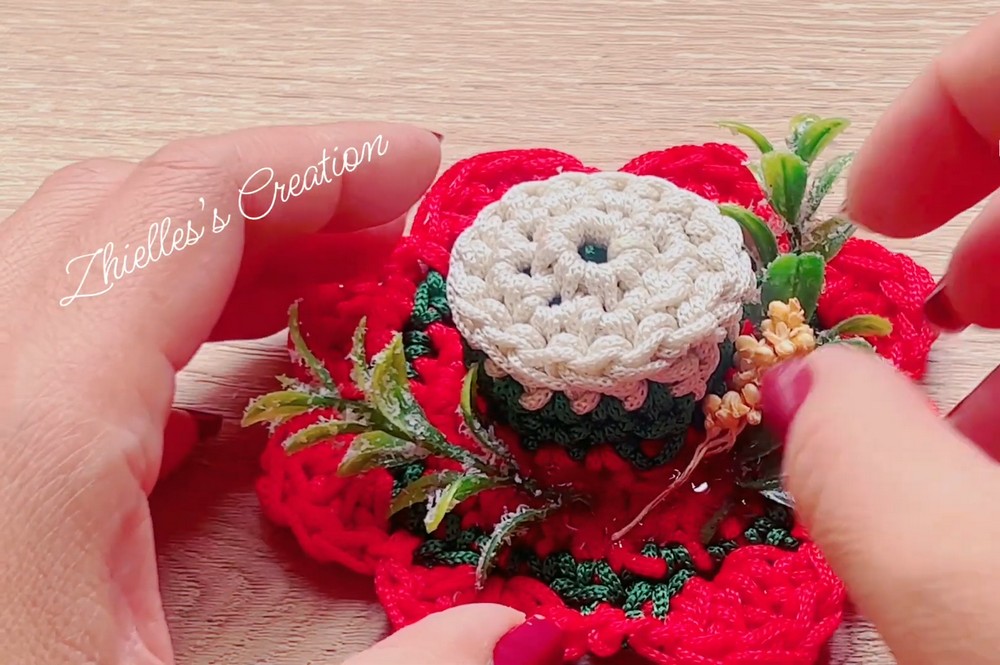
Step 12: Attach the Hanging Loop
A secure loop allows the finished hat to hang from a Christmas tree or wreath.
- Cut a 10-inch piece of thread, yarn, or cord.
- Fold it in half to form a loop.
- Tie and anchor both ends securely inside the top of the hat.
- Position the loop so it emerges neatly from the crown tip.
- Gently test the attachment before hanging the ornament.
Teaching tip: Check that the loop is centered. A loop attached off-center may cause the miniature hat to hang at an angle.
Step 13: Add Greenery and Berries
These embellishments create the festive decoration at the lower part of the hat.
- Heat the glue gun carefully.
- Position artificial greenery leaves on both sides of the lower hat base.
- Apply glue and attach the leaves.
- Add small red berries in the center gaps to complete the arrangement and cover exposed glue where possible.
- Hold each piece in position until the adhesive sets.
Teaching tip: Arrange the leaves and berries before gluing. A quick placement check helps create a balanced decoration and prevents unnecessary glue marks.
Safety note: Hot glue can cause burns. Use adult supervision when children are involved and keep the glue gun away from fingers and flammable materials.
Step 14: Make the Twine Bow
The bow adds a rustic finishing detail beneath the greenery and berries.
- Take approximately 4 feet of twine or ribbon.
- Fold it back and forth over itself about five times to create multiple loops.
- Tie the center securely to hold the loops together.
- Adjust the loops into a neat bow.
- Trim the tails to your preferred length.
- Glue the finished bow directly below the greenery and berry arrangement.
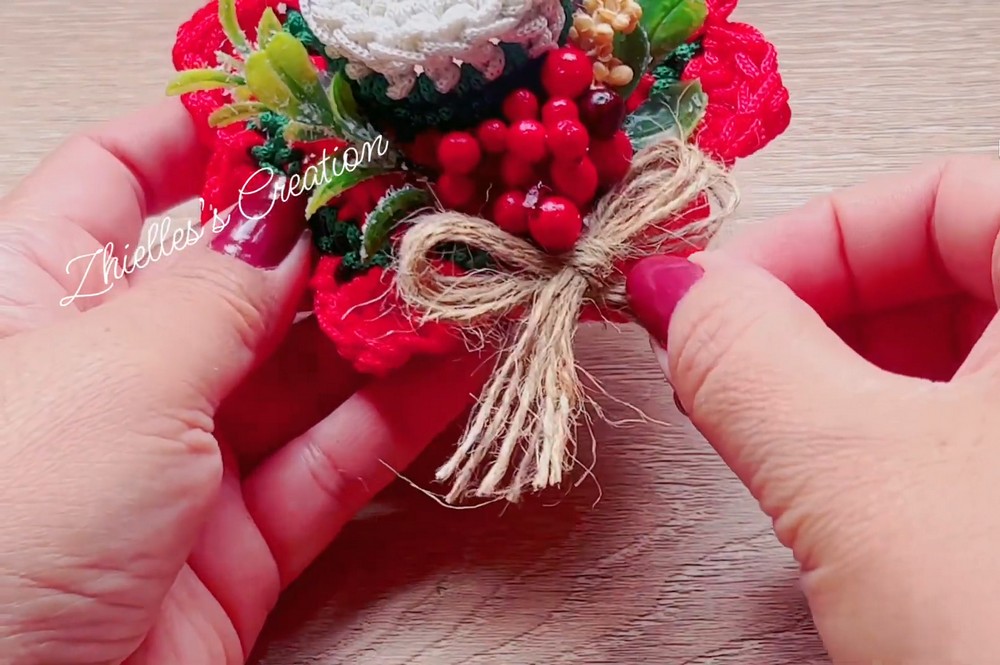
Teaching tip: Keep the bow proportionate to the miniature hat. Smaller, evenly arranged loops will preserve the shape of the ornament without hiding the colored brim.
Step 15: Secure the Finishing Details
Before hanging your ornament, allow the glue to set completely.
- Check that the leaves, berries, and bow are firmly attached.
- Secure any loose yarn tails on the inside of the hat.
- Test the hanging loop gently.
- Trim stray fibers or excess twine.
- Make sure the brim and crown retain their intended shape.
Display Your Christmas Hat Ornament
Your miniature crochet hat is ready to hang on a Christmas tree, add to a holiday wreath, or give as a handmade seasonal gift. You can also make several hats in different color combinations to create a coordinated festive display.
For a playful variation, replace traditional red and green with pastel colors or winter blues. A tiny bell or pom-pom can provide another finishing touch, while the original greenery, berries, and twine bow keep the ornament looking warm and rustic.