When the lights go out, this little crochet ghost starts to glow, making its soft shape and wavy edge even more fun for Halloween nights.
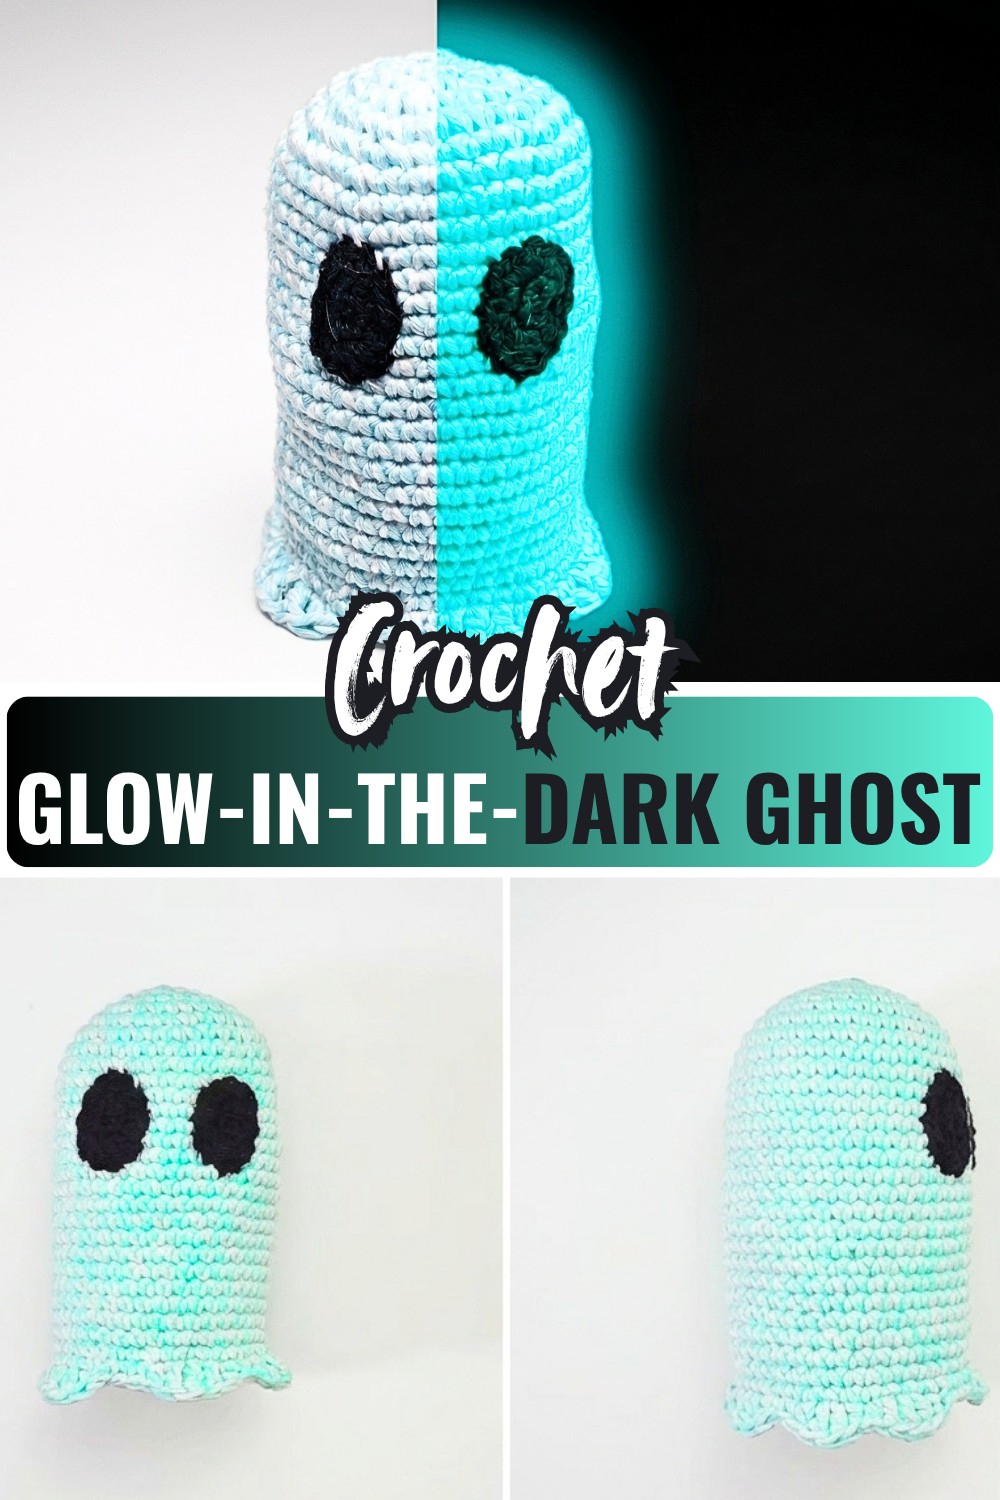
A little crochet ghost that looks sweet in daylight and glows when the room gets dark is a fun way to add something unexpected to your Halloween décor. The soft body, simple oval eyes, and wavy bottom give it a friendly expression rather than a spooky one.
The pattern is built straightforwardly: first you shape the crochet ghost into a simple tube, then add the wavy lower edge, sew on the eyes, and close the bottom with a separate base. That construction keeps the ghost upright and gives you a clear point where you can adjust the stuffing before finishing it.
Credit Diving Ducks Crochet
Materials & Tools
- Glow-in-the-dark yarn for the ghost body
- Black yarn for the eyes
- 3.5 mm crochet hook, or the size needed to achieve the stated gauge
- Fiberfill stuffing
- Tapestry needle
- Scissors
- Stitch marker
Finished Size
The completed ghost is approximately 13 cm tall when made with the recommended materials and tension.
Because crochet tension can change the finished measurements, use the stated height as a guide rather than trying to force your stitches to match an exact size.
Pattern Abbreviations
This pattern uses US crochet terminology:
- ch – chain
- sc – single crochet
- hdc – half double crochet
- dc – double crochet
- tr – treble crochet
- sl st – slip stitch
- inc – increase
- st(s) – stitch(es)
The ghost body is worked in spiral rounds, so you do not join at the end of each round. A stitch marker helps identify the beginning of each round.

Step-by-Step Crochet Instructions
Ghost Body
Round 1: Make a slip knot and chain 2. Work 6 sc into the first chain. (6 sts)
Place a stitch marker in the first stitch so you can easily identify where each round begins.
Round 2: Work 2 sc in each stitch around. (12 sts)
Do not join the round. Continue working in a spiral.
Round 3: Work (inc, 1 sc) around. (18 sts)
Round 4: Work (inc, 1 sc, 1 sc) around. (24 sts)
Round 5: Work (inc, 1 sc, 1 sc, 1 sc) around. (30 sts)
Round 6: Work (inc, 1 sc, 1 sc, 1 sc, 1 sc) around. (36 sts)
At this point, the circular base should measure approximately 6–6.5 cm across. If yours is slightly different, that is usually a tension difference rather than a problem.

Rounds 7–33: Work 1 sc in each stitch around. (36 sts per round)
Continue in spiral rounds for 27 rounds. These even rounds create the long, simple body of the ghost.
By the end of Round 33, the body should be approximately 13 cm tall.

Shape the Wavy Bottom
The ghost’s wavy edge comes from changing stitch heights rather than adding increases. Work the following sequence around the bottom edge:(hdc, dc, tr, dc, hdc, sl st). Repeat this sequence around the entire edge.
The taller tr creates the peak of each wave, while the sl st brings the next section back down. Keep the sequence consistent as you work so the waves stay even.
Fasten off and weave in the yarn tail neatly.
Make the Eyes
The eyes are worked separately in black yarn.
Eye 1: Make a slip knot and chain 2. Work 8 sc into the first chain. (8 sts)
Continue with:
1 sc, 3 dc in the next stitch, 1 sc, sl st, 1 sc, 3 sc in the next stitch, 1 sc, sl st.
Fasten off, leaving enough yarn to sew the eye onto the body. Weave the other end into the back of the eye.
Repeat the same instructions to make the second eye.
The finished shape should look slightly oval rather than perfectly round.

Make the Bottom Base
The base is worked separately using the same increase progression as the beginning of the ghost body.
Round 1: Work 6 sc into a magic circle. (6 sts)
Round 2: Work 2 sc in each stitch around. (12 sts)
Round 3: Work (inc, 1 sc) around. (18 sts)
Round 4: Work (inc, 1 sc, 1 sc) around. (24 sts)
Round 5: Work (inc, 1 sc, 1 sc, 1 sc) around. (30 sts)
Fasten off, leaving a yarn tail long enough to sew the base to the bottom of the ghost.

Assembly & Finishing
Position the Eyes
Place the two oval eyes on the upper half of the ghost.
Before sewing, step back and check their position. Keeping them reasonably even gives the ghost a neat expression, while moving them slightly higher, lower, or at a small angle can change its personality.
Once you are happy with the placement, sew both eyes securely to the body using their yarn tails.
Add the Stuffing
Place the separate base against the lower opening of the ghost and begin attaching it around the edge.
Before completely closing the base, add fiberfill through the remaining opening.
Add enough stuffing for the ghost to hold its shape, but avoid packing it so tightly that the body becomes stiff or stretches the stitches.
Once the shape feels right, finish sewing the base closed.
Final Check
Weave all remaining yarn ends securely into the crochet fabric and trim the excess.
Give the body a gentle adjustment with your hands so the sides sit evenly and the wavy edge hangs naturally.
Your ghost is now ready to glow.
How to Get the Glow Effect
Because the body is made with glow-in-the-dark yarn, expose the finished ghost to a light source before placing it somewhere dark. The yarn can then produce its soft glow when the surrounding light is reduced.
For the strongest effect, follow the lighting or charging instructions supplied with your particular glow-in-the-dark yarn.
Simple Customization
The basic ghost already has a friendly expression, so small changes can give it a different personality without changing the construction.
- Move the eyes slightly closer together for a sweeter expression.
- Place them a little farther apart for a more playful look.
- Try different yarn colors if you want a non-traditional ghost.
- Add a small bow or other simple accessory if it suits the finished piece.
Finishing Note
The combination of the simple tubular body, separately sewn eyes, and wavy lower edge is what gives this ghost its character. Take a moment to shape the body and position the eyes before securing them permanently; those two small finishing decisions have the biggest effect on how the finished ghost looks.
And when you’re done, place it under a light for a while, turn the lights down, and let the glow become part of the Halloween display.