A tiny ghost becomes even more charming when it arrives in two playful Halloween styles. These soft crochet plushies can wear colorful candy corn or witchy hats, giving each little character its own festive personality. With their sweet smiles, blush cheeks, and cozy shape, they make delightful crochet pieces for both kids and adults. Display one on a shelf, place it beside a pumpkin, or keep it close as a soft seasonal companion.
Crochet Ghost for Halloween
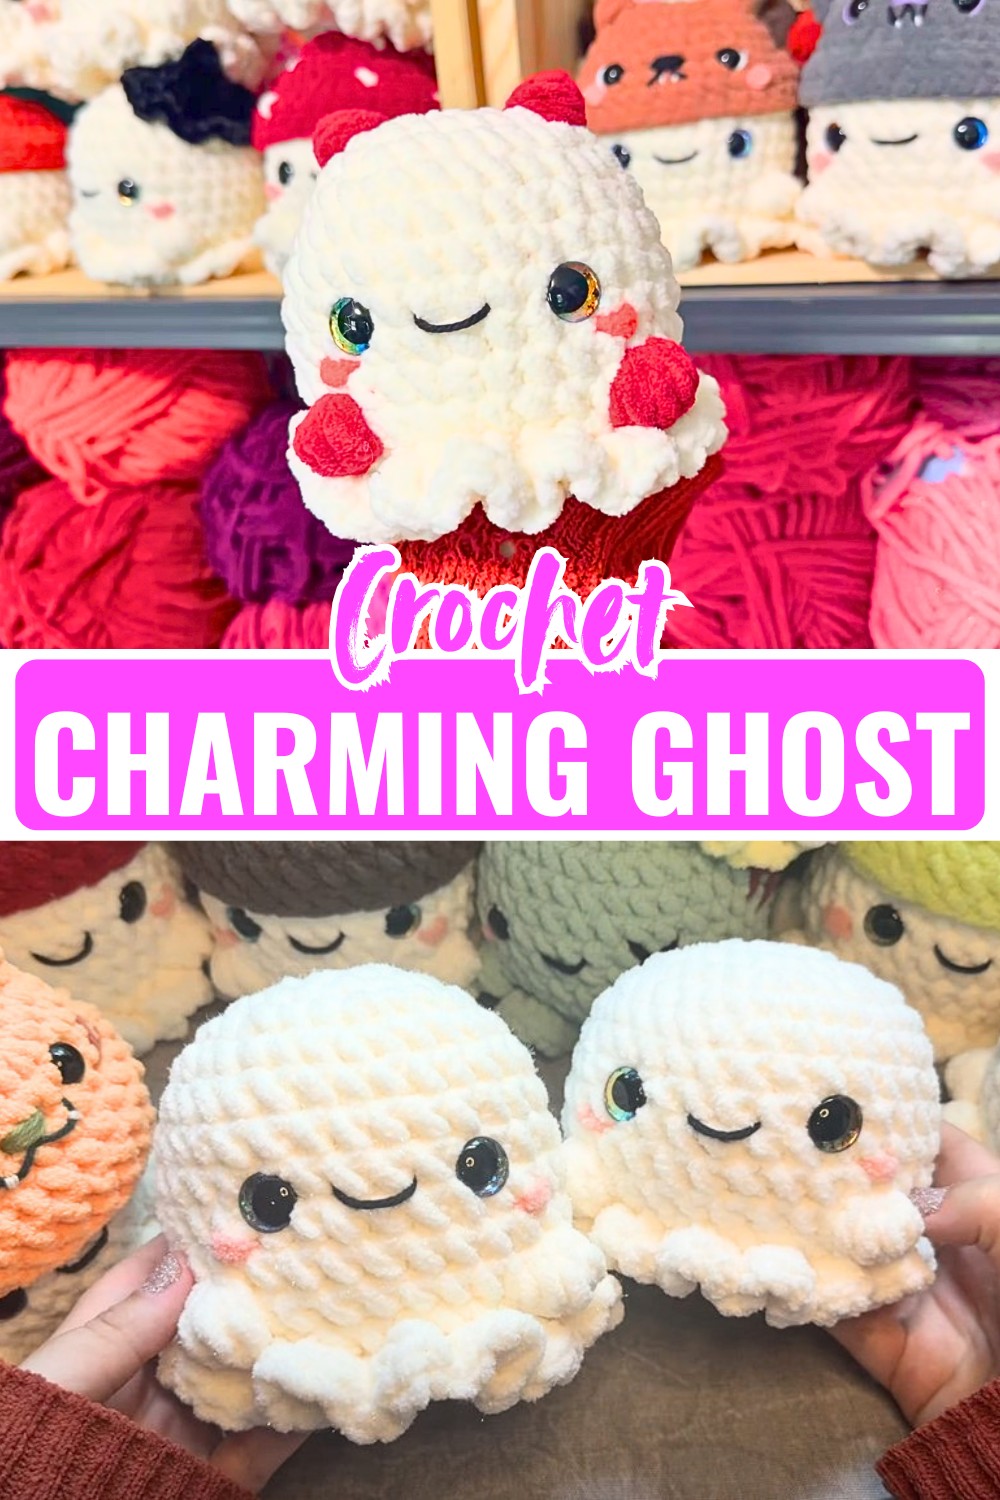
The best part is how easily these little crochet ghosts can take on your own creative touch. Choose your favorite yarn colors, add cheerful facial details, or style each hat to make the characters feel completely different. They work beautifully as Halloween décor, thoughtful handmade gifts, or cute additions to a seasonal display. Make one style or both, and turn a simple ghost into a pair of playful companions for the spooky season.
Credit Annie Carraway Art
Materials & Tools Needed
Gather your materials before beginning so you can move smoothly from the body to the finishing stages.
- Main Yarn for Body: Bernat Blanket yarn in white or sparkly white, or another yarn with a similar weight and texture.
- Blush Yarn: Coral pink or another preferred color for the cheeks.
- Face Details Yarn: Worsted weight cotton yarn in black for the smile and other facial details.
- Hat Yarn: Velvet or chenille yarn for the smaller hats.
- White, orange, and yellow for the candy corn hat.
- Your preferred solid color for the witchy hat.
- 6.5 mm Crochet Hook: For the Bernat Blanket body yarn.
- 5.5 mm Crochet Hook: For lighter-weight velvet or chenille hat yarn.
- Safety Eyes: 16 mm recommended; 14 mm or another suitable size can also be used.
- Polyfill Stuffing: For filling the ghost body and hat.
- Scissors: For cutting yarn.
- Stitch Marker: Optional, but especially helpful for beginners working in continuous rounds.
- Yarn Needle / Blunt Tapestry Needle: For sewing the body closed, attaching pieces, and adding facial details.
Before You Start
Because blanket yarn can make individual stitches harder to see, take a moment to identify each stitch clearly as you work. A stitch marker can make the beginning of each round much easier to track.
If you change the yarn weight or hook size, remember that the finished ghost may be larger or smaller than the stated 5–6 inch size.
Finished Size & Customization Ideas
The finished ghost is approximately 5–6 inches tall, although the final size can vary depending on your yarn weight, hook size, and crochet tension.
Customize the Face
The face is one of the easiest parts to personalize.
You can:
- Add pink or coral blush beneath the eyes.
- Change the shape of the smile.
- Make the mouth smaller or larger.
- Leave the mouth off completely for a minimalist ghost.
- Experiment with different eye sizes.
Change the Hat
You can make the ghost with a witchy hat, a candy corn hat, or no hat at all.
For a different seasonal look, try changing the hat colors or using a completely different color combination.
Add Extra Details
Small embellishments can give each ghost a unique personality. Consider adding:
- Tiny bows.
- Spider decorations.
- Halloween-themed patches.
- Small embroidered details.
- Other lightweight decorative accessories.
Pattern Abbreviations & Terminology
The pattern uses standard American crochet terminology.
- MR: Magic Ring
- SC: Single Crochet
- INC: Increase – 2 Single Crochets in one stitch
- DEC: Invisible Decrease
- ST: Stitch
- RND: Round
- BLO: Back Loop Only
- FLO: Front Loop Only
- SL ST: Slip Stitch
- CH: Chain
- DC: Double Crochet
- FO: Fasten Off

Helpful Pattern Tip
When working in continuous rounds, use a stitch marker at the beginning of each round. This is particularly useful when working with thick or fuzzy yarn because the stitch openings can be difficult to identify.
Overview
Looking for a cute crochet pattern that works as a Halloween decoration, handmade gift, or simply a cheerful little plushie? This crochet ghost pattern creates a soft, approximately 5–6 inch ghost with a rounded body, tiny bobble-style arms, a frilly bottom, and a sweet embroidered face.
The tutorial takes you through the construction in a practical order, starting with the ghost body and its increases, then adding the raised arm details and decorative bottom. You will also learn how to place the eyes, embroider the smile and blush, close and stuff the body, and finish your ghost with either a witchy hat or a candy corn-inspired hat.
Once the basic ghost is finished, you can make the design your own by changing the facial expression, skipping the mouth, switching hat styles, experimenting with colors, or adding small Halloween embellishments. The result is a soft handmade ghost that is easy to personalize and fun to make for seasonal decorating or gifting.
Step-by-Step Detailed Crochet Instructions
1. Start the Ghost Body
The ghost body is worked from the top downward. The first few rounds increase evenly to create the rounded shape.
RND 1: Create a magic ring and work 8 SC into the ring. Pull the ring tight.
Stitch count: 8
If the magic ring feels difficult, you can instead chain 3, join to form a loop, and crochet the stitches into the center.
RND 2: Work 1 INC in each stitch around.
Stitch count: 16
Place a stitch marker at the end of the round.
RND 3: Repeat [1 SC, 1 INC] around.
Stitch count: 24
RND 4: Repeat [2 SC, 1 INC] around.
Stitch count: 32
RNDs 5–10
Work SC in each stitch around with no increases.
These rounds create the main length of the ghost.

Stitch count: 32 per round
Check the Shape
At this point, the piece should begin to look like a small rounded ghost body. If your tension is particularly tight or loose, the height may vary slightly from the stated finished size.
Create Ghost Arms with Bobble Stitches
Instead of crocheting separate arms and sewing them on later, this pattern creates the ghost’s arms directly into the body using bobble stitches.
RND 11
- SC 11.
- Work the first bobble stitch arm.
- SC 8.
- Work the second bobble stitch arm.
- Continue with SC to the end of the round.
How to Make the Bobble Arm
To create the raised arm:
- Yarn over and pull up a loop.
- Yarn over and pull through two loops.
- Repeat this motion 5 times in the same stitch.
- You should have 6 loops on your hook.
- Yarn over and pull through all 6 loops.
- Push the completed bobble outward so it forms the arm.
The bobbles may initially point inward while you are crocheting them. Gently push each one outward before continuing.
RND 12
Work SC in each stitch around.
Make sure there is 1 SC at the bottom of each arm so the bobbles remain incorporated into the body.
Stitch count: 32
Create the Frilly Ghost Base
The decorative bottom gives the plushie its soft, wavy ghost silhouette.
RND 13: Work in the FLO and crochet 3 SC in each stitch around.
This creates a full, ruffled edge around the bottom of the ghost.
When you reach the beginning of the round, SL ST to the first stitch and FO.
Keep the Ruffle Even
Because three stitches are placed into every stitch, the edge will naturally become quite full. Try to maintain consistent tension so the ruffle spreads evenly around the body instead of bunching heavily in one area.

Add the Facial Details
Adding the face before closing the lower opening makes it easier to work with the body and check the placement while the plushie is still accessible.
Attach the Eyes
Position the safety eyes between Rows 8 and 9, leaving approximately 6 stitches between them.
Before securing them, look at the face from the front and make sure both eyes are level.
You can adjust the spacing slightly if you prefer a wider-eyed or more compact expression.
Embroider the Smile
Using black yarn and a yarn needle, sew a small smile between the eyes.
The smile can be centered around approximately 2 stitches, but you can shift or reshape it according to the expression you want.
Add Blush
Using coral pink or another blush-colored yarn, wrap the yarn around the stitch directly below each eye approximately 2–3 times.
Keep both cheeks at approximately the same height for a balanced expression.
Custom Expression Tip
If you want a simpler ghost, skip the smile entirely. The safety eyes and blush alone can create a cute minimalist face.
Stuff and Close the Ghost
Once the decorative details are complete, it is time to close the bottom of the body.
Prepare the Bottom Opening
Locate the unused BLO from Row 12.
Attach yarn and work SC into each stitch in the BLO.
Then begin shaping the opening with gradual decreases.
Closing Rounds
RND 1: Repeat [2 SC, DEC] around.
RND 2: Repeat [1 SC, DEC] around.
RND 3: Work DEC around until the opening is nearly closed.
Add the Stuffing
Add polyfill gradually while working through the closing process.
Make sure the stuffing reaches the sides and top of the ghost so the body remains rounded.
Avoid packing the stuffing so tightly that it stretches the stitches. The plushie should feel full and soft while retaining its shape.
Close the Opening
Once the opening is small enough, use a yarn needle to weave through the remaining stitches.
Pull the yarn gently to close the opening completely, secure the end, and hide the remaining yarn inside the body.

Witchy Hat
The witchy hat gives the ghost a classic Halloween look.
Hat Base
Work the hat in rounds:
RND 1: Create a magic ring and work 6 SC into the ring. (6 sts)
RND 2: Work SC around. (6 sts)
RND 3: Repeat [1 SC, 1 INC] × 3. (9 sts)
RND 4: Repeat [2 SC, 1 INC] around. (12 sts)
RND 5: Repeat [3 SC, 1 INC] around. (15 sts)
RND 6: Repeat [4 SC, 1 INC] around. (18 sts)
RND 7: Work SC around. (18 sts)
Choose the Brim Style
You can finish the hat with one of two brim options.
For a curly brim:
Work in the FLO and place 3 DC in each stitch.
For a flatter brim:
Work in the FLO and place 2 DC in each stitch.
The three-DC option creates a fuller, more dramatic brim, while two DC in each stitch produces a more controlled edge.
Finish the Hat
Lightly stuff the hat if desired.
Use the remaining yarn tail to sew the hat onto the ghost’s head at a slight angle.

Candy Corn Hat
If you want a sweeter Halloween variation, use the same basic hat structure to create a candy corn-inspired design.
Color Sequence
Work the hat using three colors:
- White for the base.
- Orange for the middle section.
- Yellow for the lower section.
Follow the same hat construction, changing to orange after RND 3 and to yellow after RND 6.
Finish with the curly brim using 3 DC in each FLO stitch.
Color Change Tip
When changing colors, keep the yarn tails organized and secure them as you go where appropriate. This prevents a collection of loose ends from making the small hat difficult to finish later.
Final Assembly
Once the ghost body and chosen hat are finished, bring the pieces together.
Attach the Hat
Place the hat on top of the ghost and experiment with the angle before sewing.
A slight tilt can give the ghost a more playful appearance.
Use the remaining hat tail to sew through the FLO from the last hat round and into the ghost’s head. This helps keep the attachment neat and reduces visible sewing on the outside.
Add Optional Decorations
Once the hat is secure, you can add any additional lightweight embellishments you have chosen.
For example:
- A small bow.
- A spider detail.
- A Halloween patch.
- Simple embroidery.
Make sure every added decoration is firmly attached before using the plushie as a gift or decoration.

Final Finishing Check
Before calling the project complete, inspect the ghost from all sides.
Check that:
- The eyes are level and securely attached.
- The smile is centered.
- The blush is balanced.
- Both bobble arms face outward.
- The frilly bottom spreads evenly.
- The body is firmly but evenly stuffed.
- The bottom opening is completely closed.
- The hat is securely sewn on.
- All yarn ends are hidden.
These small checks can make the finished plushie look much cleaner and more polished.
Conclusion
Your Charming Crochet Ghost Plushie is now complete and ready to become a cute Halloween decoration, handmade gift, or seasonal display piece.
The basic ghost design is simple enough to customize in many ways. Try a witchy hat for a classic Halloween look, a candy corn hat for something sweeter, or leave the ghost without a hat for a simple everyday plushie. You can also experiment with facial expressions, blush colors, bows, and other small embellishments.
Once you have the basic body construction down, you can easily make a whole collection of little ghosts, each with its own colors, expression, and personality.