Looking for a simple fall crochet decoration with plenty of texture? Make this ribbed pumpkin in two sizes, then finish it with a rustic cork or cinnamon-stick stem.
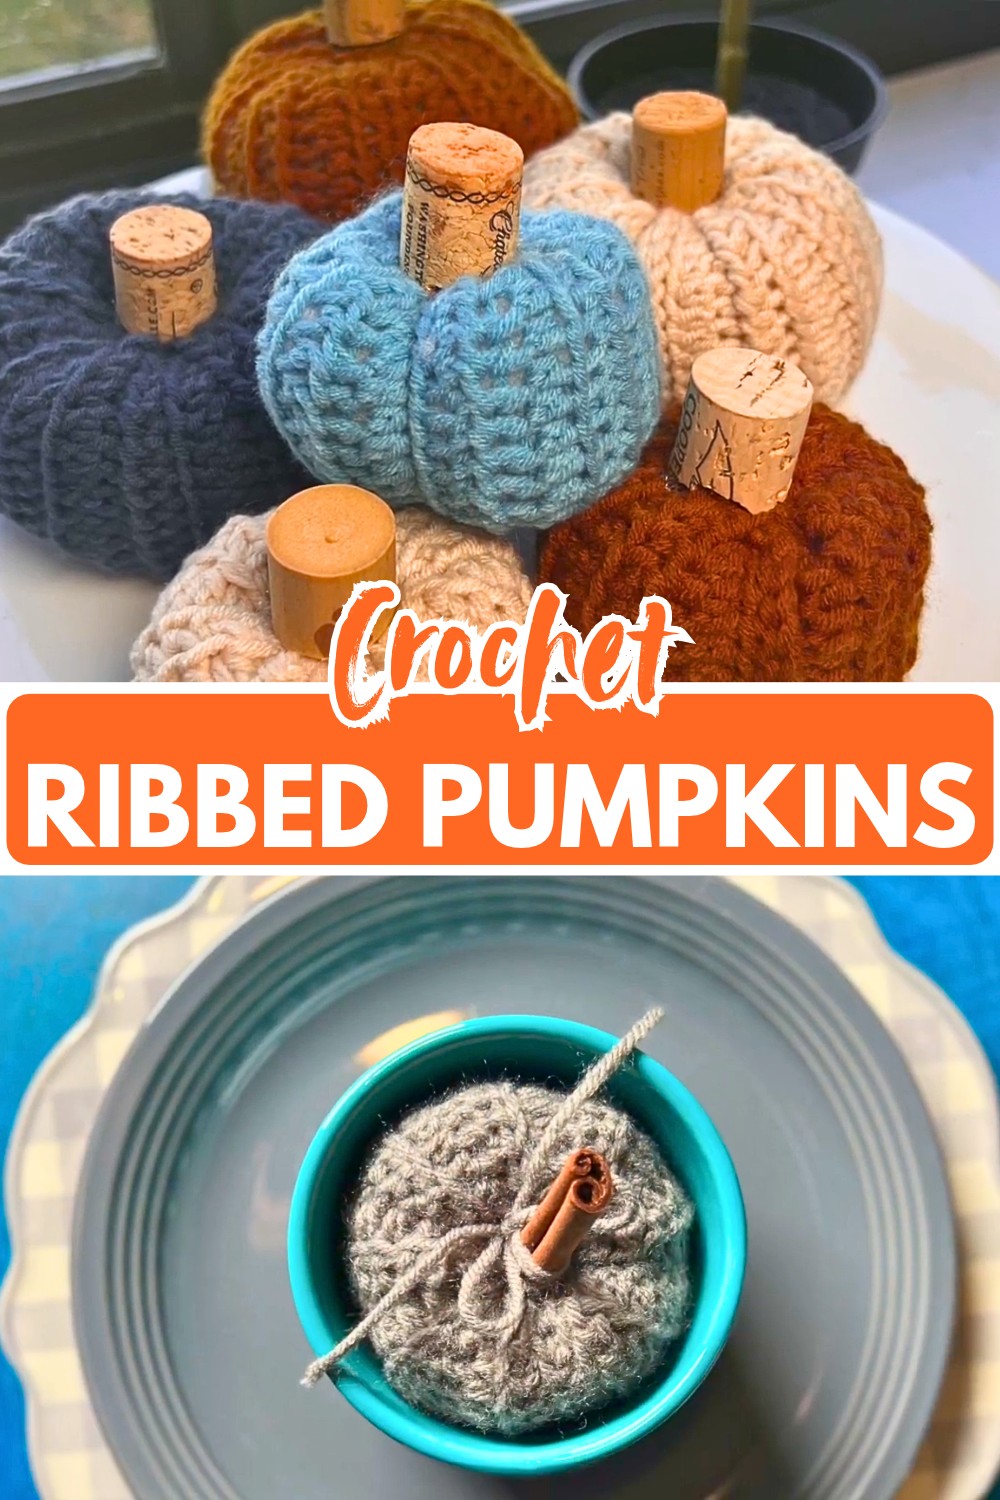
The charm of this crochet pumpkin comes from its deeply ridged surface. Rather than shaping the pumpkin with complicated increases and decreases, you crochet a flat rectangle in front-loop-only half double crochet, join the ends, and cinch both openings to create the rounded form.
This tutorial walks you through both the small and large versions, including how to keep the joining seam even, when to stuff the pumpkin, and how to finish the top neatly. You can then choose a cork, cinnamon stick, or simple wood stick for a stem to give your crochet pumpkin the exact autumn look you want.
Credit Uri Designs Studio
Materials and Tools
- Size 3 yarn in your choice of color
- Crochet hook: Use the hook size recommended on your yarn label
- Scissors
- Yarn needle
- Polyfill or your preferred stuffing
- Stem: Cork, cinnamon stick, or wood stick
- Hot glue for attaching the stem

Finished Sizes and Customization
This pattern gives you two starting sizes:
- Small pumpkin: Foundation chain of 15, worked for 14 rows
- Big pumpkin: Foundation chain of 21, worked for 20 rows
The finished dimensions will vary depending on your yarn, hook, and tension.
For a seasonal display, try warm orange, cream, rust, brown, or muted green yarn. A cinnamon-stick stem adds a particularly nice rustic touch, while cork gives the pumpkin a simple, natural finish.
Pattern Abbreviations
US crochet terms are used.
- CH: Chain
- HDC: Half Double Crochet
- SC: Single Crochet
- FLO: Front Loop Only
- SL ST: Slip Stitch
Crochet the Ribbed Pumpkin Panel
The pumpkin starts as a rectangle. The ribbed texture is created by working the HDC stitches through the front loop only after the foundation row.
Choose your yarn and the hook size recommended on its label.
Foundation Chain
Leave a short yarn tail and make a slip knot.
Small Pumpkin: Ch 15.
Big Pumpkin: Ch 21.
The small version produces 14 HDC across the first row, while the big version produces 20 HDC.
Build the Ribbing
Row 1: HDC in the second ch from the hook, then work 1 HDC in each remaining chain across. (14 HDC for small; 20 HDC for big)
Row 2: Ch 2, turn. Work 1 HDC in the FLO of each stitch across, making sure to work into the final stitch. (14 sts for small; 20 sts for big)
Rows 3-14 (Small): Repeat Row 2. (14 sts each row; 14 rows total)
Rows 3-20 (Big): Repeat Row 2. (20 sts each row; 20 rows total)
The front-loop-only stitches form raised horizontal ridges across the panel. These ridges will run around the finished pumpkin once the rectangle is joined.

Keep the Ribbing Consistent
When working each row, make sure you are picking up the front loop only rather than accidentally working under both loops. Also check the final stitch before turning.
Missing that last stitch can gradually make the rectangle narrower, which makes the finished pumpkin less even when you come to join the short ends.
Turn the Rectangle Into a Pumpkin Body
Once you have finished the required number of rows, lay the rectangle flat and bring the two short ends together.
The ribbed rows should run from top to bottom around the future pumpkin. Your goal is to create an even cylinder before you close either opening.
Join the Short Ends
Fold the rectangle in half so the two short ends meet.
Insert your hook through the corresponding stitches on both edges and begin with a SL ST to connect them. Continue joining the seam with SC stitches, making sure you work through the same number of stitches on both sides.
Work evenly all the way across.
Cut the yarn and fasten off.
Seam Check: Before moving on, look at the joined edge and make sure it has not pulled one side higher than the other. An even seam will make the top and bottom openings easier to cinch neatly.
Cinch the Bottom
Thread your yarn needle with yarn and weave it in and out around one open end of the tube.
Work around the entire opening, then pull the yarn firmly.
The stitches should gather toward the center until the opening is completely closed. Secure the gathered section so it will stay closed once the pumpkin is filled.

Add the Stuffing
Take the needle through to the opposite side of the tube and begin filling the pumpkin with Polyfill.
Add the stuffing gradually and work it into the corners and along the inside walls. The pumpkin should become firm enough to hold its rounded shape, but leave enough flexibility for the top to close.
Because the ridges will become more visible as the pumpkin is filled, check the outside occasionally while stuffing rather than waiting until the very end.
Cinch the Top Closed
Once the pumpkin is filled, weave your yarn needle in and out around the remaining open edge.
Pull the yarn tightly to gather the top around the stuffing.
Before securing the knot, make sure the stuffing is tucked inside and the gathered opening is centered. Knot the yarn firmly to keep the pumpkin closed.
You should now have the basic rounded pumpkin shape, with the FLO ribbing creating its textured surface.
Choose a Rustic Stem
The stem is the finishing detail, and you have several simple options.
- Cork: Cut a cork in half for a short, rounded stem.
- Cinnamon stick: Use a small piece for a rustic autumn appearance and a natural seasonal scent.
- Wood stick: Trim a small branch or wooden stick to the desired length.
For a Thanksgiving centerpiece, cinnamon sticks work especially well with warm-toned yarn. For a simpler everyday fall display, cork or wood gives the pumpkin a clean handmade appearance.
Attach the Stem
Apply a small amount of hot glue to the base of your chosen stem.
Press the stem firmly into the center of the cinched top of the pumpkin.
Hold it in place briefly while the adhesive sets.
Take care not to use more glue than necessary, especially if you want the stem to sit neatly in the center without excess adhesive showing around its base.

Make a Small Pumpkin Patch
The two sizes make it easy to create a grouped fall display without changing the basic pattern.
Make several small pumpkins for a bowl or tray, then add one or two larger pumpkins for height. You can also mix orange with cream, brown, rust, or muted green to create a more natural autumn palette.
For a Thanksgiving table, arrange the pumpkins together as a centerpiece or place individual pumpkins around candles, serving dishes, or seasonal greenery.
The simple rectangle is what makes this pattern so adaptable: once you are comfortable with the FLO ribbing, changing the foundation chain and number of rows gives you room to experiment with the proportions.