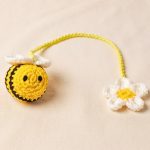
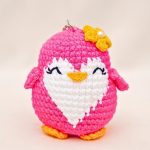
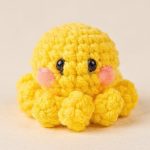
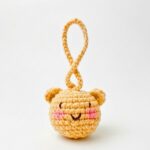
Tiny tentacles, a rounded mint-green body, and rosy cheeks make this crochet jellyfish keychain an adorable little charm for keys, bags, or backpacks.

A plump crochet jellyfish with eight dangling tentacles makes a playful little accessory that is easy to carry anywhere. Its rounded body, tiny eyes, smiling face, and soft pink cheeks give this crochet design plenty of personality without making it bulky.
Working in simple rounds creates the compact body, while BLO stitches help define the lower edge before ruffles and tentacles are added. This crochet pattern also includes clear guidance for stuffing, keychain placement, facial details, and tentacle length, with room to change colors, add accessories, or adjust the finished size.
Materials & Tools Needed
- Yarn: Polyester yarn in mint green or another color of your choice
- Hook: Crochet hook No. 3
- Eyes: 5mm bead eyes
- Hardware: Keychain ring
- Stuffing: Fiberfill stuffing
- Adhesive: Hot glue or craft glue
- Notions: Yarn needle and scissors
- Embroidery: Black yarn or thread for the mouth and pink thread or blush for cheeks
Finished Size & Customization
The finished jellyfish measures approximately 2.5 to 3 inches in height, excluding keyring and tentacles, so it stays lightweight and portable.
Change mint green to pastel pink, lavender, or variegated yarn for a different look. Tentacle length can also be changed by adjusting the foundation chain. A tiny bow can add another decorative touch, while safety eyes can replace bead eyes if preferred.
Pattern Abbreviations & Terminology
- ch: Chain
- sc: Single crochet
- dc: Double crochet
- inc: Increase – 2 single crochets in the same stitch
- dec: Decrease – single crochet two stitches together
- BLO: Back loop only
- sl st: Slip stitch
- MR: Magic ring
- R: Round

Step-by-Step Crochet Jellyfish Keychain
Shaping the Jellyfish Body
Rounds 1-5: Building the Rounded Base
The first five rounds gradually widen the crochet body from the center, creating the rounded upper shape needed for the jellyfish.
Round 1: Begin with an MR. Ch 1, work 6 sc into MR, then join with sl st to first stitch. Total: 6 stitches.
Teaching Guide – Why this starts small:
Six stitches establish the center from which the body expands. Keep the MR closed neatly so the center does not leave an unwanted opening.
Round 2: Ch 1, work (inc sc) * 6 around, then join with sl st. Total: 12 stitches.
Teaching Guide – What to check:
Each stitch from Round 1 receives an increase. Counting 12 stitches before joining helps prevent uneven growth later.
Round 3: Ch 1, work (1 sc, inc sc) * 6 around, then join with sl st. Total: 18 stitches.
Round 4: Ch 1, work (1 sc, inc sc, 1 sc) * 6 around, then join with sl st. Total: 24 stitches.
Round 5: Ch 1, work (3 sc, inc sc) * 6 around, then join with sl st. Total: 30 stitches.
Teaching Guide — Shape check:
At this point, the stitch count has reached 30 and the piece should be noticeably wider than its starting center. If the edge looks uneven, check increase placement before continuing.
Rounds 6-9: Maintaining Body Width
Once the widest point is reached, the next rounds maintain the same stitch count instead of continuing to increase.
Rounds 6-9: Ch 1, work 1 sc in each stitch around, then join with sl st. Total: 30 stitches per round.
Teaching Guide – Why these rounds matter:
Repeated sc rounds build the height of the jellyfish without making its body wider. Keep the 30-stitch count consistent through all four rounds.
Teaching Guide – Before moving on:
Check that the body has enough height for the intended rounded shape. These rounds form the main side walls before the opening begins to narrow.
Creating the Lower Rim
Round 10: Back-Loop Separation
Round 10 creates exposed front loops that will later provide the attachment point for the lower ruffle.
Round 10: Ch 1, working in BLO, work 1 sc in each stitch around, then join with sl st. Total: 30 stitches.
Teaching Guide – Why BLO is important:
Working through back loops leaves the front loops exposed on the lower rim. Those unused loops are needed for the ruffle stage, so avoid accidentally working through both loops here.
Teaching Guide – Keychain placement:
Before the inner structure is closed, securely attach the keychain hardware near the top/center of the head as indicated in the tutorial. Doing this at this stage keeps the hardware accessible.
Closing the Stuffed Body
Rounds 11-13: Shaping the Opening Smaller
The decrease rounds now bring the lower opening inward while preserving the jellyfish’s rounded form.
Round 11: Ch 1, working in BLO, work (3 sc, dec sc) * 6 around, then join with sl st. Total: 24 stitches.
Teaching Guide – What is changing:
Decrease stitches reduce the circumference gradually. Keep decreases evenly distributed so the opening closes smoothly rather than pulling toward one side.
Round 12: Ch 1, work (1 sc, dec sc, 1 sc) * 6 around, then join with sl st. Total: 18 stitches.
Round 13: Ch 1, work (1 sc, dec sc) * 6 around, then join with sl st. Total: 12 stitches.
Finishing the Body
Finishing: Ch 1 and cut yarn, leaving a short tail.
Stuffing: Firmly fill the body with fiberfill.
Teaching Guide – How to judge stuffing:
Fill the shape enough to give the body a plump appearance, but avoid packing it so tightly that the stitches stretch or the rounded shape becomes distorted.
Closing: Thread the yarn needle through the front loops of the remaining 12 stitches and pull tightly to close the bottom opening securely.
Teaching Guide – Final body check:
Before adding decorative elements, make sure the opening is firmly closed and the body holds its rounded shape. The next stage uses the exposed front loops left from Round 10 to create the ruffled lower edge.
Adding the Ruffled Lower Edge
Ruffle Around the Rim
The ruffle gives the jellyfish a defined lower edge and creates a visual transition between its rounded body and hanging tentacles.
Ruffle: Join yarn to the exposed front loops around the lower rim from Round 10. Work [2 ch, (2 dc, 2 ch), sl st] 15 times evenly around the entire bottom rim.
Teaching Guide – Where to work:
Use the exposed front loops from Round 10 rather than attaching randomly along the finished body. Even spacing keeps the ruffle distributed around the full rim.
Teaching Guide – What to watch:
As you repeat the pattern, check that the ruffle remains evenly spread. Crowding several repeats into one area can make one section fuller than another.
Adding Eight Tentacles
Tentacle Placement
With the ruffle complete, add the eight hanging tentacles around the bottom base.
Tentacle 1: Attach yarn to the bottom base of the body. Ch 19, skip 1 stitch, then work 18 sl sts back down the chain.
Tentacles 2-8: Repeat the same process until 8 individual tentacles are distributed around the base.
Teaching Guide – Why the chain comes first:
The 19-chain foundation determines tentacle length, while the 18 slip stitches worked back down give each tentacle a narrow, flexible shape.
Teaching Guide – Placement check:
Distribute eight tentacles around the base rather than clustering them together. Before finishing each attachment, check that the tentacle hangs freely and does not pull the ruffle out of shape.
Customization:
For longer or shorter tentacles, change the number of foundation chains while keeping the same basic return-stitch method.
Adding the Face
Positioning the Eyes
The facial details give the small jellyfish its expression, so placement matters more than adding extra decoration.
Eyes: Insert the 5mm bead eyes between Rows 6 and 7, spacing them approximately 5 stitches apart. Secure with glue if needed.
Teaching Guide – What to check:
Look at the face from straight on before permanently securing the eyes. Both eyes should sit at a similar height and spacing so the expression remains balanced.
Embroidering Mouth & Cheeks
Mouth: Embroider a cute smiling mouth with black yarn or thread between Rows 7 and 8.
Cheeks: Add bright pink thread or fabric paint below the outer edges of the eyes for blush marks.
Teaching Guide – Final face check:
Keep the mouth centered between the eyes and place blush marks at similar heights on both sides. Small adjustments here can noticeably change the expression of such a compact accessory.
Attaching the Keychain Ring
Final Hardware Check
Once body, ruffle, tentacles, and facial details are complete, check the keychain connection before using the accessory.
Secure attachment: Confirm that keychain hardware is firmly attached near the top/center of the head.
Teaching Guide – Why this check matters:
This jellyfish is intended to hang from keys, bags, or backpacks, so the attachment point needs to hold the accessory securely during everyday handling.
Final check: Gently inspect the hardware, facial details, ruffle, and all eight tentacles. Make sure no loose yarn ends remain and that the body retains its intended compact shape.
Easy Ways to Personalize the Jellyfish
Mint green gives the jellyfish a fresh ocean-inspired appearance, but pastel pink, lavender, and variegated yarn can create completely different moods.
For a smaller or larger version, adjust yarn weight and hook choice together. Tentacle length can be changed independently through chain count, making this one of the easiest details to personalize without changing the body pattern.
A tiny bow can add another decorative feature, while safety eyes offer an alternative to 5mm bead eyes.