Need tiny storage with festive charm? This drawstring money crochet bag keychain keeps folded notes close while colorful trim, ruffles, and hanging loop add playful detail.
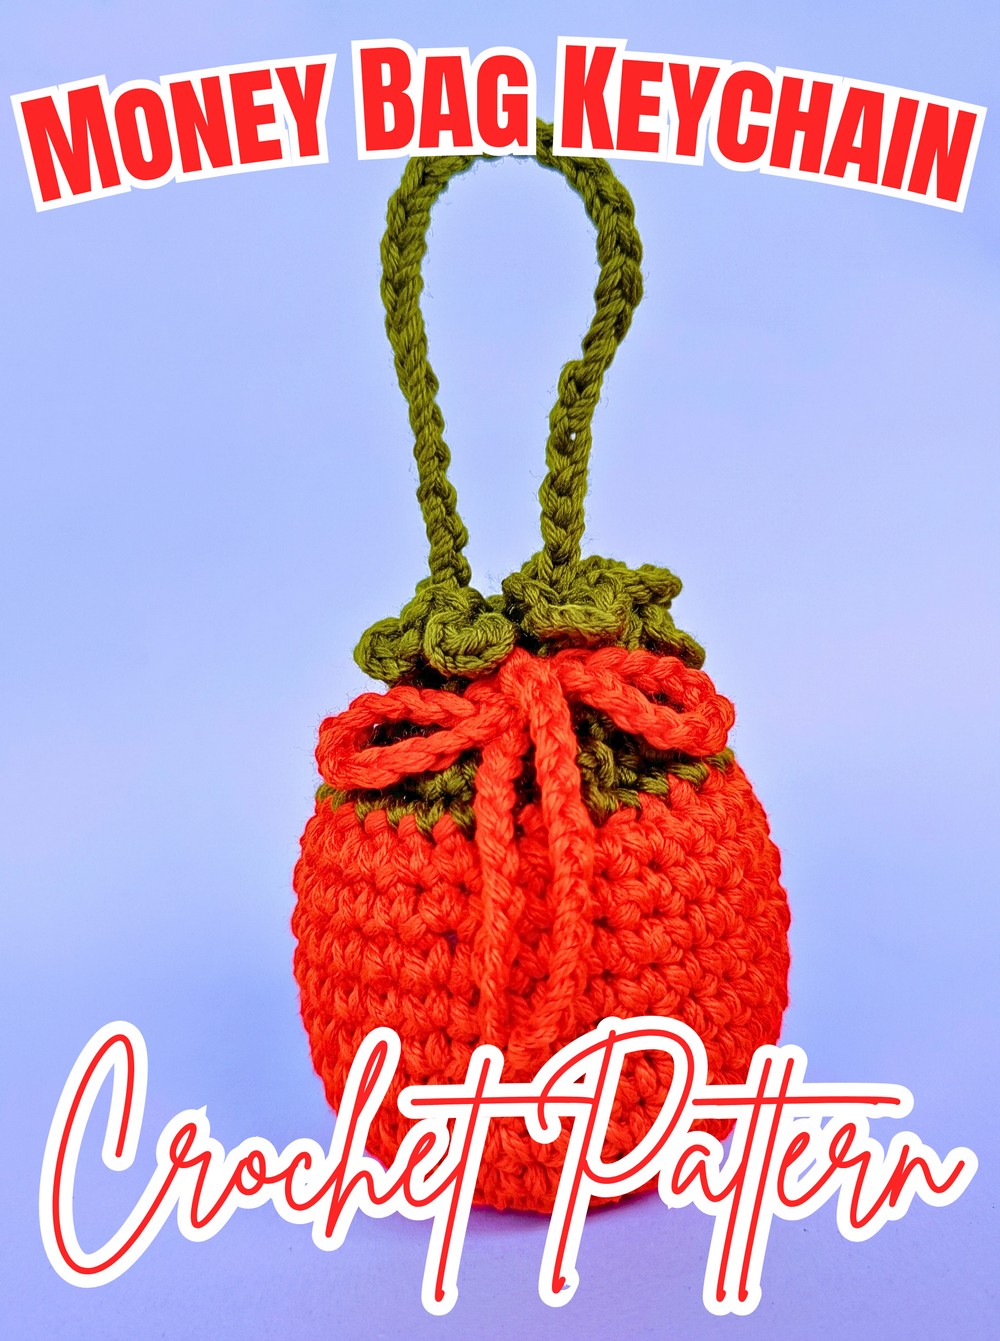
Crochet this miniature bag for carrying folded holiday notes, tiny gifts, or other small essentials right on your keys. Its compact shape combines practical storage with colorful trim, gathered ruffles, and matching hanger loop, giving finished crochet piece plenty of personality despite its tiny size.
This crochet pattern uses simple single crochet shaping, gradual increases, straight body rounds, and an accent-color trim before adding eyelets and drawstring closure. You can adjust body height by changing straight rounds, while tutorial guidance covers color changes, eyelet spacing, cord threading, ruffle gathering, and secure keychain attachment.
Credit Erfin R. Tangdilintin
Materials & Tools Needed
- Yarn:
- Main Color (MC): Orange, red, or another chosen shade for bag body and drawstring.
- Accent Color (AC): Green, yellow, or another contrasting shade for trim and hanger loop.
- Crochet Hook: Choose hook size suitable for selected yarn; approximately 2.0–2.5 mm works well for miniature keychain-style pieces.
- Keychain Ring
- Yarn Needle
- Lighter: Useful for securing or melting synthetic yarn ends when appropriate.
Finished Size & Customization
Finished pouch measures approximately 2-3 inches tall, making it suitable for folded miniature bills, holiday money notes, or other tiny items.
Change body height: Add or remove straight single crochet rounds during body section.
Change color character: Try orange with green trim for fruit-inspired styling, red with yellow trim for festive pouch styling, or other combinations suited to gifts and holidays.
Pattern Abbreviations & Terminology
- ch = Chain
- sc = Single crochet
- sc2inc = Single crochet increase; work 2 single crochets into same stitch
- sl st = Slip stitch
- st(s) = Stitch(es)
- MC = Main Color
- AC = Accent Color

Step-by-Step Crochet Money Bag Keychain Process
Shape Bag Base
This miniature bag begins from center using MC. Increasing rounds gradually widen circular base before straight rounds establish pouch height.
Round 1: Using MC, start with magic ring, work 6 sc into ring, then join with sl st into first sc. (6 sts)
Why this round matters: Magic ring creates compact center for tiny pouch base. Six stitches provide starting count for gradual expansion.
Check your center: Keep magic ring pulled closed so no large opening remains beneath bag.

Round 2: Ch 1, work sc2inc in every stitch around, repeating increase 6 times. Join with sl st into first stitch. (12 sts)
What changes here: Each original stitch receives 2 sc, doubling stitch count from 6 to 12 and widening base evenly.
Round 3: Ch 1, work (1 sc, sc2inc) 6 times around, then join with sl st. (18 sts)
Look for this shape: Base should continue spreading outward without forming deep cup shape. If increases are placed unevenly, later rounds may pull sideways.
Round 4: Ch 1, work (2 sc, sc2inc) 6 times around, then join with sl st. (24 sts)
Round 5: Ch 1, work (3 sc, sc2inc) 6 times around, then join with sl st. (30 sts)
Why increases stop here: Thirty stitches provide finished base circumference for miniature pouch. Straight rounds can now build height without continuing outward.
Build Straight Bag Body
Rounds 6–12 maintain 30 stitches while gradually extending pouch upward.
Rounds 6-12: Ch 1, work 1 sc in each stitch around, then join with sl st. (30 sts per round)
Teaching Guide – body height: These seven rounds create main pouch height. For taller or shorter bag, add or remove straight rounds here rather than changing increase rounds.
Check your sides: Bag should begin rising evenly from circular base. Keep stitch count at 30 each round; accidental increases can make upper edge wider than intended.

Before color change: Complete Round 12 fully, then fasten off MC so accent trim can begin cleanly.
Add Accent Trim
AC now creates solid trim around upper opening before eyelets are formed.
Color Change: Fasten off MC and join AC yarn.
Why color changes here: Keeping body and upper trim separate gives finished pouch clear visual contrast and creates defined area for drawstring details.
Round 1: Ch 1, work 1 sc in each stitch around, then join with sl st. (30 sts)
Rounds 2-3: Ch 1, work 1 sc in each stitch around, then join with sl st for 2 additional solid trim rounds. (30 sts per round)
Check trim height: Three AC rounds should form continuous band above body before eyelet round begins.

Form Drawstring Eyelets
Round 4 changes solid trim into open loops that will hold drawstring cord.
Round 4 – Eyelet Round: Ch 6, skip 1 stitch, then sl st into next stitch. Repeat around entire opening to create lace-like loops.
Why this spacing matters: Each chain-6 loop becomes passage for drawstring cord. Keep loop formation consistent so cord can travel around opening without tight or oversized gaps.
What to check: Eyelets should remain open and evenly spaced. If one loop is accidentally attached too early or too late, cord may not gather pouch evenly.
Create Keychain Hanger
Hanger loop is formed immediately after eyelet round while AC remains attached.
Hanger Loop: Chain 30 stitches, then secure with slip stitch and fasten off securely.
Teaching Guide – loop placement: Keep hanger connected directly after eyelet round so loop remains integrated with upper trim. Secure fastening matters because metal ring will pull against this section during use.
Check before moving on: Hanger should form long enough loop to pass through keychain ring without twisting excessively.

Make Separate Drawstring Cord
MC now returns for separate cord that will travel through upper eyelets.
Drawstring Cord: Using MC, chain 70 stitches, then fasten off.
Why cord is separate: Separate chain gives pouch adjustable closure while keeping body uninterrupted. Seventy chains provide length needed to travel through all eyelets and leave enough ends for tying.
Thread Cord Through Eyelets
Use yarn needle to guide 70-chain MC cord through each eyelet around upper opening.
Threading: Weave cord in and out through eyelet loops until cord travels completely around pouch.
Teaching Guide – threading direction: Keep cord passing through every loop in sequence rather than skipping spaces. Even threading helps upper edge gather uniformly when cord is pulled.
Check before pulling: Both cord ends should remain accessible and approximately balanced.
Gather Ruffle and Close Bag
Pull both cord ends firmly to gather upper opening into ruffled shape.
Closure: Once pouch opening is gathered, tie cord into neat bow.
Why gathering comes now: Full ruffle effect depends on complete eyelet threading. Pulling cord before checking every loop can leave uneven sections around opening.
What to look for: Upper trim should bunch into small even folds while opening closes securely enough to hold tiny notes or items.
Attach Keychain Ring
Finish by connecting metal ring through 30-chain AC hanger.
Keychain Attachment: Loop 30-chain hanger through metal keychain ring and fasten tightly.
Teaching Guide – secure attachment: Check connection by gently pulling hanger before using pouch. If fastening feels loose, secure it again before attaching pouch to keys, bag, or backpack.
Finishing check: Inspect body, trim, drawstring, bow, and hanger for loose ends. If synthetic yarn was used, use lighter carefully only when appropriate for selected fiber and only for securing loose yarn ends.
Your miniature drawstring money bag keychain is ready for folded holiday notes, tiny keepsakes, or small gift-giving moments. Color changes can turn same basic crochet shape into fruit-inspired charms, festive pouches, or personalized key accessories.