Here, you’ll find how to crochet Miffy’s recognizable bunny head with long upright ears, neat shaping, and embroidered facial details for a sweet miniature plushie or keychain.
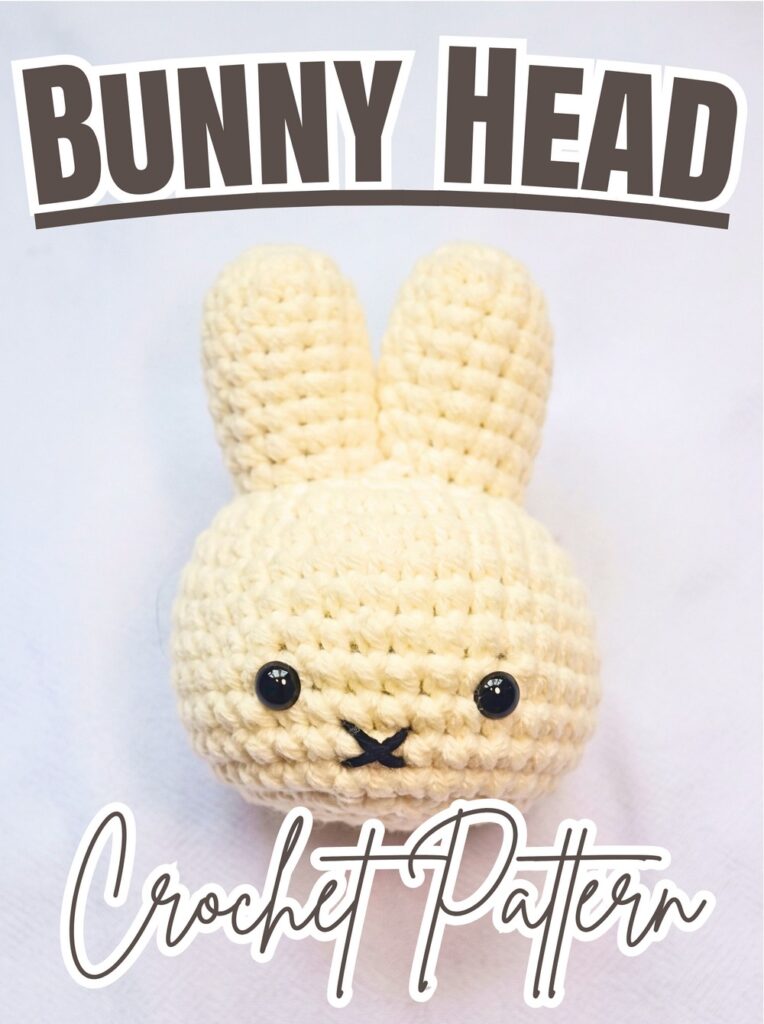
White crochet yarn creates Miffy’s simple storybook look, but joining long ears to a rounded head can be tricky when stitch placement feels unclear. This crochet Bunny pattern helps beginners follow each shaping stage with greater confidence.
From crochet ears and increases to head shaping, safety-eye placement, and Miffy’s signature X-shaped nose, this tutorial explains each stage in order. You’ll also learn when to stuff the head and how to close it neatly. Let’s begin!
Credit Odinka Studio
Materials & Tools
- Yarn: White sport- or DK-weight cotton yarn for the head and ears, plus a small amount of black yarn for facial embroidery.
- Crochet hook: 2.0-2.5 mm, chosen to suit your yarn and maintain tight stitches.
- Safety eyes: One pair of black safety eyes.
- Fiberfill stuffing: For lightly stuffing the ears and firmly stuffing the head.
- Yarn needle: For sewing and weaving in ends.
- Stitch marker: To identify the beginning of each round.
- Scissors: For trimming yarn.
Finished Size & Customization
Finished size: A miniature bunny head suitable for a keychain, small plushie accent, or decorative accessory. Exact dimensions will depend on yarn weight, hook size, and tension.
Customization ideas:
- Add a tiny orange, blue, or yellow accessory inspired by Miffy’s classic storybook palette.
- Use a larger yarn and hook for a bigger plushie, or finer yarn and a smaller hook for a miniature charm.
- Keep the white head and black facial embroidery for a recognizable, minimalist appearance.
Pattern Abbreviations
- mr: Magic ring
- ch: Chain
- sc: Single crochet
- inc: Increase – work 2 single crochet stitches in the same stitch
- dec: Decrease – work 2 single crochet stitches together
- sl st: Slip stitch
- sts: Stitches
- ( … ) x N: Repeat instructions inside parentheses the stated number of times
Step-by-Step Miffy Crochet Pattern
Step 1: Crochet the First Ear
Round 1: Make a magic ring and work 6 sc into the ring. (6 sts)
Round 2: Work 1 increase in each stitch around. (12 sts)
Rounds 3–10: Work 1 sc in each stitch around. (12 sts per round)
The increases widen the ear’s base, while the following even rounds create its long, upright shape.
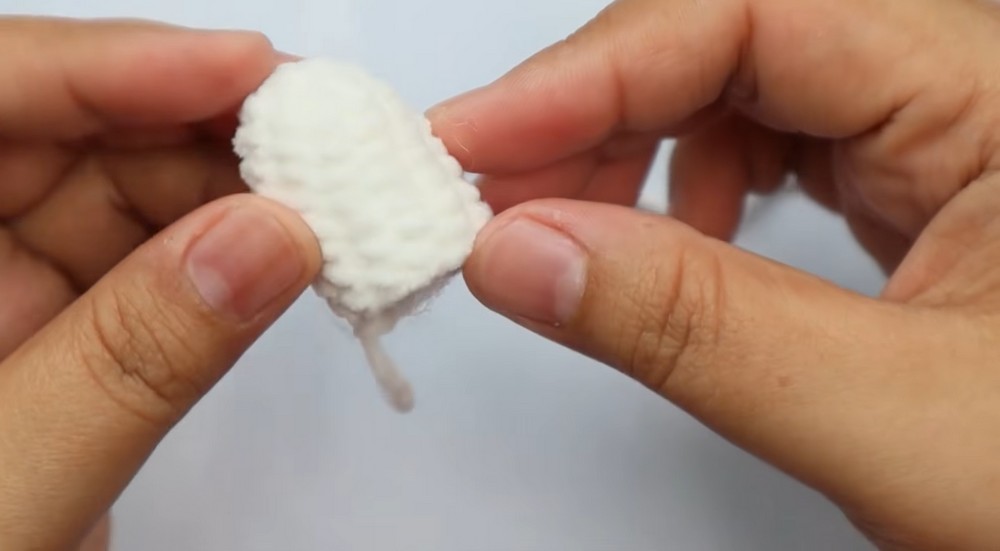
Finish the first ear: Work 1 sl st in the next stitch. Fasten off, leaving a long yarn tail for sewing. Lightly stuff the ear.
Teaching tip: Distribute stuffing gently rather than packing it tightly. Too much fiberfill can make narrow ears look bulky or bend out of shape. Keep the yarn tail accessible for closing the gap after joining.
Step 2: Crochet the Second Ear
Repeat Rounds 1–10 using white yarn:
- Round 1: 6 sc in a magic ring. (6 sts)
- Round 2: Increase in every stitch. (12 sts)
- Rounds 3–10: 1 sc in each stitch around. (12 sts per round)
Important: Do not fasten off after completing the second ear. The working yarn will continue directly into the joining round and head.
Place both ears side by side before joining. Their length and width should look similar, with no obvious difference in the shaping.
Teaching tip: Use your stitch marker to identify the final round of the second ear. Keeping track of this round helps when following the front-loop joining instructions.
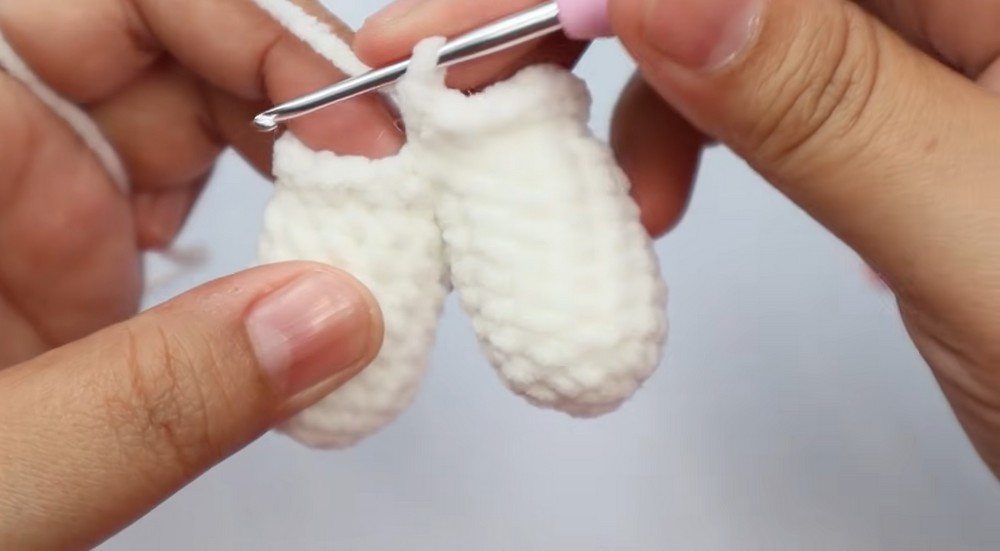
Step 3: Join the Ears
Round 11: This round connects the two ears and establishes the starting shape for the head.
According to the supplied pattern:
- Position the two ears beside each other.
- Work into the front loops only while joining the second ear to the first.
- Work
(2 sc, 1 inc)twice across the front loops. - Skip the next 6 stitches.
- Work
(2 sc, 1 inc)twice across the remaining front loops. - Check the stitch count before moving to the next round.
Important pattern clarification: The supplied joining instructions do not clearly account for all 24 stitches stated for Round 11. Confirm the precise placement and number of repeats against the original demonstration before treating this round as a fully verified 24-stitch sequence. The joining geometry matters because it determines how the ears sit above the head.
Teaching tip: Keep the ears aligned while working across their bases. If one ear twists during joining, correct its position before continuing into the head.
Step 4: Increase the Head to 30 Stitches
Round 12: Work (3 sc, 1 inc) six times around. (30 sts)
This round expands the joined section, creating more room for the rounded head beneath the ears.
To work each repeat, make 3 single crochet stitches in consecutive stitches, then work 2 single crochet stitches into the next stitch. Repeat this sequence six times.
Check your work: You should finish with 30 stitches. If the count differs, recount before beginning the next increase round.
Step 5: Expand the Head to 36 Stitches
Round 13: Work (4 sc, 1 inc) six times around. (36 sts)
Each repeat consists of 4 single crochet stitches followed by an increase in the next stitch. Continue evenly around the head.
This additional increase round creates the wider section needed for Miffy’s rounded face.
Teaching tip: Keep increases spaced evenly. Placing them in the wrong stitches can make the head look uneven or angular rather than smoothly rounded.
Step 6: Build the Rounded Head
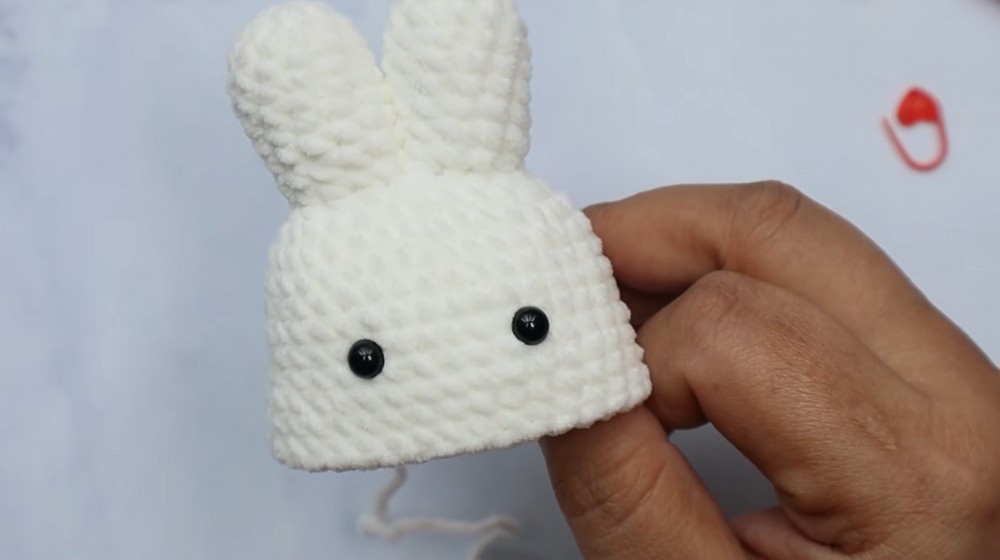
Rounds 14–21: Work 1 sc in each stitch around. (36 sts per round)
These eight rounds create the main depth of the head without increasing or decreasing the stitch count.
- Work one single crochet in every stitch.
- Move the stitch marker at the beginning of each round.
- Check periodically that the sides remain even.
- Keep tension consistent so the stuffing will not show through the fabric.
Check your work: The head should have a rounded, slightly elongated shape beneath the two ears. If the fabric feels too loose, adjust your tension before continuing.
Step 7: Begin Decreasing the Head
Round 22: Work (1 sc, 1 dec) twelve times around. (24 sts)
This round begins narrowing the lower part of the head.
For each repeat, work 1 single crochet, then combine the next 2 stitches into one decrease. Repeat twelve times to reduce the stitch count from 36 to 24.
Teaching tip: Avoid pulling decreases excessively tight. Even decreases help the head retain a smooth shape and prevent visible gaps.
Step 8: Reduce the Opening to 12 Stitches
Round 23: Work 12 decreases consecutively. (12 sts)
Work one decrease over each pair of stitches around. This reduces the opening from 24 stitches to 12.
The opening will become noticeably smaller, making this a useful point to check the head’s shape and add any stuffing that is still needed.
Important: Insert the safety eyes before closing the head completely. The next stage will leave a much smaller opening for working inside the piece.
Step 9: Position the Safety Eyes
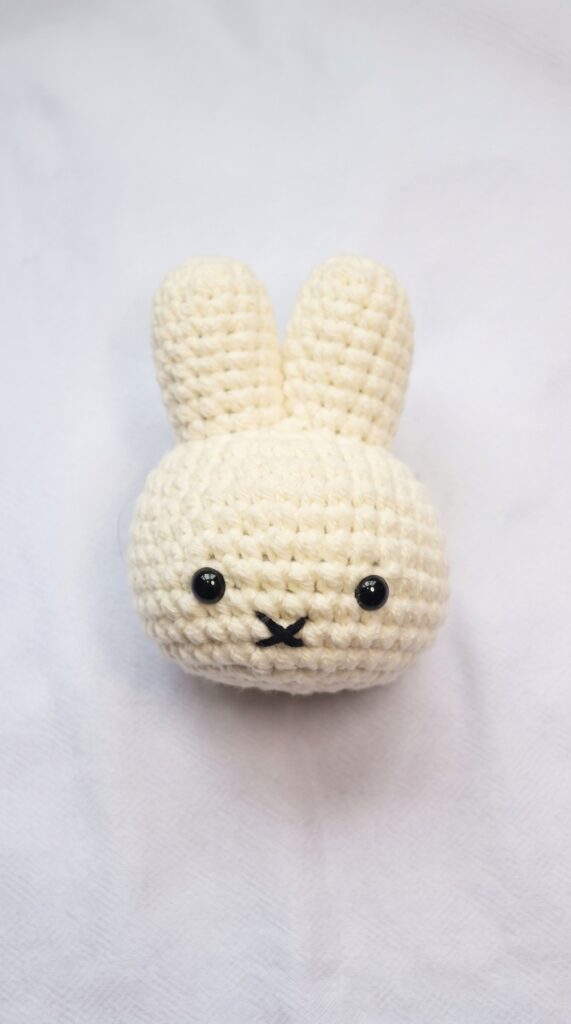
Before completing the final round, place the black safety eyes between Rounds 17 and 18, approximately 6 stitches apart, as specified in the supplied pattern.
- Locate the intended eye positions on the front of the head.
- Count the stitches carefully to keep the eyes level.
- Insert both eye posts through the fabric.
- Check the face from the front before securing the backs inside the head.
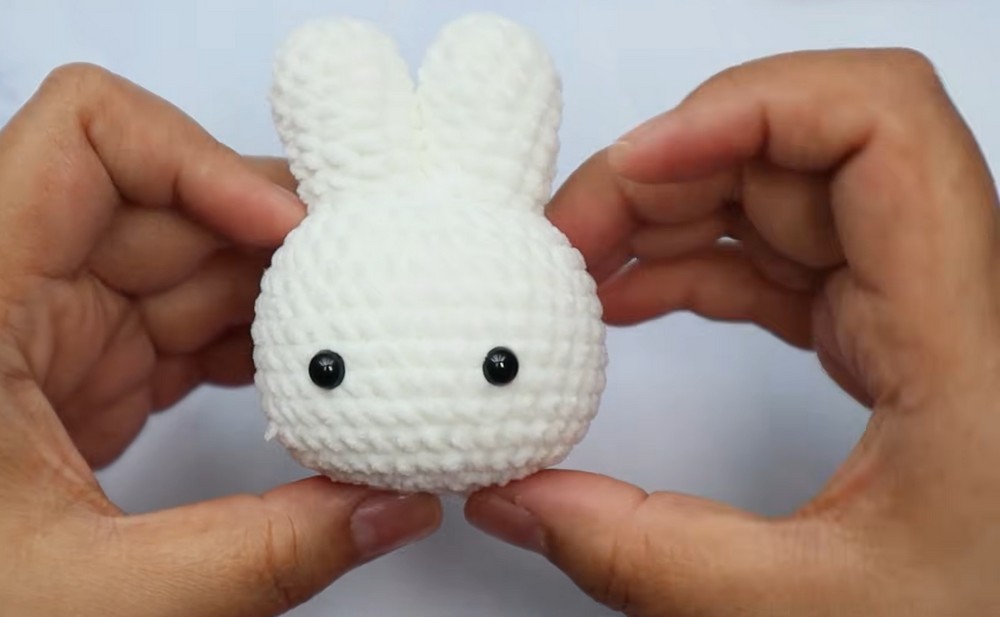
Teaching tip: Use the stitch marker and round boundaries to keep the eyes aligned. A small difference in height can change the expression of a miniature face.
Safety note: Safety eyes contain small parts and are not suitable for every age group. For toys intended for young children, embroidered eyes may be a safer alternative.
Step 10: Embroider Miffy’s X-Shaped Nose
Use black yarn and a yarn needle to embroider the recognizable cross-shaped nose.
Position the nose centrally between Rounds 18 and 20, directly between the eyes.
- Thread the needle with a manageable length of black yarn.
- Bring the needle through the fabric at the intended starting point.
- Stitch the first diagonal line.
- Add the second diagonal line to form an X.
- Secure the yarn on the inside without pulling the fabric out of shape.
Teaching tip: Keep the stitches small and symmetrical. Miffy’s simple facial design relies on clean placement rather than extra details.
Step 11: Stuff the Head and Close the Opening
Round 24: Work 6 decreases consecutively. (6 sts)
Before completing the closure, fill the head with fiberfill. Add small amounts at a time and distribute them evenly into the rounded sides and upper section.
- Check that the head feels firm but not stretched.
- Complete six decreases to reduce the opening to 6 stitches.
- Cut the yarn, leaving a long tail.
- Thread the tail through the remaining stitches.
- Pull gently to close the opening.
- Secure the yarn and weave the remaining tail inside the head.
Teaching tip: Avoid overstuffing. Excessive pressure can stretch the stitches and make the head look uneven. Add enough fiberfill to maintain a smooth, rounded form without distorting the ears.
Step 12: Close the Gap Between the Ears
Use the long yarn tail left from the first ear to close any small opening remaining between the joined ear bases.
- Thread the tail through the yarn needle.
- Bring the edges together at the base of the ears.
- Sew across the gap using small, neat stitches.
- Check the front and back to ensure no obvious opening remains.
- Secure the yarn and weave in the end.
Teaching tip: Avoid pulling the yarn so tightly that the ears bunch together. The goal is a neat join with both ears remaining clearly defined.
Final Finishing Checklist
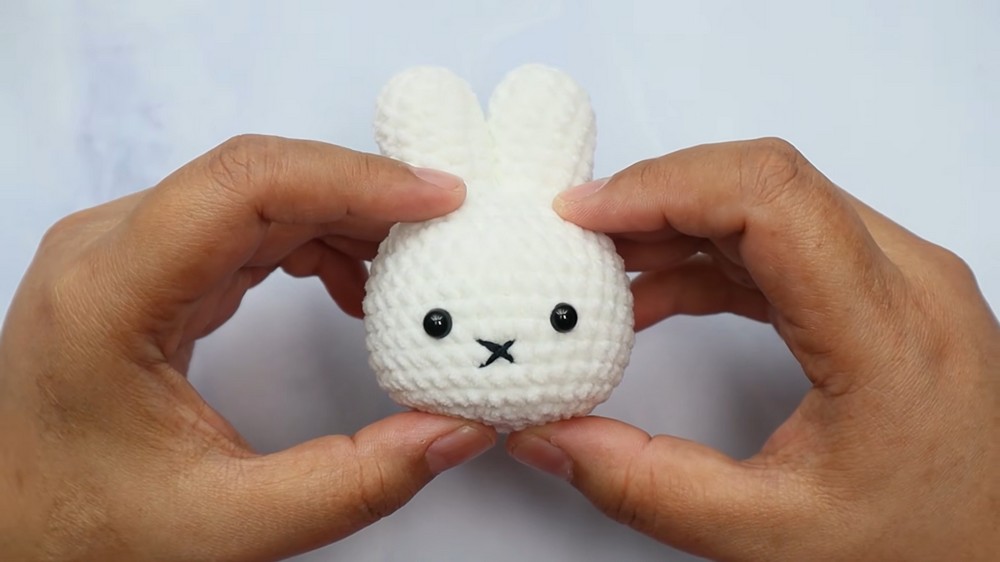
Before considering your Miffy-inspired bunny head complete, check the following:
- Both ears have similar lengths and remain upright.
- The joining section is secure and the head is evenly shaped.
- The safety eyes are level and approximately 6 stitches apart.
- The embroidered X-shaped nose sits centrally between the eyes.
- Fiberfill is distributed smoothly without stretching the stitches.
- The final opening and gap between the ears are closed securely.
- All loose yarn ends are woven in.
Personalization Ideas
Keep the familiar white head and simple black face, then add a small accessory if you want a more colorful finish.
- Orange accent: Add a tiny orange bow or scarf.
- Blue accent: Use a small blue accessory for a cool, classic color combination.
- Yellow accent: Add a small yellow decorative detail for a cheerful finish.
- Miniature charm: Choose finer yarn and a suitably smaller hook to create a compact version.
The finished bunny head can be used as a small plushie accent or adapted into a keychain by adding suitable hardware securely to the top. For a wearable or frequently handled charm, make sure all attachments are firmly secured before use.