Need an adorable handmade capybara? This crochet pattern guides you through textured paws, a rounded body, tiny ears, and a distinctive dark muzzle for a palm-sized companion.
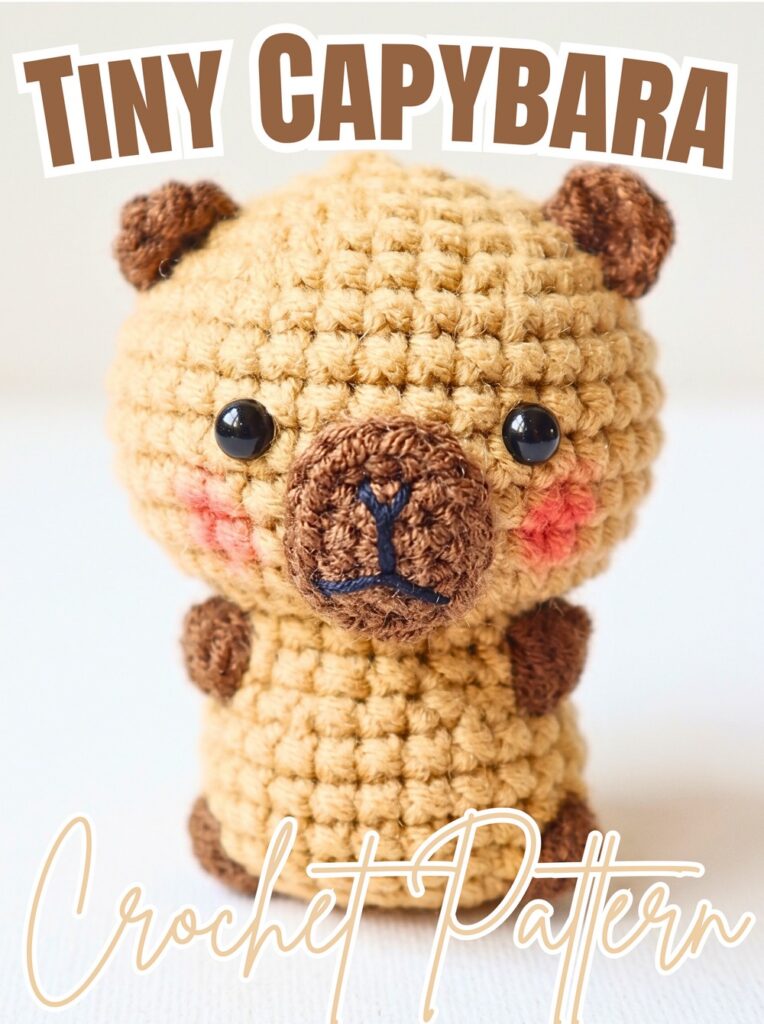
Warm brown yarn and tiny dark details give this crochet capybara its recognizable, gentle expression. Crochet color changes and small bobble stitches can feel tricky for beginners, so careful stitch counts and clear placement guidance help keep each part on track.
This crochet tutorial covers body shaping, bobble-stitch paws, a separate muzzle, and small rounded ears, followed by facial embroidery and finishing. Follow each round in sequence to bring your miniature capybara to life.
Credit Odinka Studio
Why You’ll Love This Pattern
- Cute, Palm-Sized Design: This tiny capybara has an adorable rounded shape, making it a sweet handmade companion or a little gift for someone who loves animals.
- Beginner-Friendly Techniques: The pattern uses basic stitches, increases, decreases, and simple assembly, giving you a chance to practice useful amigurumi skills.
- Quick and Enjoyable to Make: Its small size makes it a fun crochet make when you want to create something cute without working on a large piece.
- Adorable Little Details: Tiny ears, a dark brown muzzle, embroidered facial features, and a touch of pink blush bring this capybara to life.
- Easy to Personalize: Experiment with different brown shades, adjust the blush, or add your own finishing touches to give your capybara a unique personality.
Materials & Tools
- Light Brown Yarn: For the body and head.
- Dark Brown Yarn: For the paws, ears, and muzzle.
- Black Yarn or Embroidery Thread: For the nose and mouth.
- Crochet Hook: 2.2 mm (3/0).
- Safety Eyes: Small round eyes.
- Fiberfill Stuffing: To shape the body and head.
- Craft Glue: Such as B7000, if using glue to attach the muzzle.
- Tapestry Needle: For embroidery, sewing, and finishing.
- Stitch Markers: To track continuous rounds.
- Scissors: For trimming yarn.
- Pink Blusher or Makeup: For adding rosy cheeks.
- Small Makeup Brush: For applying cheek color.

Finished Size & Customization
This capybara is designed as a compact, palm-sized amigurumi. Its final dimensions will vary with yarn thickness, hook size, and stitch tension.
For a different texture, try sport-weight or velvet yarn, adjusting the hook to suit your chosen material. You can also attach a keychain ring to turn your finished capybara into a bag charm.
Pattern Abbreviations
- ch: Chain
- sc: Single crochet
- inc: Increase; work 2 single crochets in the same stitch
- dec: Decrease; crochet 2 stitches together
- hdc: Half double crochet
- dc: Double crochet
- bobble (5 dc): Five double crochets worked into the same stitch to create a bobble
- FLO: Front loop only
- sl st: Slip stitch
- st(s): Stitch(es)
- [… ] × N: Repeat instructions inside brackets N times
Step-by-Step Crochet Instructions
Step 1: Form the Oval Body Base
Use light-brown yarn to begin working from the bottom of the capybara upward. The foundation chain creates an elongated base rather than a simple circle.
Make a slip knot and chain 6.
Round 1: Starting from the second chain from the hook, work 1 sc, then 4 sc, followed by 3 sc in the last chain. Continue along the opposite side of the foundation chain with 3 sc, then increase in the final stitch. Total: 12 stitches.
Round 2: Work 1 increase, 3 sc, 3 increases, 3 sc, then 2 increases. Total: 18 stitches.
Teaching tip: Keep both sides of the foundation chain accessible as you work around it. This helps form an even oval and makes it easier to identify where each round begins.

Step 2: Add Dark Brown Bobble Paws
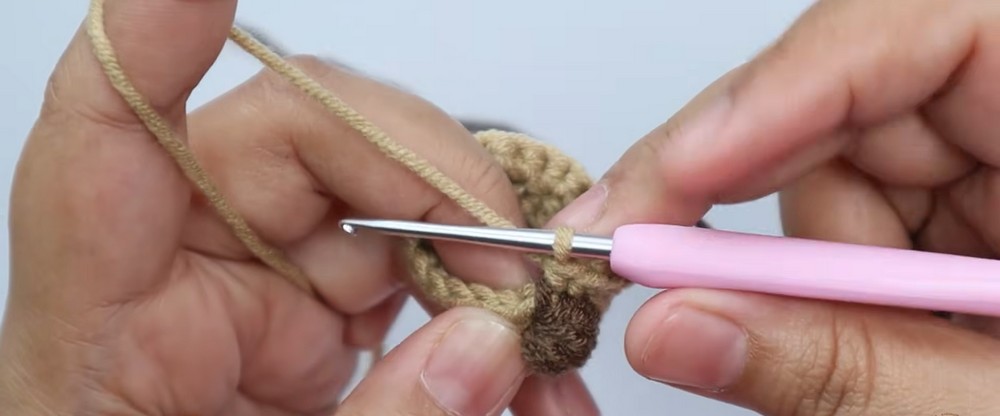
Round 3 introduces the capybara’s darker paws, which are worked directly into the body rather than crocheted separately.
Round 3: Work 8 sc, make 1 bobble using dark-brown yarn, work 8 sc, then make another dark-brown bobble. Total: 18 stitches.
For each bobble, work five double crochets into the designated stitch using your chosen bobble technique. Keep the stitches grouped together to create one raised detail.
Result check: Both bobbles should sit on the outside of the body and appear similarly raised. Keep the surrounding single crochets neat so the paws remain distinct.
Step 3: Widen the Body and Add Another Paw Detail
The next increase round expands the oval, while the following bobble adds another dark accent.
Round 4: Work (1 sc, 1 increase) once, 3 sc, repeat (1 sc, 1 increase) 3 times, 3 sc, then repeat (1 sc, 1 increase) 2 times. Total stated in source: 24 stitches.
Round 5: Work 5 sc, 1 dark-brown bobble (5 dc), then 18 sc. Total: 24 stitches.
Round 6: Work sc in every stitch around. Total: 24 stitches.
The plain round helps stabilize the developing body before shaping begins to narrow it.
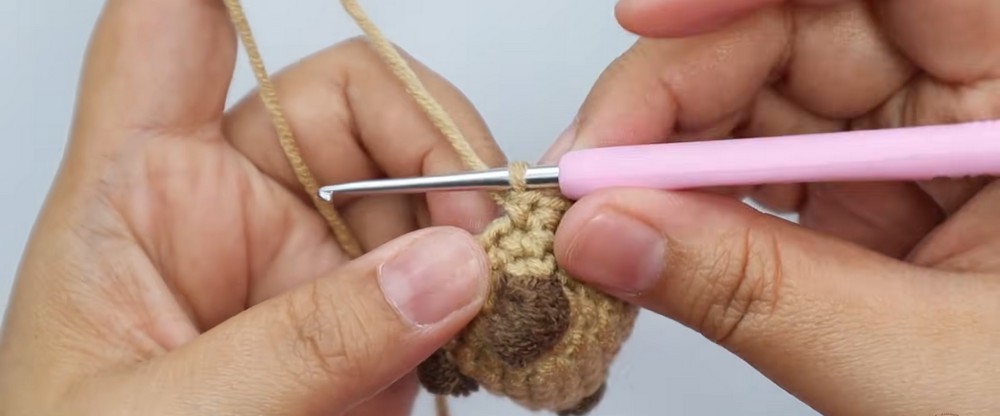
Step 4: Narrow the Body
Round 7: Repeat (2 sc, 1 decrease) 6 times. Total: 18 stitches.
Work each decrease carefully to bring the body inward without creating large gaps.
Helpful tip: If your decrease leaves visible holes, try an invisible single-crochet decrease technique, provided it works with your yarn and pattern.
Step 5: Complete the Lower Body Details
The next round adds two more dark-brown bobbles to the body.
Round 8: Work 9 sc, 1 dark-brown bobble (5 dc), 6 sc, another dark-brown bobble (5 dc), then 1 sc. Total: 18 stitches.
Round 9: Work sc around. Total: 18 stitches.
Check that the raised details remain visible and that the body retains its compact shape. The next section expands to form the head, so keep the working yarn secure and your round marker in place.
Step 6: Expand the Head
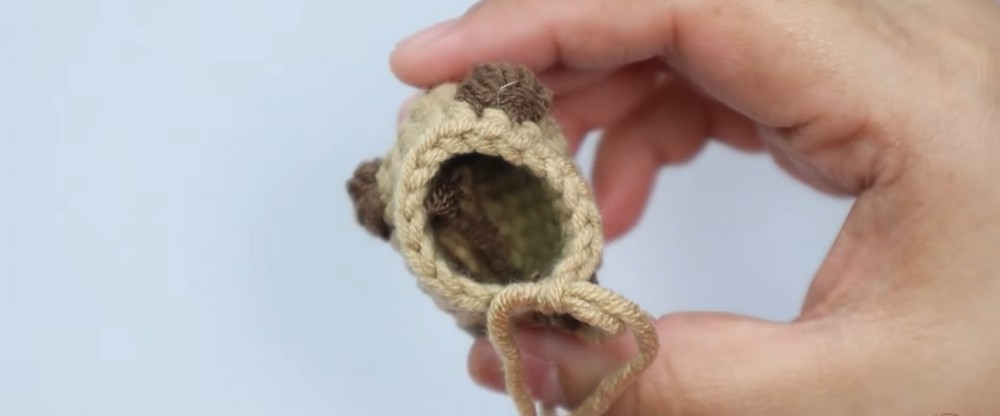
Work the next increase round through the front loops only to create the transition into the head.
Round 10 (FLO): Repeat (1 sc, 1 increase) 5 times, work 1 increase, 6 sc, then 1 sc and 1 increase. The supplied instructions state a total of 30 stitches.
Round 11: Repeat (4 sc, 1 increase) 6 times. Total: 36 stitches.
Rounds 12–17: Work sc around in every stitch. Total: 36 stitches per round.
These even rounds establish the height and width of the head.
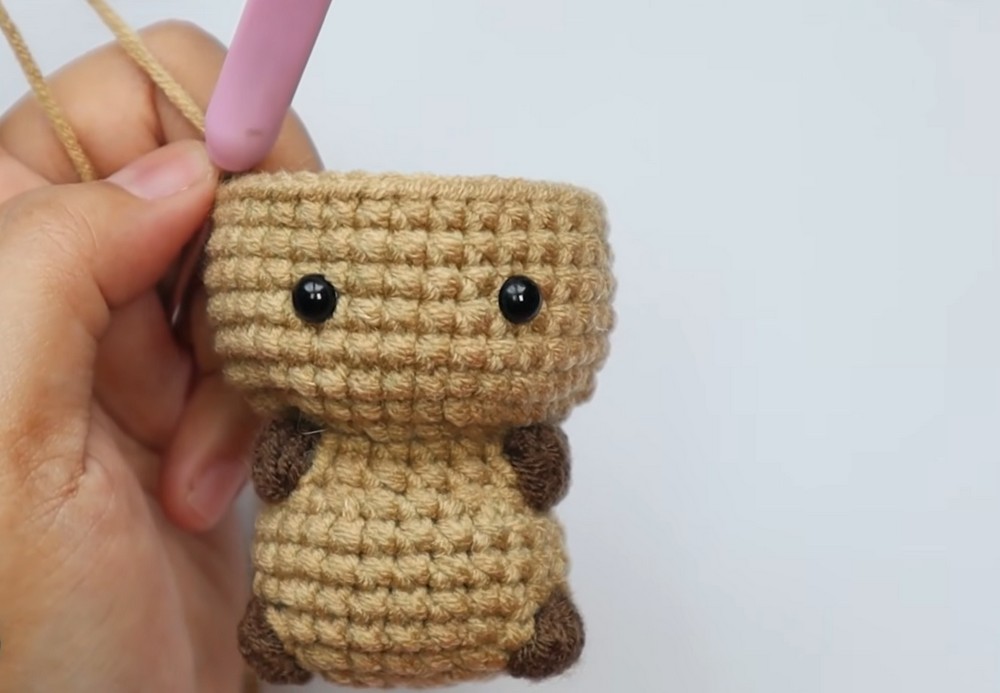
Eye placement: Insert safety eyes between Rounds 14 and 15, approximately 6 stitches apart.
Before securing the safety-eye backs, look at the face from the front to check that both eyes are level and evenly spaced.
Step 7: Shape and Close the Head
The decrease rounds gradually reduce the opening until the head can be closed securely.
Round 18: Repeat (4 sc, 1 decrease) 6 times. Total: 30 stitches.
Round 19: Repeat (3 sc, 1 decrease) 6 times. Total: 24 stitches.
Add fiberfill stuffing to the body and head, distributing it evenly around the inside.
Round 20: Repeat (2 sc, 1 decrease) 6 times. Total: 18 stitches.
Round 21: Repeat (1 sc, 1 decrease) 6 times. Total: 12 stitches.
Round 22: Decrease 6 times. Total: 6 stitches.
Cut the yarn, leaving a long tail. Thread the tail through the front loops of the remaining six stitches with a tapestry needle, then pull tight to close the opening. Weave the remaining end inside the piece.
Result check: The head should feel evenly stuffed without obvious gaps. Avoid overfilling it, as excessive stuffing can stretch the stitches and distort the shape.

Step 8: Crochet the Small Dark Brown Ears
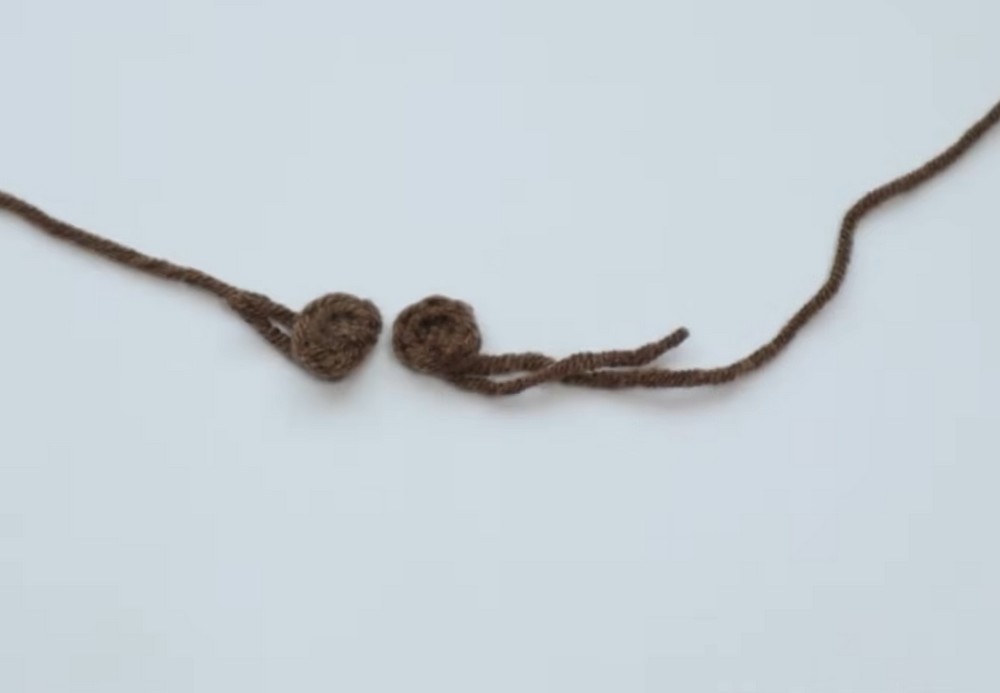
Make two ears using dark-brown yarn. Each ear is worked into a magic ring and uses taller stitches to create a small rounded shape.
Round 1: Make a magic ring. Work 1 hdc, 3 dc, and 1 hdc into the ring, then finish with a slip stitch.
Pull the magic ring closed securely, leaving a long yarn tail for sewing. Cut the yarn and repeat the same instructions for the second ear.
Teaching tip: The ears are small, so keep the stitches grouped closely around the ring. Compare both pieces before attaching them to ensure they look similar in size.
Step 9: Crochet the Dark Brown Muzzle
The muzzle is worked separately and attached to the front of the head. Its oval shape creates the capybara’s distinctive darker snout.
Chain 4 using dark-brown yarn.
Round 1: Starting from the second chain from the hook, work 1 sc, then 2 sc, followed by 3 sc in the last chain. Work 1 sc along the opposite side and increase in the final stitch. Total: 8 stitches.
Round 2: Work 1 increase, 1 sc, 1 increase, 3 sc, 1 increase, 1 sc, then 1 increase. Total: 14 stitches.
Finish with a slip stitch to join. Cut the yarn, leaving a long tail for sewing.
Result check: The muzzle should lie flat enough to sit against the face, with a slightly rounded outline. Keep the yarn tail long enough to attach it securely.
Step 10: Embroider the Nose and Mouth
Add the facial expression before attaching the muzzle to the head, making the small details easier to handle.
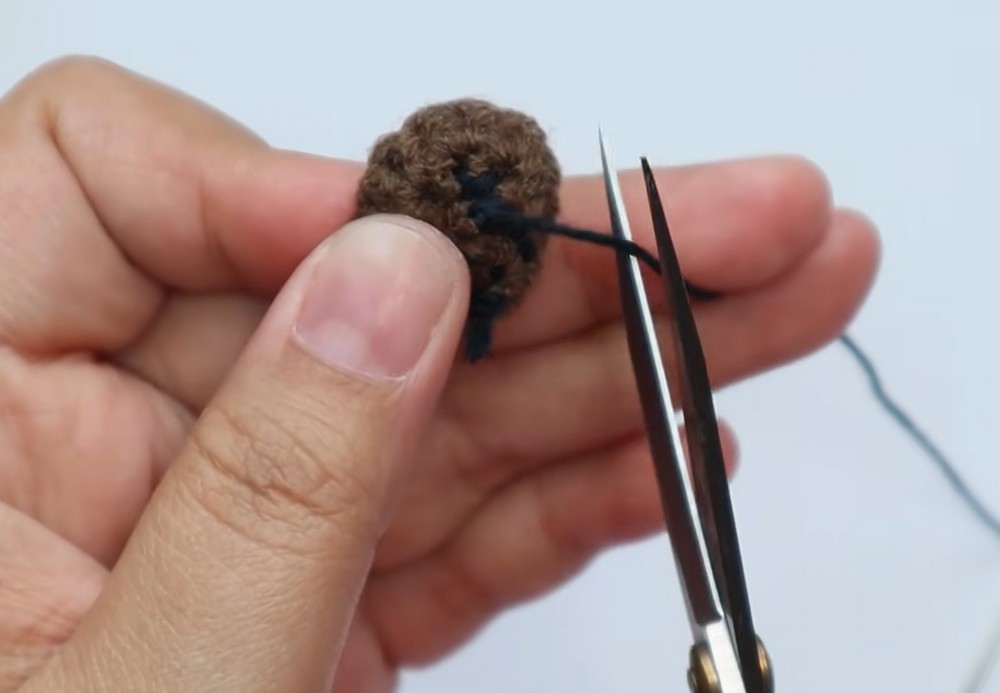
Using black yarn or embroidery thread, stitch a small triangular nose at the center of the dark-brown muzzle. Add a short vertical line extending downward to form the mouth.
Keep the embroidery compact so it remains proportional to the miniature face.
Helpful tip: Check the muzzle from the front before securing the embroidery ends. Centered facial details help give the capybara its characteristic gentle expression.
Step 11: Attach the Muzzle
Position the embroidered muzzle directly below the safety eyes, between Rounds 10 and 15.
Use the long yarn tail to sew it in place with small stitches around its edge. Alternatively, use craft glue such as B7000, following the product’s safety and curing instructions.
Hold the muzzle in position while checking its alignment. It should sit centrally beneath the eyes without covering them or tilting to one side.
Step 12: Sew on Both Ears
Place the ears on top of the head between Rounds 17 and 20.
Use the yarn tails and a tapestry needle to sew each ear securely. Position them on opposite sides of the head and check their placement from the front before fastening off.
Placement check: Both ears should appear balanced, with similar height and spacing. Small adjustments before finishing the seams can make a noticeable difference to the capybara’s expression.
Step 13: Add Rosy Cheeks
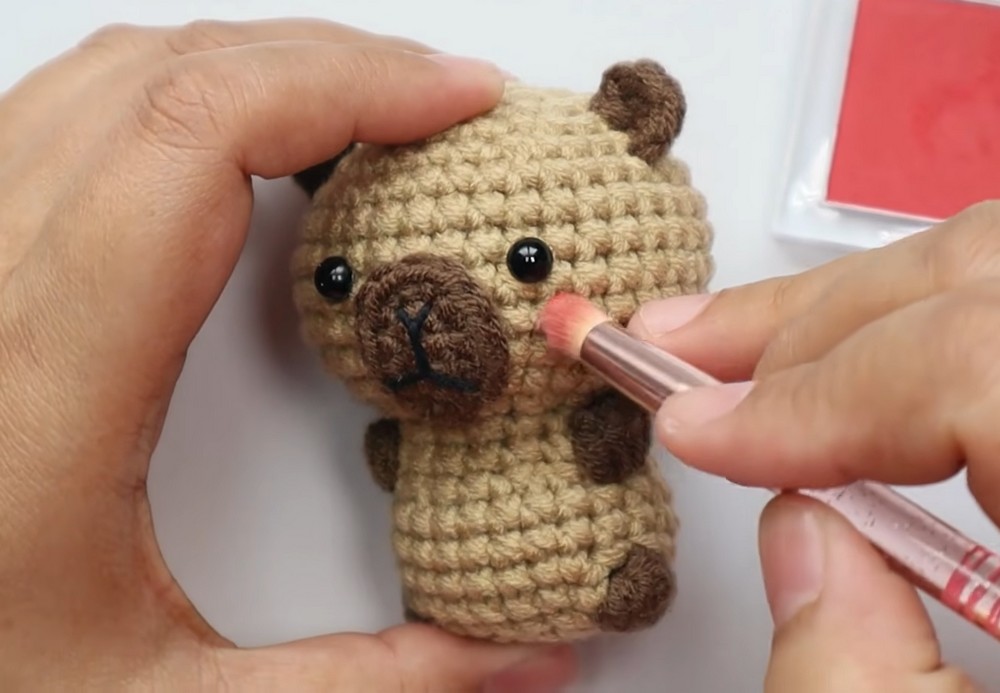
Finish the face with a gentle touch of pink blusher or makeup.
Using a small brush, apply a little color to each cheek on either side of the muzzle. Begin with a very light layer and build it gradually if needed.
Keep both cheeks similar in size and intensity for a balanced appearance.
Finishing tip: Test the makeup on a discreet area first. Some products may transfer or mark yarn, especially if the toy will be handled often.