
Want a playful bag charm? This tiny crochet mouse-ear headband uses a wire-filled band to hold its curved shape, with an optional red bow for a Minnie-inspired finish.

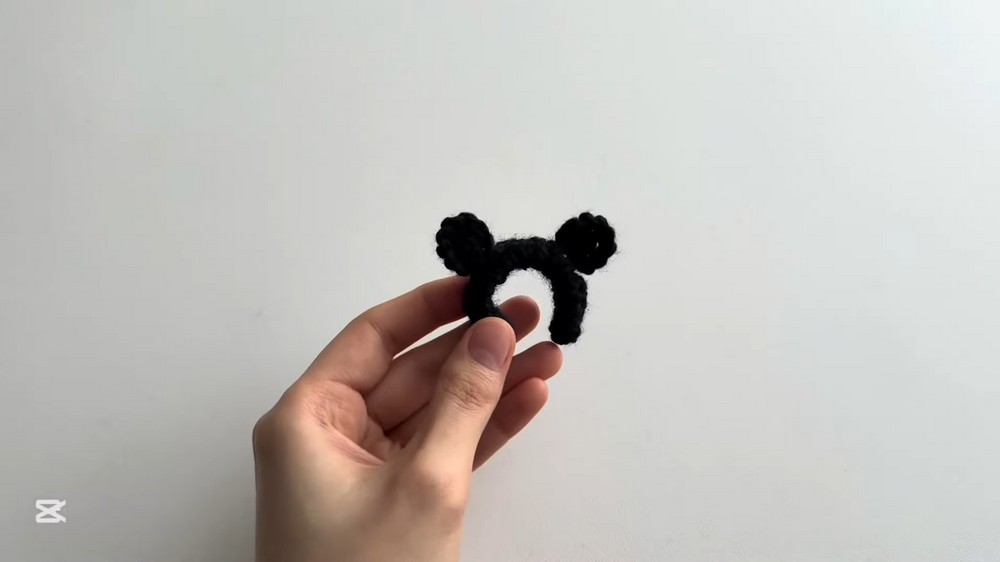
Playful mouse ears turn into a tiny wearable-style charm with this crochet headband keychain. The black crocheted band is reinforced with jewelry wire so you can curve it into the familiar upside-down U shape, while two simple round ears complete the silhouette.
Keeping the base narrow makes this a quick make even though the finished crochet piece has a little bit of shaping inside. You’ll crochet the six-stitch tube, carefully insert the folded wire, close the ends, and then add two ears. Leave off the bow for a Mickey-inspired version, or add the small red rectangle between the ears for a Minnie-inspired variation.
Credit Crochet with ice
Materials & Tools
- Black yarn: For the headband and ears
- Red yarn: For the optional bow
- Crochet hook: 3.5 mm; changing hook or yarn size will change the finished dimensions
- Jewelry wire: To reinforce the headband and help it hold its curved shape
- Stitch marker: Recommended for the continuous rounds
- Sewing needle: For weaving in ends and attaching the pieces
- Scissors: For yarn and wire
- Glue gun: Optional alternative to sewing the ears and bow
- Keychain ring: For attaching the finished charm
Finished Size & Customization
The finished size depends on your yarn weight and hook. With a 3.5 mm hook, the result is a small, palm-sized charm suitable for keys or a backpack.
For a Mickey-inspired version, attach the black ears and leave the bow off.
For a Minnie-inspired version, make the small red bow and place it between the ears.
You can also change the yarn and hook size to make a larger decorative version, but remember that the wire should be suitable for the new size and strong enough to help the band retain its curve.

Abbreviations
- MR: Magic Ring
- ch: Chain
- sc: Single crochet
- inc: Increase – 2 sc in the same stitch
- dec: Decrease – insert the hook into one stitch and pull up a loop, insert it into the next stitch and pull up a loop, then pull through all 3 loops on the hook
- sl st: Slip stitch
- st(s): Stitch(es)
Crochet Mouse-Ear Headband
The headband is worked as a narrow tube in continuous rounds. The first two rounds establish the tube, while Rounds 3–17 give you enough length to shape the curved band. A stitch marker is especially useful here because there are no joined rounds to announce where one round ends.
Crochet the Black Headband
R1: Make a MR, ch 1, work 4 sc into the MR, then pull the short tail to close the ring tightly. (4 sts)
R2: Work 1 sc in the first st, 1 inc in the next st, 1 sc in the next st, and 1 inc in the final st. (6 sts)
R3-R17: Work 1 sc in each st around for 15 rounds. (6 sts per round)
The tube should now be long and narrow with six stitches around its circumference. Before inserting the wire, gently straighten the tube so the inside is easy to access.
Add the Wire Reinforcement
Cut the jewelry wire to your desired length. Fold it three times so you have several strands together, then twist the folded strands slightly to keep them together.
Carefully push the folded wire through the opening of the crocheted tube until it reaches the other end. The wire may catch against the stitch gaps while you are inserting it, so work slowly rather than forcing it through the fabric.
Once the wire is inside, check that it is fully enclosed by the crochet. It should provide support without protruding through the stitches.
R18: Work 1 sc in the next st, 1 dec over the next 2 sts, 1 sc in the next st, and 1 dec over the final 2 sts. (4 sts)
The final round reduces the opening around the wire. Take care that the wire remains tucked inside while you work.
Close and Shape the Headband
Sl st into the next st, pulling through twice, then cut the yarn and leave a short tail. Thread the tail onto a sewing needle and weave it through each remaining stitch at the top. Pull firmly to close the opening completely, then push the needle through the crocheted tube to hide the excess yarn.
Now gently bend the wire-filled tube into an upside-down U or C shape. Make gradual bends rather than sharply folding the tube so the crochet remains smooth.
The band should now hold the curved shape on its own. This is the point to adjust the overall curve before attaching the ears.

Crochet the Mouse Ears
Make 2 ears in black yarn. These are small circular pieces, so keeping the increases even will help them remain round and flat.
R1: Make a MR, ch 1, work 5 sc into the MR, then pull the ring tightly closed. (5 sts)
R2: Work 5 inc around, placing 2 sc in each stitch. (10 sts)
Fasten off with a sl st, pulling through twice. Cut the yarn and leave a long tail if you plan to sew the ears onto the headband. If using hot glue instead, a short tail is sufficient for weaving in.
Before attaching either ear, lay both pieces beside the curved headband and compare their placement. Keeping them at similar heights will make the finished silhouette look balanced.

Make the Optional Red Bow
The bow is worked as a tiny rectangle in rows.
Row 1: Ch 5, skip the first ch from the hook, then work 4 sc starting in the second ch. (4 sts)
Row 2: Turn, then work 4 sc across. (4 sts)
Ch 1 to fasten off and cut the yarn, leaving a very long tail for shaping.
The crocheted piece will look like a small rectangle at first. Take the long tail and wrap it tightly around the exact middle of the rectangle several times. This pinches the center inward and creates the two bow loops.
Keep the wraps centered; if they sit too close to one edge, one side of the bow will appear larger than the other.

Assemble the Mouse-Ear Keychain
Shape the Base
Make sure the black wire-filled headband is already bent into its final upside-down U or C shape. It is easier to establish the curve before the ears are attached.
Attach the Ears
Position one ear on each of the two upper arches of the headband. Check them from the front before sewing so they sit at approximately the same height and angle.
Use the long black yarn tails and a sewing needle to stitch each ear securely to the headband. Work through several stitches of the ear and the underlying headband so the attachment is stable.
If you prefer, use hot glue instead of sewing. Allow the glue to cool and set completely before adding the keychain hardware.
Add the Minnie-Inspired Bow
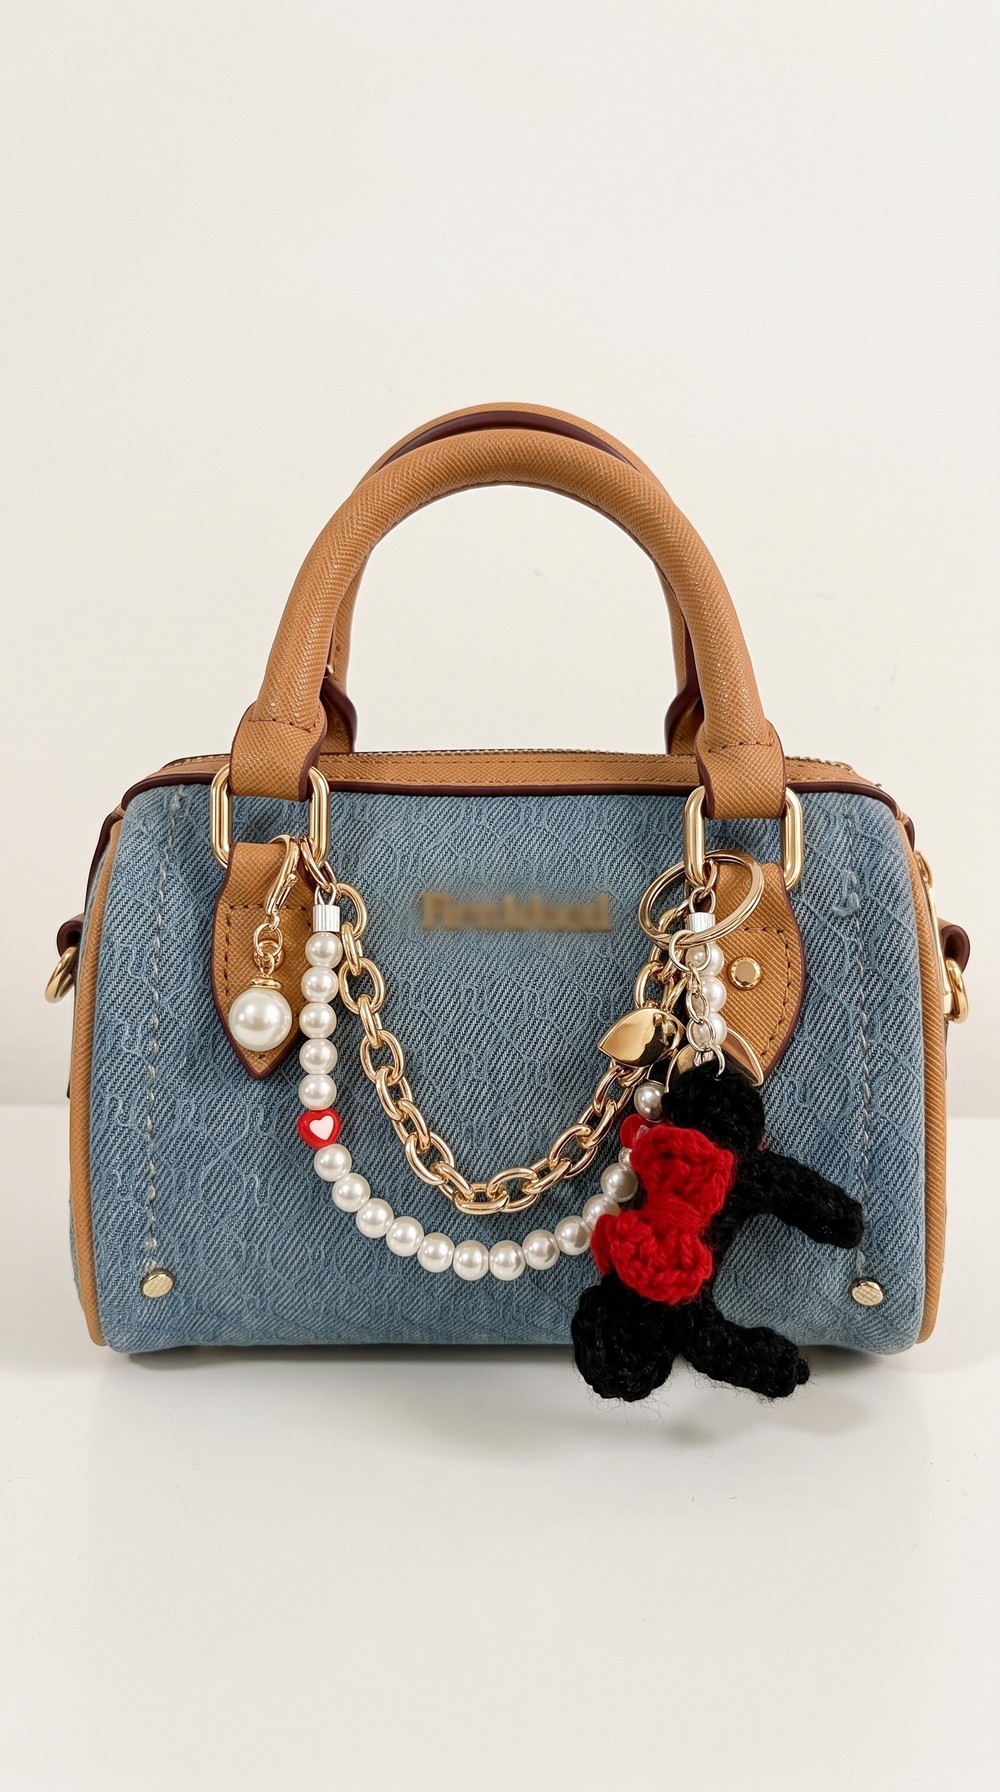
For the Minnie-inspired version, place the finished red bow directly between the two black ears. Stitch or glue the center of the bow securely to the headband.
Adjust the loops before the attachment is fully secured so they remain even and centered.
Attach the Keychain Ring
Attach the keychain ring directly to the top of one ear. Choose a point with several sturdy stitches rather than attaching it to a loose strand.
Give the ring and ear a gentle pull to check the attachment before using the finished charm.
Final Check
Your finished keychain should have a smoothly curved black band, two evenly positioned round ears, and-if making the Minnie-inspired version—a centered red bow. The wire should remain completely enclosed inside the crocheted tube, while the keychain ring should be firmly attached to an ear.
The same simple base gives you two recognizable variations: black ears alone for a Mickey-inspired charm or black ears plus the red bow for a Minnie-inspired charm.




One Comment