
Need a tiny Christmas accent? This crochet Santa hat pairs a pointed red body with a soft white brim, wooden bead, and embroidered snowflake.

Festive details come together in miniature with this crochet Santa Claus hat ornament. The pointed red hat, contrasting white brim, and little wooden bead at the top give it the recognizable crochet Santa look without requiring complicated stitches, making it a charming addition to a Christmas tree, bag, or keychain.
Starting with just six single crochets, the hat gradually widens through a series of increases before the straight rounds create its pointed body. The white section then forms the wider brim, while a simple chain loop turns the finished piece into a hanger. You’ll also add a tiny embroidered snowflake to the front, giving the red body one extra seasonal detail.
Credit SASAN
Materials & Tools
- Red and white yarn: 2 mm fine or sport-weight yarn
- Crochet hook: 2.5 mm
- White sewing thread: For the embroidered snowflake
- Sewing needle: For embroidery
- Tapestry or yarn needle: For weaving in ends and securing the hanging loop
- Scissors
- Small wooden bead: 1 bead for the hanging decoration
The recommended 2 mm yarn and 2.5 mm hook create a miniature ornament. For a larger Santa hat, use a thicker yarn with a suitably larger hook. Keep in mind that changing the yarn and hook will also change the proportions and final size.
Finished Size & Uses
With the recommended materials, the finished hat is small enough for a Christmas tree ornament, keychain, or festive bag charm.
For a larger version, try worsted-weight or chunky plush yarn with a matching hook. The same basic shaping can then become a wearable Santa-style hat or a larger piece of Christmas home décor.
Abbreviations – US Terms
- MR: Magic Ring
- ch: Chain
- sc: Single crochet
- inc: Increase – 2 sc in the same stitch
- slst: Slip stitch
- st/sts: Stitch/Stitches
- R: Round

Joining note: This pattern is worked in joined rounds. At the end of each round, slip stitch into the first sc to close the round, then chain 1 to begin the next round. The chain-1 does not count as a stitch.
Crochet Santa Hat Pattern
The red section starts narrow and gradually widens through five increase rounds. Once you reach 18 stitches, the next four rounds are worked without increases, allowing the hat body to develop its pointed, slightly tapered appearance before the white brim is added.
Part 1: Hat Body – Red Yarn
Keep track of the first sc of every joined round. Since the increases are spaced evenly through each round, maintaining the stated stitch counts will help the hat widen consistently.
R1: Start with a MR, ch 1, crochet 6 sc into the ring, pull the loop tight to close, then slst into the first sc to join. (6 sts)
R2: Ch 1, (1 sc, 1 inc) repeat 3 times, then slst to join. (9 sts)
R3: Ch 1, (2 sc, 1 inc) repeat 3 times, then slst to join. (12 sts)
R4: Ch 1, (3 sc, 1 inc) repeat 3 times, then slst to join. (15 sts)
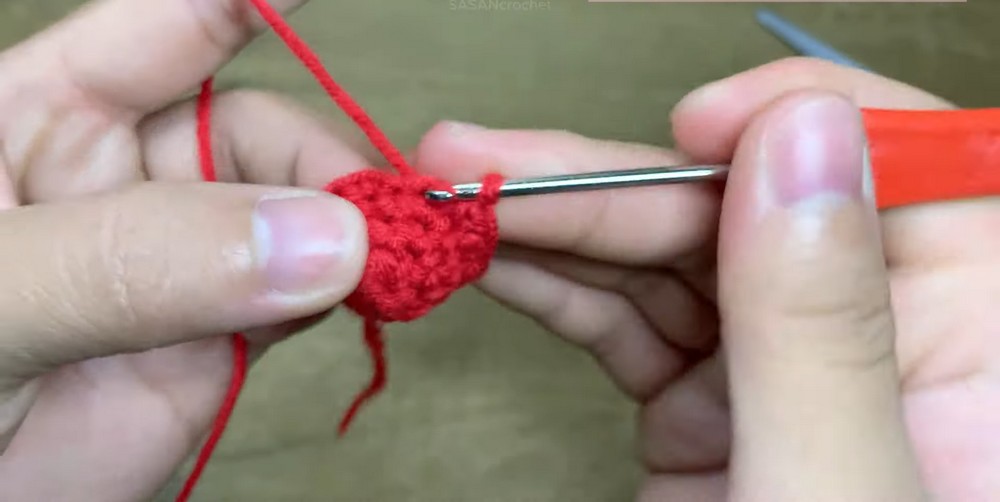
R5: Ch 1, (4 sc, 1 inc) repeat 3 times, then slst to join. (18 sts)
Each increase round adds three stitches, taking the body from 6 to 18 stitches. At the end of Round 5, the piece should be visibly wider than the magic ring while still retaining its pointed hat shape.
R6–R9: Ch 1, work 1 sc in every st around, then slst to join. (18 sts per round)
These four even rounds give the red section its length without making it wider. Keep your tension consistent so the sides remain neat and the top does not become overly loose.
At the end of Round 9, cut the red yarn and prepare to attach the white yarn. Weave the red tail toward the inside later so it does not show through the front.

Part 2: White Hat Brim
The white section begins with an increase from 18 to 20 stitches. This slight widening gives the brim enough room to extend around the lower edge of the red hat.
R10: Attach the white yarn, ch 1, (8 sc, 1 inc) repeat 2 times, then slst to join. (20 sts)
Check the transition after this round. The white section should begin spreading slightly beyond the red body rather than continuing as a narrow tube.

R11–R13: Ch 1, work 1 sc in every st around, then slst to join. (20 sts per round)
These straight rounds build the depth of the white brim. Keep all 20 stitches around each round so the brim develops evenly.
At the end of Round 13, slst to finish, cut the white yarn, pull it through to fasten off, and weave all loose ends securely into the inside of the hat with a tapestry needle.
Add the Hanging Loop
The hanging loop is attached directly through the top center of the hat, at the magic ring.
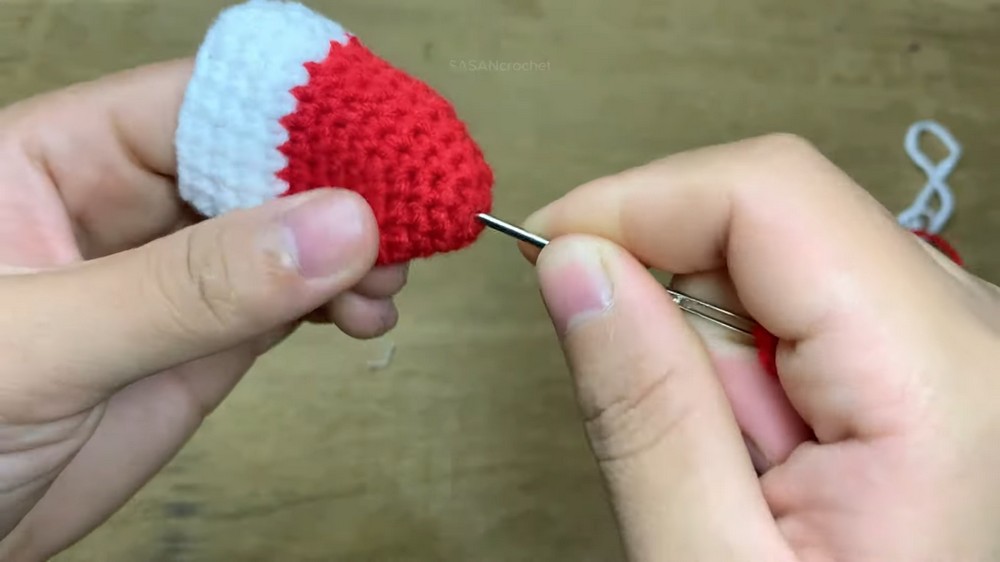
Using your hook, pull a loop of red yarn through the very top center of the hat. Crochet approximately 30–40 chains, or adjust the length according to where you plan to hang the ornament.
Cut the yarn, leaving a small tail. Thread the tail onto a needle, bring it back through the top of the hat to form the loop, and securely tie the ends together inside the hat.
Before trimming the ends, give the loop a gentle pull to make sure it is firmly attached. It should emerge from the center of the pointed top without pulling the hat out of shape.
Add the Wooden Bead
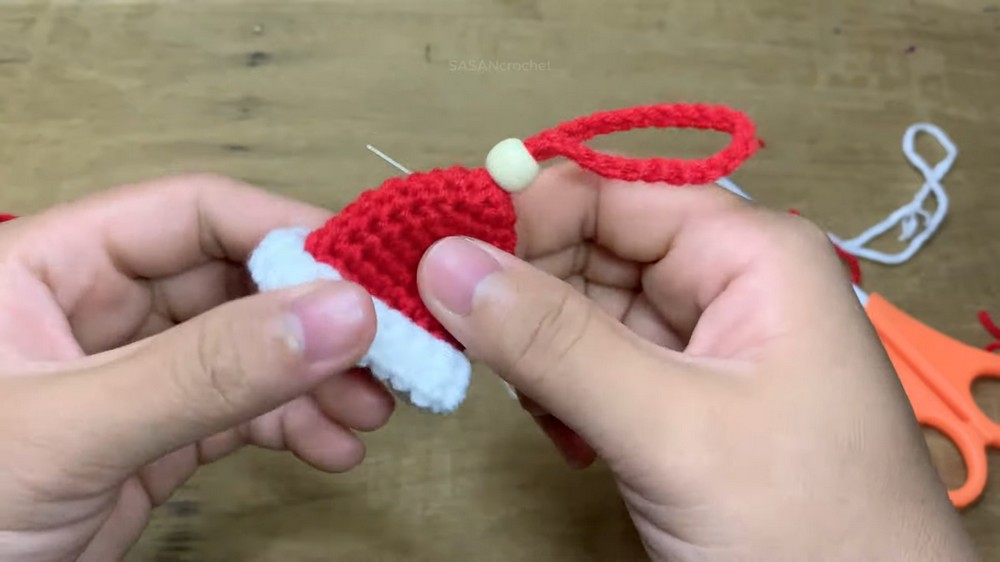
Thread the hanging loop through the hole in the small wooden bead. If the opening is tight, use your crochet hook to help pull the yarn through.
Slide the bead down until it rests securely at the peak of the red hat. The bead acts as a simple decorative topper and also gives the hanging loop a finished appearance.

Embroider the Snowflake
The small snowflake is added to the front of the red hat using white sewing thread.
Thread your sewing needle and position the design on the front of the red body. First embroider a small plus sign (+), then cross it with a small multiplication sign (×) through the center. Together, the lines create a simple snowflake-like motif.
Keep the embroidery small enough to stay centered on the red section. Secure the thread on the inside of the hat and trim the excess.






