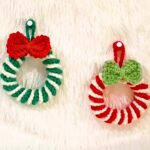
Crochet this beautiful Christmas holly leaf for festive decorations! A quick and easy pattern to add a handmade touch to your holiday decor. Perfect for any skill level!

Christmas decorations become even more meaningful when every little detail is handmade. This crochet holly leaf combines bright green leaves with cheerful red berries, creating a timeless holiday accent for Christmas trees, wreaths, gift toppers, and seasonal displays. The pattern stays simple from beginning to end while creating a decoration you’ll enjoy bringing out every holiday season.
The tutorial walks through each stage of shaping the leaves, forming neat berries, and joining every crochet piece into one festive decoration with an easy hanging loop. Each step follows a clear sequence, making it easy to follow while helping every part come together neatly before you begin the crochet pattern instructions.
Credit Molina DIY
Materials & Tools Needed
- Milk Cotton Yarn (125g): Green for the leaves and stem; Red for the berries.
- 4mm Crochet Hook
- Scissors
- Yarn Needle
Abbreviations & Terminologies
C: Crochet
Ch: Chain
SC: Single Crochet
DC: Double Crochet
HDC: Half Double Crochet
Dec: Decrease
In. C: Increase Crochet
Sl: Slip
St / Sts: Stitch / Stitches
Sl St: Slip Stitch
Rev: Reverse

Pattern Overview & Making Process
The pattern begins with a foundation chain that creates the base of the holly leaf. The stitches gradually change in height to shape one side before the pointed tip is formed with chains and slip stitches. The same stitch sequence is then repeated on the opposite side to create a balanced leaf.
After the leaf shape is complete, the outer edge is worked with small pointed sections that give the holly leaf its classic look. A short stem is crocheted from the base, and a line of slip stitches is added through the center to form the leaf vein and define the finished shape.
The berries are made separately with a magic ring and half double crochet stitches before being tightened into neat round shapes. Finally, two leaves are arranged together, three berries are sewn where the stems meet, and a simple hanging loop is added, leaving the decoration ready for the step-by-step instructions that follow.
Step-by-Step Pattern Instructions
Creating the Holly Leaves
- Foundation Chain Base:
- Slip knot and Ch 10.
- First Side: Skip 1 Ch, then Sl St in the next Ch, and work SC, HDC, DC over the next 3 Sts. Follow by HDC, SC, Sl St to finish one side.
- Tip Turning: Ch 2 and Sl St back into the same St to form a point.
- Second Side Base:
- Mirror the first side by working SC, HDC, DC over the next 3 Sts and finishing with HDC, SC, Sl St, SC, Sl St along the opposite side.
- Outer Edging & Points:
- Work SC (next 2 Sts), Ch 2, Sl St in second Ch, SC (next 2) and repeat 3 times for leaf points.
- Finish tip turning with Sl St, Ch 2, Sl St, Sl St into the base.
- Stem Detail:
- Ch 5, skip 1 Ch, Sl St through the next Ch, Sl St back across the 3 remaining Ch, then secure it to the base.
- Center Vein:
- Work 10 Sl Sts directly along the middle of the leaf to add intricate detailing.
Crocheting the Red Berries
- Magic Ring:
- Start with a magic ring, then Ch 2, and work 4 HDC stitches into the ring. Finish with a Sl St.
- Shaping:
- Pull the ring tight, fasten off leaving a long tail, and use your yarn needle to shape each berry into a round form.

Assembling Your Ornament
- Position the Leaves:
- Place two crocheted leaves side-by-side, aligning at the stem.
- Attach the Berries:
- Use your yarn needle, threading the red berry tail, and sew the berries securely where the stems/leaf bases meet. Add two more berries to create a cluster of three.
- Hanging Loop:
- Cut a strand of green yarn, loop it through the top stem area, tie a knot, and weave in the tail.
Customization & Variations
- Combine two leaves with berries for a simple ornament or join up to three for a fuller holly cluster.
- For larger pieces like garlands, alternate holly leaf clusters with other holiday-themed crochet items like snowflakes or stars.
Troubleshooting & Tips
- Berry Shaping: Tighten the magic ring fully and evenly weave through stitches to avoid gaps.
- Leaf Ends: Thoroughly weave in yarn tails to prevent unraveling.
- Assembly: Use a yarn needle to secure the join between leaves tightly before attaching berries.
Final Notes
This design is both festive and beginner-friendly, allowing you to crochet delightful ornaments for your holiday decor. A step-by-step visual guide can be found in the “Easy Crochet Christmas Holly Leaf Tutorial” for extra clarity in Making.