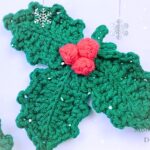
Add handmade holiday charm with these realistic crochet Christmas pinecones- an easy design that’s perfect for festive decorating!

Crochet Christmas Pinecones Pattern
Handmade holiday decorations always feel extra special, and these crochet pinecones capture the beauty of nature with rich texture and simple shaping. Layer by layer, an ordinary ball transforms into a lifelike festive accent that looks wonderful on branches, wreaths, and seasonal displays.
The crochet design begins with a compact pinecone base before textured scales are added to create its realistic appearance. Long leafy sprigs are worked separately, then wrapped around natural twigs and finished with the pinecone, bringing every crochet detail together in a beautifully balanced holiday decoration.
Credit Crochet Anywhere
Design Details
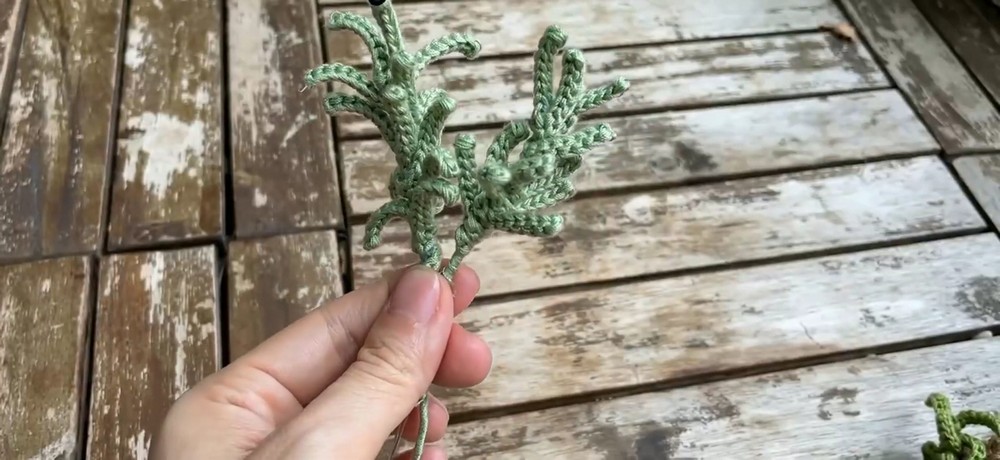
Key Visuals: A multi-layered amigurumi pinecone attached to a wrapped branch element alongside textured green leaves, creating a realistic holiday twig decoration.
Materials Needed
- Amigurumi yarn in brown (for pinecones)
- Amigurumi yarn in green (for leaves)
- Fiberfill/stuffing (for the pinecones)
- Dry twigs (for a natural touch)
- Glue (to secure components)
Tools Required
- Crochet hook (sized to your yarn’s recommendation)
- Scissors
- Tapestry needle (for finishing)
Gauge
Not specified in the tutorial video.
Finished Size / Measurements
Not provided in the video.
Abbreviations & Terminologies
MR: Magic Ring
sc: Single Crochet
BLO: Back Loop Only
inc: Increase
dec: Decrease
ch: Chain
DC2tog: Double Crochet Two Together
sl st: Slip Stitch
Techniques & Key Stitches Used
Magic ring (MR)
Single crochet (sc)
Back loop only (BLO)
Increase (inc)
Decrease (dec)
Slip stitch (sl st)
Chain (ch)
Double crochet two together (DC2tog)
Working in the round
Helpful Tips Before You Start
You can adjust the length of the leaves by increasing the number of initial chains according to your preferences.
Ensure you have glue on hand to secure the elements onto the dry twigs.

Pattern Overview & Making Process
The tutorial starts by crocheting the pinecone base with brown yarn in continuous rounds. A magic ring forms the center, followed by increases, even rounds, and decreases worked through the back loops only. Before the opening is closed, the pinecone is stuffed to create a full, rounded shape.
Once the base is complete, the front loops left from the earlier rounds are used to build the pinecone texture. A repeating combination of slip stitches, chains, and double crochet two-together stitches creates layered scales that give the pinecone its realistic look.
The leaves are made separately with green yarn by working from a long foundation chain into repeated leaf sections. After both pieces are finished, the leaves are wrapped around dry twigs and secured with glue, then the completed pinecone is attached to create a natural-looking holiday decoration.
Step-by-Step Pattern Instructions
1. Pinecone Base (with Brown Yarn)
- Round 1: Start with a magic ring (MR). Work 6 single crochets (sc) into the ring. (6 stitches)
- Round 2: Work into the back loop only (BLO). [Increase (inc) in every stitch] x 6. (12 stitches)
- Round 3: BLO [Single crochet (sc), inc] x 6. (18 stitches)
- Round 4–5: BLO 18 sc, repeat for 2 rounds. (18 stitches)
- Round 6: BLO [sc, dec] x 6. (12 stitches)Add fiberfill stuffing here for a plump shape.
- Round 7 to end: BLO [2 sc, dec] repeat until the opening closes.

2. Pinecone Texture Layer
- Using the front loops left on the pinecone base:
Repeat this texture pattern in these loops to create the “scales.”- [sl st, 2 ch, DC2tog, 2 ch, sl st] in each front loop until all stitches are covered.

3. Pinecone Leaves (with Green Yarn)
- Foundation: Make a slip knot, and chain 31.
- Turn, and work:
- 7 slip stitches (sl st).
- Chain 7, turn, and work 7 sl st back to the main chain. Repeat this “mini-leaf pattern” 7 times along the chain.
- Work 2 sl st along the chain before starting the next set of leaves.
- Continue until the end of the chain.
Tip: To adjust the leaf length, increase or decrease the number of initial chains.
Assembly Instructions
- Prepare Twigs: Apply glue to the tips of dry twigs.
- Wrap the Leaves: Use the green leaf piece to wrap around sections of the twig. Add glue as needed to secure.
- Attach the Pinecone: Secure the completed pinecone to the twig with glue, wrapping it neatly for stability.
Customization Ideas
- Adjustable Leaf Length: Alter the initial chain for the leaves to create longer or shorter leaf accents.
- Color Variations: Use speckled brown yarn for a more natural look or add some metallic yarn for festive sparkle.
- Alternative Base: Replace pinecones with other crochet holiday motifs, like holly berries or mini ornaments.

Troubleshooting Common Issues
- Loose Leaf Elements: Ensure the green yarn and thread ends are secured tightly, and apply enough glue for a sturdy attachment.
- Gaps in Pinecone Layers: Check your stitch tension during the texture layer and adjust accordingly.
Pattern Variations & Modification Ideas
Modifying the chain lengths for the leaves allows you to scale the length of the twig decoration to suit your holiday setup.
Conclusion
These crochet pinecones, combined with green leaves and natural twigs, make beautiful handmade holiday decorations. Whether hung on your Christmas tree, placed in a centerpiece, or displayed as part of a wreath, they bring a sophisticated, festive touch to any setting.