Make a crochet Christmas tree with this beginner-friendly pattern, perfect for ornaments, holiday décor, and handmade festive gifts.

This crochet Christmas tree brings a classic seasonal shape to life with a simple cone design, layered texture, and a charming star topper. Made with beginner-friendly rounds and thoughtful details, it creates a festive decoration for shelves, tables, Christmas displays, or gift wrapping. The unique construction details make this little crochet tree a lovely handmade accent to enjoy during the festive season.
More than a Christmas accent, this crochet tree can be used as a hanging ornament, gift topper, or meaningful keepsake for loved ones. Its compact shape makes it easy to customize with different colors, garlands, and embellishments while keeping the design simple. Every step adds a new detail that transforms basic crochet stitches into a cheerful seasonal treasure.
Credit Avocado Handmade
Materials & Tools Needed
- Yarn:
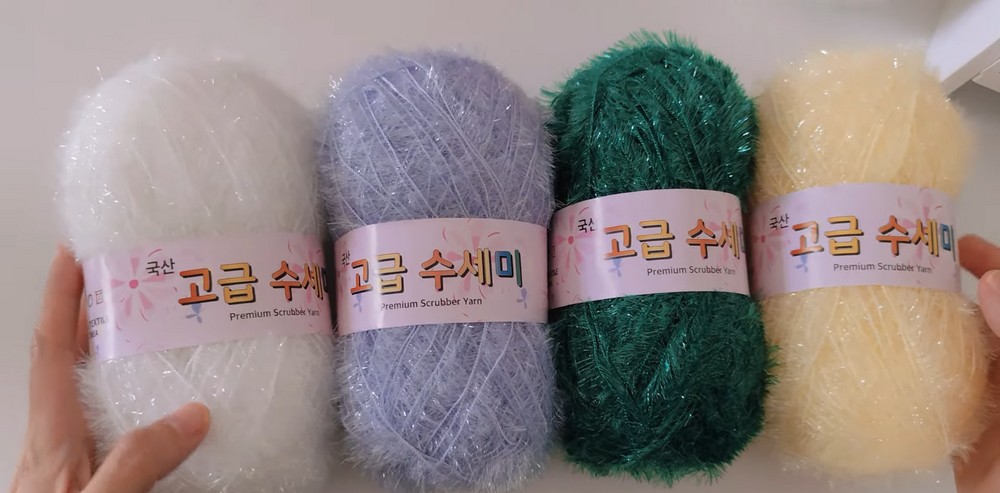
Scrubber Yarn (100% Polyester, 80g)- Green or Lavender for the main tree.
- White for the garland.
- Yellow for the star details.
- Crochet Hook: 4.0mm (Size 7/0).
- Other Tools:
- Stitch markers.
- Yarn needle.
- Scissors.
Pattern Notes
This pattern is worked in the round, so use stitch markers to track rounds.
Gauge:
Not crucial for this project. Focus on maintaining uniform stitches for a clean structure.
Certain rounds are worked in Back Loops Only (BLO) to leave Front Loops Open (FLO) for attaching decorative elements.
Construction Summary
- Base Form: Built from the top down, increasing as you work to form a cone.
- Textured Elements: Utilize BLO in specific rows for a unique texture.
- Garland Effects: Attach contrasting white yarn to the FLO left behind from previous rows.
- Finishing Touch: A yellow star is crocheted separately and sewn to the top.

Pattern Overview & Making Process
This crochet Christmas tree is worked in the round from the top down, beginning with a magic ring and single crochet stitches to form the cone shape. Increase rounds gradually expand the structure, creating the tree’s pointed form while keeping the stitches evenly arranged.
The design uses the Back Loops Only (BLO) technique in selected rounds to build textured sections and leave Front Loops available for the garland attachment. After completing the main cone shape, decrease rounds close the top opening and secure the tree structure.
The final steps add the decorative details that complete the design. White yarn is attached through the reserved Front Loops from the BLO rounds to create a spiral garland effect, and a small yellow star is crocheted separately before being sewn onto the top of the tree. This completes the festive handmade decoration.

Step-by-Step Round Pattern
Making the Tree
Form a cone shape by following this step-by-step pattern. Keep your stitch tension even throughout the rounds to maintain the pointed tree shape and a balanced structure.
Helpful Tip Before Starting:
Before beginning the rounds, place a stitch marker to track the beginning of each round. Since this tree is worked in the round, keeping an accurate stitch count will help the cone shape develop evenly.
- Round 1: Make a magic ring, work 6 sc into the ring. (6 stitches)
Pattern Note:
The magic ring creates a neat closed starting point, which helps the top of the tree look clean and compact.
- Round 2: 1 sc in each stitch around. (6 stitches)
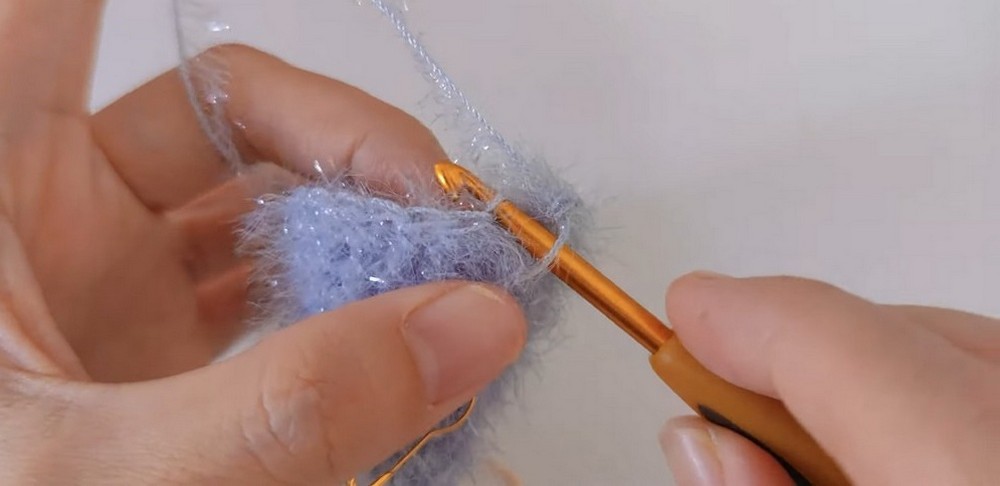
- Round 3: (1 sc, inc) repeat 3 times. (9 stitches)
Making Tip:
The increase rounds slowly expand the shape, so keep the increases evenly spaced to create a smooth cone structure.
- Round 4: (2 sc, inc) repeat 3 times. (12 stitches)
- Round 5: (3 sc, inc) repeat 3 times. (15 stitches)
- Round 6 (BLO): (4 sc, inc) repeat 3 times. Mark the exposed FLO for later use. (18 stitches)
Technique Note:
This BLO round creates a textured section on the tree surface while keeping the Front Loops available. These reserved loops will later be used to attach the white garland detail.
- Round 7: 1 sc in each stitch around. (18 stitches)
- Round 8: (5 sc, inc) repeat 3 times. (21 stitches)
- Round 9: 1 sc in each stitch around. (21 stitches)
- Round 10 (BLO): (6 sc, inc) repeat 3 times. Mark the exposed FLO for later use. (24 stitches)
Pattern Reminder:
Keep the reserved Front Loops visible after this round because they are an important part of the final decorative effect.
- Round 11: 1 sc in each stitch around. (24 stitches)
- Round 12: (7 sc, inc) repeat 3 times. (27 stitches)
- Round 13: 1 sc in each stitch around. (27 stitches)
- Round 14 (BLO): (8 sc, inc) repeat 3 times. Mark the exposed FLO for later use. (30 stitches)

Texture Tip:
The repeated BLO sections build the layered look of the Christmas tree, so try to keep these rounds neat for a cleaner finished appearance.
- Round 15: 1 sc in each stitch around. (30 stitches)
- Round 16: (9 sc, inc) repeat 3 times. (33 stitches)
- Round 17: 1 sc in each stitch around. (33 stitches)
- Round 18 (BLO): (10 sc, inc) repeat 3 times. Mark the exposed FLO for later use. (36 stitches)
Construction Note:
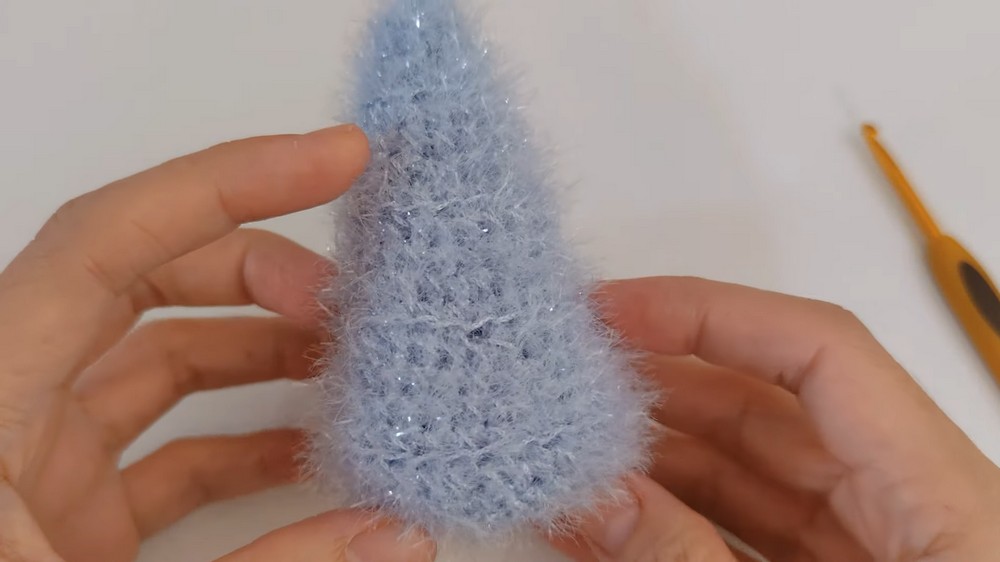
At this stage, the tree has reached its main height and shape. Check that the stitches are even before moving toward the closing rounds.
- Round 19: 1 sc in each stitch around. (36 stitches)
- Round 20: (2 sc, dec) repeat 9 times. (27 stitches)
- Round 21: (1 sc, dec) repeat 9 times. (18 stitches)
- Round 22: 9 decreases (dec) to close the top. (9 stitches)
Finishing Tip:
Close the opening securely and adjust the shape gently with your fingers to keep the tree standing evenly
- Fasten off and close the opening securely.
Adding the Garland
Helpful Tip:
When attaching the garland, keep the yarn tension relaxed so the spiral effect stays visible and does not pull the tree shape inward.
- Attach white yarn to the first marked FLO from any BLO round.
- (Ch 1, sc in the next FLO) along the reserved loops to form a spiral snow garland.
- Repeat for all reserved FLOs from the BLO rounds.

Making the Star
Star Tip:
Make sure each point of the star is worked with similar tension so all five points have a balanced shape.
- Create a magic ring.
- (Ch 2, double crochet, ch 2, double crochet, single crochet) into the magic ring.
- Repeat the above sequence 5 times to form 5 points for the star.
- Tighten the magic ring.
- Sew the star to the tip of your tree.

Troubleshooting & Suggestions
- Working with Scrubber Yarn:
- The fuzzy texture can obscure stitches, so use your fingers to feel for loops or place safety markers on key stitches.
- Stability:
- To avoid leaning, you can insert lightweight stuffing or a small circular support (e.g., plastic cut-out) into the tree base before closing Round 22.
- Customizations:
- Add pearl beads or sequins for ornaments.
- Use pastel shades for a whimsical, frosted winter look.