Want a flower that stays beautiful all year? This tiny crochet rose pot pairs a layered bloom with delicate leaves and a charming handmade planter.

Fresh roses add lovely color to a room, but their beauty doesn’t last forever. This little crochet rose pot offers a lasting alternative, with a miniature flower that looks sweet on a desk, bedside table, or gift shelf.
The crochet design includes a layered rose, two wired leaves, a green stem, and a small white pot you can customize in your favorite shade. Each part is crocheted separately and assembled at the end, so you can work through the pattern one piece at a time.
Credit: Young DIY
Materials & Tools
- Yarn: Susan’s Family 5 or another yarn that suits your desired flower size
- Rose petals: red, pink, yellow, white, or peach
- Leaves and stem: green
- Pot and soil: your preferred colors
- Crochet hook: 2.5 mm
- Floral wire: 0.5 mm wire, approximately 16 cm long for each leaf; 1 mm wire, approximately 12 cm long for the main flower stem
- Stuffing: Polyfill or cotton stuffing
- Optional weight: Small gravel stones to help stabilize the pot
- Tools: Hot glue gun, stitch markers, darning needle, and scissors
Stitches You’ll Use
- Ch: Chain
- Sl st: Slip stitch
- Sc: Single crochet
- Hdc: Half double crochet
- Dc: Double crochet
- Inc: Increase, making 2 stitches in the same stitch or space
- St(s): Stitch(es)
- BLO: Back loop only
- FLO: Front loop only

The petals use double crochet stitches to create their fullness, while the pot is shaped with increases and single crochet rounds. The leaves combine several stitch heights to form a pointed oval shape. You’ll also work around floral wire to help the leaves and stem hold their positions.
How to Crochet the Rose
Step 1: Make the Petal Foundation
With your chosen rose-colored yarn and 2.5 mm hook, make a slip knot and chain 26.
For the first row, begin in the fourth chain from your hook. Work 1 dc, ch 2, and 1 dc into the same chain to create your first V-stitch.
Skip 1 chain, then work another V-stitch into the next chain. Repeat this pattern across the foundation chain until you have 12 V-stitches. Keep the chain-2 spaces open and easy to see because you’ll use them to create the rounded petals.
Step 2: Shape the Petal Edges
Chain 1 and turn your work. Into the first chain-2 space, work 5 dc stitches. These stitches form a full, rounded petal section.
Next, make 1 sc in the small gap between the first and second V-stitches. Continue across the row, working 5 dc into each chain-2 space and 1 sc into each gap between V-stitches.
At the final chain space, work 5 dc, then finish with 1 sl st into the last chain space as described in the pattern. Chain 1, cut the yarn, and secure it.
You now have a strip of scalloped petals. Keep the strip intact; you’ll roll it into a rose in the assembly stage.

Step 3: Crochet the Sepal
The sepal is the green piece beneath the flower that helps cover the base of the rose.
Make a magic ring and chain 1. Work 10 dc stitches into the ring. Place a stitch marker in the first stitch, pull the ring closed, and join with a sl st into the marked stitch.
To make the first pointed section, chain 5. Skip the first chain from your hook, then work 1 sl st into the second chain, 1 sc into the next chain, and 1 dc into each of the final two chains.
Skip the next 2 stitches of the round and make a sl st into the third stitch, counting from the stitch where you began the sepal point. This attaches the point to the circular base.
Repeat the same sequence to make the remaining four sepal points, for five points in total. Finish with a sl st in the last stitch, chain 1, and cut the yarn, leaving a long tail. Insert your hook through the center and pull the tail through to the back.
Pattern check: The supplied sepal instructions say to skip 2 stitches and attach at the third stitch for the first point, but they give a slightly different skip instruction for the repeated points. Follow the first point’s placement consistently, and check that all five points are evenly spaced around the base.
Make the Leaves and Pot
Step 4: Crochet Two Wired Leaves
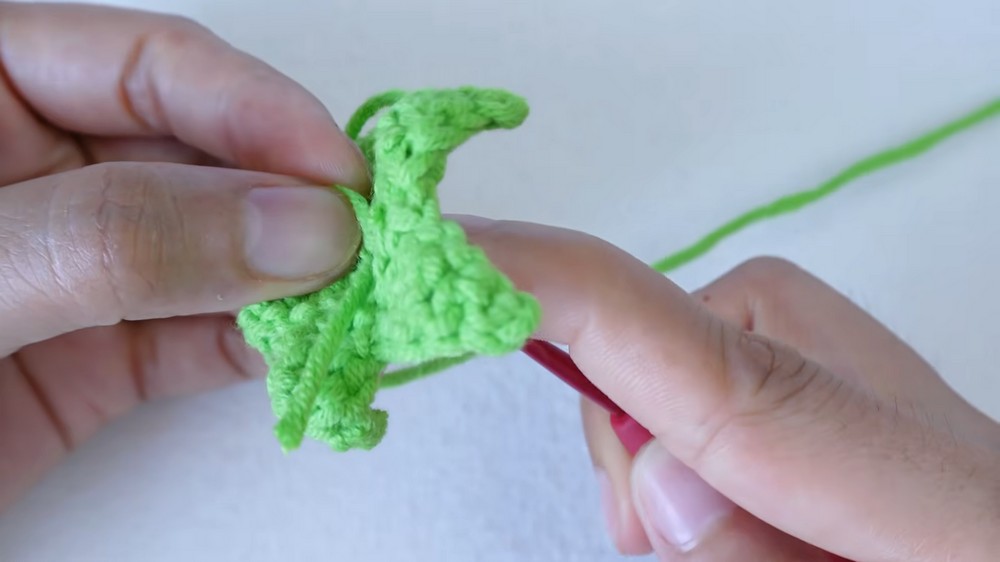
Make a slip knot and chain 10 with green yarn. Take a piece of 0.5 mm floral wire, approximately 16 cm long, and bend it slightly at the center. You’ll crochet around the wire so the finished leaf can be shaped.
For the upper side of the leaf:
- Skip the first chain and insert your hook into the second chain.
- Place the wire over the working yarn and under the hook. Yarn over and pull through both loops to complete 1 sc around the wire.
- Make 1 hdc in the next chain, keeping the hook under the wire.
- Make 1 dc in each of the next 5 chains, enclosing the wire as you work.
- Make 1 hdc in the next chain and 1 sc in the final chain.
To form the pointed tip, chain 2, skip the first chain, and make 1 sl st in the second chain. Then make 1 sc into the same base chain at the tip.
Turn the work and crochet along the lower loops of the foundation chain, continuing to cover the wire. Work 1 hdc in the stitch next to the last chain, 1 dc in each of the next 5 stitches, 1 hdc in the next stitch, and 1 sc in the final stitch.
Join with a sl st into the first stitch, chain 1, and cut the yarn. Wrap the yarn tail tightly around the exposed wire stem and secure it with a knot. Trim the excess yarn and repeat to make a second leaf.
Leaf-shaping tip: Before trimming the wire, gently curve each leaf into a natural shape. Keep the wire ends covered with yarn so no sharp tip is exposed.

Step 5: Start the Pot Base
Using your chosen pot color, make a magic ring.
- Round 1: Work 8 sc into the ring. Pull the ring closed, join with a sl st to the first stitch, and chain 1.
- Round 2: Work 1 inc in every stitch around, giving you 16 stitches. Mark the first stitch, skip the small slip-stitch gap at the end, join to the first stitch with a sl st, and chain 1.
- Round 3: Repeat (1 sc, 1 inc) around for 24 stitches. Join and chain 1.
- Round 4: Repeat (2 sc, 1 inc) around for 32 stitches. Join and chain 1.
- Round 5: Repeat (3 sc, 1 inc) around for 40 stitches. Join and chain 1.
The circle should grow wider with each round. Keep it flat as you work; if the edge starts curling noticeably, check your stitch count before continuing.
Step 6: Build the Pot Sides
For Round 6, work 1 sc into the back loop only of every stitch around. You should still have 40 stitches. Join with a sl st and chain 1.
Leave the front loops from this round unworked. They will be used later to add a neat trim around the bottom edge.
For Rounds 7-14, work 1 sc into both loops of each stitch around, keeping 40 stitches in every round. At the end of each round, join with a sl st and chain 1.
These rounds form the planter sides. Keep the tension steady so the pot has an even shape and can hold the stuffed filling.
Step 7: Add the Textured Rim
For Round 15, work into the front loops only.
Make 4 sc into the front loop of the first stitch, skip the next 3 stitches, then make 4 sc into the front loop of the next stitch. Repeat this sequence around the pot.
At the end, skip the remaining 3 stitches and join with a sl st to the first sc. Chain 1, cut the yarn, and hide the tail inside the pot.
This creates a raised, scalloped rim. Keep each group of 4 sc close together and the skipped sections consistent to make the texture look even.

Step 8: Finish the Bottom Edge
Attach yarn to any unworked front loop from Round 6 at the base of the pot. Chain 1, then make 1 sl st into that same loop.
Continue making 1 sl st in each remaining exposed front loop around the base. Join with a sl st to the first stitch, chain 1, and cut the yarn. Pull the tails inside and tie them securely.
This small trim finishes the base and makes the transition between the bottom and sides look tidier.
Step 9: Crochet the Soil Circle
Repeat Rounds 1-5 of the pot pattern to create a separate circular piece in your chosen soil color.
When tightening the magic ring for Round 1, leave a small center hole so the flower stem can pass through later. Complete Round 5, join with a sl st, chain 1, and cut the yarn, leaving a long tail of approximately 40 cm for sewing.
Set the soil circle aside until the pot and flower are ready for assembly.

Assemble the Rose Pot
Step 10: Stuff the Pot
Fill the crocheted pot with polyfill or cotton stuffing. Add a few small gravel stones at the bottom first if you want extra weight to help the pot stand more securely.
Keep the stones well inside the pot, with stuffing around them so they don’t interfere with the soil piece or flower stem.
Step 11: Sew on the Soil
Place the circular soil piece over the top of the stuffed pot. Thread its approximately 40 cm yarn tail onto your darning needle.
Whipstitch the soil circle securely to the pot’s top edge. Work around the entire opening, keeping the stitches close enough to hold the soil in place. Add a few extra anchoring stitches on the inside, then trim the tail.
Check that the small center hole remains open for the flower stem.

Step 12: Roll the Rose
Take the 1 mm floral wire, about 12 cm long, and apply a small amount of hot glue to the tip.
Attach the tip to the starting end of the crocheted petal strip. Begin rolling the strip around the wire, keeping the petal edge facing outward.
Continue wrapping the strip into a layered spiral. As you roll, apply hot glue along the base to hold the layers together. Work carefully in small sections so the rose stays secure without spreading glue onto the visible petals.
Allow the glue to set before moving the flower.
Step 13: Attach the Sepal
Push the lower end of the wire stem through the center hole of the crocheted sepal, positioning the sepal’s right side outward beneath the rose.
Add a small drop of hot glue under the rose base and press the sepal into place. Once secure, use the remaining sepal yarn tail to wrap neatly around the wire stem for approximately 5 cm.
This yarn wrapping covers part of the wire and gives the stem a more finished appearance.
Step 14: Attach the Leaves
Position the two wired leaves against the stem at your preferred height. Secure each one with a small dot of hot glue.
Continue wrapping the leftover yarn down the remaining wire branch. Carefully trim excess wire, making sure no sharp ends remain exposed. Glue the final wrap in place and snip away extra yarn.
Before moving on, gently arrange the leaves so they face slightly outward rather than sitting flat against the stem.

Step 15: Place the Rose in the Pot
Insert the lower end of the completed flower stem through the center hole in the soil circle and into the pot. Adjust until the rose stands upright and the leaves show above the rim.
If needed, add a small amount of glue where the stem meets the soil to help hold it in place. Let the glue cool completely before moving the finished piece.
Your miniature crochet rose pot is now assembled, with a layered flower, wired leaves, and a textured planter.
Personalize Your Rose Pot
A red or pink rose creates a classic floral look, while yellow, white, or peach petals give the same pattern a different feel. You can also change the pot color to resemble terracotta, a pastel ceramic planter, or dark soil.
For a miniature desk decoration or handmade gift, keep the pot and flower colors coordinated, and arrange the leaves to frame the rose without hiding its layered petals.