Need a tiny crochet treat with a cute surprise? This rabbit choco cake pairs a creamy layered look with floppy ears, a cherry topping, and an easy bear-ear option.
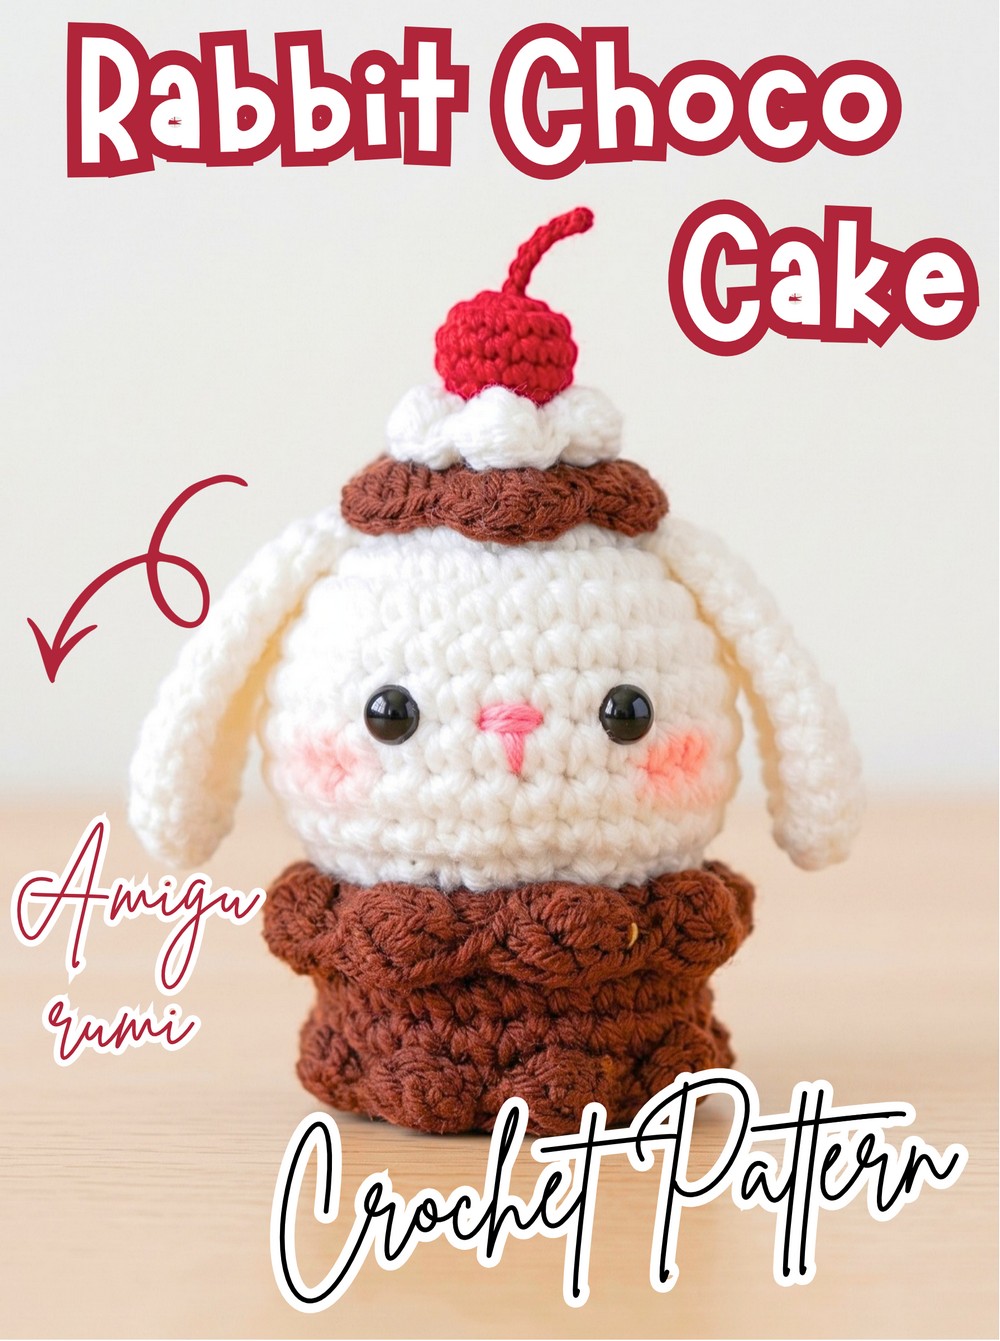
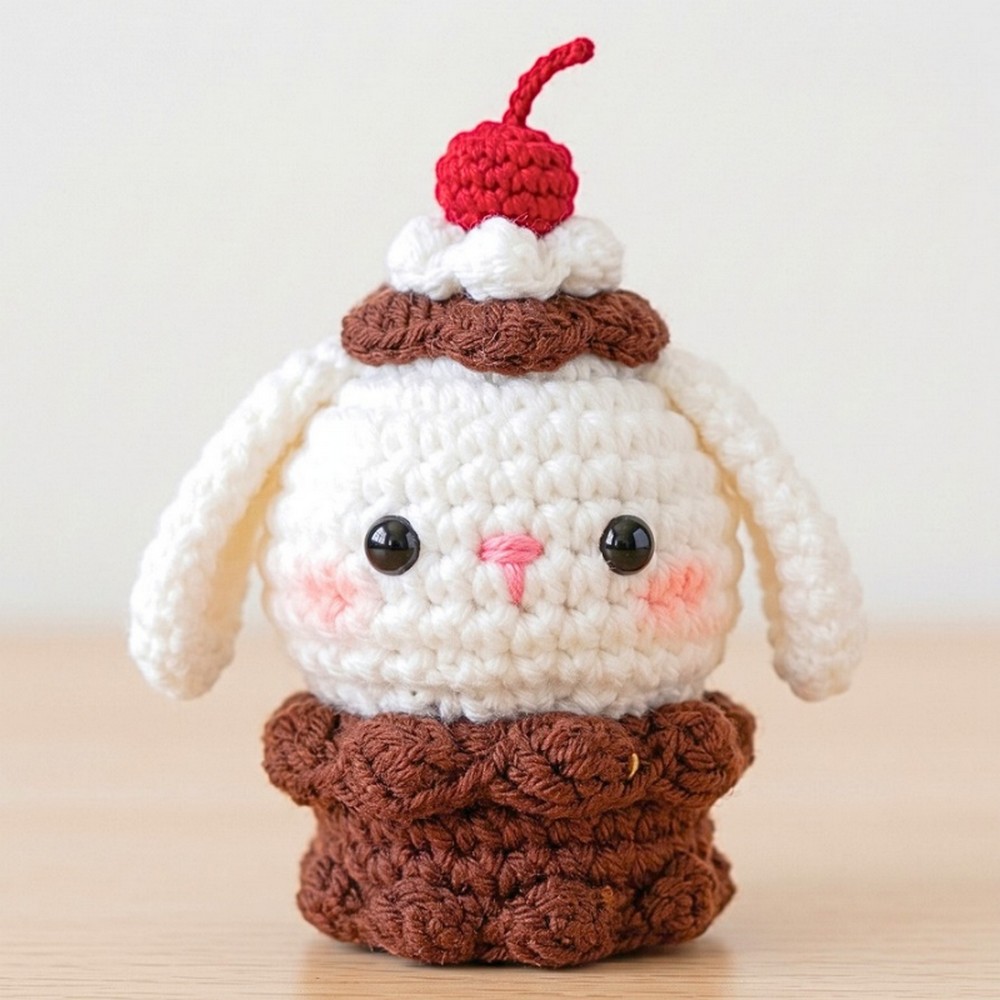
Tiny enough for a keychain or desk, this crochet cake turns a sweet little dessert shape into an adorable animal character. The brown cake details, soft white head, rabbit ears, cherry, and tiny embroidered nose give it the look of a miniature treat with a playful face.
Working the crochet piece from the rounded head into the cake section keeps the main shape compact and easy to follow, while the front-loop and back-loop rounds create places for the whipped-cream details to sit. You will also see exactly where to place the 6 mm safety eyes, when to add stuffing, and how to switch the rabbit ears for simple bear ears if you want a different crochet character.
Credit Tedzukurida
Materials & Tools Needed
- Milk Cotton Yarn (5-ply): White, brown, dark brown, and red
- Small Ply Yarn: Pink for sewing the nose
- Crochet Hook: 3.00 mm–3.50 mm
- Safety Eyes: 6 mm
- Stuffing: Polyester fiber
- Tools: Yarn needle, stitch marker, scissors, and a hot glue gun optional for assembly
Finished Size & Customization
This pattern creates a miniature amigurumi cake that works well as a keychain or small desk buddy.
For a different animal version, replace the rabbit ears with the included bear-ear alternative. The rest of the cake and face can remain the same, giving you a simple way to turn the rabbit choco cake into a bear choco cake.
Pattern Abbreviations
- Rnd: Round
- sc: Single crochet
- inc: Increase — 2 sc in one loop
- dec: Decrease — invisible decrease recommended
- ch: Chain
- dc: Double crochet
- hdc: Half double crochet
- slst: Slip stitch
- FLO: Front Loop Only
- BLO: Back Loop Only
- Cluster stitch: A group of stitches worked into the same space and joined at the top
Step-by-Step Crochet Pattern
Animal Head & Cake Body
The main piece is worked from the top downward, beginning with a small white circle and gradually increasing until the head reaches 30 stitches. The brown section then creates the cake portion, with FLO and BLO rounds leaving specific loops available for the whipped-cream decorations later.
Keep track of the stitch count after each increase and decrease round. These counts are what keep the head and cake body evenly rounded rather than allowing the shape to become too wide or narrow.
Start with White yarn.
Rnd 1: 6 sc in Magic Ring. (6)
Rnd 2: (inc) x 6. (12)
Rnd 3: (sc, inc) x 6. (18)
Rnd 4: (sc, inc, sc) x 6. (24)
Rnd 5-Rnd 6: sc around. (24)
Rnd 7: (3sc, inc) x 6. (30)
Rnd 8-Rnd 9: sc around. (30)
Rnd 10: (3sc, dec) x 6. (24)
Rnd 11: (sc, dec, sc) x 6. (18)
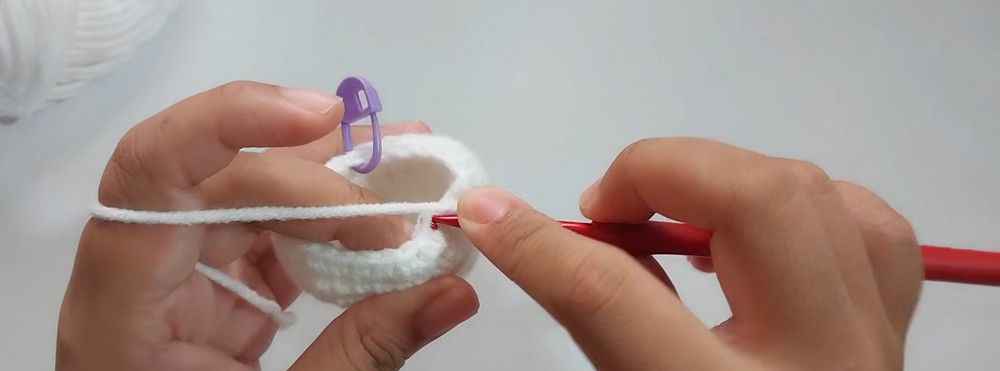
Change to Brown Yarn
The color change marks the transition from the white animal-head portion into the brown cake section. The next two rounds also prepare the unworked loops that will later hold the whipped-cream decoration.
Rnd 12: In FLO (2sc, inc) x 6. (24)
Rnd 13: In BLO (sc around). (24)
Rnd 14-Rnd 15: sc around. (24)
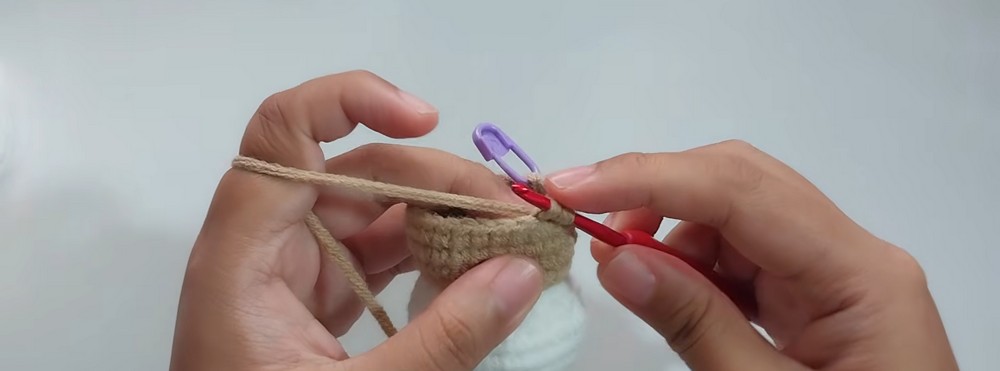
Add the Eyes and Begin Stuffing
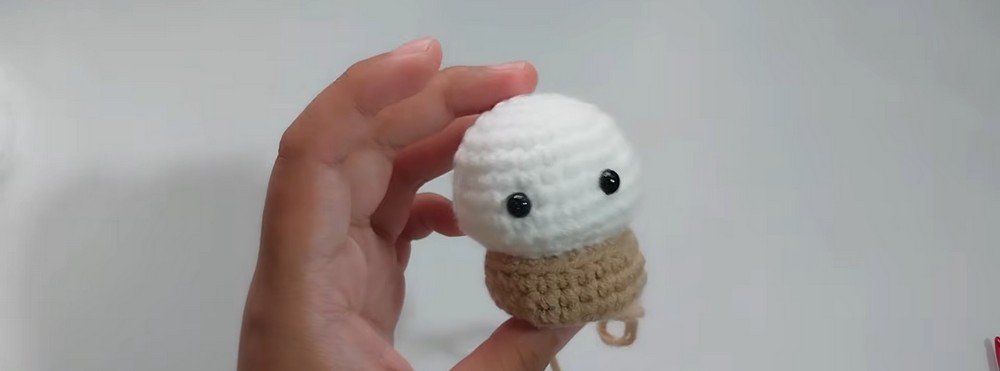
At this point, the face is developed enough to position the safety eyes before the opening becomes smaller.
Assembly Break: Place the 6 mm safety eyes between Rnd 7 and Rnd 8, with a distance of 4 loops between them. Begin filling the head with polyester fiber.
Take a moment to check the face from the front before continuing. The eyes should sit at the same general height, with four loops between them. Adding them now also means they are secured while the head is still easy to reach from inside.
Shape the Lower Cake Section
The decrease rounds now bring the 24-stitch body inward. Keep the stuffing distributed evenly as you work so the finished piece remains rounded rather than developing empty areas.
Rnd 16: In BLO (sc, dec, sc) x 6. (18)
Rnd 17: (sc, dec) x 6. (12)
Assembly Break: Fill the remaining cake part with polyester fiber.
Rnd 18: (dec) x 6. (6)
Finishing: Leave a tail for sewing, cut, and pull up the yarn. Close the crocheting by sewing through the Front Loop Only (FLO) 6 times. Pull tight to close the hole and hide the yarn end inside the body.
Shape Check
Before moving to the separate toppings and ears, the main piece should now be completely closed and filled. The white upper portion forms the animal face, while the brown lower portion gives the piece its cake-like body.
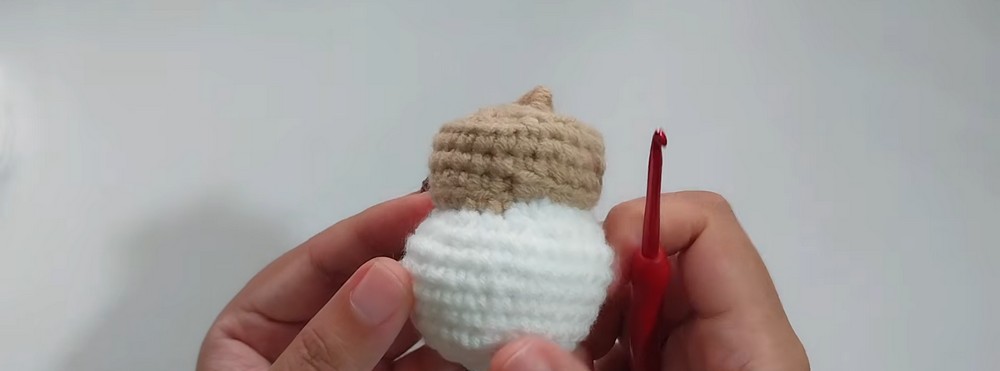
The two BLO/FLO rounds are also important because their unworked loops are used next for the whipped-cream decorations. This is why those loops should remain clearly available rather than being accidentally crocheted into later.
Whipped Cream on the Edge
The first dark-brown decoration is worked into the unworked front loops from Rnd 13. These loops were deliberately left available when the cake body was worked.
Join Dark Brown yarn to the unworked front loops left from Rnd 13.
Pattern: [2ch, (3dc cluster stitch), skip 2sc, slst, ch 1] x 8
Finishing: Leave a tail for sewing, cut, and pull up the yarn. Hide the yarn tails by weaving them securely inside the piece.
What to Look For
The repeated cluster stitches create the little scalloped whipped-cream edge around the cake. Keep the repeats even as you work around all 8 sections so the decoration sits evenly around the body.
Bottom Whipped Cream
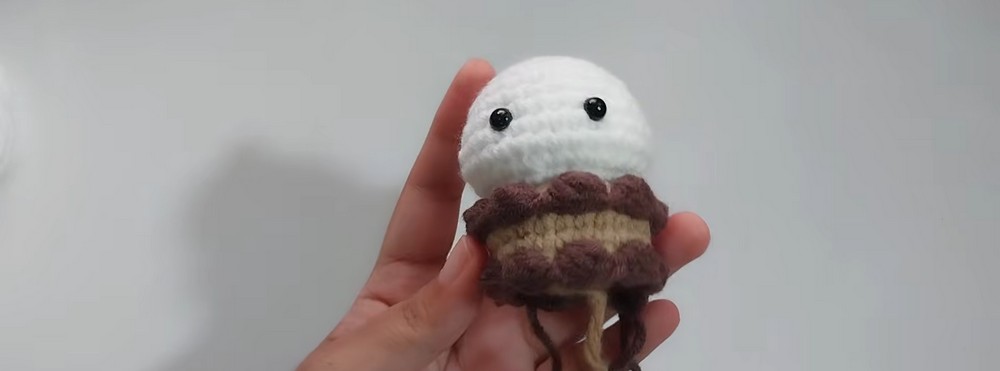
The lower decoration uses the same repeat, but it is attached to the unworked front loops from Rnd 16.
Join Dark Brown yarn to the unworked front loops left from Rnd 16.
Pattern: Crochet the bottom part using the same pattern as the edge: [2ch, (3dc cluster stitch), skip 2sc, slst, ch 1] x 8
Finishing: Leave a tail, cut, pull up, and hide the yarn inside the body.
Using the same repeat here keeps the two cake edges visually related while the different attachment round places each decoration at its intended height.
Whipped Cream on Top
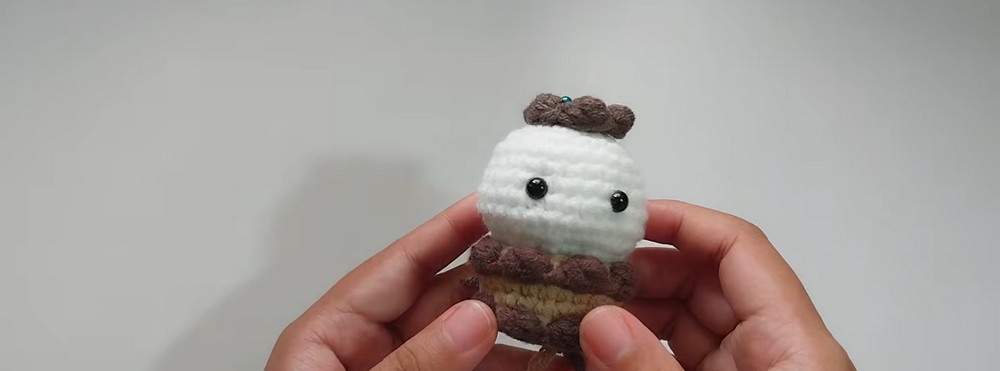
This small piece becomes the base for the cherry, so it is made separately rather than directly onto the cake body.
Using Dark Brown yarn.
Rnd 1: 5 sc in Magic Ring, slst, ch 1. (5)
Rnd 2: (inc) x 5, slst. (10)
Rnd 3: [2ch, (3dc cluster stitch), slst, ch 1] x 5
Finishing: Cut the yarn and hide the tails. This piece will be glued down, so leaving a long tail for sewing is optional unless you prefer sewing over gluing.
Crochet Cherry
The cherry is intentionally small so it sits neatly on top of the whipped cream.
Using Red yarn: In a Magic Ring, make 2ch, 4dc cluster stitch, slst.
Finishing: Leave a tail, cut, and pull up the yarn. Tighten the magic ring to form a small cherry ball.
Set the cherry aside for assembly rather than attaching it immediately; the whipped-cream piece needs to be positioned first.
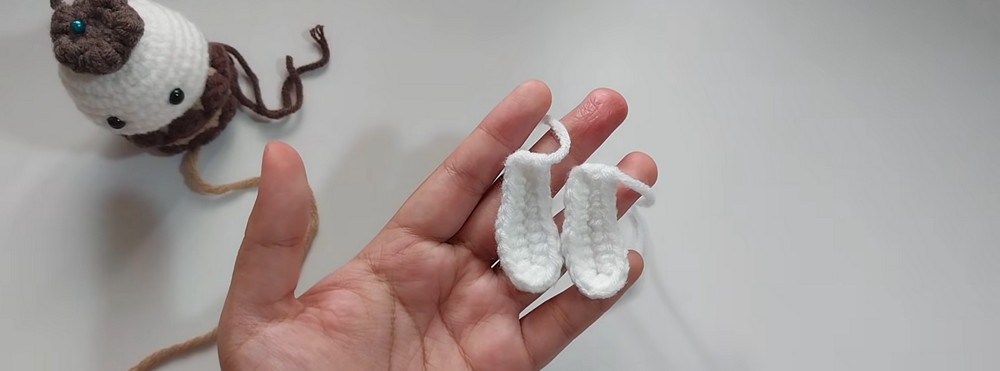
Rabbit Ears – Make 2
The rabbit ears are worked flat from a foundation chain. Because the shape uses different stitch heights on each side, follow the chain carefully so the ear develops its long, rounded form.
Using White yarn.
Row 1: 10 ch, skip 1 ch from the hook.
Row 2: Work down the chain: 5sc, 3hdc. In the last chain loop work 3 hdc. Rotate and work down the opposite side of the chain: 4hdc, 5sc.
Finishing: Leave a tail for sewing, cut, and pull up the yarn. Make the second ear the exact same way.
Ear Check
Make sure both ears are worked identically before attaching them. The shaping on Row 2 creates the curved outline, so keeping the stitch sequence the same on both ears helps them match when placed on the head.
Bear Ears Alternative – Make 2
If you would rather turn the rabbit into a bear, use the shorter rounded ear option instead.
Using Brown yarn.
Rnd 1: 4 sc in Magic Ring. (4)
Finishing: Leave a tail for sewing, cut, and pull up the yarn.
These smaller brown pieces replace the rabbit ears during assembly; the rest of the pattern remains the same.
Assembly
Attach the Ears
Thread your yarn needle with the long white tail left on each rabbit ear.
Sew the rabbit ears onto the head, positioning them between Rnd 3 and Rnd 4.
Before securing the stitches completely, check the placement from the front. Both ears should sit at a similar height and have enough space between them for the face and top decoration.
If you are making the bear version, use the brown bear ears instead and attach them in the same general position.
Add the Top Whipped Cream and Cherry
Place the separate top whipped-cream piece at the top center of the head.
Use a small amount of hot glue to attach it directly to the top. If you prefer not to use hot glue, you can sew the piece in place instead.
Once the whipped cream is secure, glue the red cherry on top.
The optional glue makes this small assembly quick, but sewing is a useful alternative if you prefer an entirely stitched finish.
Embroider the Nose
Thread your small-ply pink yarn onto the yarn needle.
Sew a tiny horizontal nose between the eyes.
Keep the nose small so it complements the 6 mm eyes without taking over the face.
Add the Final Face Detail
For an extra cute finish, use a small brush or cotton swab to apply a touch of real blush beneath the eyes.
Keep the amount light and place it evenly on both sides so the face retains its simple amigurumi expression.
Final Check
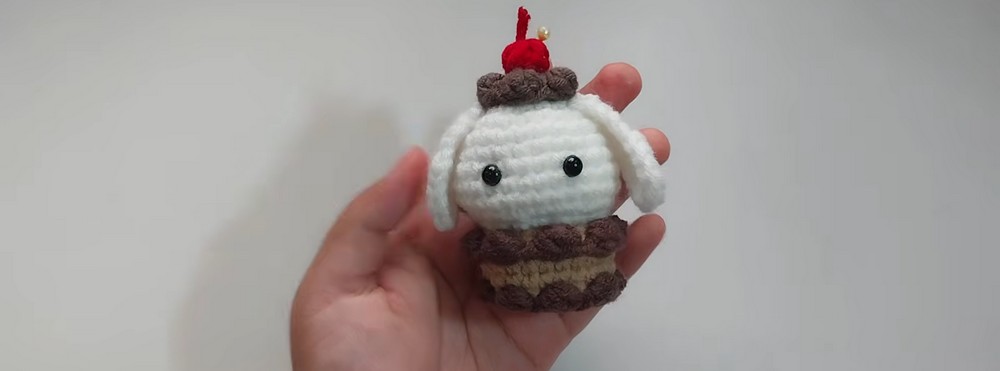
Look over the finished cake from all sides before trimming the remaining yarn tails. Make sure the ears are secure, the eyes and nose are centered, and the whipped cream and cherry are firmly attached.
Weave all loose sewing tails securely into the stuffing and trim them so they remain completely hidden inside the body.
Your miniature rabbit choco cake is now ready to use as a cute keychain or little desk buddy. For the bear version, simply swap the rabbit ears for the brown bear ears and keep the rest of the finished details the same.