
Need a tiny holiday gift? This crochet Christmas bear combines simple shaping with playful accessories for a finished piece that fits easily on a tree or keyring.

Small details give this crochet Christmas bear its personality. White body, red hat, miniature crossbody bag, bobble arms, and embroidered face come together to create a tiny holiday character that works beautifully as seasonal décor, tree ornament, or keychain.
This crochet pattern uses joined rounds instead of continuous spirals, so each round closes with a slip stitch before the next round begins with chain 1. Keeping this rhythm consistent is especially useful for hat and bag color changes, while careful stuffing and assembly help maintain the crochet bear’s compact shape.
Credit Yui Crochet
Materials & Tools Needed
- Yarn: White for body, ears, hat trim, and bag trim; Red for hat, bag, and strap; Brown for facial embroidery. Light worsted, DK, or sport weight yarn works well.
- Crochet Hook: Suitable size for chosen yarn, typically 2.5 mm–3.0 mm for amigurumi.
- Fiberfill stuffing
- Yarn needle: Tapestry needle for sewing and weaving ends.
- Scissors
- Stitch marker
- Hot glue or fabric glue: Optional for securing hat and pom-pom.
Finished Size & Customization
Finished bear measures approximately 3 to 4 inches tall, depending on yarn weight and personal tension.
For ornament use, attach a loop of yarn to the top of the hat. For keychain use, add a lobster clasp or suitable keychain hardware.
Red accessories can also be changed to forest green, gold, or another holiday shade. Small color changes make it easy to create matching sets of bears without changing body pattern.
Pattern Abbreviations & Terminology
- MR – Magic Ring
- sc – Single Crochet
- inc – Increase, 2 sc in same stitch
- dec – Decrease, sc 2 together
- sl st – Slip Stitch
- ch – Chain
- FLO – Front Loop Only
- 4-dc Bobble (Arms) – Yarn over, insert hook into st, pull up loop, yarn over and pull through 2 loops. Repeat 3 more times in same stitch until 5 loops remain on hook. Yarn over and pull through all 5 loops.
- 3-dc Bobble (Pom-pom) – Yarn over, insert hook into st, pull up a loop, yarn over and pull through 2 loops. Repeat 2 more times in same stitch until 4 loops remain on hook. Yarn over and pull through all 4 loops.
- [ ] x N – Repeat bracketed instructions N times.
- ( ) – Total stitch count at end of round.

Important Joined-Round Note
Unlike traditional amigurumi worked in continuous spirals, this bear uses joined rounds. At the end of every round, sl st into the first stitch, then ch 1 before beginning the next round. Chain 1 does not count as a stitch.
Keeping each join consistent helps color transitions stay aligned and makes round placement easier to follow during assembly.
How to make Legs & Body
Body is worked from bottom upward in one piece after two separate legs are formed.
Leg 1
Round 1: Using White yarn, make 6 sc in MR. Join with sl st, ch 1. (6)
Round 2: [1 sc, 1 inc] 3 times. Join with sl st, ch 1. (9)
Fasten off and cut yarn. Weave tail toward inside.
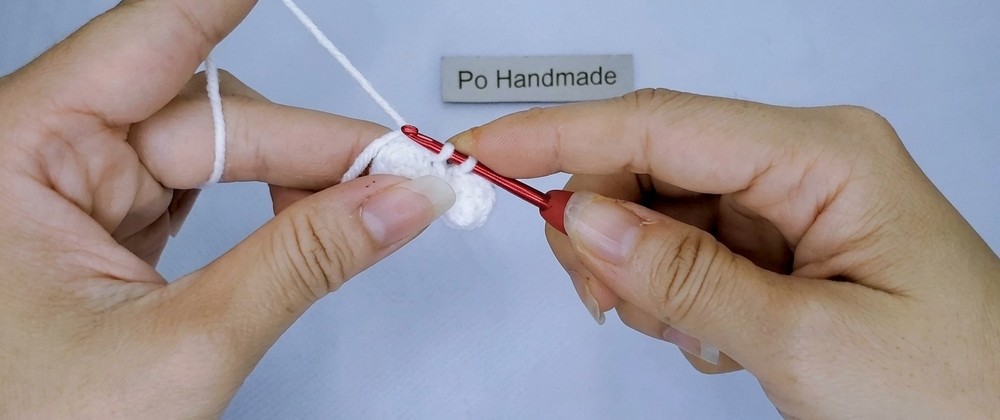
Leg 2 & Body Join
Rounds 1–2: Repeat same instructions used for Leg 1. Do not fasten off.
Round 3 – Joining Round: Sl st into first stitch of Leg 1 to join legs. Ch 1. Sc in all 9 sts of Leg 1, then sc in all 9 sts of Leg 2. Join with sl st to first st, ch 1. (18)
Before continuing, check the gap between legs. If a small opening remains where the legs meet, use the Leg 1 yarn tail to sew it closed. Closing this point now prevents stuffing from showing later.
Round 4: [2 sc, 1 inc] 6 times. Join with sl st, ch 1. (24)
Rounds 5–6: 1 sc in each st around. Join with sl st, ch 1. (24)
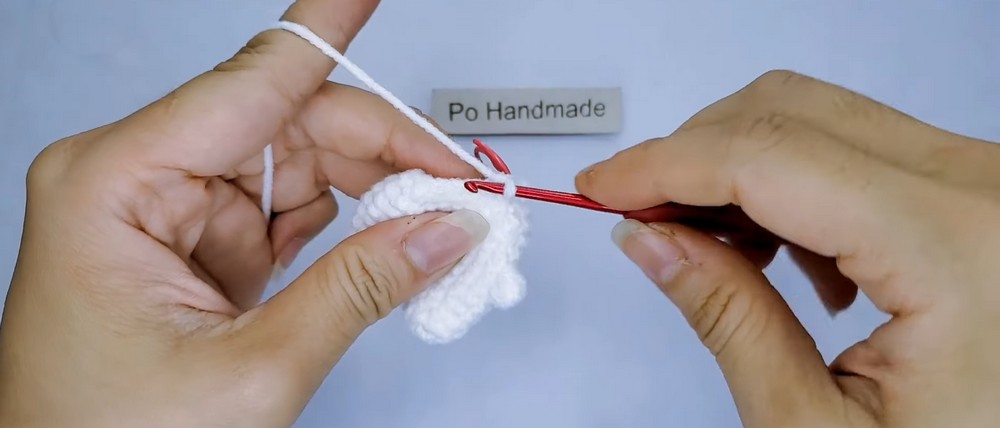
Add Tiny Arms
Round 7: 5 sc, work 1 4-dc Bobble in next st, 12 sc, work 1 4-dc Bobble in next st, 5 sc. Join with sl st, ch 1. (24)
Bobble stitches become bear’s small arms. Keep each bobble in its specified stitch so both arms sit opposite one another around the body.
Rounds 8–11: 1 sc in each st around. Join with sl st, ch 1. (24)
Shape Head & Upper Body
Round 12: [1 sc, 1 dec, 1 sc] 6 times. Join with sl st, ch 1. (18)
Round 13: [1 sc, 1 dec] 6 times. Join with sl st, ch 1. (12)
Pause here and stuff body and head firmly with fiberfill. Add stuffing gradually and shape as you go rather than filling everything at once. Firm stuffing helps small bear hold its rounded form, while overfilling can stretch stitches and affect facial placement.
Round 14: 6 dec. Join with sl st. (6)
Fasten off, leaving a long tail. Thread tail onto yarn needle, weave through front loops of remaining 6 stitches, and pull tightly to close opening. Hide yarn tail inside body.
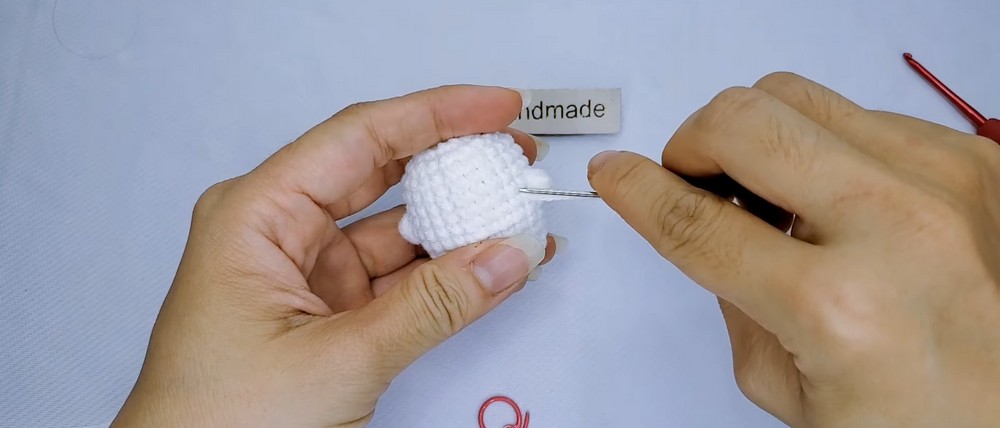
Ears – Make 2
Using White yarn:
Round 1: Make 6 sc in MR. (6)
Sl st to first st to finish. Fasten off, leaving long tail for sewing.
Keep both ear pieces similar in size. Long tails will be used during assembly, so avoid cutting them too short.

Christmas Hat
Using Red yarn:
Round 1: Make 5 sc in MR. Join with sl st, ch 1. (5)
Round 2: 1 sc in each st around. Join with sl st, ch 1. (5)
Round 3: 5 inc. Join with sl st, ch 1. (10)
Round 4: 1 sc in each st around. Join with sl st. (10)
Change to White yarn and join. Ch 1.
Round 5: 1 sc in each st around. Join with sl st, ch 1. (10)
Round 6 – Hat Brim: Working in FLO, 1 sc in each st around. Join with sl st. (10)
Fasten off and weave in ends. Fold Round 6 upward to form white hat brim.
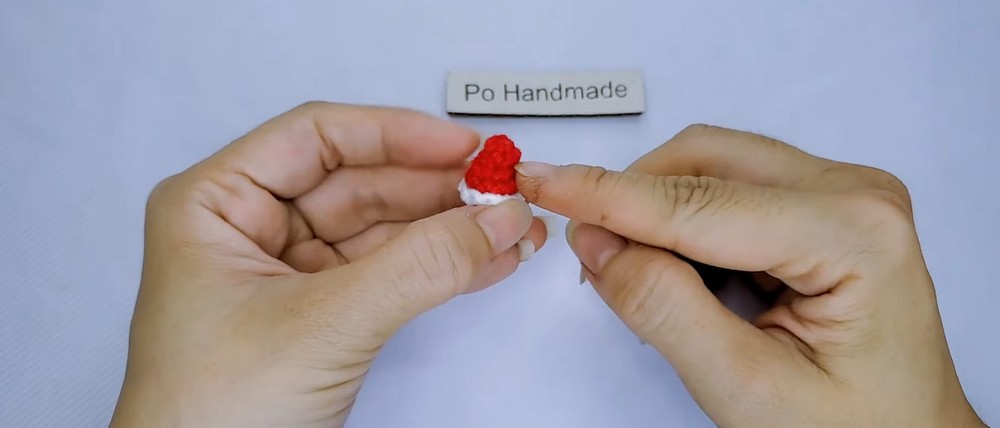
Hat Pom-Pom
Using White yarn, make MR and ch 2. Work 1 3-dc Bobble into MR. Ch 2, then sl st back into MR.
Pull MR tightly. Fasten off, leaving a short tail. Tie beginning and ending tails securely into a knot, trim excess, and hide the knot.

Crossbody Bag
Using Red yarn:
Round 1: Ch 4. Starting in the 2nd ch from the hook, work 1 sc, 1 sc in the next ch, 3 sc in the final ch. Rotate to the opposite side of the chain and work 1 sc in the next ch, then 2 sc in the final ch. Join with sl st, ch 1. (8)
This creates a small oval base for the bag, so check both ends before moving forward. Rounded ends should remain smooth rather than forming sharp corners.
Round 2: 1 sc in each st around. Join with sl st. (8)
Change to White yarn on join. Do not cut Red yarn; drop it toward the back so it can be picked up later for the strap.
Round 3: 1 sc in each st around. Join with sl st. (8)
Fasten off White yarn and weave in end.
Bag Strap
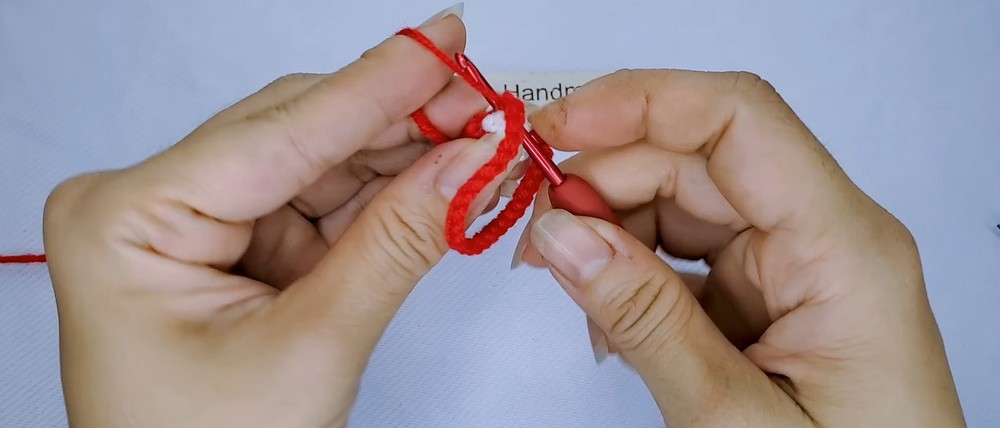
Pick up dropped Red yarn and sl st into side edge of bag. Ch 26, or chain between 25–30 until strap reaches desired length across bear’s body. Sl st into opposite side edge of bag.
Fasten off and use yarn needle to weave loose ends into inside of bag.
Assembly
Embroider Face
Using Brown yarn and a tapestry needle, embroider a small horizontal nose line centered on face between Rounds 7 and 8, counting from top of head downward.
Embroider eyes one stitch away from each side of nose. Loop Brown yarn vertically over one stitch for each eye.
Check face placement before securing embroidery fully. Centered features help maintain bear’s cute expression once ears and hat are attached.
Attach Ears
Pin ears to sides of head.
Sew ears securely between Rounds 3 and 4, counting from the top of the head. Weave remaining tails into body.
Position both ears at similar height before sewing completely. Slightly angled ears can give bear more personality, while matching angles create a symmetrical look.
Attach Crossbody Bag
Slip bag over bear’s head. Position bag at bear’s side with Red strap crossing diagonally over chest.
Adjust strap before securing loose ends so bag sits comfortably against body instead of twisting toward front or back.
Attach Christmas Hat
Attach small White pom-pom to top tip of Red hat using hot glue or fabric glue.
Apply glue inside hat rim and press hat firmly onto top of bear’s head at slightly jaunty angle. If you prefer sewing over glue, use remaining White yarn to secure hat around its lower edge.







One Comment