Looking for a sweet little handmade accessory? This crochet candy keychain features colorful diagonal stripes, playful wrapper ends, and simple assembly for a fun, giftable finish.
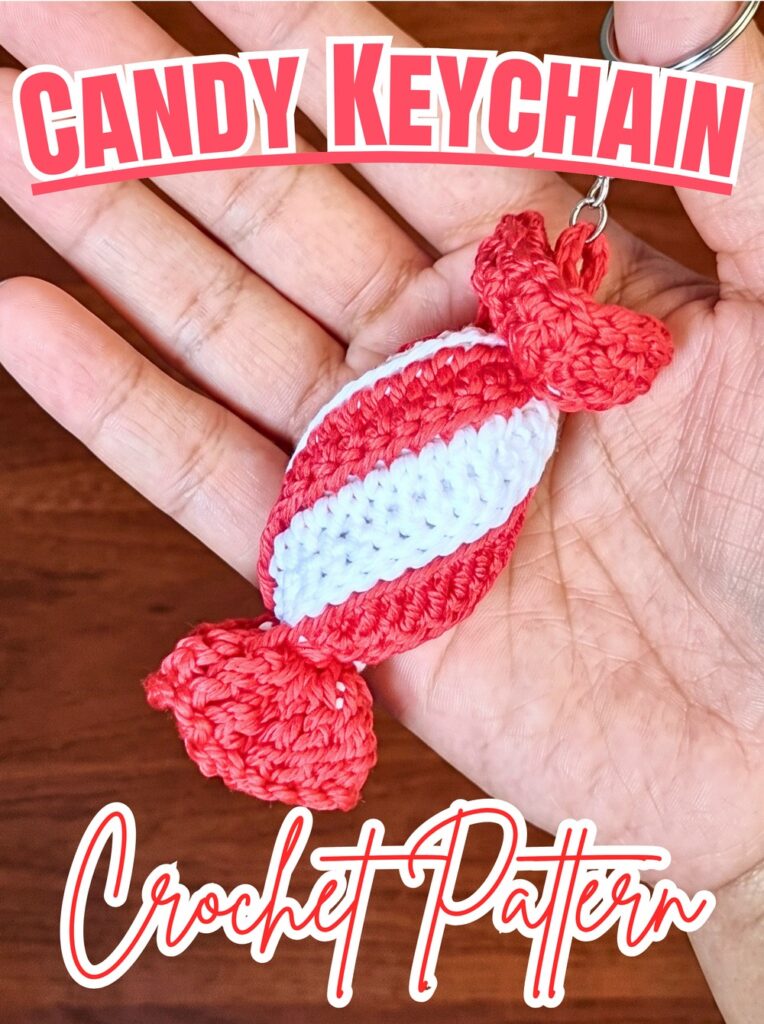
Color changes and shaping can feel tricky when working on small crochet accessories, especially when you want neat diagonal stripes. This crochet candy keychain combines simple stitches with a clever striped panel to create a miniature sweet-inspired design.
Inside this crochet tutorial, you’ll learn how to crochet the striped body, form both wrapper ends, add stuffing, and attach keychain hardware. Follow each row and finishing step to turn two yarn colors into a cheerful handmade accessory. Let’s get started!
Credit Erfin R. Tangdilintin
Materials & Tools
- Yarn: Two contrasting colors, such as green and white or red and white.
- Crochet hook: 2.5 mm.
- Fiberfill: Dacron cotton or polyester stuffing.
- Keychain ring: For attaching your finished candy.
- Yarn needle: For sewing seams and gathering ends.
- Scissors: For cutting yarn.
- Lighter (optional): For securing synthetic yarn ends, only when safe and appropriate. Keep away from flammable materials and use adult supervision.
Finished Size & Customization
Finished candy measures approximately 3.5–4 inches long.
Choose classic red and white or green and white for a festive Christmas accessory, or experiment with pastel shades for a candy-inspired look. Different yarn weights can change finished dimensions, so adjust your hook to suit your yarn.

Pattern Abbreviations
- ch: Chain
- sc: Single crochet
- sc inc: Single crochet increase – work 2 sc in one stitch
- sc dec: Single crochet decrease – work 2 sc together
- tr: Treble crochet
- sl st: Slip stitch
- BLO: Back loop only
- R: Row or round
Pattern note: Color A and Color B refer to your two chosen yarn colors. Follow stitch counts and color changes carefully to maintain diagonal stripes.
Step-by-Step Crochet Candy Keychain Pattern
Step 1: Create the Striped Candy Panel
Start with Color A. This flat panel forms the main candy body. Alternating increases and decreases at opposite ends of each row create its slanted shape, while color changes form diagonal stripes.
Foundation: Make a slip knot and ch 17.
Row 1: Starting in second ch from hook, work 1 sc inc, 13 sc, and 1 sc dec.
Teaching tip: Keep your foundation chain relaxed. Tight chains can make your first row difficult to work into and cause one edge to pull inward.
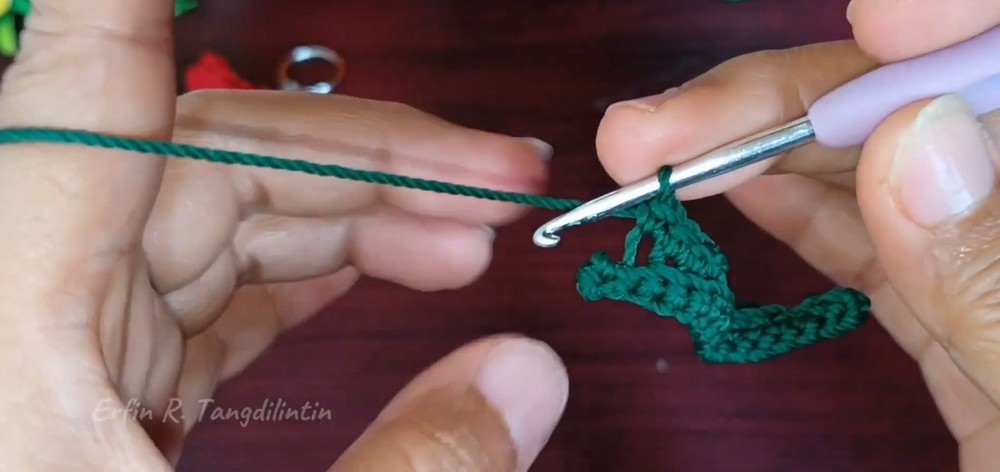
Step 2: Shape Row 2 and Change Color
Row 2: Ch 1 and turn. Work 1 sc dec, 13 sc, and 1 sc inc in BLO.
On final pull-through of last stitch, switch to Color B.
How to change color: Begin final stitch using Color A. Before completing its last yarn-over and pull-through, use Color B to finish stitch. This leaves new color ready for next row.
Teaching tip: Keep both yarns close to your work without pulling tightly. Excess tension at turning edges can make striped panel curl or narrow.
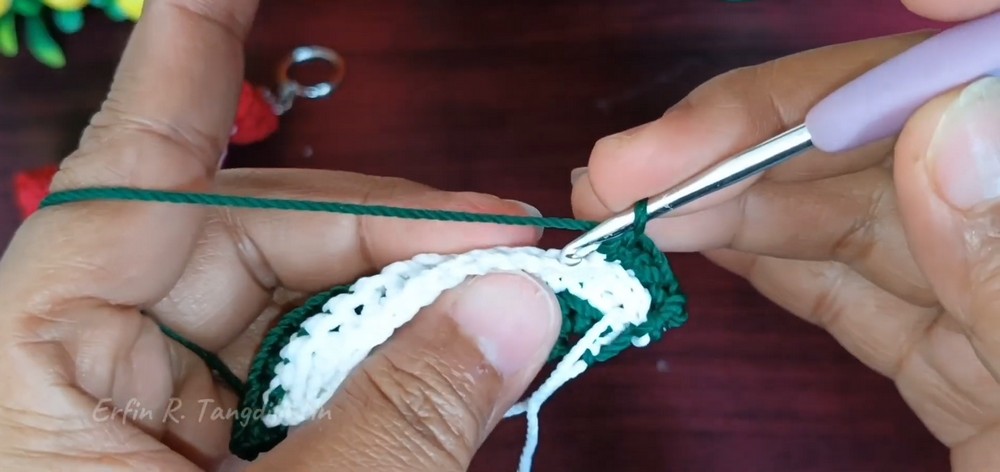
Step 3: Work Row 3 in Color B
Row 3: Ch 1 and turn. Work 1 sc inc, 13 sc, and 1 sc dec in BLO.
This reverses placement of increase and decrease, continuing diagonal shaping.
Check your work: Your two edges should slope in opposite directions. If panel starts becoming noticeably narrower or wider, check that you have worked correct number of stitches.
Step 4: Complete Row 4 and Return to Color A
Row 4: Ch 1 and turn. Work 1 sc dec, 13 sc, and 1 sc inc in BLO.
Switch back to Color A on final pull-through of last stitch.
Teaching tip: Make each color change at same turning edge. Consistent placement helps diagonal stripes flow neatly across candy body.
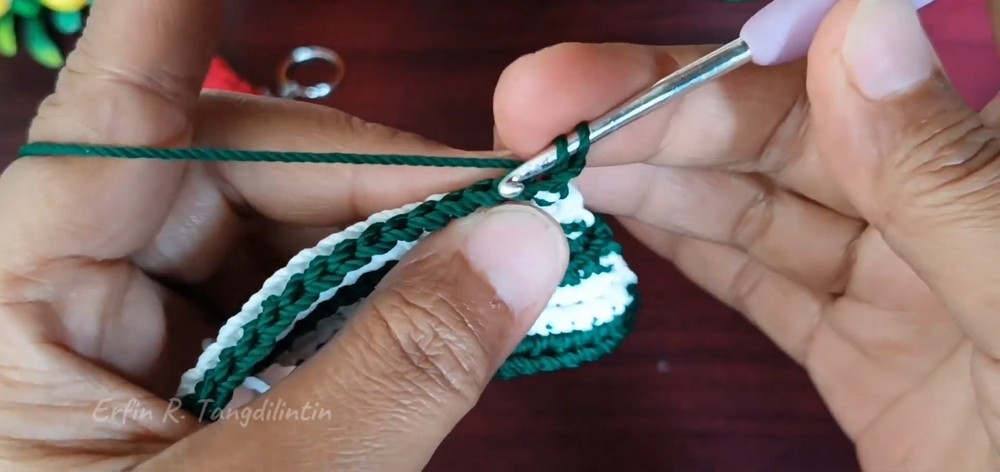
Step 5: Continue Alternating Stripes
Continue working rows in alternating colors through Row 12.
- Rows 5, 7, 9, and 11: Follow Row 3 sequence.
- Rows 6, 8, 10, and 12: Follow Row 2 sequence.
Keep working ch 1 and turn at start of each row.
Teaching tip: Check your color sequence after every pair of rows. Stripes should continue diagonally rather than forming disconnected blocks. Maintain same stitch pattern at each edge to preserve panel shape.
Step 6: Finish Panel with Slip Stitches
Row 13: Ch 1, turn, and work 1 sl st in BLO across row.
Fasten off, leaving long yarn tail for sewing.
Slip stitches create a firmer finishing edge. Keep them loose enough to avoid shortening panel, since tight slip stitches can make final seam difficult to align.
Step 7: Add First Candy Wrapper
Attach Color A to one short side edge of striped panel.
Round 1: Ch 4, then work treble crochet stitches evenly around edge. Join with sl st to first treble crochet.
Because original instructions do not specify exact number of treble crochets, distribute stitches evenly around edge instead of forcing too many into one area.
Teaching tip: Wrapper should gather evenly around end of candy. If stitches bunch together, spacing may be too tight; if large gaps appear, spread stitches more evenly.
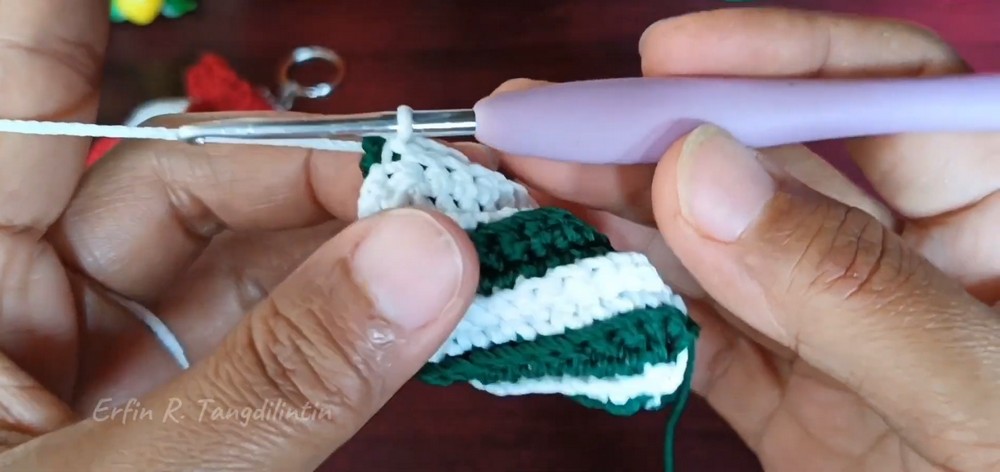
Step 8: Form Hanging Loop and Finish Wrapper
Round 2: Work 4 sl st.
Then ch 8 and join with sl st to create hanging loop.
Fasten off and weave in ends.
This loop provides attachment point for keychain ring. Keep chain stitches even and avoid pulling them too tightly, so metal ring can pass through easily.
Step 9: Make Second Wrapper
Repeat wrapper construction on opposite short edge of candy panel.
Work first round of treble crochets, join, then complete edging with 4 sl st. You can omit 8-chain hanging loop on second end if only one attachment point is needed.
Check your work: Both wrapper ends should be similar in size. Matching edges will help candy look balanced after panel is sewn into cylinder.

Step 10: Sew Striped Panel into Cylinder
Lay panel flat with right side facing outward. Bring two long side edges together to form cylinder.
Using yarn needle and suitable yarn tail, whipstitch long edges together. Catch corresponding edge stitches evenly and avoid pulling seam too tightly.
Teaching tip: Align stripe edges before sewing. This helps pattern look continuous rather than twisted around body.
Step 11: Stuff Candy Body
Fill center with Dacron cotton or polyester fiberfill. Use crochet hook handle or stuffing tool to guide small portions into middle.
Add stuffing gradually until candy feels firm but still has some flexibility.
Result check: Body should look rounded and hold its cylinder shape. Avoid overstuffing, which can stretch seam or make wrapper ends difficult to close.
Step 12: Gather and Close Both Wrapper Ends
Thread yarn needle with remaining tail. Weave yarn through base of each treble crochet around wrapper edge.
Pull yarn gently to gather opening closed. Repeat on opposite end, securing each closure firmly.
Teaching tip: Tighten gradually rather than pulling one large tug. Even gathering reduces gaps and keeps wrapper shape neat. Check that stuffing remains inside before securing final knot.

Step 13: Attach Keychain Ring
Open keychain ring or clasp and pass it through 8-chain loop made on chosen wrapper end.
Close clasp securely. Give loop and attachment a gentle pull to check they are firmly connected.
Step 14: Secure Yarn Ends
Weave remaining loose yarn tails into crocheted fabric and trim excess.
If using synthetic yarn, a lighter may be used only when suitable and handled very carefully by an adult. Keep flame away from body, stuffing, other yarn, and flammable materials. Safer alternative is weaving ends securely with yarn needle.
Inspect both seams, wrapper closures, and hanging loop before using finished keychain.
Finishing check: Finished candy should hold its rounded shape, display clear diagonal stripes, and have two neatly gathered wrapper ends. Your crochet candy keychain is ready to use or give as a small handmade gift.